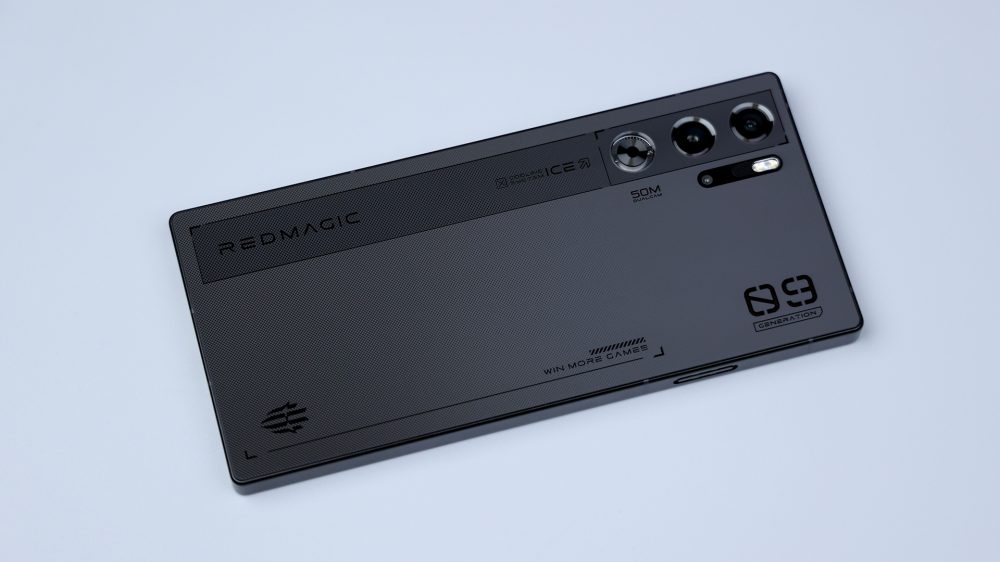
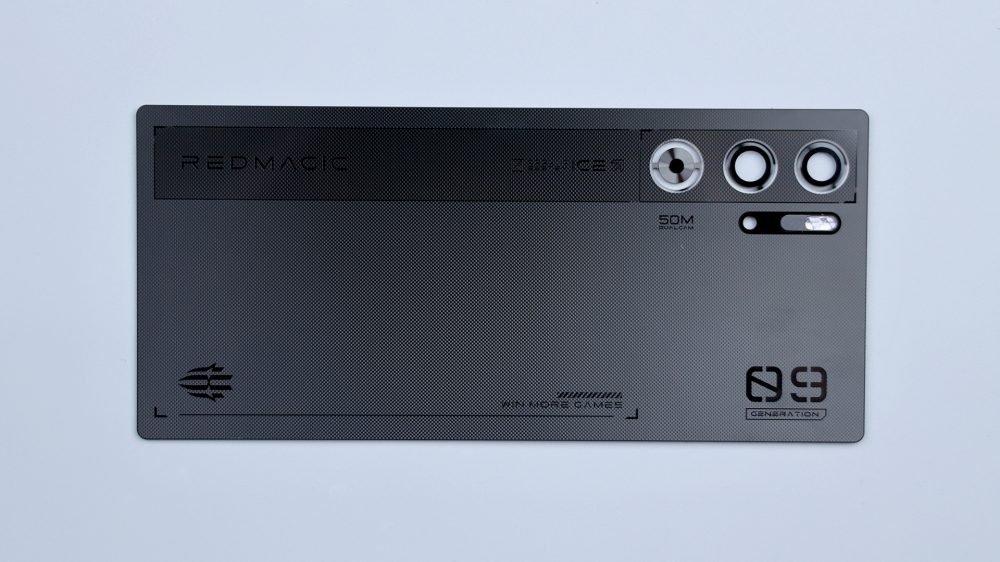
Of all the new phones released recently, which one is the best looking, or, which one has the most impressive design, it has to be the Red Magic 9 Pro+, which is really one of those products that grows on the public aesthetic. The lines are simple and angular, with no cutouts on the front and no bumps on the back. As the netizens said, Red Magic has made a real MIX in the hearts of Mi fans, I wonder if you like this design of Red Magic 9 Pro+? Today let's take a look at what its internal structure is like and how the camera is made flat.
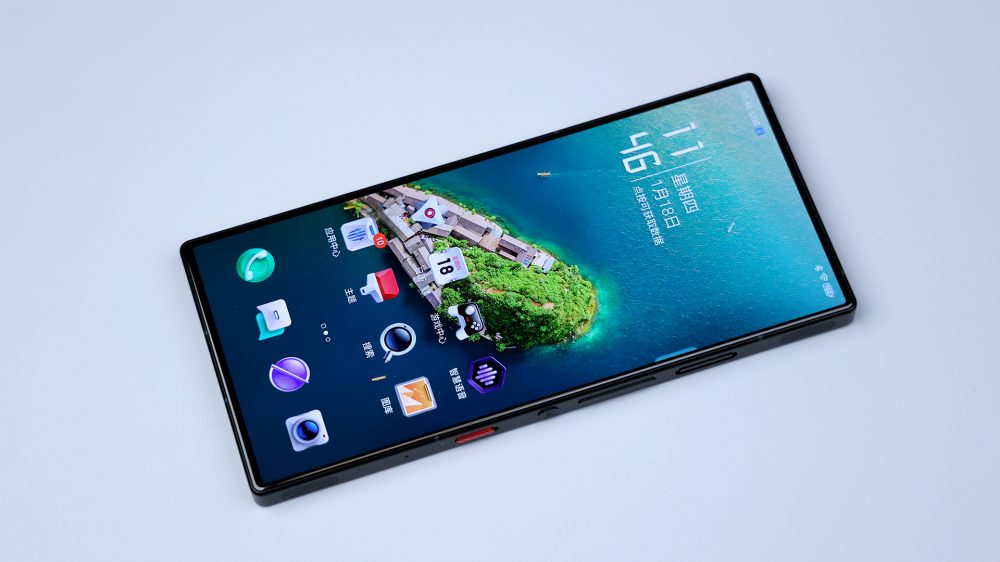
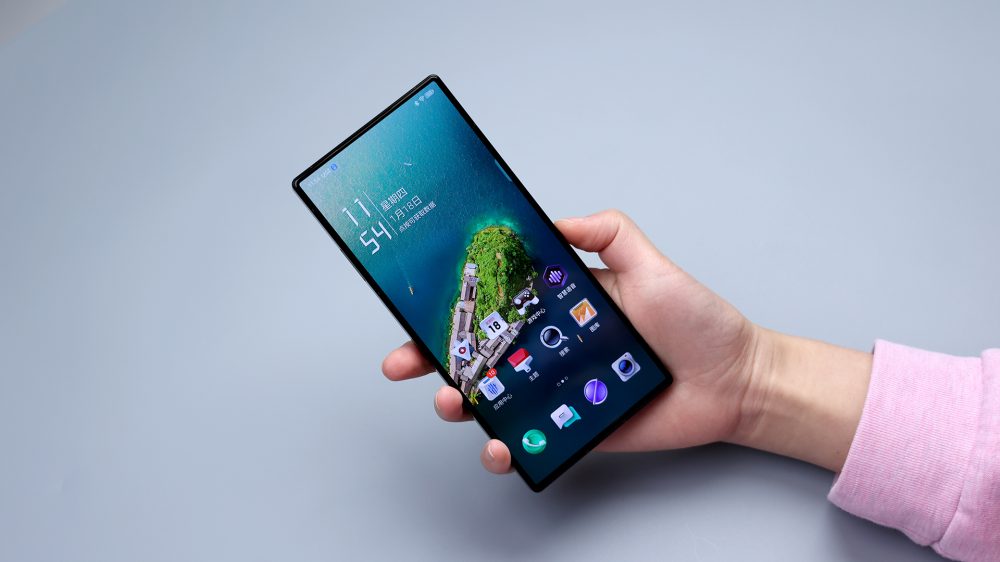
The machine I have in my hands is the Dark Knight Edition, and unlike those phones that have been over-glorified by PPT, the real Red Magic 9 Pro+ looks even better than the official renders. For those of you who like this type of design, it's exactly what you had in mind, with a tech-savvy look that resembles those concept phones that were once rumored on the web, and in one word, it's "cool!" The conceptualization of the device was once rumored on the Internet. However, as good as it looks, it's really hard on your hands, whether you hold it horizontally or vertically, one-handed or two-handed, it basically has nothing to do with comfort. Because there is almost no arc, so there is not much fit to speak of, if you want to use a little more comfortable, to ease the problem of pinching hands, you can only wear a better feel of the protective case.
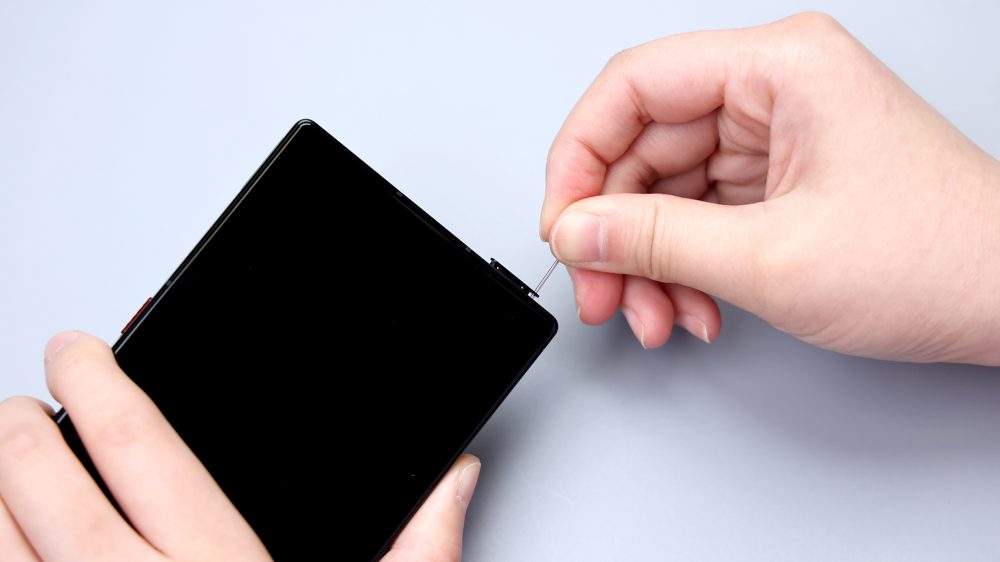
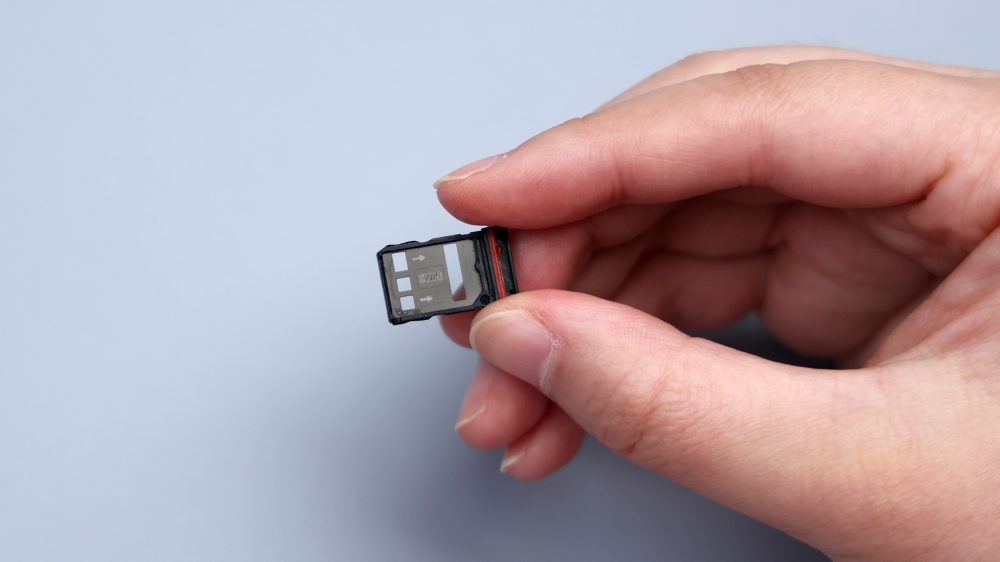
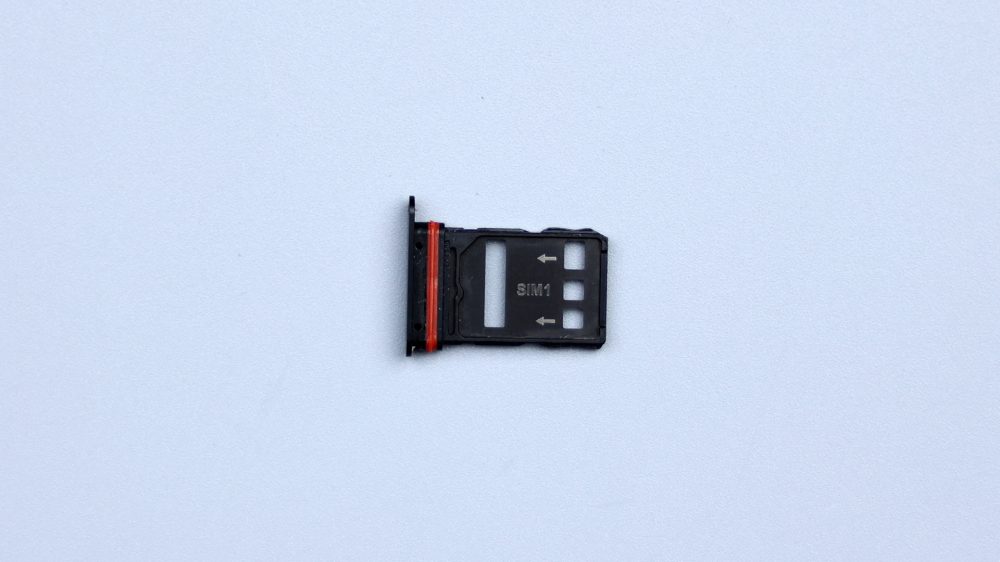
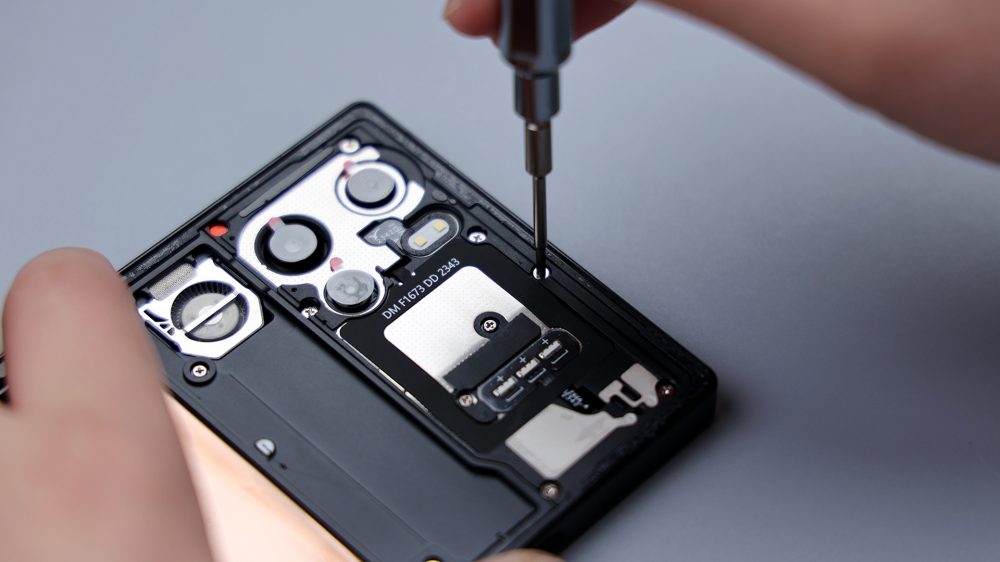
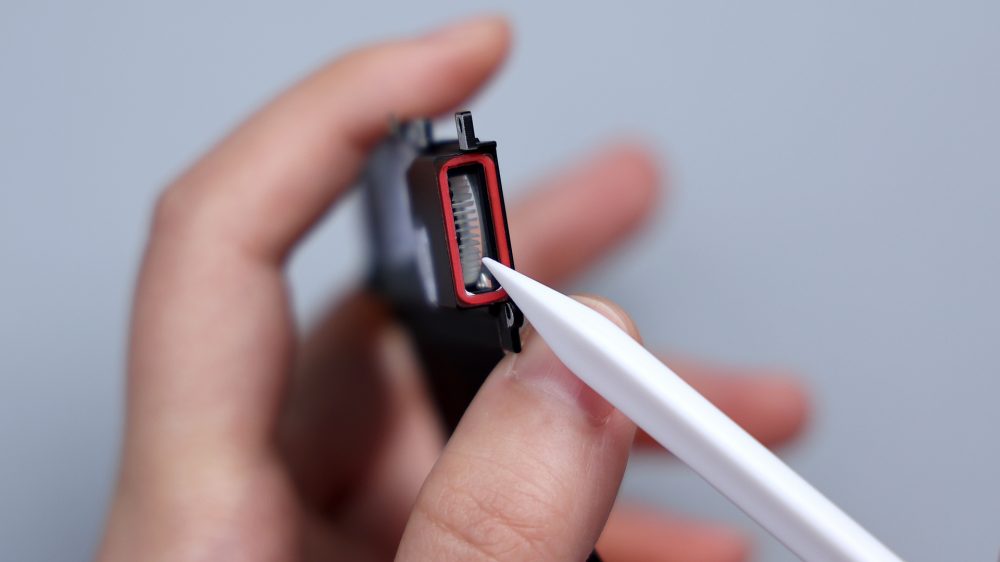
The following began to disassemble, after turning off the phone, take out the bottom of the SIM card tray, metal + plastic material, the edge of the red rubber ring to assist in dust and waterproof.
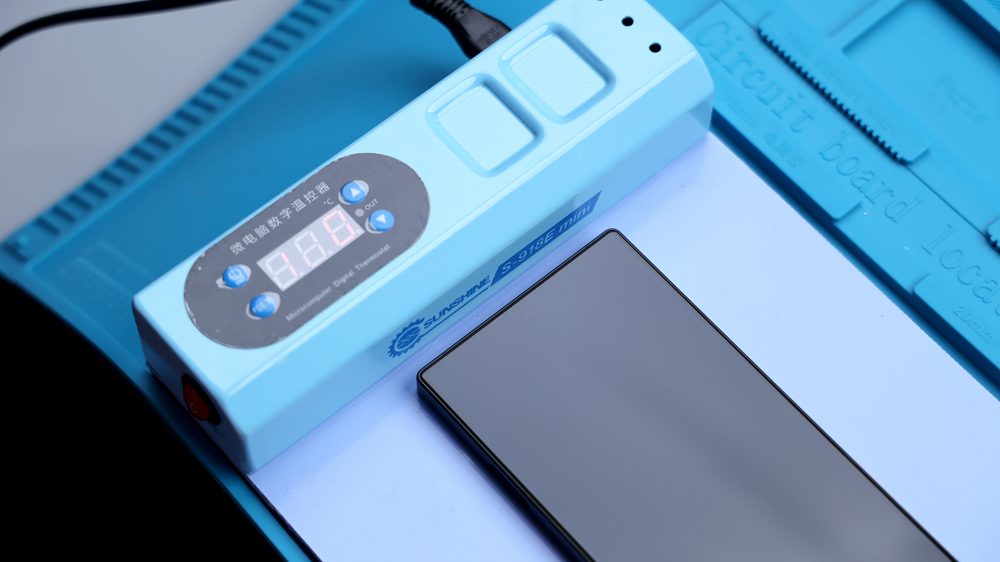
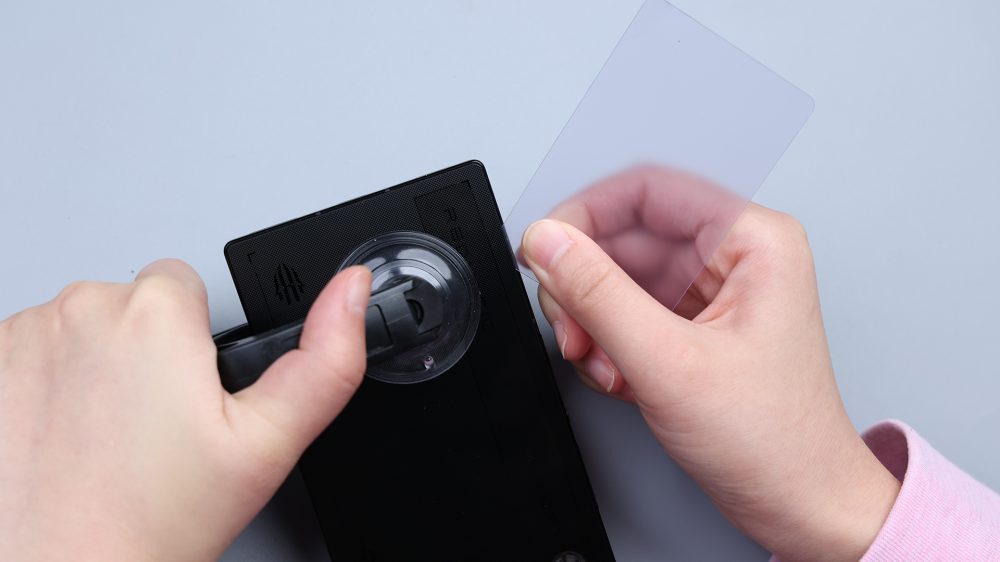
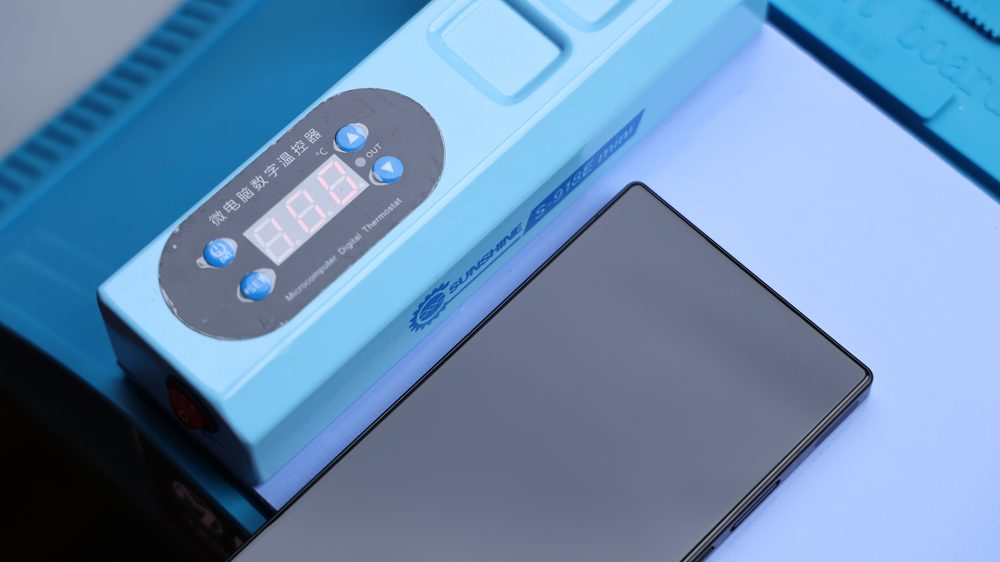
For disassembly, the flat glass back cover has three advantages, one is that it can be placed flat on the heating plate to ensure that the back cover and the surrounding area is heated evenly. Second, you can use a suction cup to assist in opening the back cover, saving a lot of effort. Thirdly, unlike the curved edge kind of back cover is not glued so tightly, less inner arc and outer buckle, as long as the temperature is in place, the adhesive is softened, it is easy to cut the gap in the adhesive position. The actual situation is as expected, the process of opening the back cover did not encounter any obstacles, can be said to be effortless.38
The inner and outer edges of the back cover are covered with a circle of adhesive, which is a kind of sticky, but not easy to wrinkle and clumping of soft adhesive, the right side of the middle position is slightly wider, which plays the role of reinforcing the role of reinforcement, and the left side of the middle and upper part of the corresponding air duct edges, the space is limited, the adhesive to be a lot narrower, but not affecting the sealing of the rest of the position of the adhesive width is basically the same.
In fact, this kind of flat glass back cover has another advantage, that is easy to recover. This is determined by its structure and assembly method, the metal center frame edge of the inner frame, to take the position of the back cover, to do a certain degree of sinking, its amplitude and the thickness of the glass is the same, in order to allow the back cover just embedded in the frame.

As long as the opening of the back cover does not damage the adhesive, its adhesive at least half of the remaining, the back of the recovery can not be supplemented when the adhesive, directly stick the back cover back, the future of the battery change, than the other modeling of the back cover is much more convenient, good to dismantle or install, hands-on ability of the user, look at the tutorials on their own can be changed.
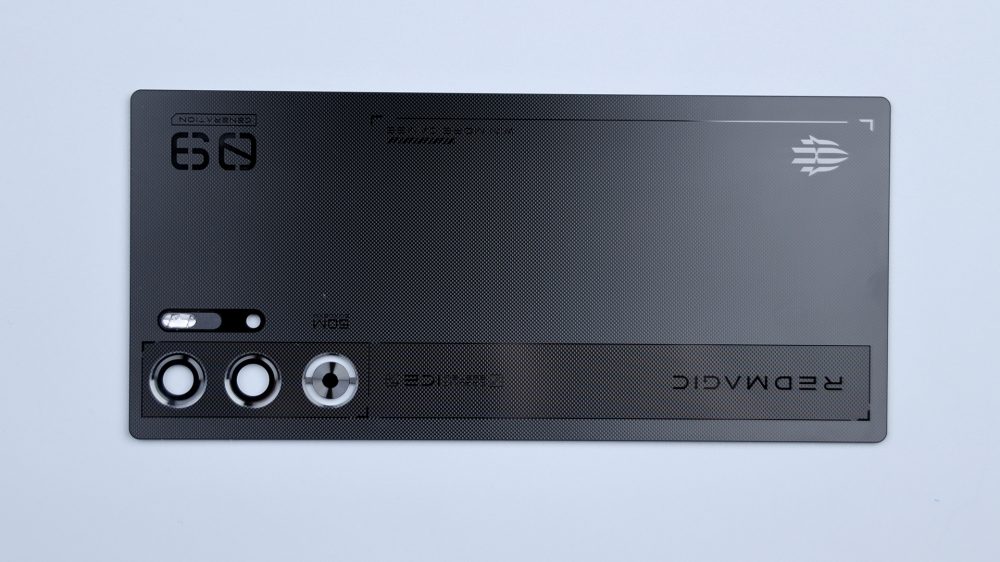
As the back cover and lens is a block of glass, the camera area is not raised, there is no traditional concept of DECO.
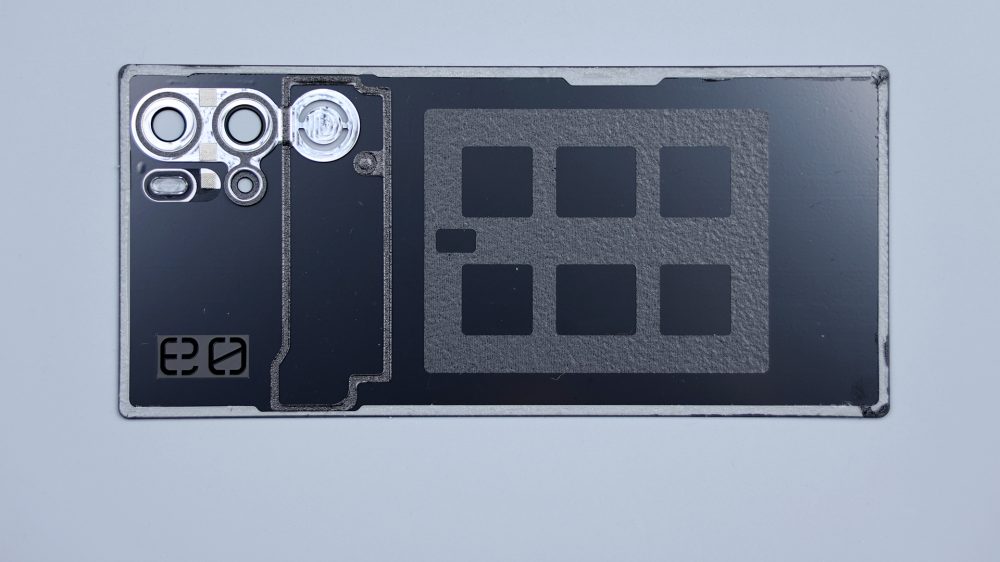
The camera area is structured with only a metal liner, which is fixed to the inside of the back cover by adhesive, which serves to position the lenses as well as protect them.
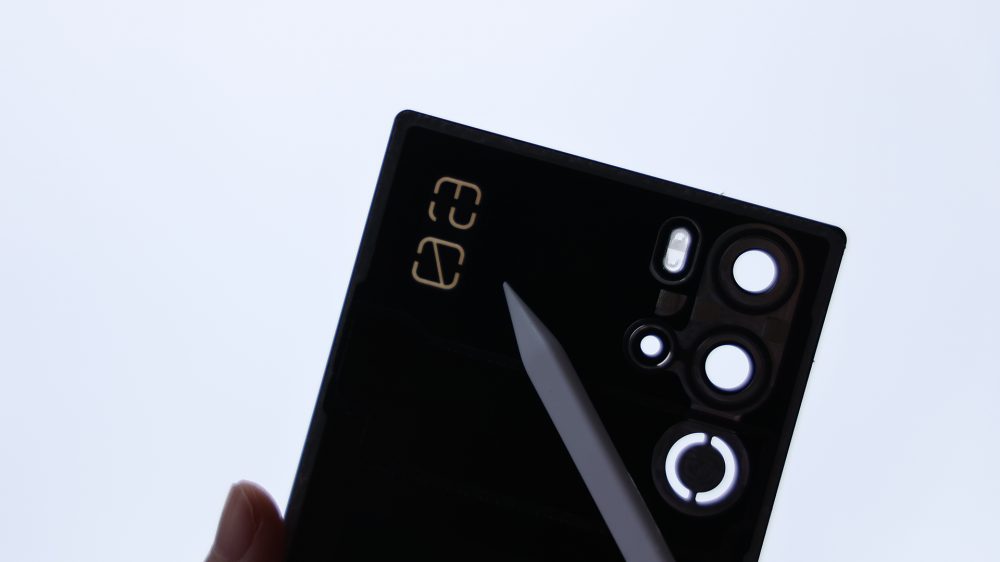
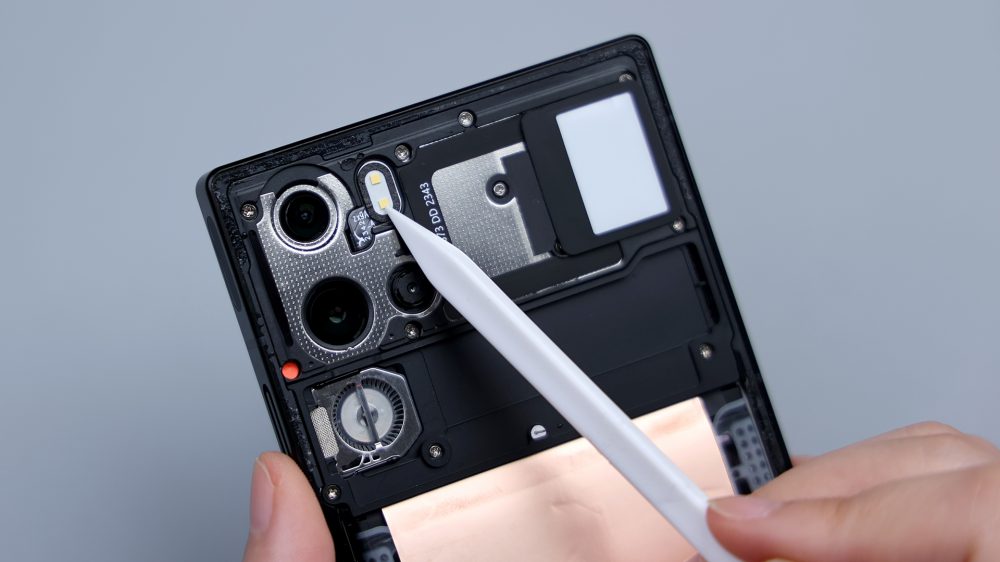
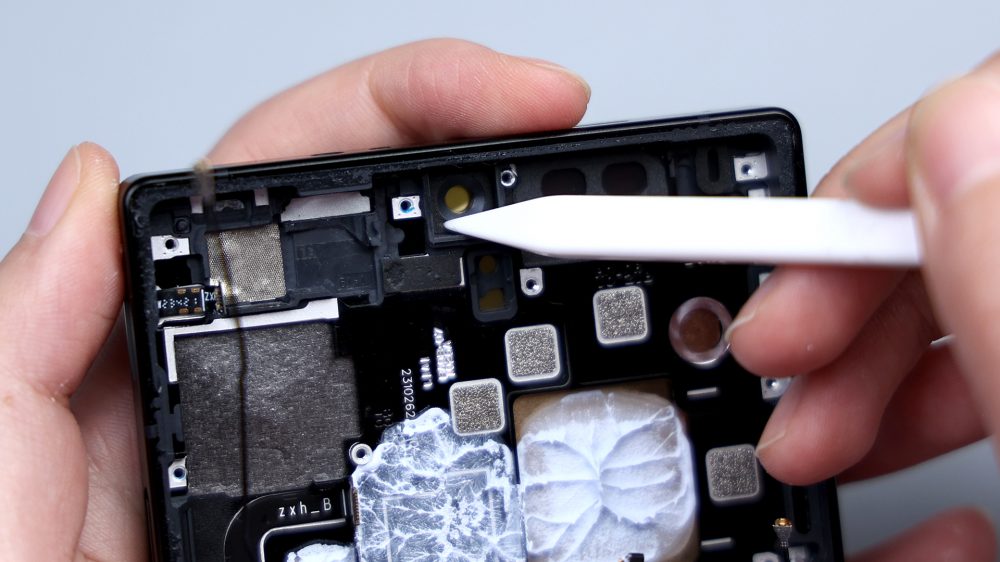
The number in the upper left corner is skeletonized and semi-transparent, so you can see the light coming through. Of the five openings on the right side, the oval opening in the upper left corner corresponds to the flash, and the black rubber ring on the outer edge prevents light leakage.
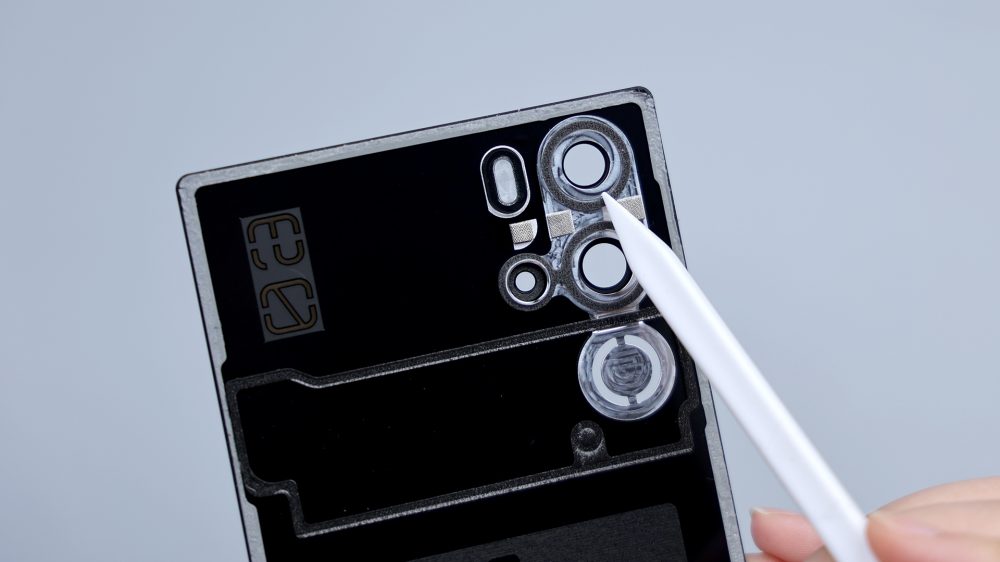
In the corresponding position on the outer side, there is a metal decorative piece, in addition to aesthetic, another role is to form a proper bump, when the phone is placed flat on the desktop, you can pad the back cover slightly a little bit to form a certain gap, to avoid the lens position of the glass is scratched.

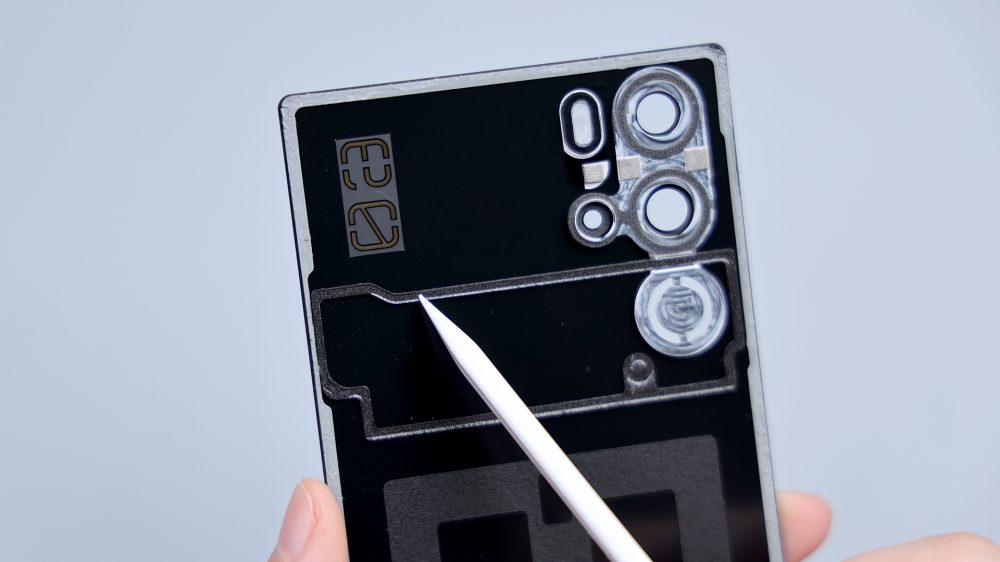
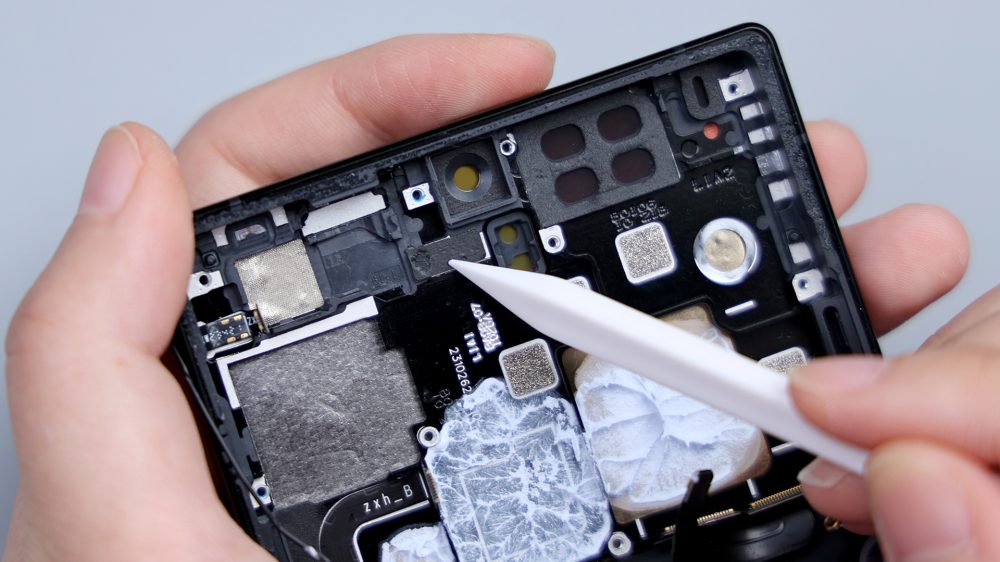
The three round holes right next to each other correspond to the three rear cameras, and they are all protected by a foam ring cushion, with three thick conductive cloths in the center. The bottom hole corresponds to the fan, and the transparent hollowing allows you to see the fan blades and ambient lighting effects. That ring of irregular foam corresponds to the cooling duct, the shape just fit, both a cushioning protection, but also played a role in sealing the air duct. The large hollow foam in the center corresponds to the battery and heat dissipation copper foil.
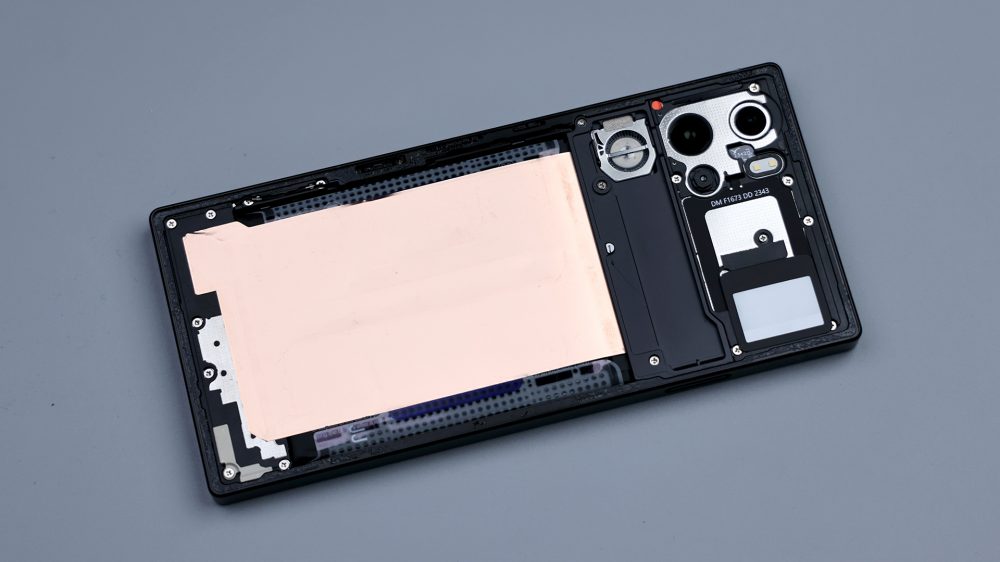
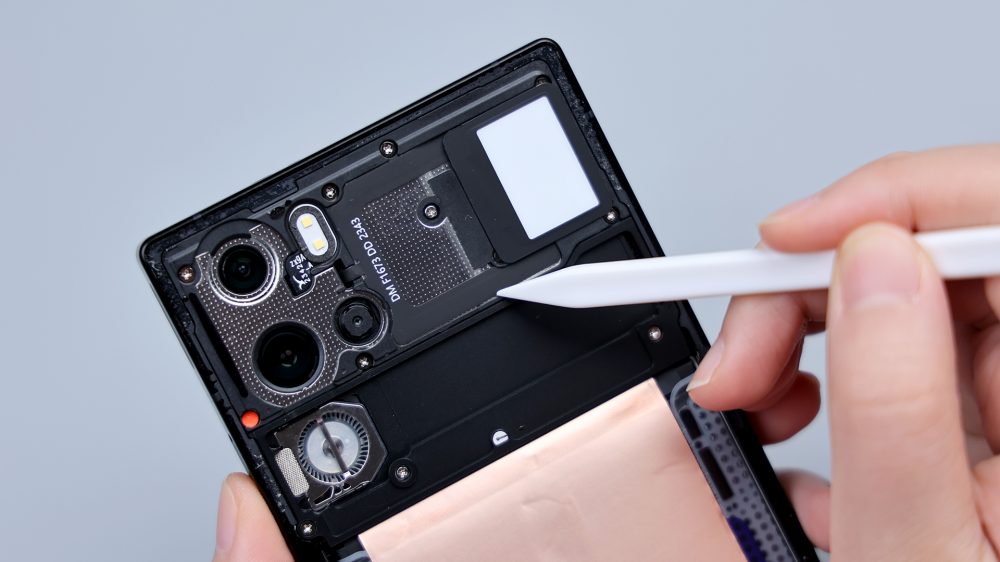
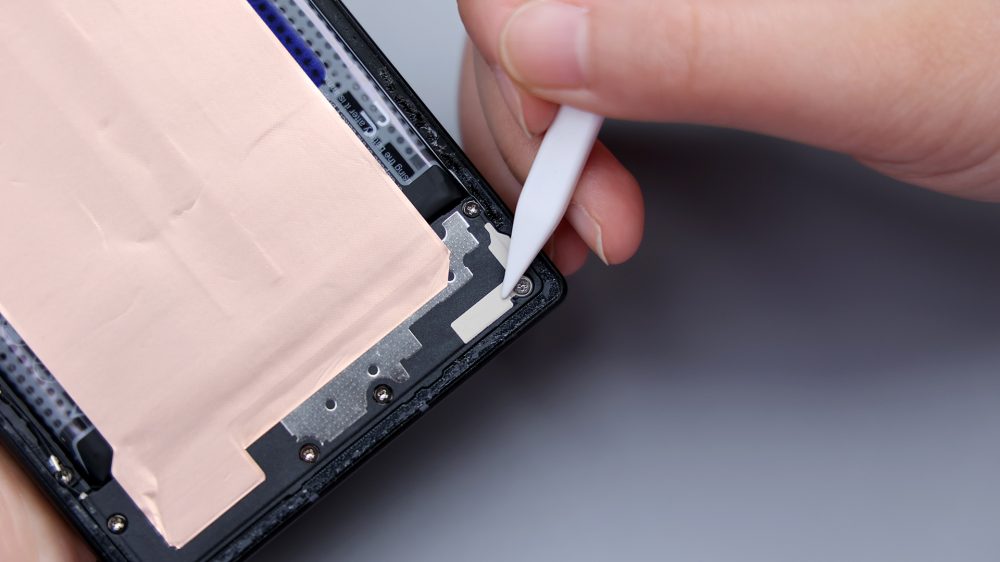
The edge of the main frame of the phone, you can still see the adhesive residue, it is strong enough to be good to remove at the same time, does not affect the sealing. The rear three cameras, at this level of the cover is also basically flat. Around can see a large exposed metal plate, visible this time the cover of the metal proportion is very high, conducive to heat dissipation and signal conduction.
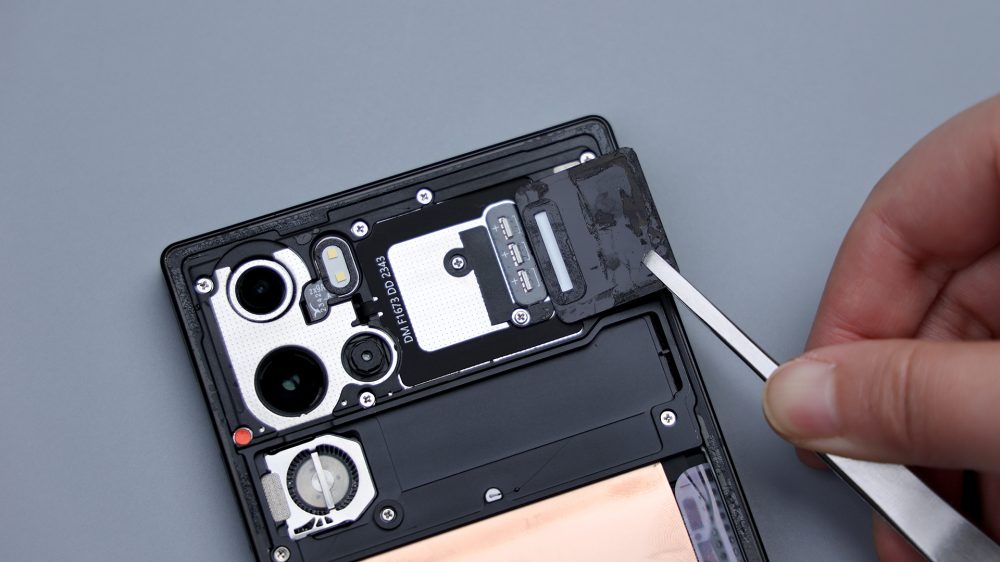
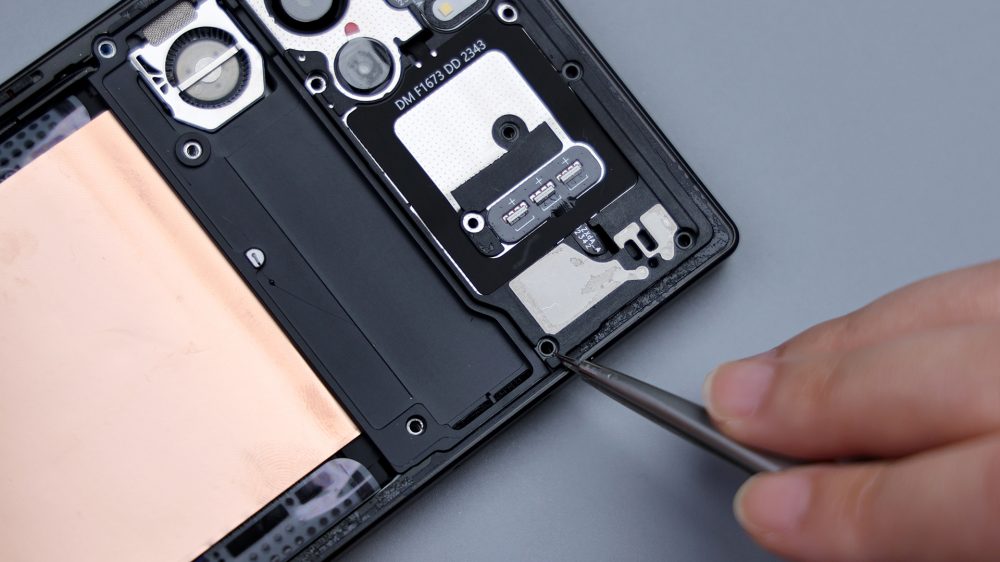
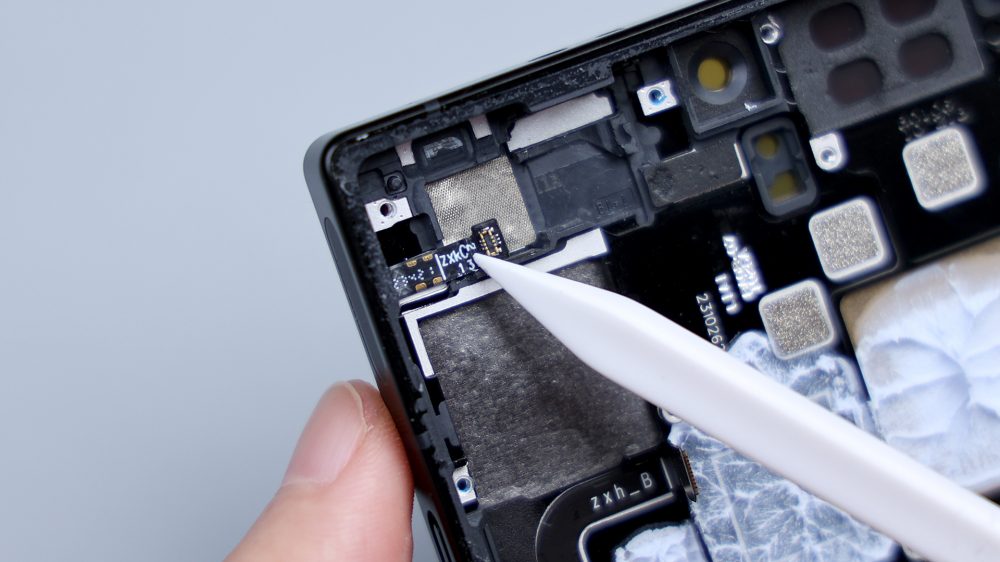
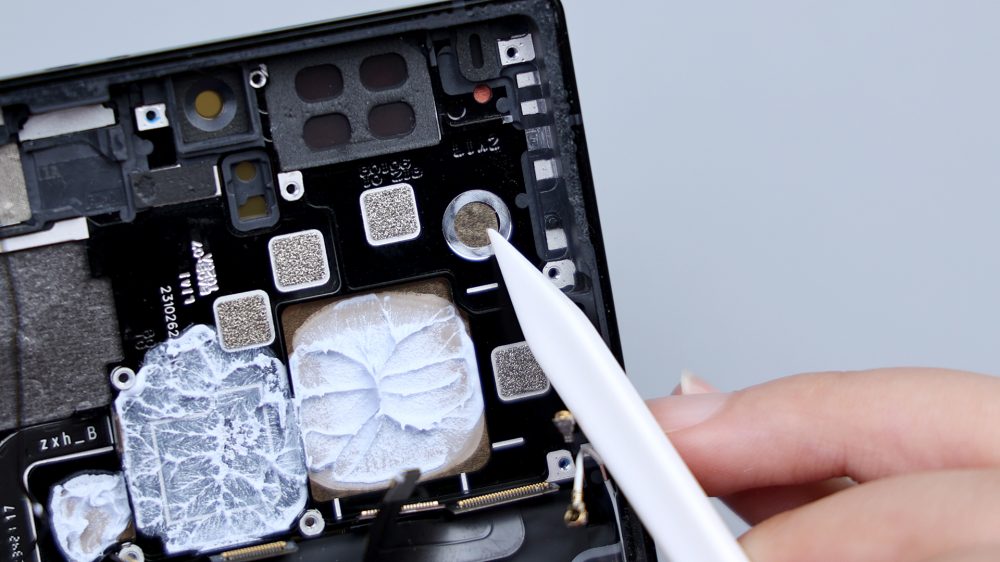
The flash adopts a dual-LED bead configuration with a ring of foam around the outer edge. The Red Magic 9 Pro+ adds NFC functionality, with the coil in the center and the extended FPC received on the inside of the cover. The white square on the right side is the ambient light guide, and the corners are pressed with fixing screws for the cover.
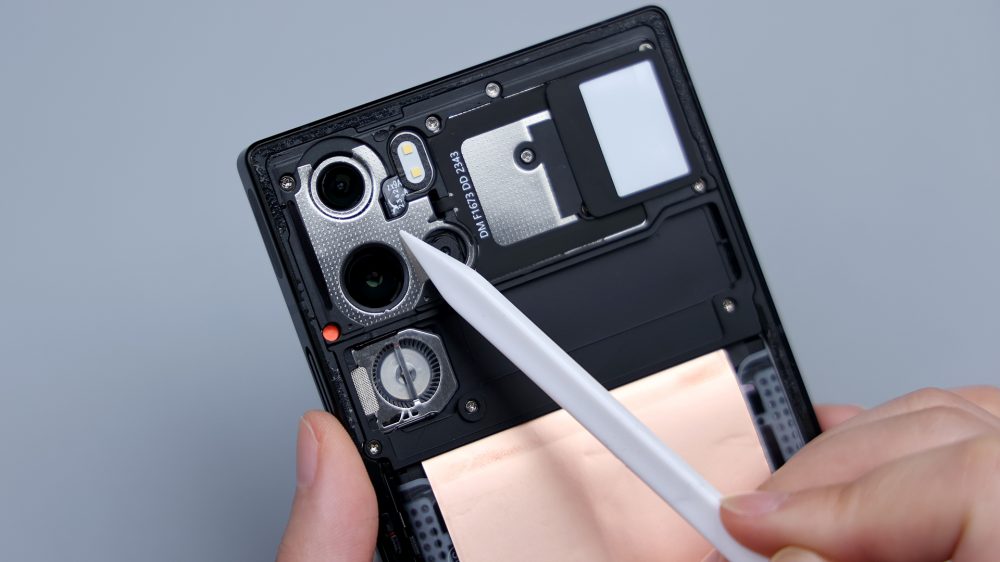
There is a gap between the cover plate and the air duct, they are two separate parts, judging from the height difference of the edges and the position of the screws, the cover plate is pressed against the air duct for fixing.
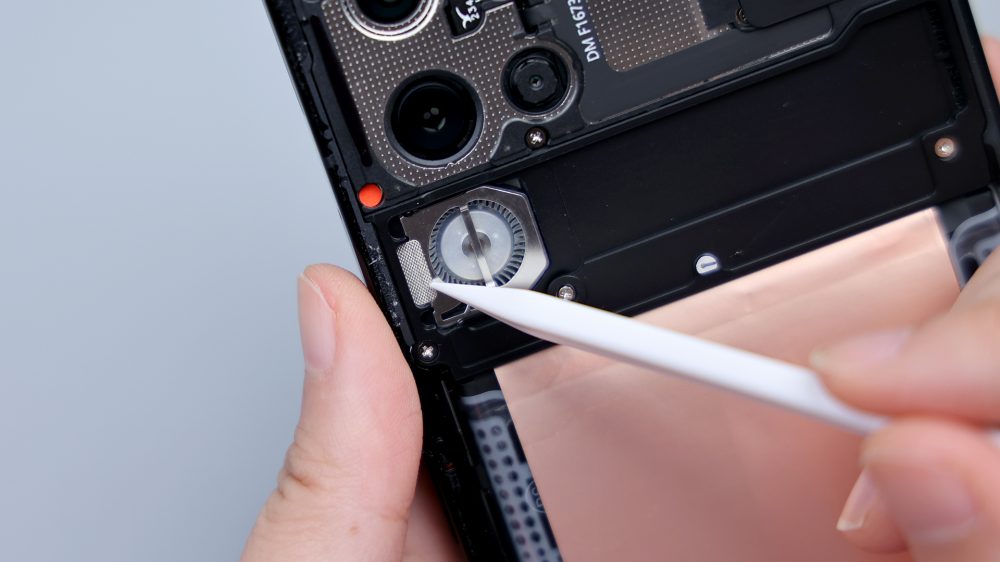
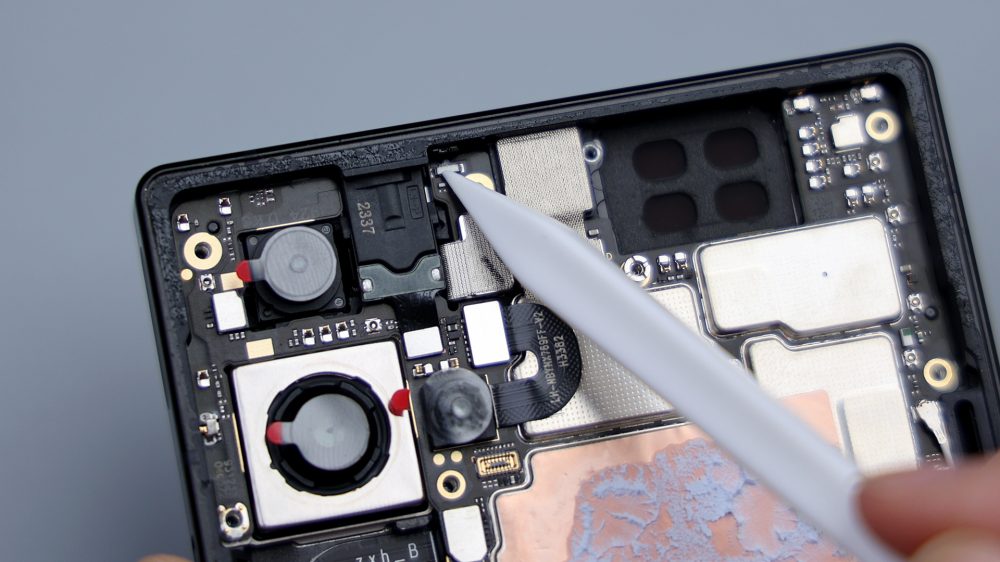
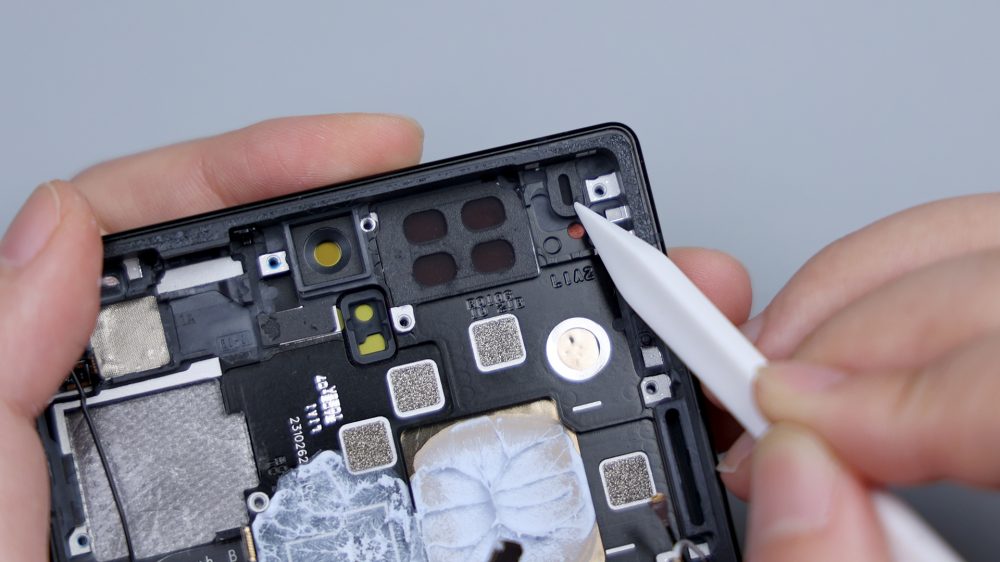
The fan is located on the left side, the frame and fins (qi) are made of metal, the speed has been upgraded to 22,000 rpm, and the metal mesh is faintly visible at the location of the air intake. There is a dot in the middle of the duct, with a metallic luster, it is stained with a bit of black paint on the top and the side, at first I did not look closely, I thought it was my own speech sprayed above the spit, but also went to wipe, found that the wipe does not move, and realized that it is the paint, the camera brother looked at my strange behavior, laughing that called a happy.
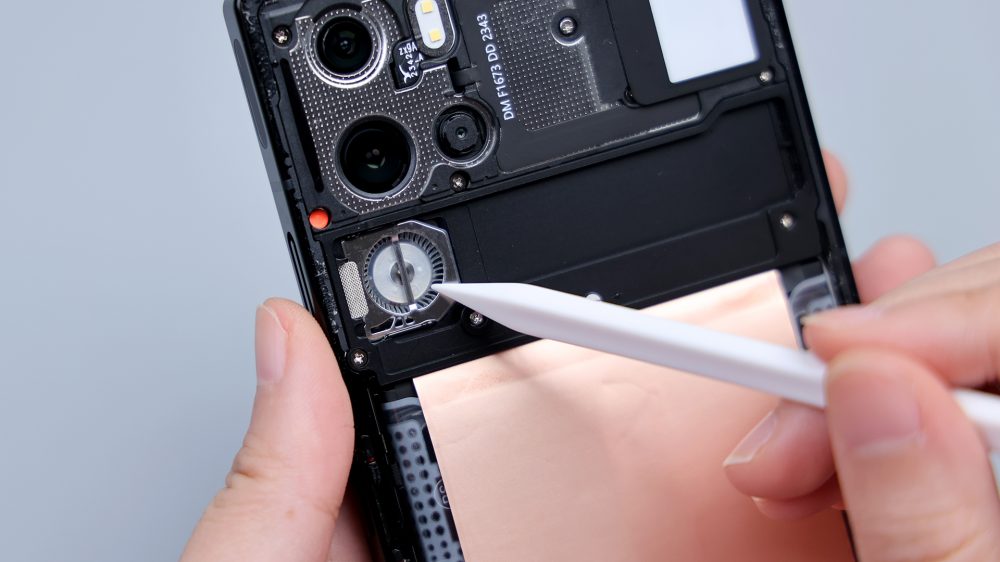
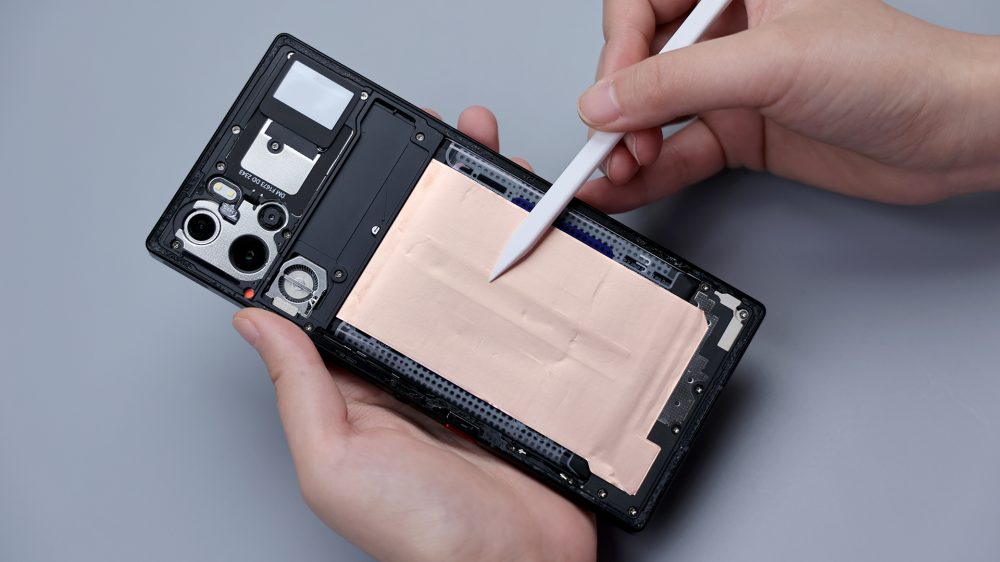
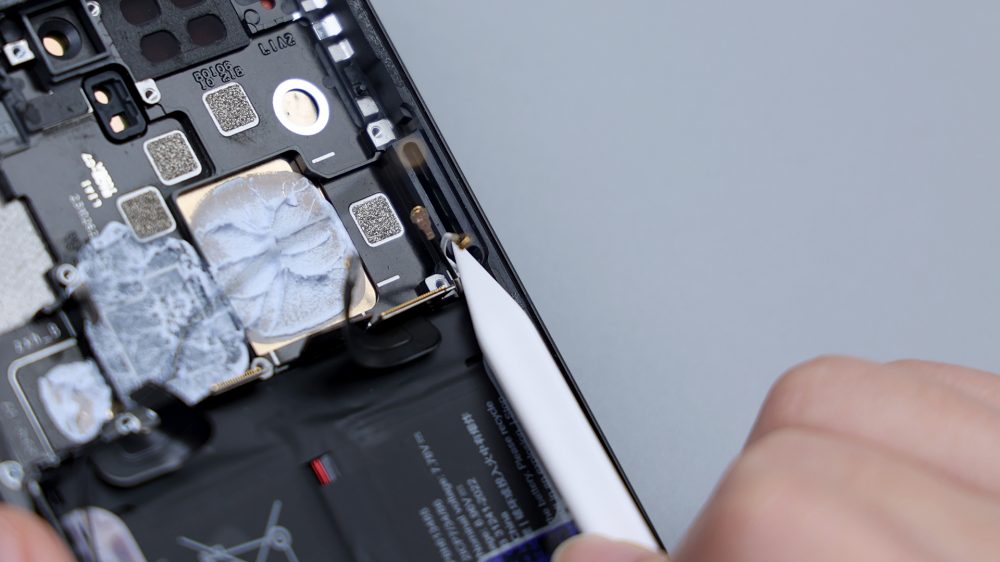
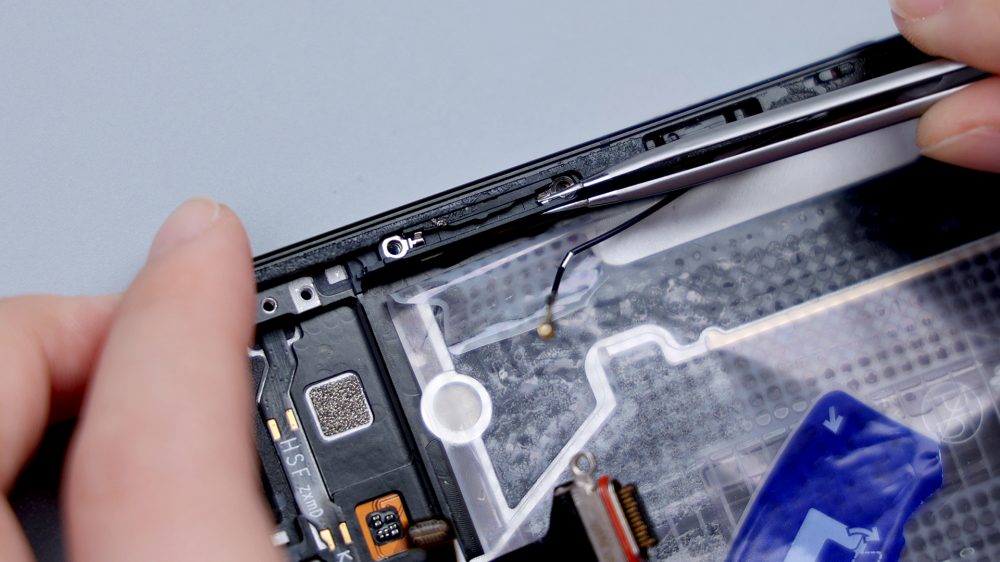
There is a large piece of copper foil under the duct that covers a large area of the battery and extends to the sound chamber, which is held in place by adhesive, and a portion of the LDS laser laser antenna can be seen in the lower right corner.
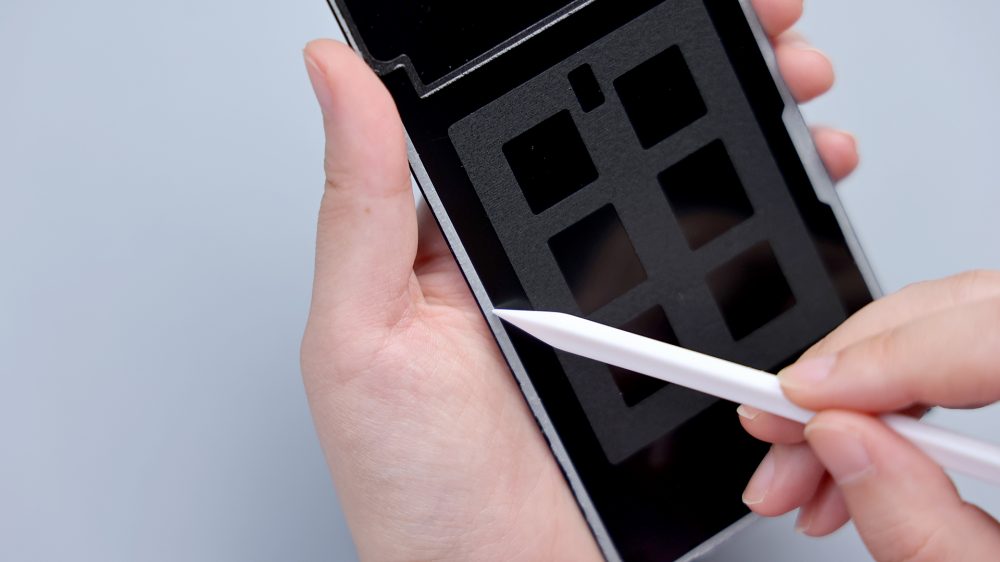
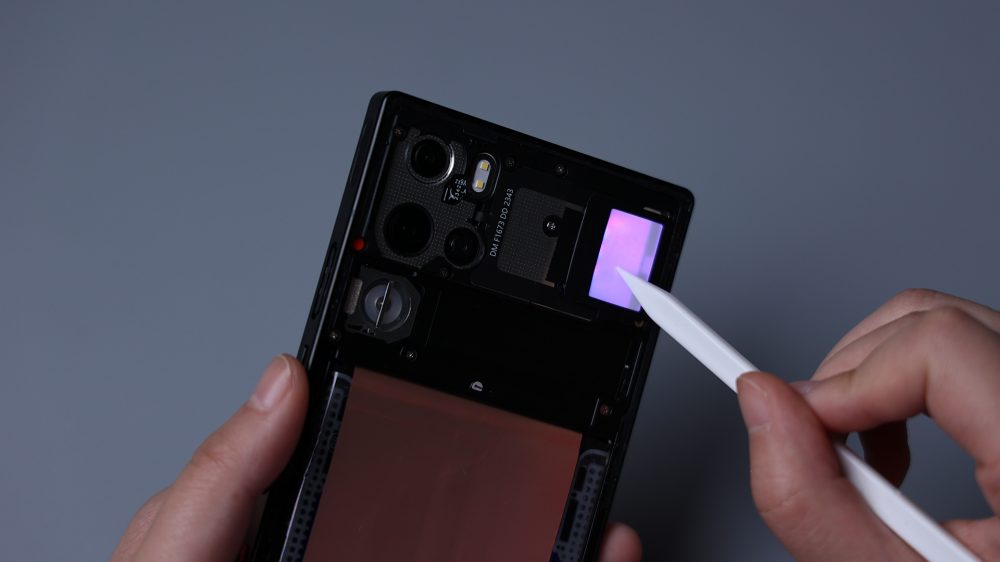
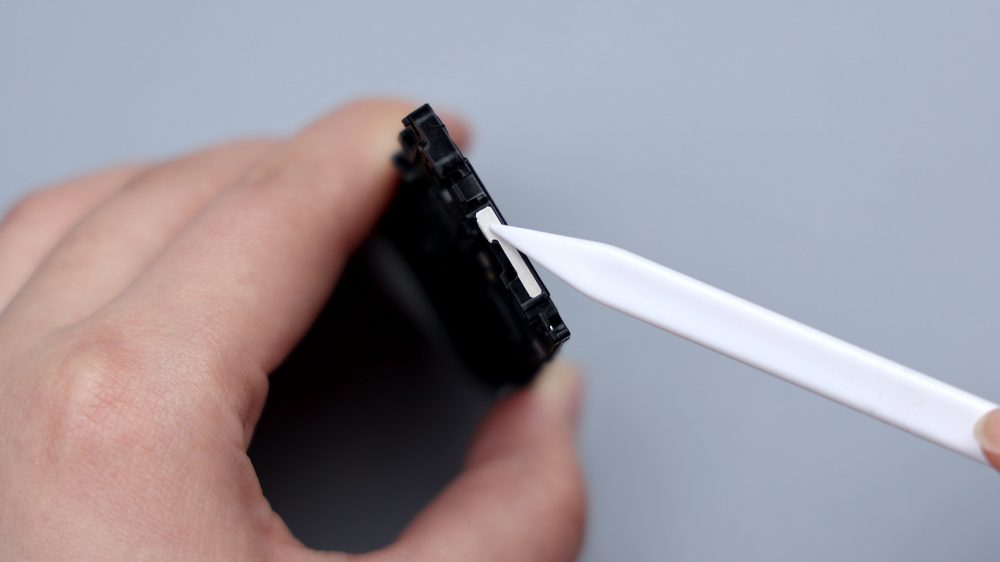
After slightly heating the cover location and softening the adhesive on the light guide, it was ready to be peeled off.
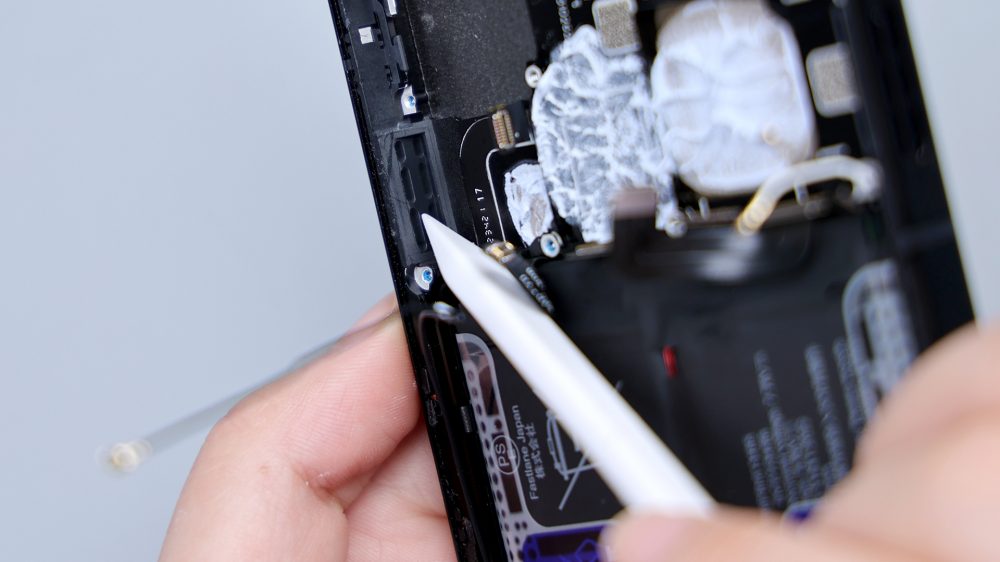
Its structure and principle is very simple, most of the inner area is covered by a black sticker, leaving only a thin strip of blank area to gather light, which corresponds to the location of the ambient light, there is a circle of black foam adhesive next to it, which is used both to fix and to prevent leakage of light, and a circle of black stickers on the outside, leaving a large blank area in the middle, which is the same as the inner side of the role and effect of the gathering of light gathered here to form a light-emitting plate, which is directly opposite to the skeleton of the back cover. Semi-transparent numbers and letters, that is, the user can see from the outside of the color-changing ambient light.

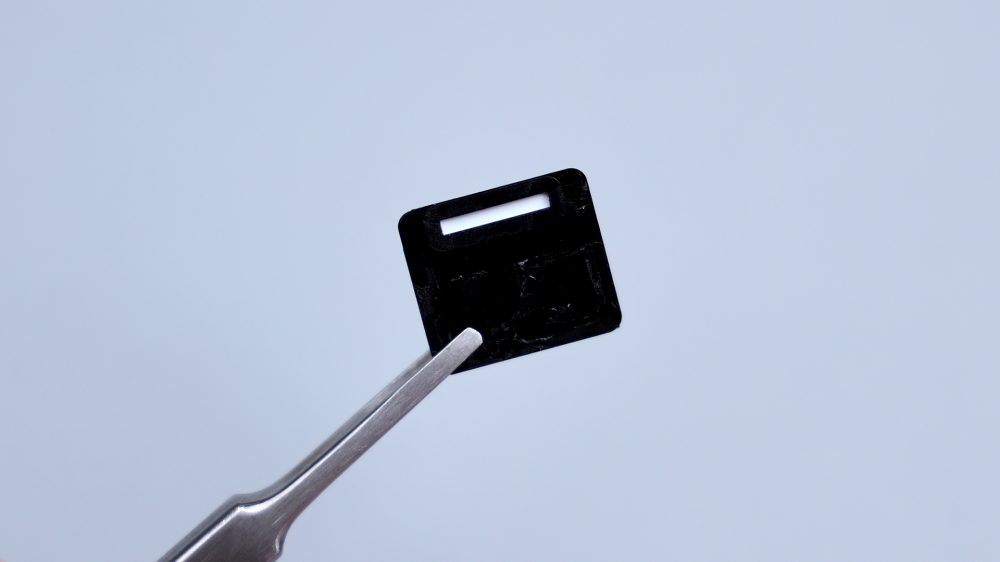
Here is a small detail, the ambient light of the Deuterium Front Transparent Edition has 2 beads, while the Dark Knight Edition has 3, which is theoretically brighter than the Deuterium Front Transparent Edition.
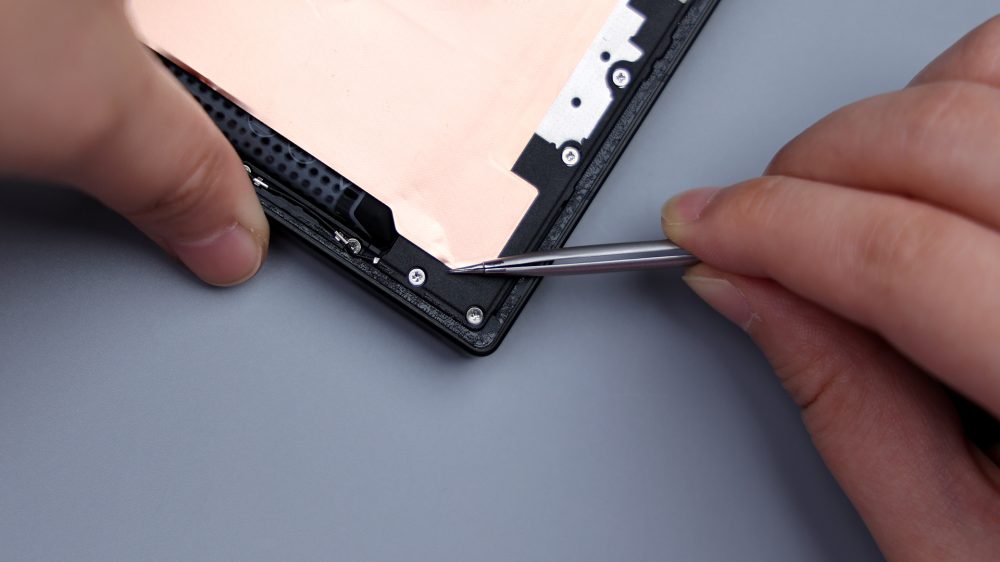
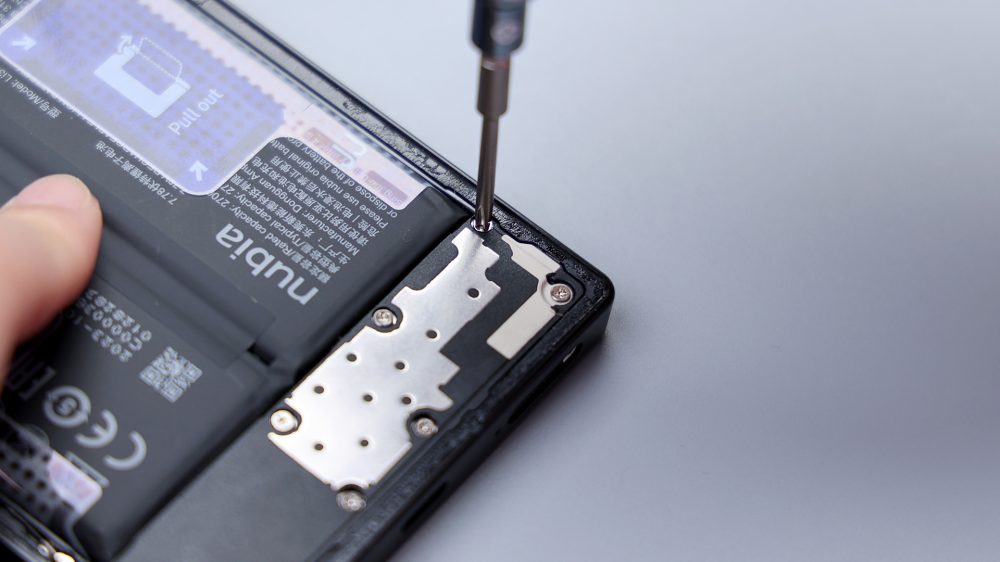
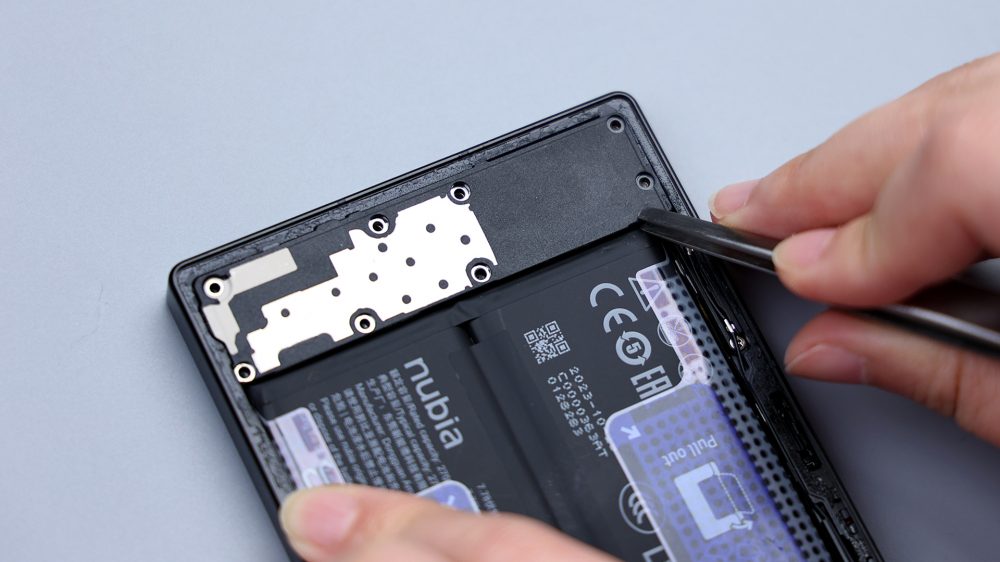
Tear off the adhesive on the copper foil at the bottom, unscrew all the fixing screws for the cover and air duct, pry up to remove the cover first, then disconnect the BTB of the fan, then disassemble the air duct.
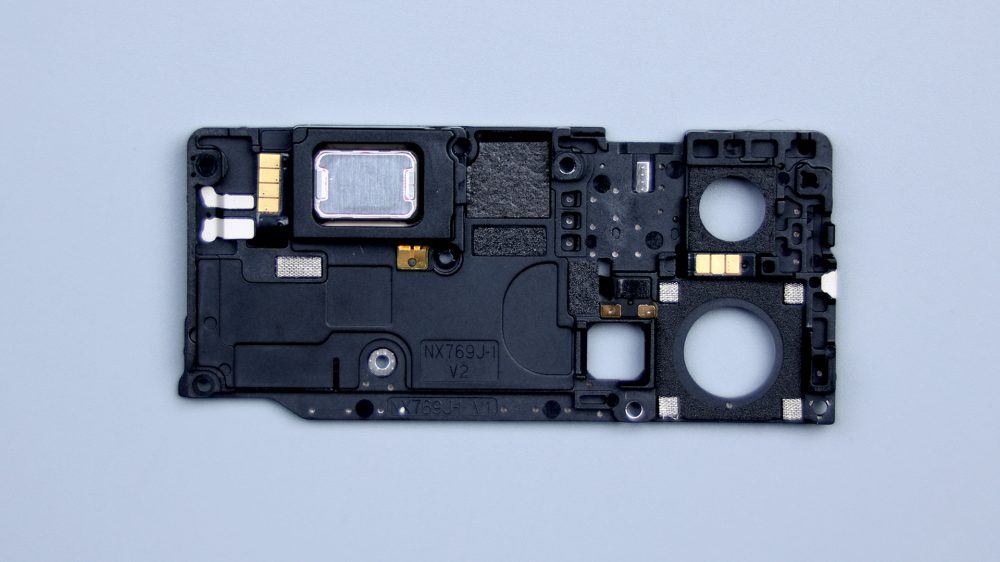
The main body of the cover plate is made of plastic + metal, 4 contacts in the upper left corner correspond to the ambient light, next to the whole piece of LDS laser laser antenna, the top speaker is integrated into the cover plate, it comes from Ruixing Technology, model number 1115K, and is connected to the motherboard through the 2 contacts in the lower right. The middle position of the two pieces of foam, respectively, corresponding to the front lens and its BTB. the rest of the rear three cameras, also have a foam buffer protection, which the main camera has also been "special care", the four corners of the corresponding position of the addition of a thick conductive cloth. The two contacts on the top of the macro lens correspond to the NFC coil, and the three contacts on the top right correspond to the flash.

Next to the main camera, there is also a part of the LDS laser antenna, which extends outwards to the side of the cover.
There are red rubber rings on both sides of the duct where the air vents are located to improve the airtightness of the duct.
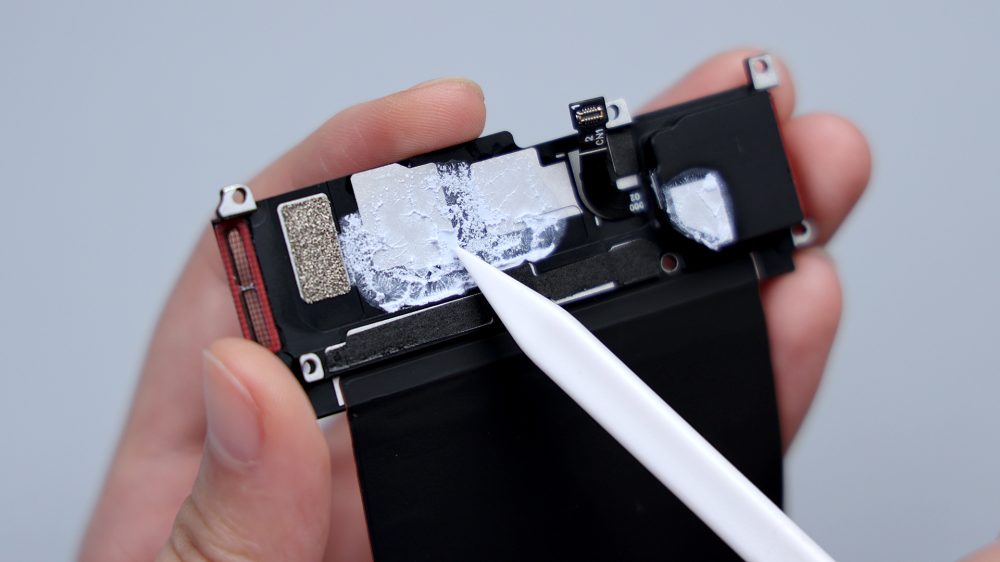
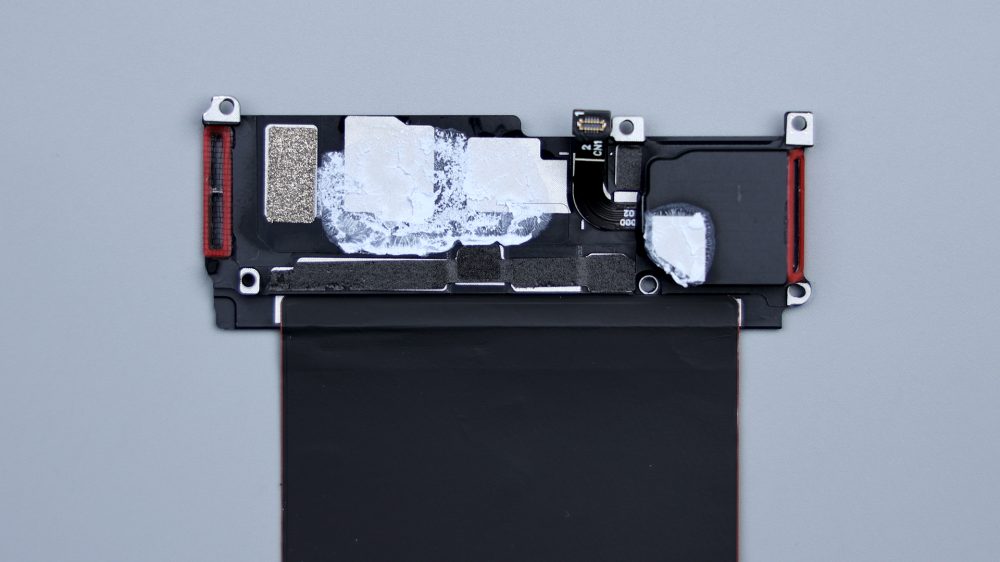
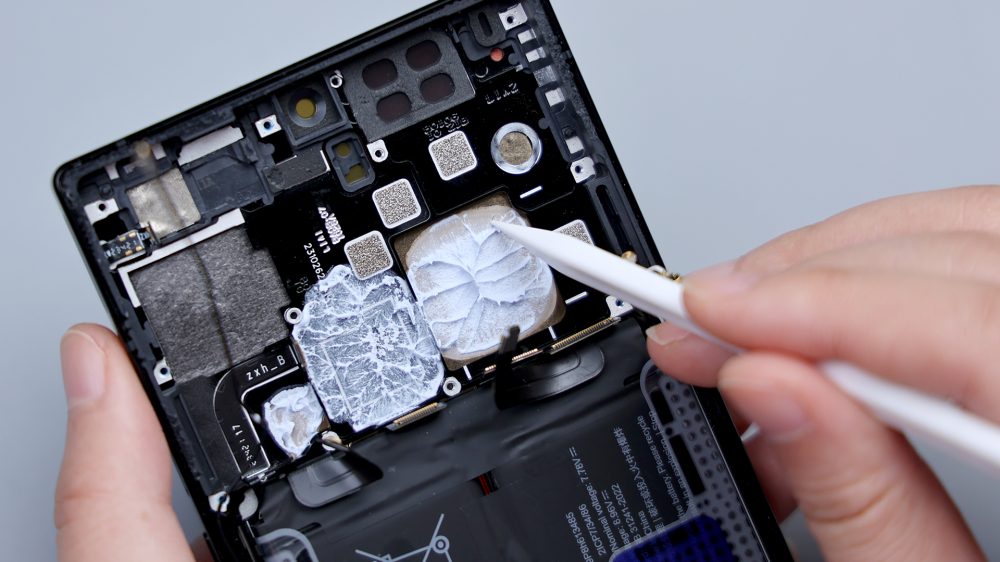
There is a lot of silicone residue on the inside of the air duct. The reason why it is made of metal is that apart from strengthening the structural strength, another function is to assist in heat dissipation, including silicone grease in the position of the fan, which is still a very thorough consideration of heat dissipation. The long strip of foam pads below corresponds to the row of BTBs on the lower A-side of the motherboard, and there is also a layer of graphite thermal paste on the inside of the copper foil to improve cooling efficiency.
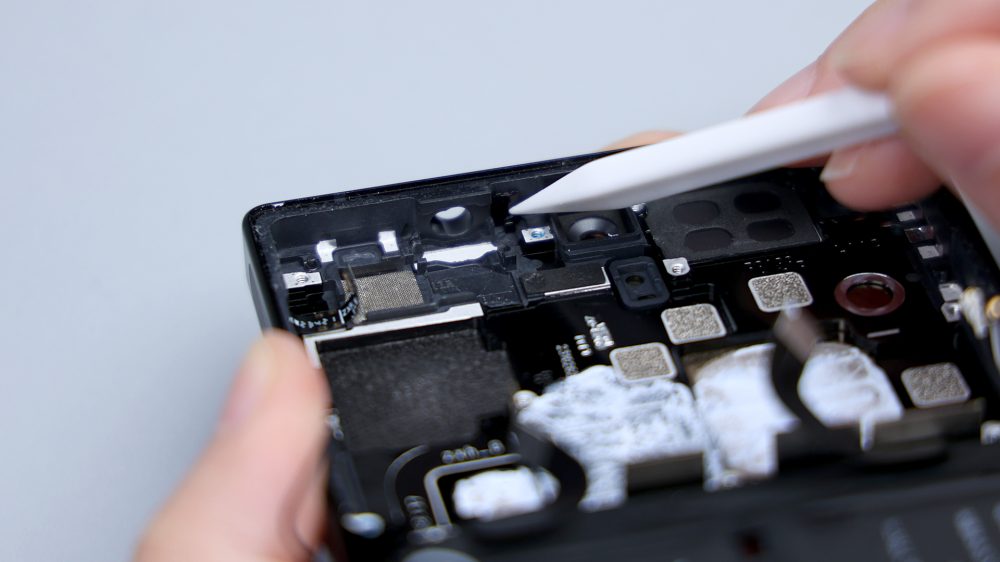
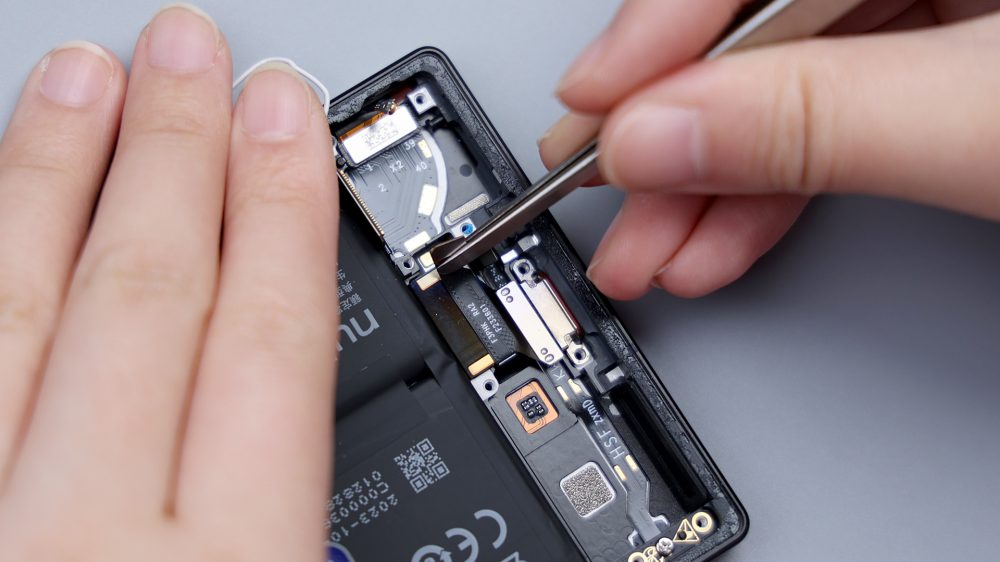
The three rear cameras are basically about the same height, the back of the front lens and the ultra-wide-angle lens BTB are affixed with a conductive cloth, the headphone hole is sandwiched in the middle of the two, the infrared transmitter is on the right side of the headphone hole, and the speaker is equipped with a skeletonized foam pad at the corresponding location, next to the noise-canceling microphone, which is protected by a metal cover on the outside.
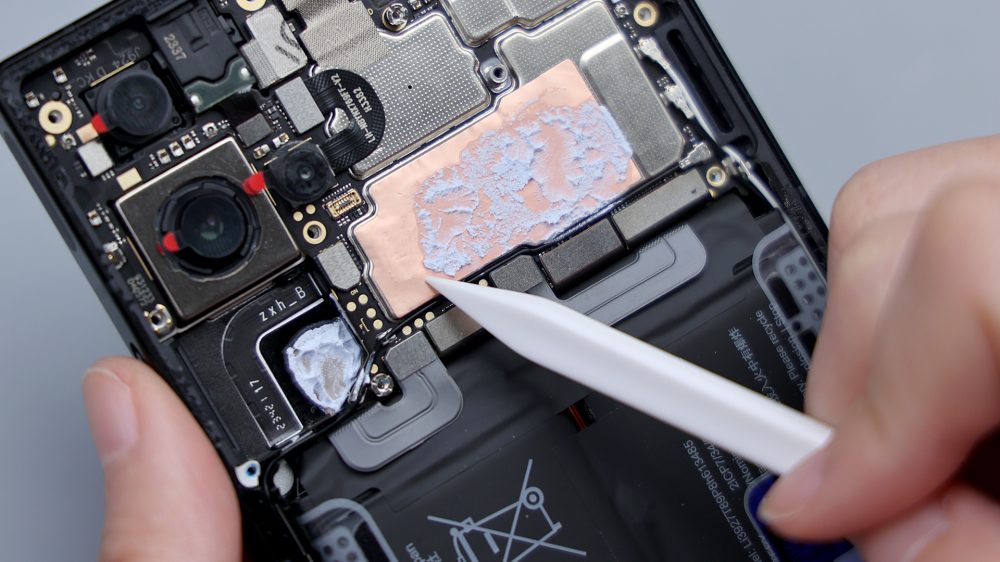
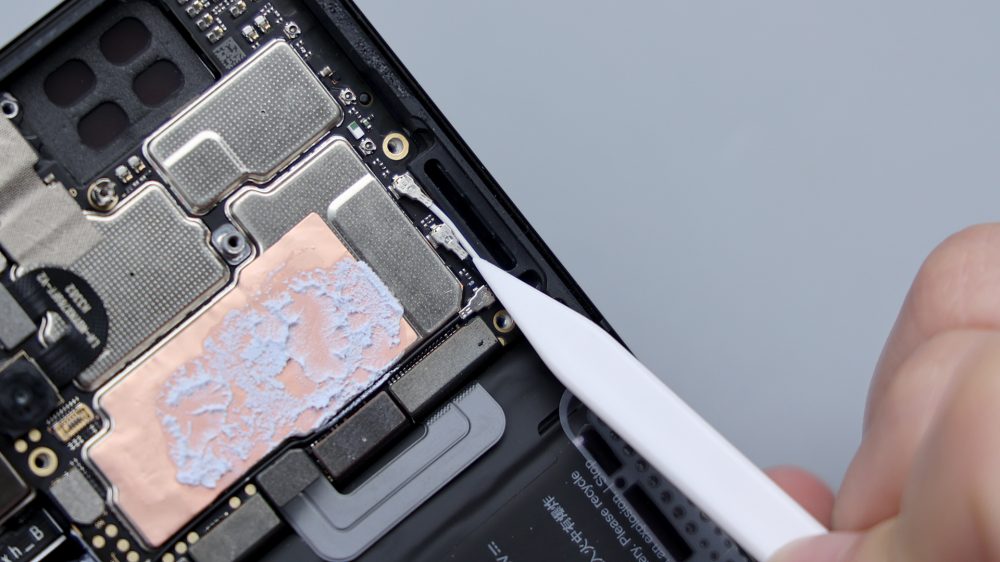
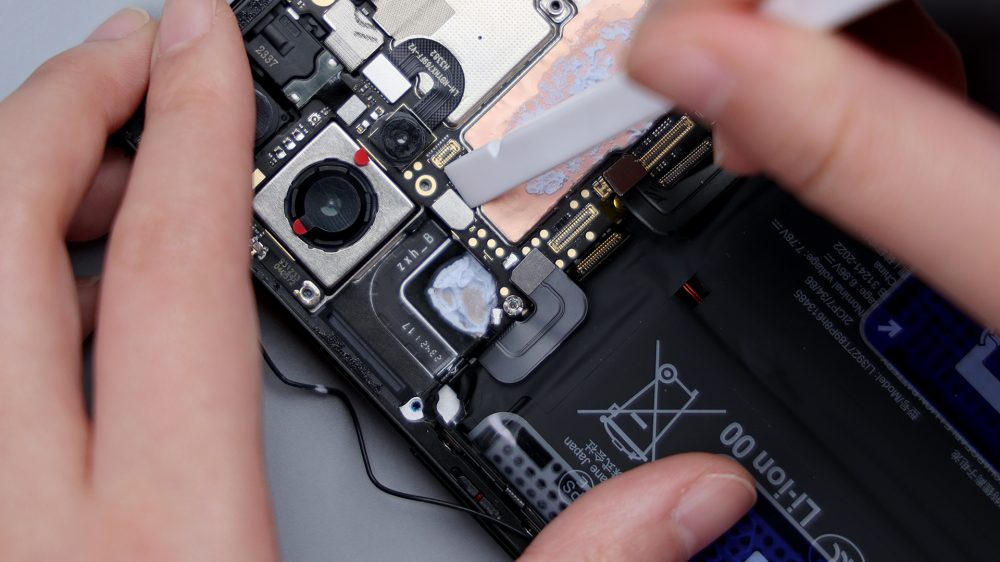
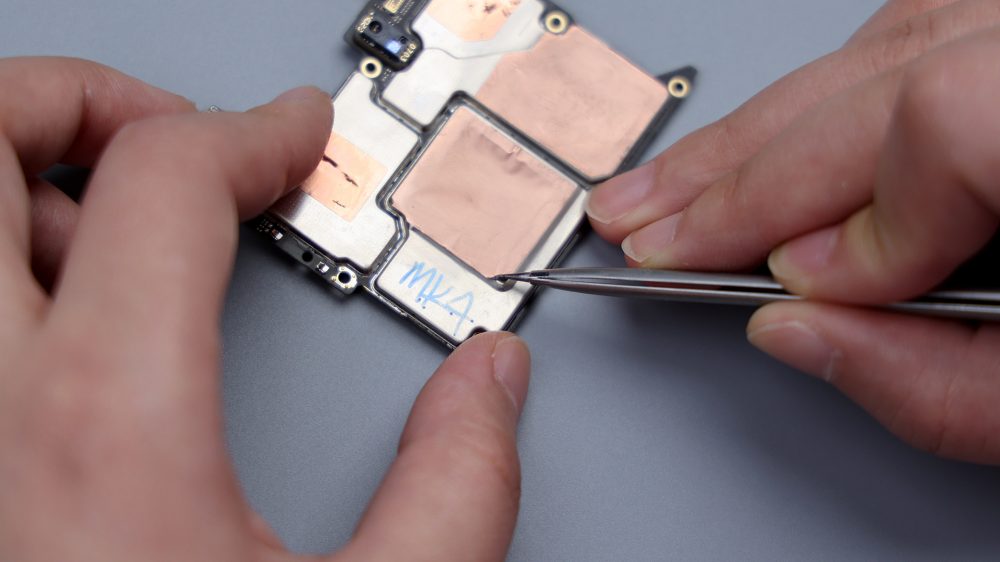
The core area of the A-side is covered with copper foil and is also coated with silicone grease to aid in heat dissipation, and silicone residue can also be seen at the corresponding location of the fan.
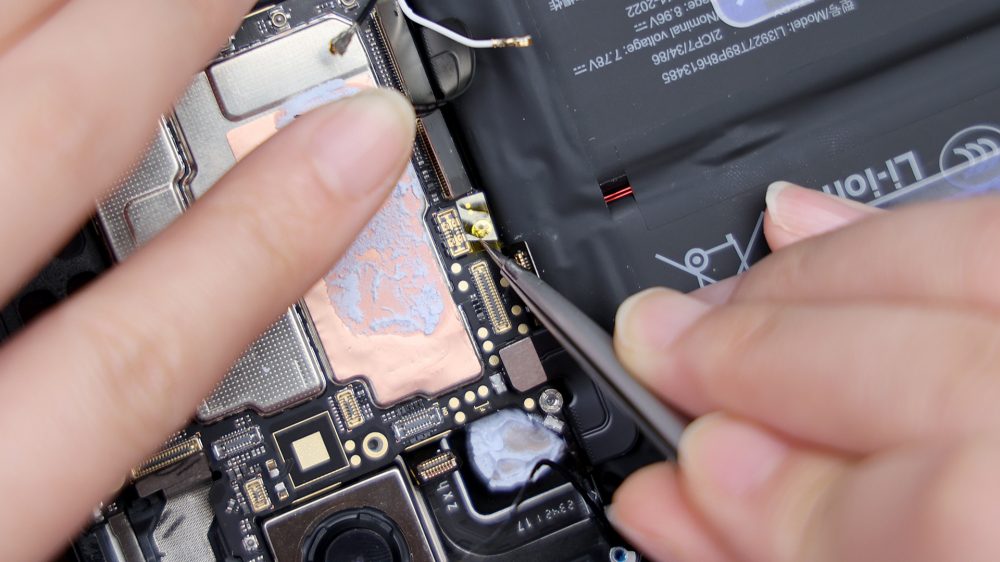
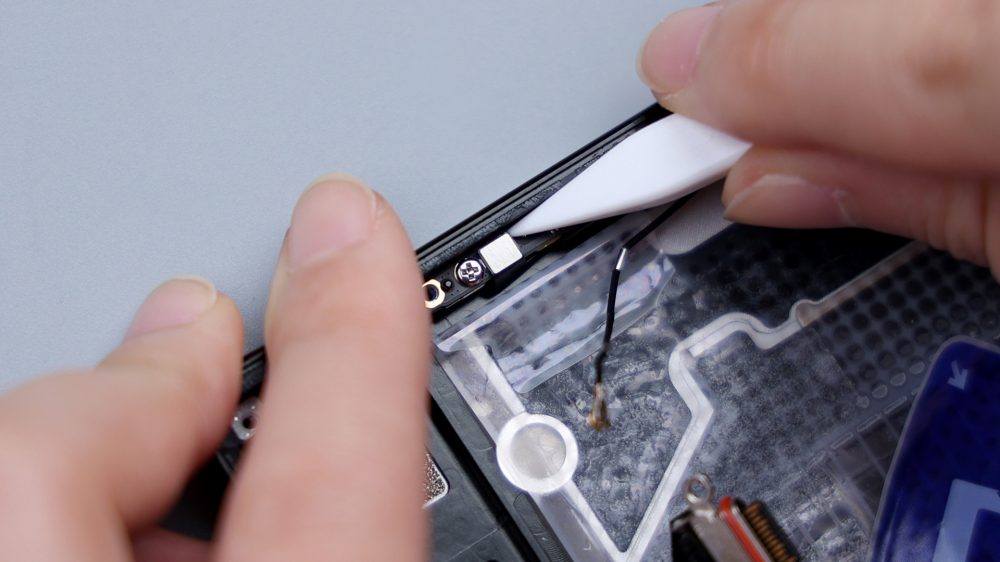
The following row of core BTBs, of which the battery has 2 ports. The right edge connects 3 coaxial cables, with 1 black one chosen to run through the motherboard alignment and down the left side.
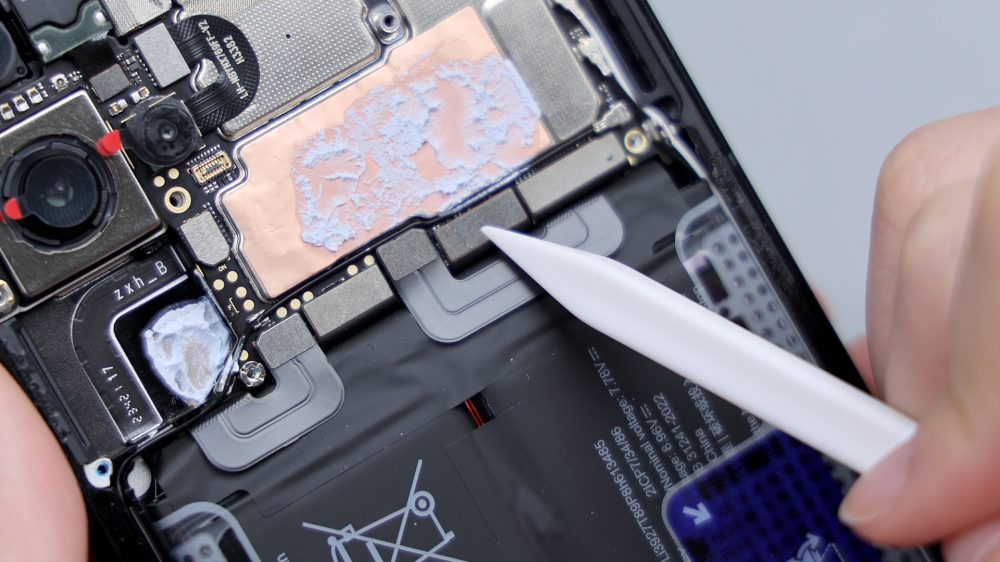
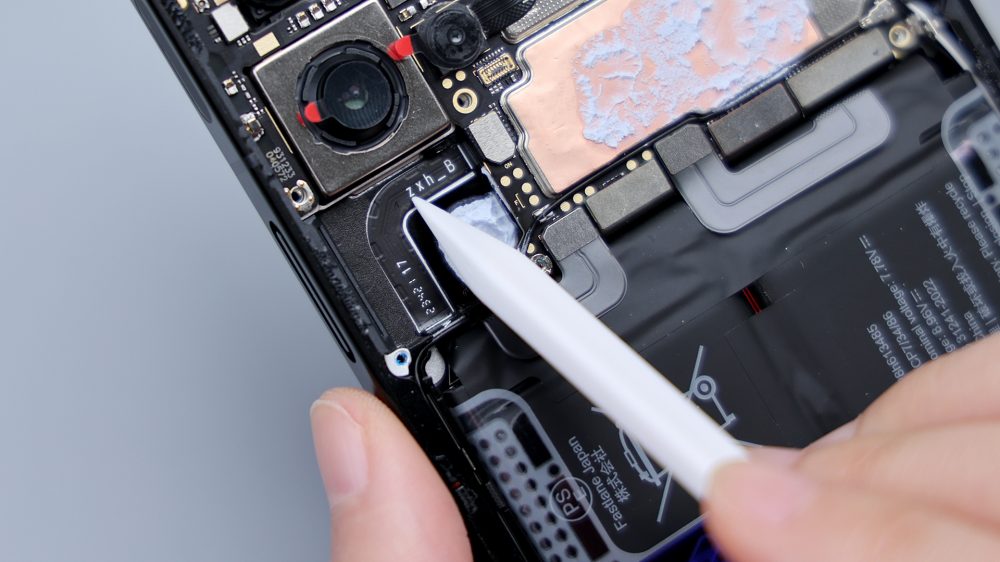
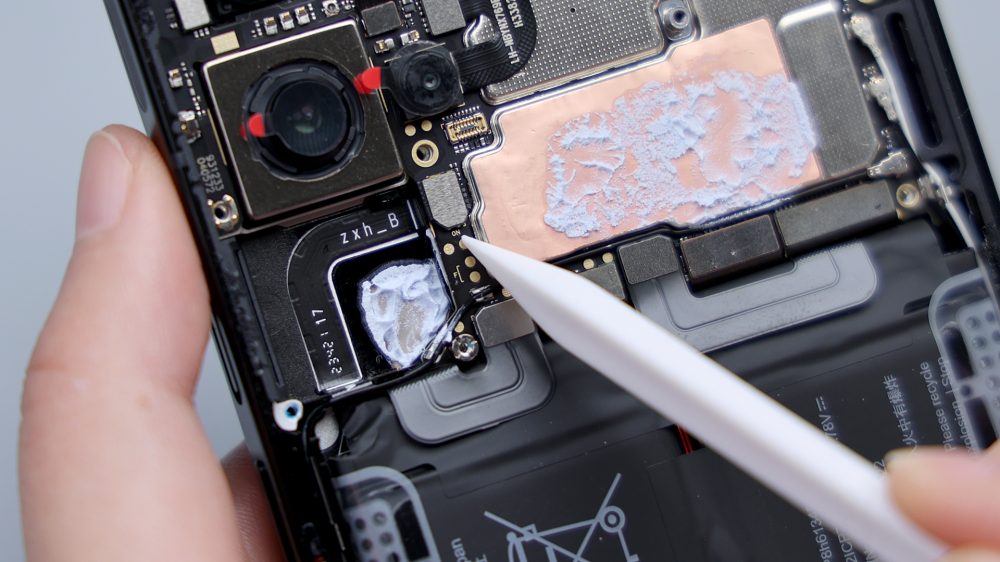
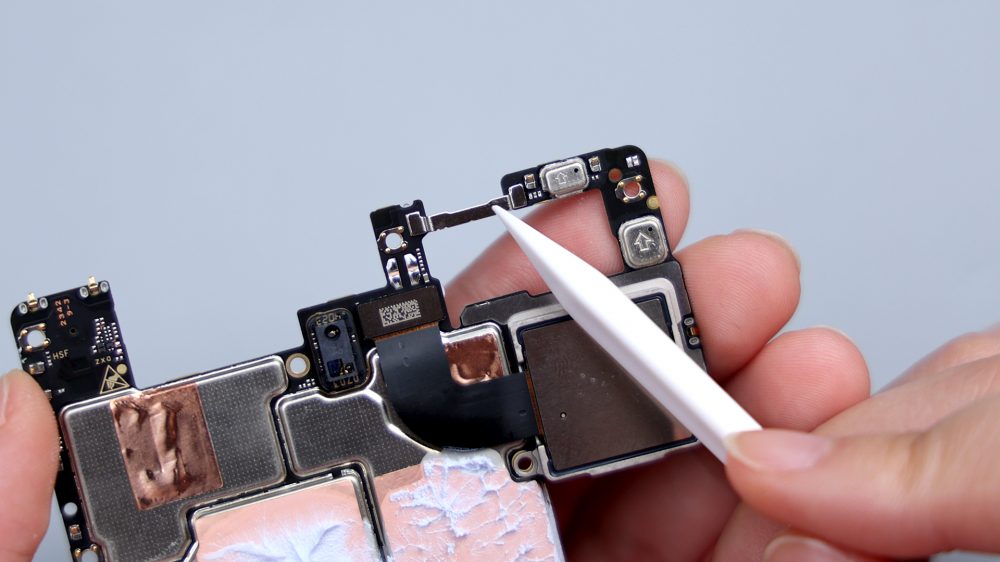
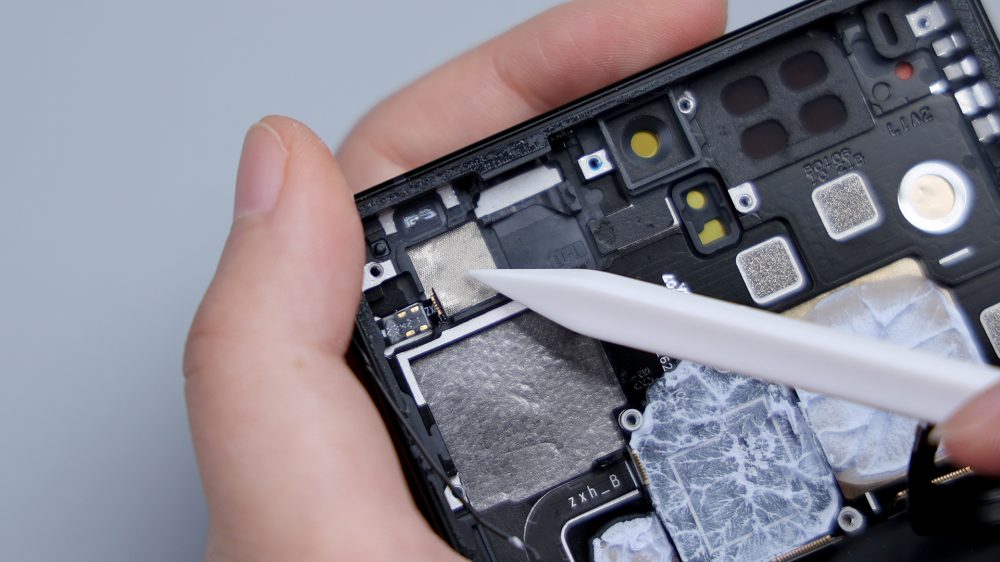
Unlike common cell phones, the side buttons are not connected by contacts, but by a FPC to the A side of the motherboard, in order to avoid the fan, the FPC also made a rounded corner deformation, the location of the BTB connector is marked with 2 special small letters "ON". There is one screw on the top right and one on the bottom left, which can be used as a fixing nut for the cover screws or as a fixing screw for the motherboard.
Disconnect the battery, the main and secondary FPC, the BTB of the USB port and power button in turn, and the 3 coaxial cables on the right side, tear the conductive cloth on the back of the front lens, disconnect the BTB and remove it.

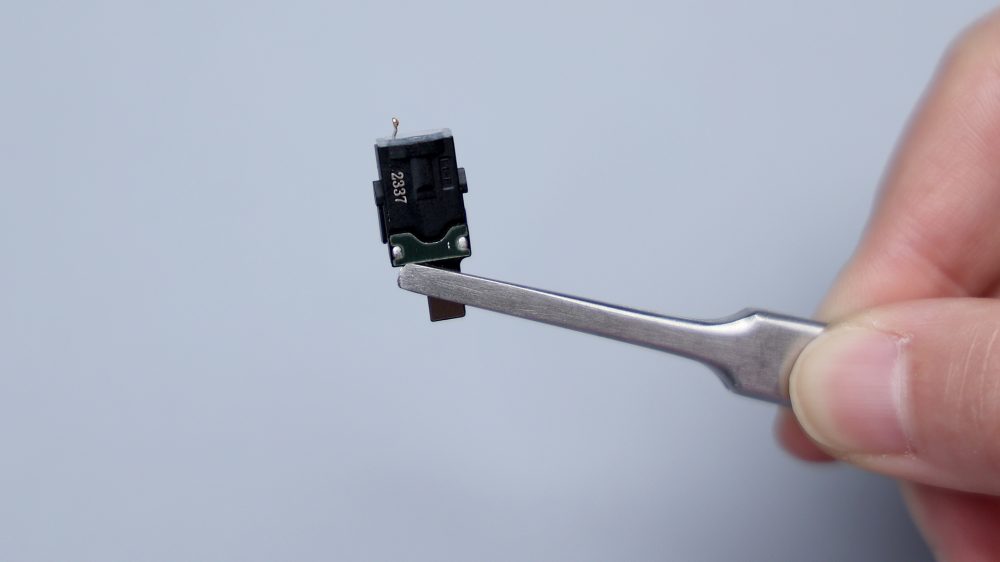
Next deal with the headphone jack, it's stuck rather tightly, be careful when removing it, don't hurt the FPC, later on, if the headphone jack fails, it is possible to replace it separately.

Disconnect the BTB of the ultra-wide-angle lens and the macro lens, of which the macro lens can be directly removed. there is no BTB of the main camera on side A, presumably it should be connected to side B, because there is really no place to set up a base around it.
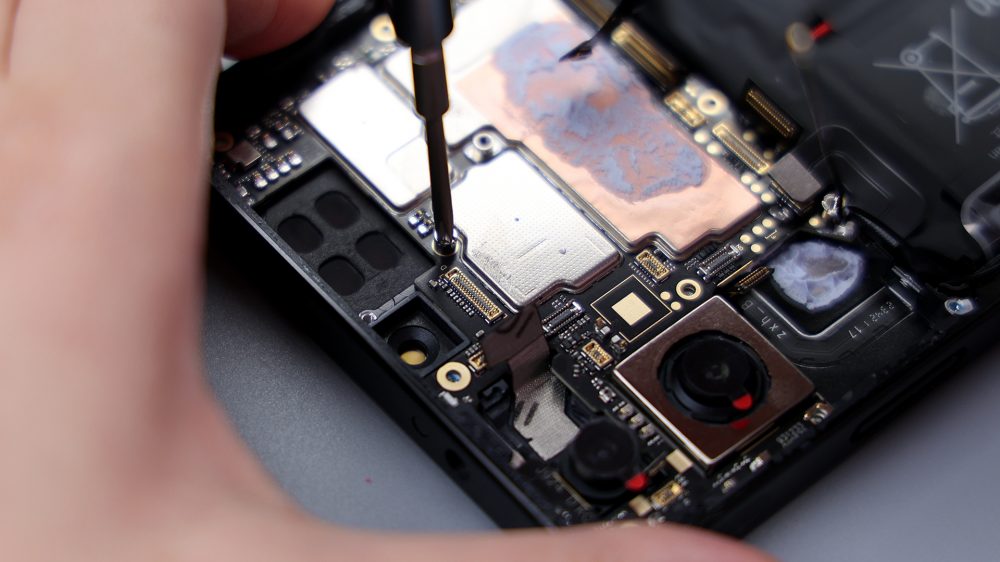
There is a piece of yellow tape attached next to the battery BTB, and there is 1 motherboard fixing screw underneath, unscrew it and the other 2 sub-screws to pry up and remove the motherboard.
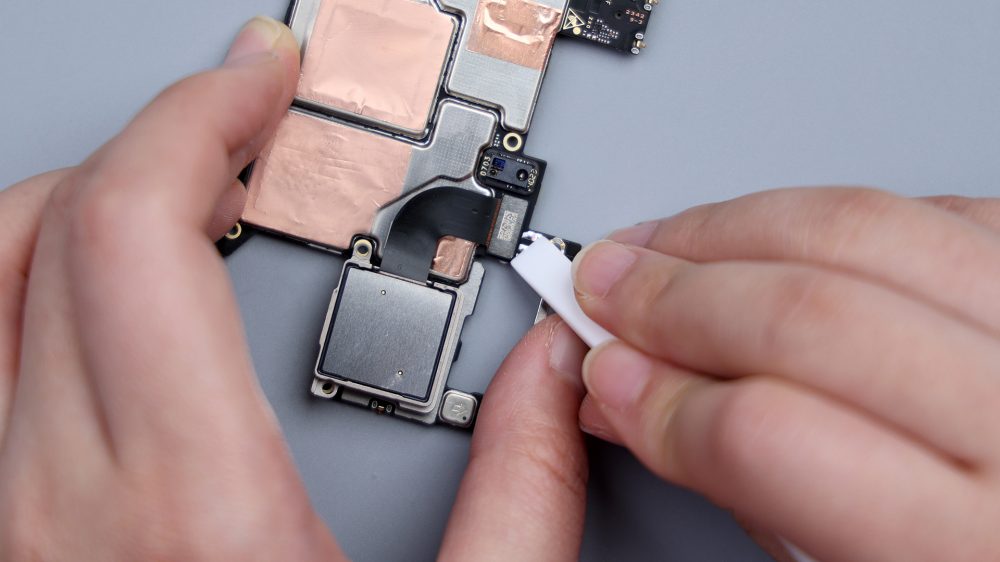
The BTB for the main camera is really connected to the B-side, disconnect it and remove it, and the ultra wide-angle lens is glued to the frame, pry it up and remove it with tweezers.

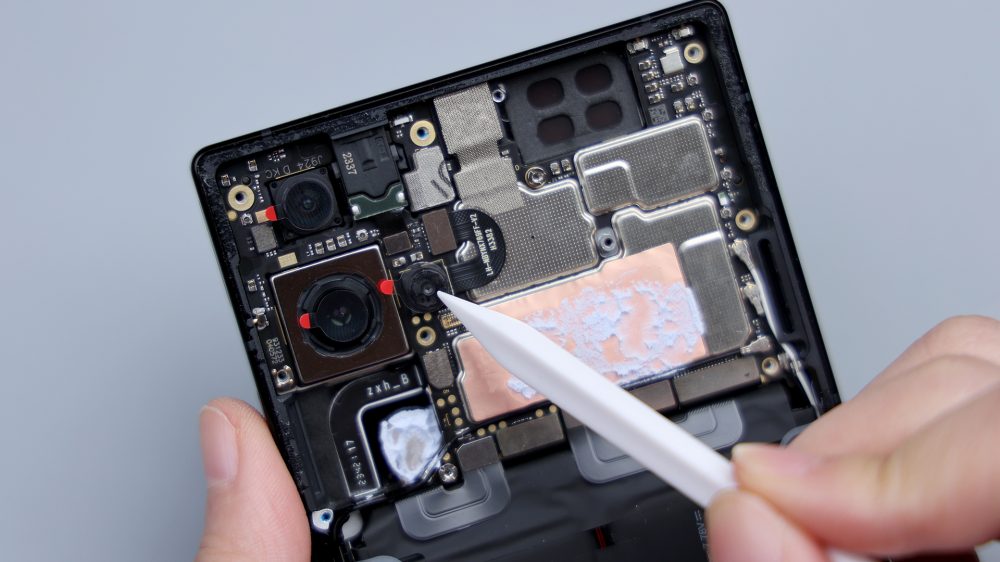
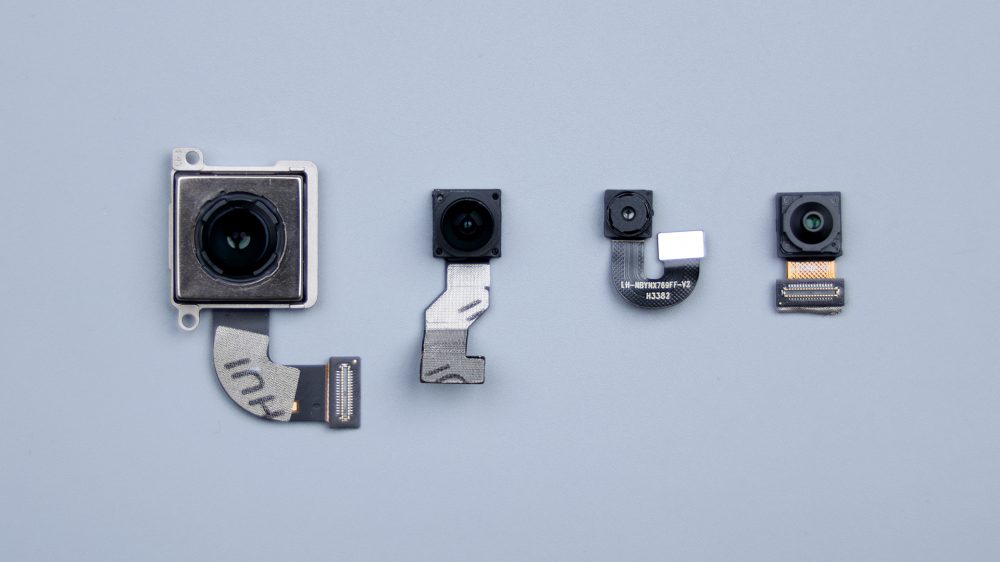
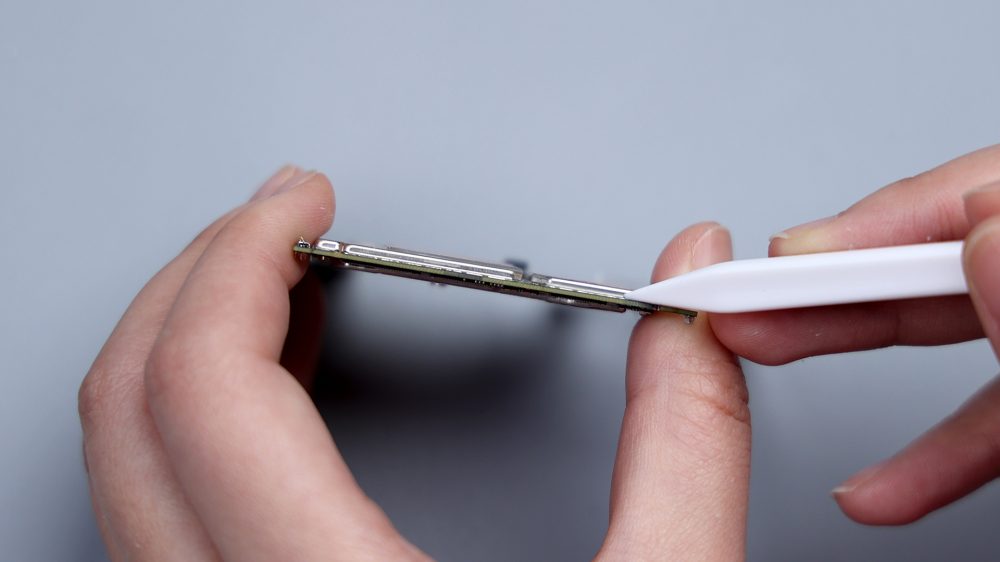
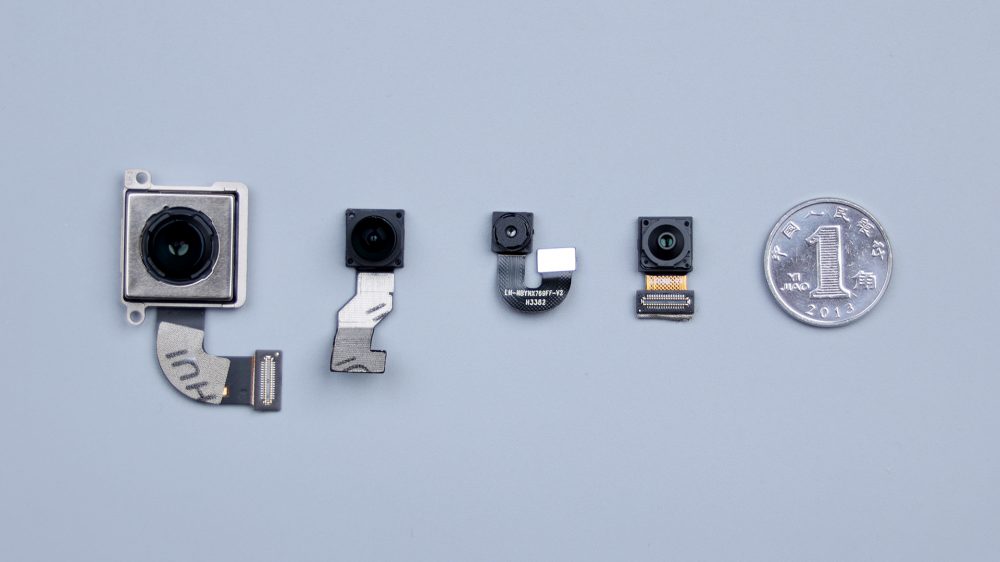
The front and rear four cameras came together, 50 megapixel Samsung GN5 main camera, sensor area 1/1.57 inches, consistent with its predecessor, however, redesigned the lens assembly, added OIS optical stabilization, looking at the volume seems to be bigger, in fact, only increased the length and width, the thickness of the contrary than its predecessor thinner, mainly to reduce the height of the lens, the back cover to make flat.50 megapixel Samsung JN1 ultra wide-angle lens, sensor area 1/2.76 inches.2 megapixel Gekko Micro GC02M1 macro lens, sensor area 1/5 inches.16 megapixel Howell OV16E1Q front lens with under-screen algorithm 4.0 technology.
The view goes back to the motherboard, which features a single-layer PCB reinforced with sheet metal at the headphone jack and other weak spots.
All the BTB bases on the A-side don't have foam or rubber rings, and the capacitors and small parts are not dotted with adhesive; Red Devil puts the protection on the inside of the cover and air ducts, cushioning the BTB connectors with foam pads.
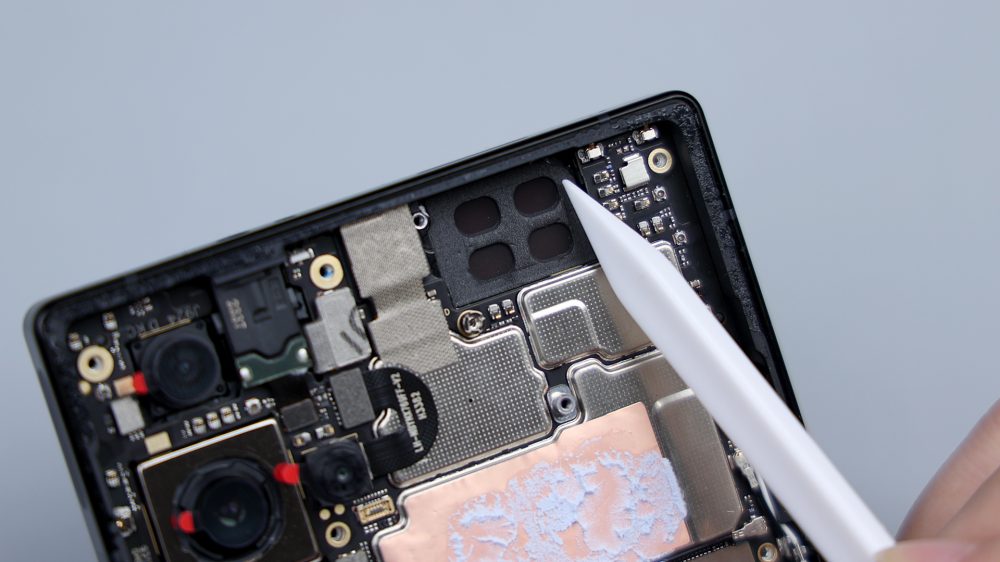
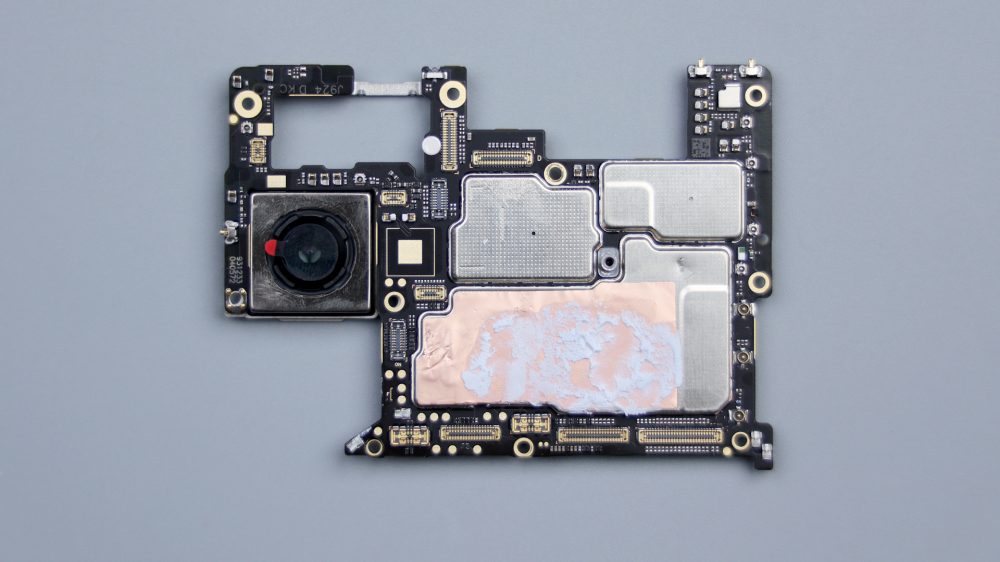
The Red Magic 9 Pro+ adds infrared functionality, with the transmitter located above the ultra-wide-angle lens BTB.The B-side is in the same condition as the A-side, with no foam ring on the main camera BTB base, and the small parts are also unspotted. The round hole for the noise-canceling microphone can be seen in the upper left corner, and the front ambient light sensor is integrated into the PCB and has a stacked padded finish. Most of the shield is covered with copper foil, and the core area is coated with silicone grease to aid in heat dissipation.
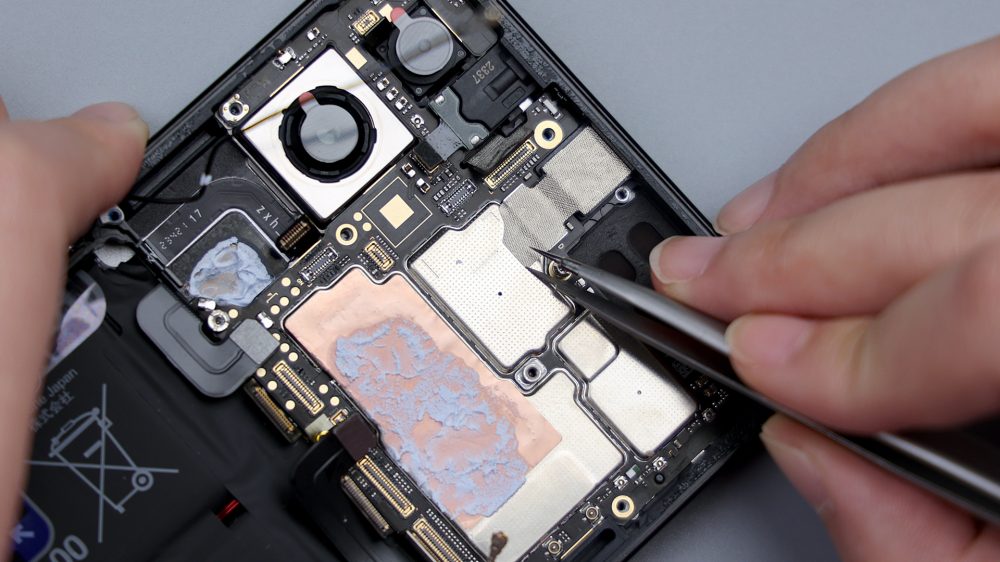
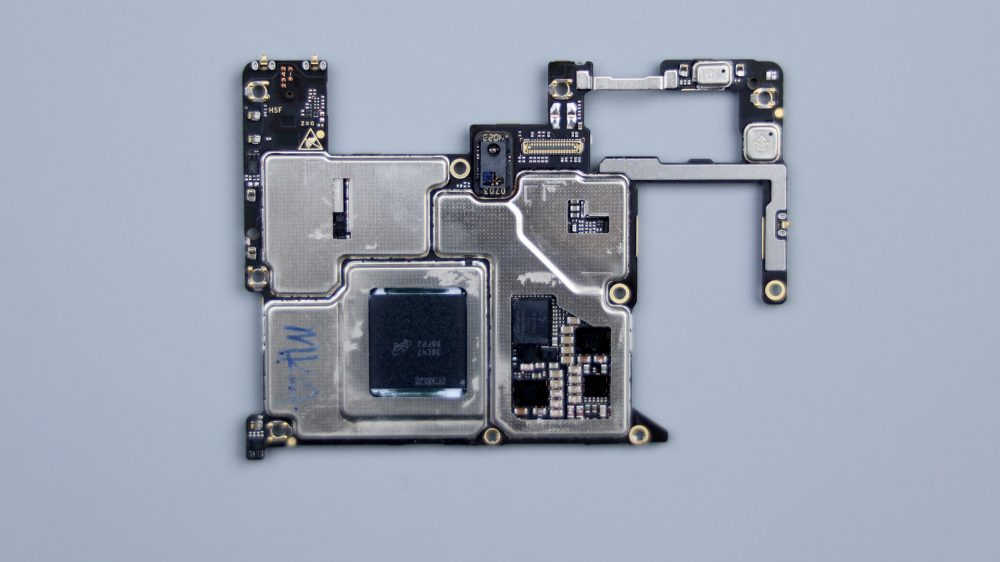
Tear away all the copper foil, and there's a layer of heat dissipation material underneath to boost cooling efficiency.The most prominent one on side B is the LPDDR5X running memory from Magnesium, and the green chip pressed underneath it is the Qualcomm Snapdragon 8 Gen 3 processor, and next to it there's a similarly sized chip covered up that's from Toshiba's UFS 4.0 flash memory, and on the other side of the processor, the one that's slightly more reflective is from Qualcomm's PM8550 power IC.

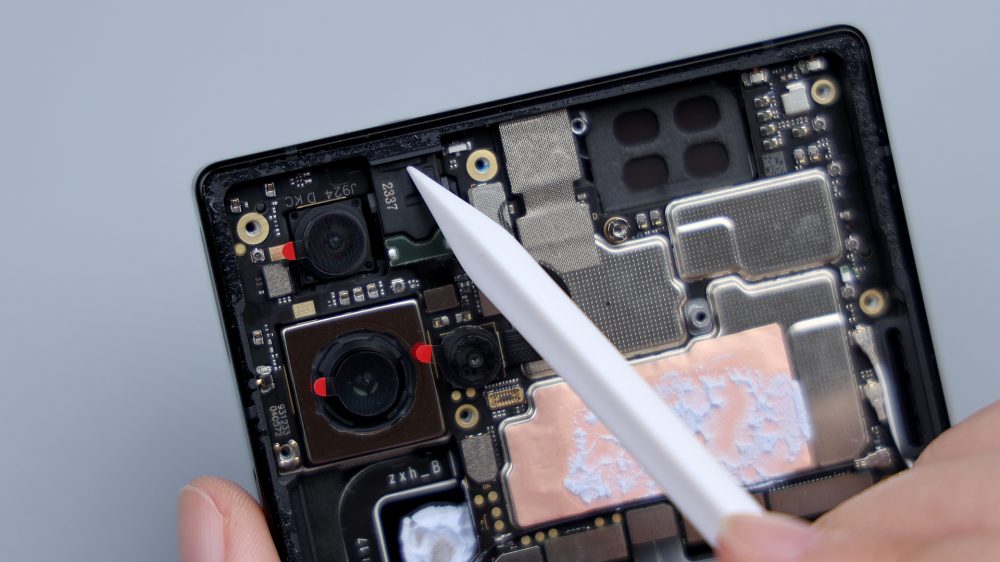
After removing the motherboard, there are quite a few small details on the empty frame. The FPC in the upper left corner corresponds to the gaming shoulder keys, and there is a special limit design for the headphone hole location, which is why it snaps so tightly.
There is a foam pad next to it that corresponds to the BTB of the main camera, the position of the front lens and the noise-canceling microphone is protected by a foam ring cushion, and the corresponding position of the ambient light sensor features a rubber ring.
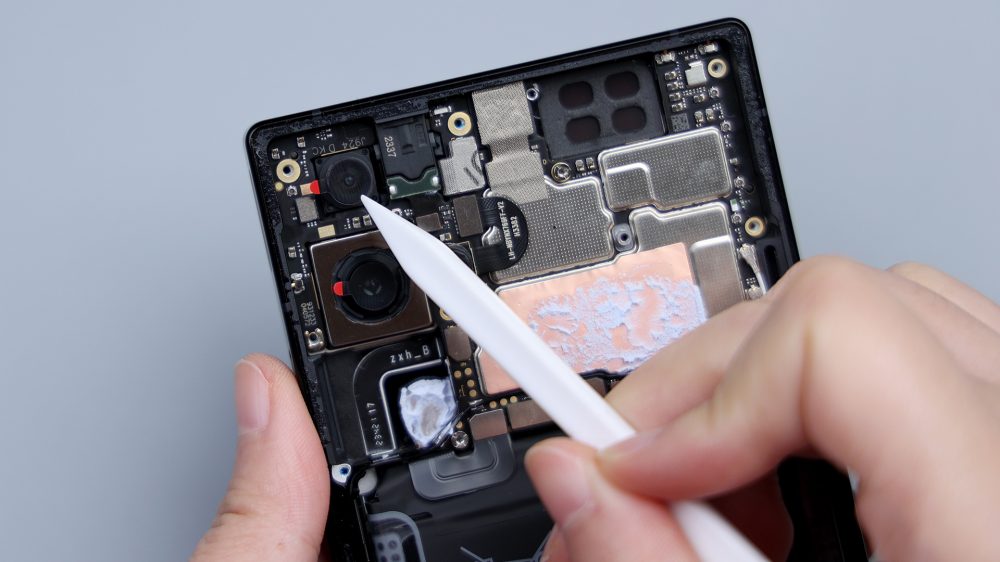
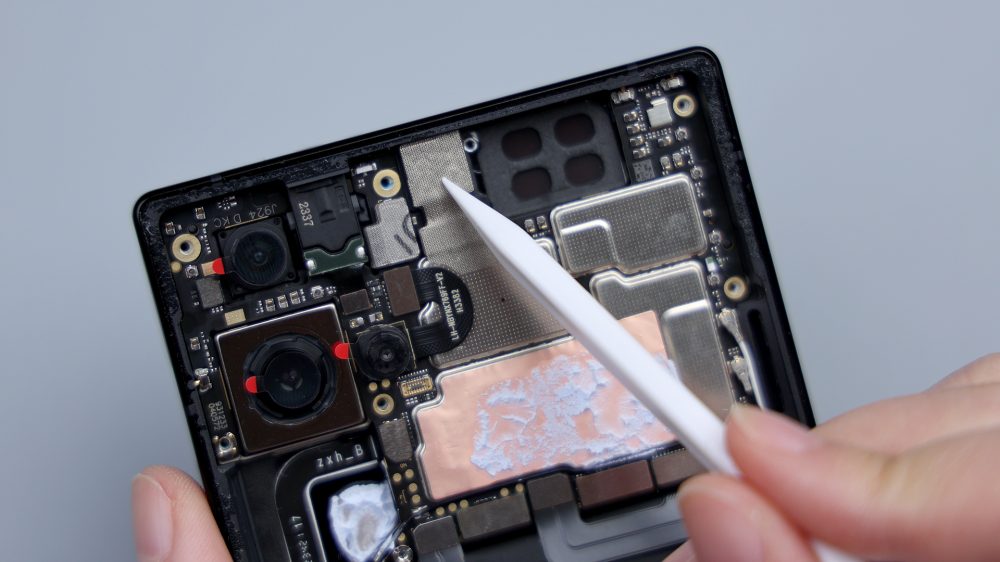
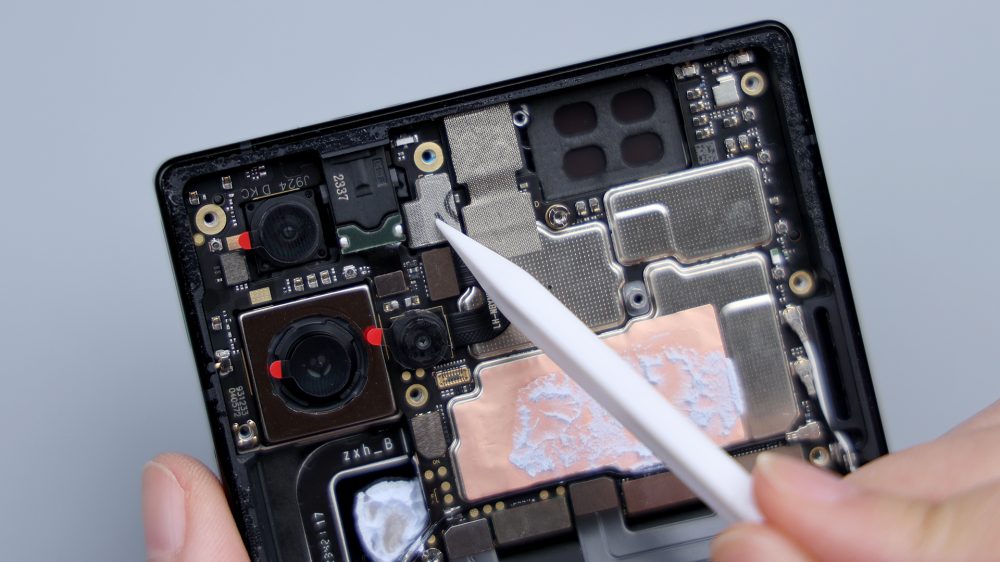
Including the processor, fan, main camera, corresponding to the location of the metal frame, have done hollowing down processing, which processor and fan is mainly for heat dissipation, because they are located in a position that can be directly contacted with the VC thermal homogenizing plate, so that a lot of thermally conductive silicone grease is coated.
The main camera is sunken to lower the lens to avoid protruding and ensure that the back cover can be made flat. The skeletonization of these three positions has another thing in common, which is to control the thickness of the fuselage and avoid squeezing more vertical space. Both sides of the air vents are made oblique cut processing, just with the corresponding position of the air ducts to fit, made oblique cut effect, more conducive to the air ducts to fit, in order to enhance the airtightness.

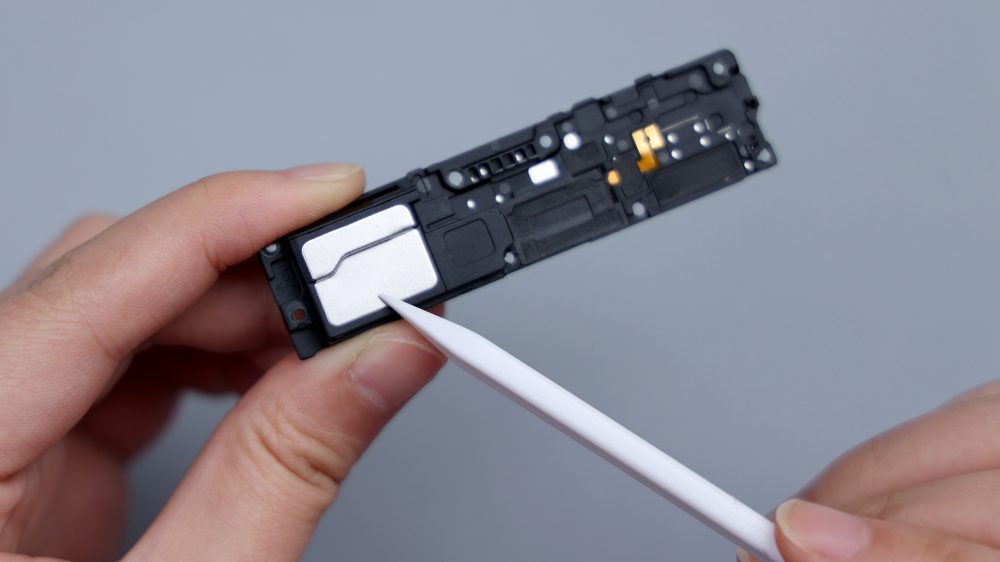
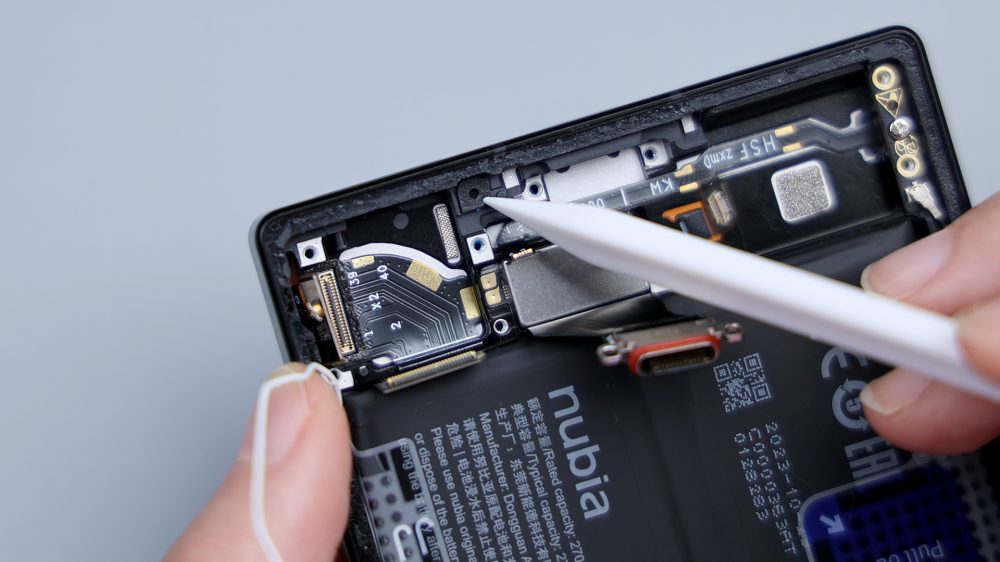
The line of sight turns to the bottom, unscrew all the fixed screws in the sub-panel area, pry up and remove the cover plate, the speaker is integrated on top, connected to the sub-panel through the 2 contacts extending out from the right side, which is also the 1115K sound chamber from Ruixing Technology, and the one on top is of the same size and type, constituting a stereo dual-raising combination of dual 1115K. There are 4 pieces of foam on the inside of the cover, corresponding to the 3 BTBs and the vibration motor on the sub plate.
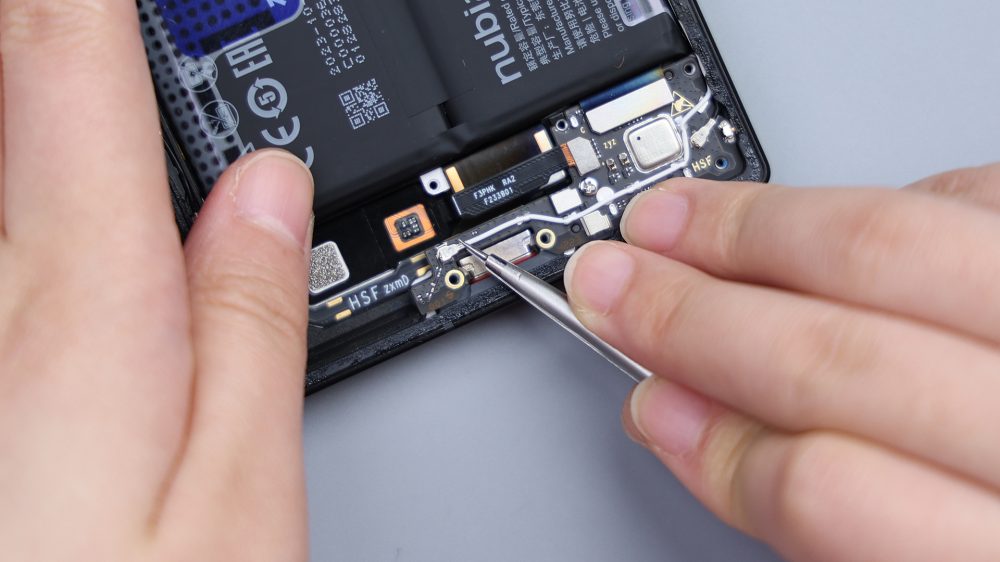
Disconnect the shoulder keys, fingerprint recognition and the BTBs of the main and sub panel FPCs in turn, as well as the 2 coaxial cables, unscrew the fixing screws of the sub panel, and pry up to remove the sub panel.
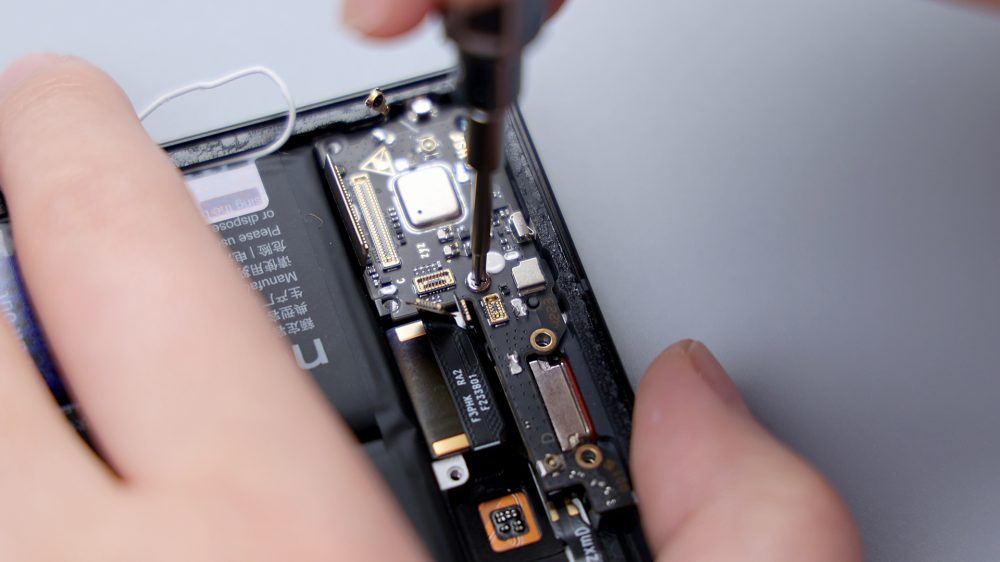
Like the main board, all BTB bases on the vice board do not have foam rings or rubber rings, and the capacitors and small parts are not glued, the microphone is integrated on the vice board and protected by a metal cover, and the corresponding position of the USB port is reinforced by a metal sheet.
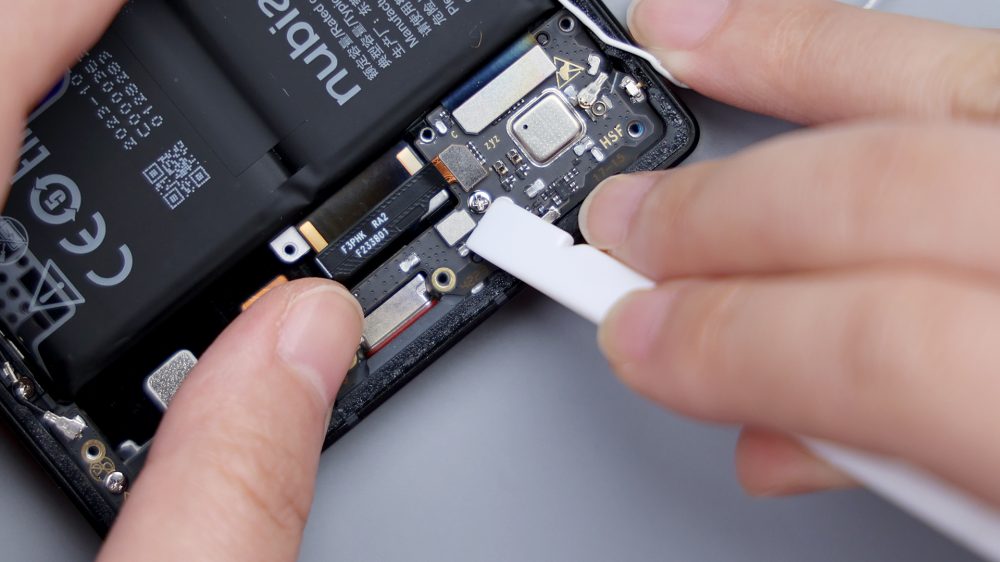
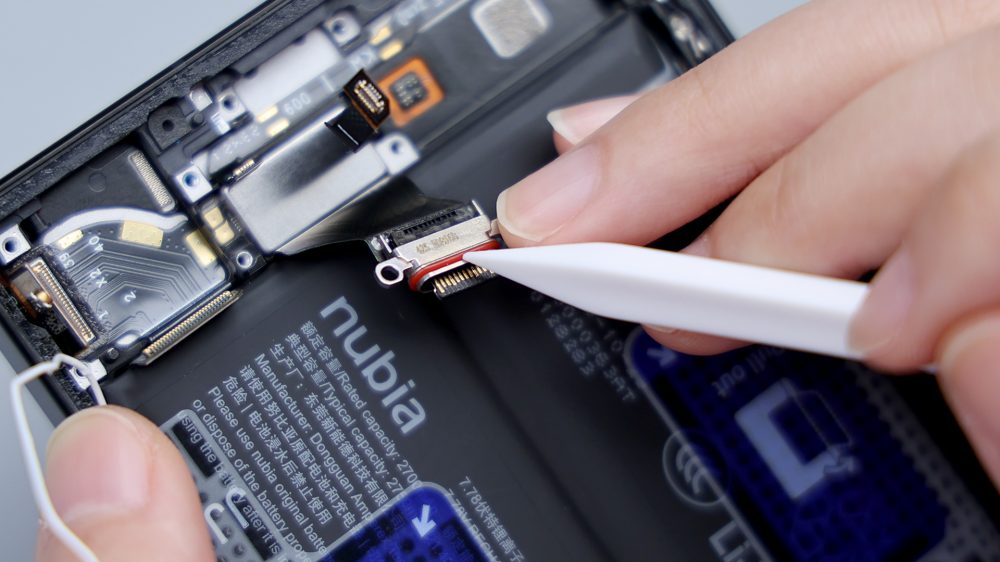
Tear off the FPC of the shoulder button, pry up and take out the USB port, it is directly connected to the motherboard through a FPC, the interface is USB 3.2 Gen 2 standard, and the outside is wrapped with a dustproof and waterproof rubber ring.

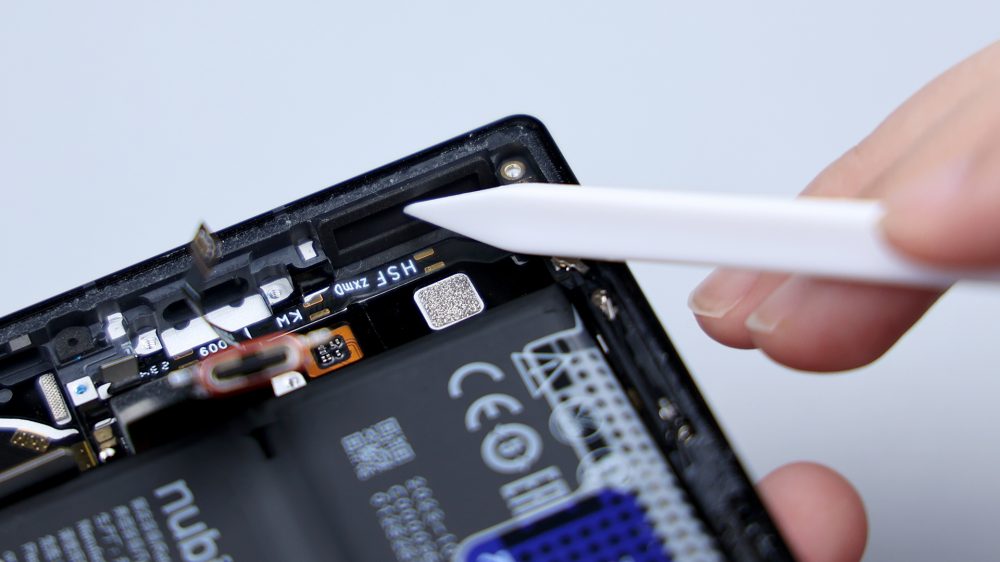
There is a foam ring on the frame at the corresponding position of the speaker and microphone, and the following anti-dumbing design is adopted to avoid damaging the microphone by inserting the card pin wrongly.
The vibration motor is glued to the frame and connected to the secondary board via 2 contacts. There is also a small piece of PCB next to the shoulder button, which is fixed by 1 screw, and the separate black coaxial cable is connected to it.
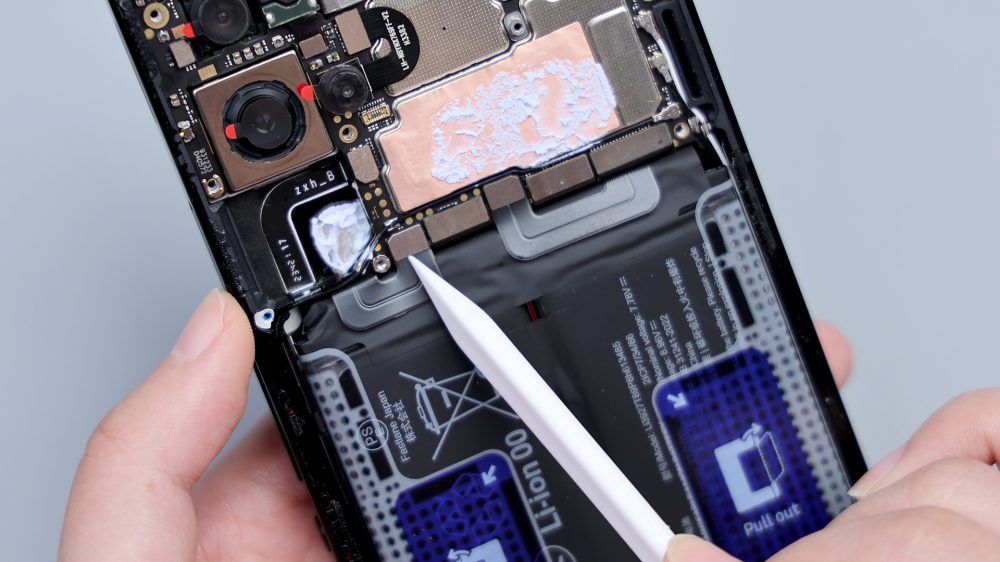
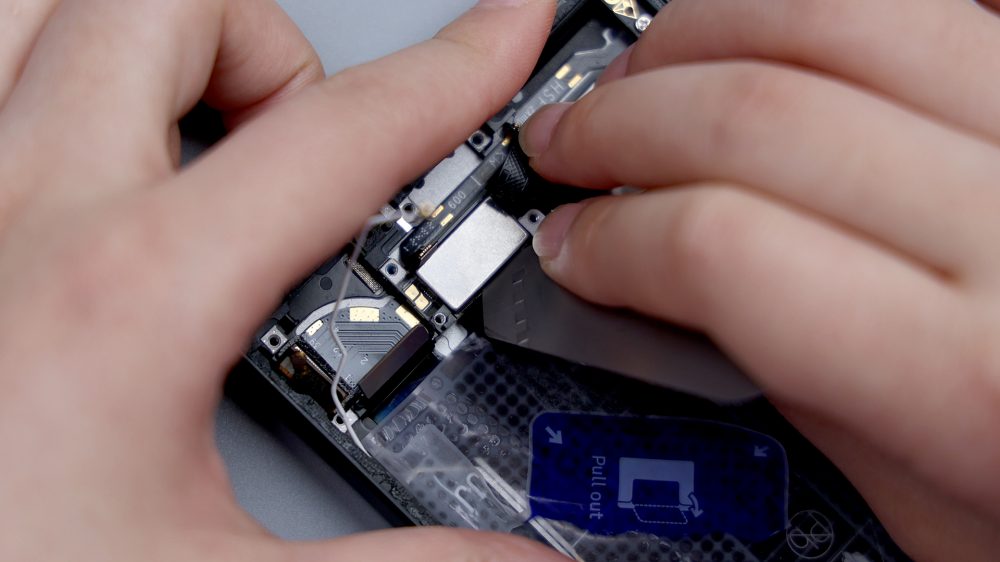
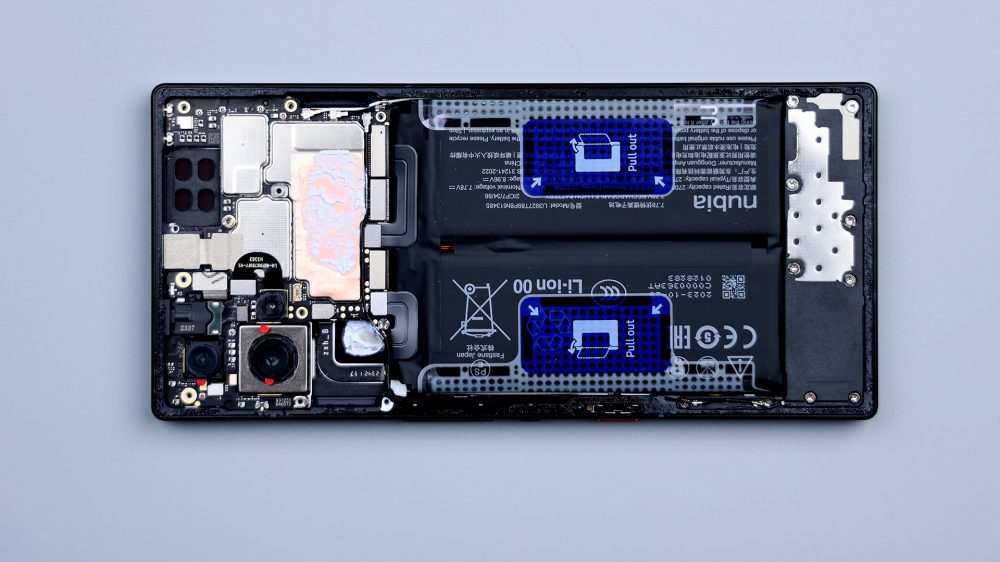
2 thin red wires can be seen in the center of the battery up against the top, they are the NTC temperature sensors. The battery is designed with easy pull quick release, tear the tape according to the diagram, remember, tear it to the end, don't break it in the middle.
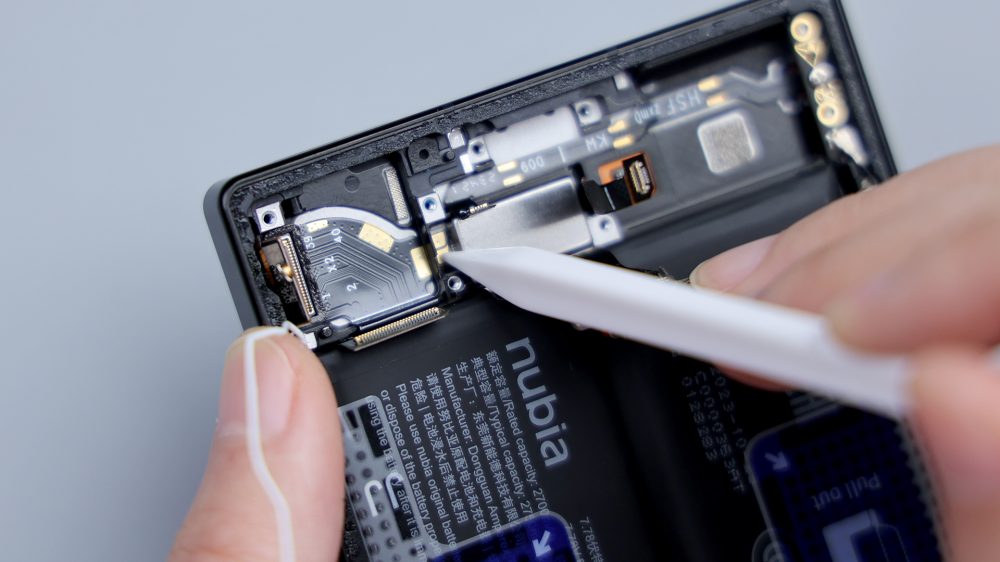
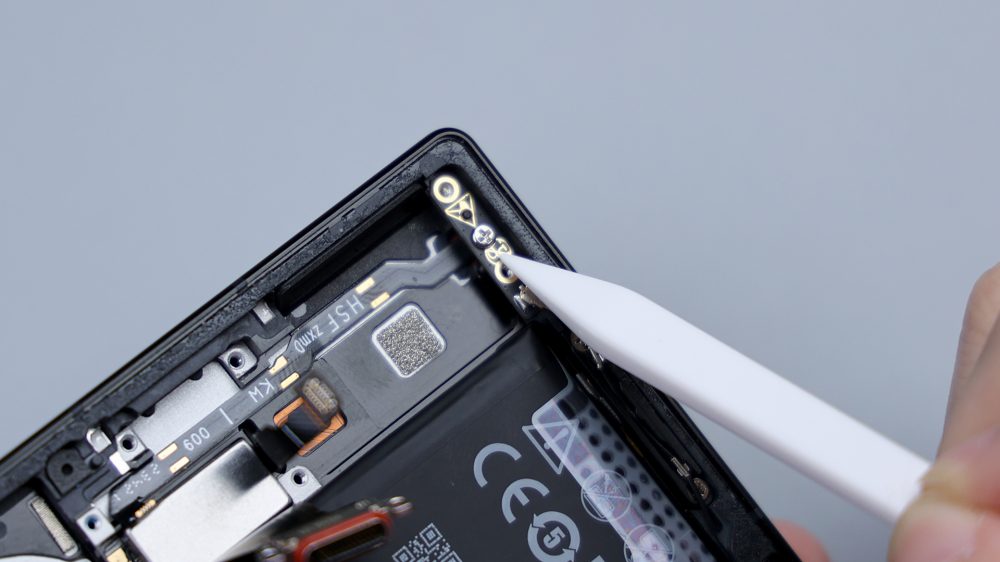
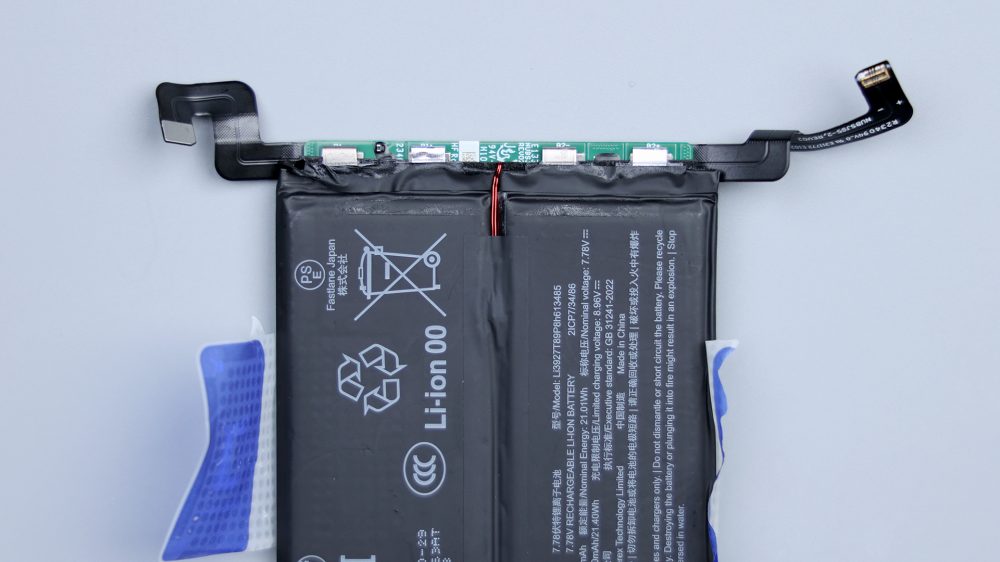
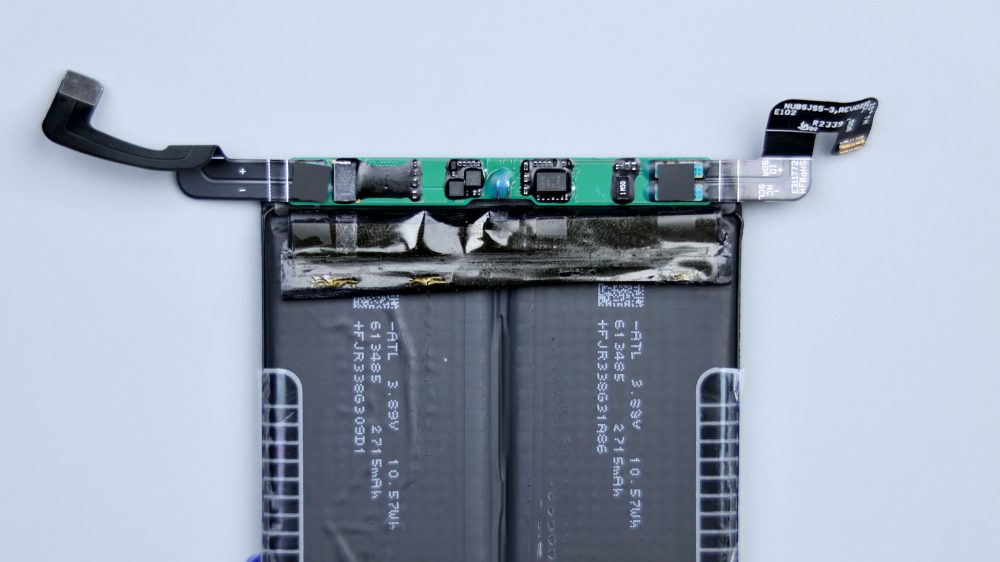
The battery is easy to remove if you operate it properly. The battery of the Red Magic 9 Pro+ uses a dual-cell, dual-interface program, with a total dual-cell equivalent capacity of 5,500mAh, and supports 165W wired fast charging. The manufacturer is Dongguan Xinnengde Technology Co., Ltd, and the battery cell supplier is ATL. in the black tape at the top of the battery, there is also a green PCB wrapped around it, which integrates the FPC of the battery interface and the battery management chip, and those 2 NTC temperature sensors are also connected to it.
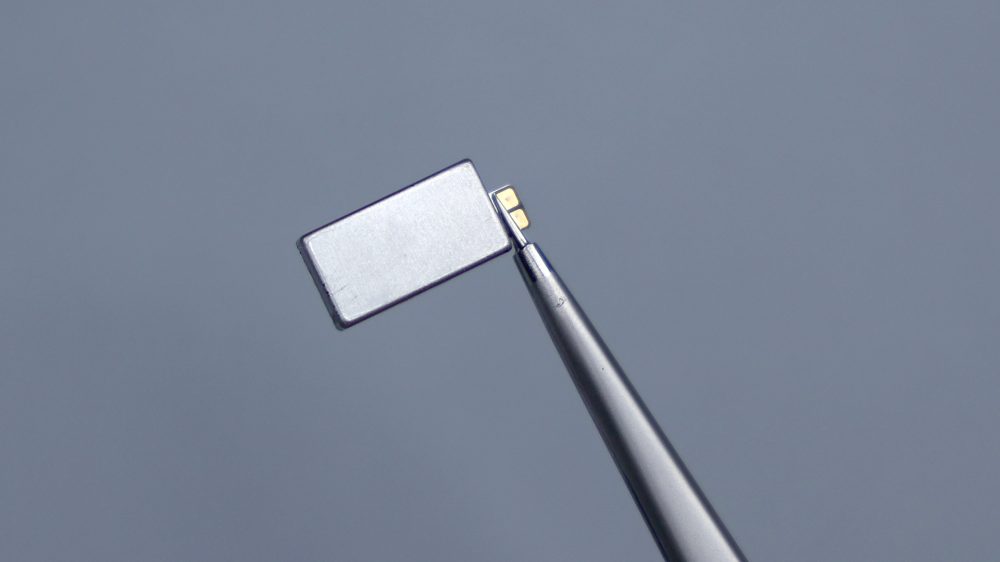
After removing the battery, you can pry up to remove the vibration unit, which is also an X-axis linear motor, which comes from Hengdian Dongmag, model LM0815B. From the actual experience, it is certainly not as good as its predecessor's dual X-axis linear motors, the Red Devil 9 Pro + in the vibration of the piece, belongs to the reduction of the main reason is still a change in the structure of the ID, compressed internal space, it is difficult to realize the configuration of the dual motors, the Had to settle for the second best, changed to a single long motor, however, the supplier is the same as the previous generation.
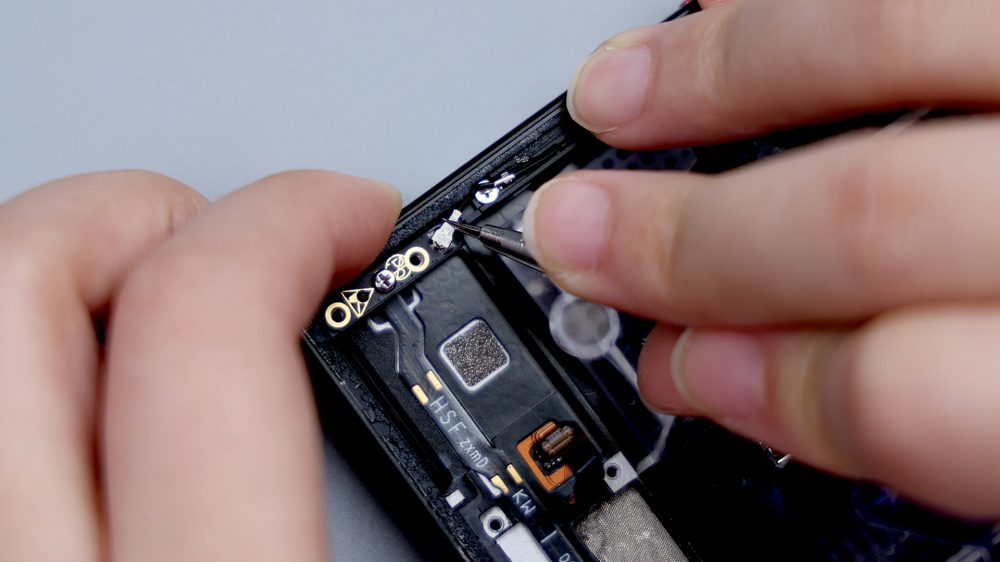
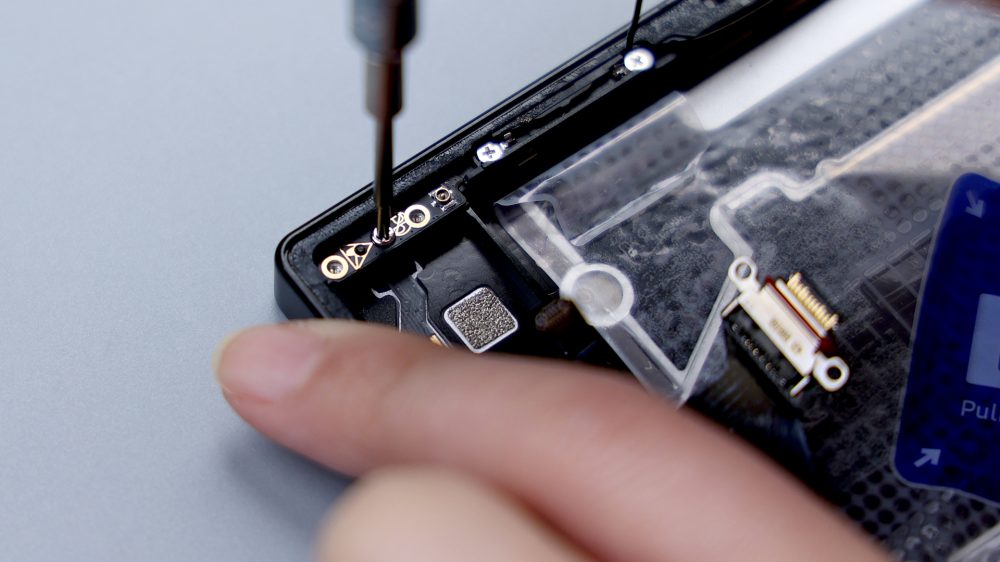
Finally, to deal with a few small parts around the edges, disconnect the separate black coaxial cable, unscrew the fixing screws and remove the PCB. 2 fixing screws are pressed under the coaxial cable next to it, pick apart the coaxial cable, unscrew the fixing screws, take out the black cable slot, and there's another PCB underneath it, disconnect it from the BTB connector, unscrew the separate fixing screws, take out the PCB, and there's a microphone integrated into the top of it, and the cut-out is located on the center frame on the side, to avoid the cross-hole. The opening is located on the side center frame, to avoid blocking the upper and lower microphone and affecting the sound collection when gaming in landscape. The battery compartment has a large hollowed out area underneath, which is in direct contact with the VC heat equalization plate to assist in battery and FPC heat dissipation.
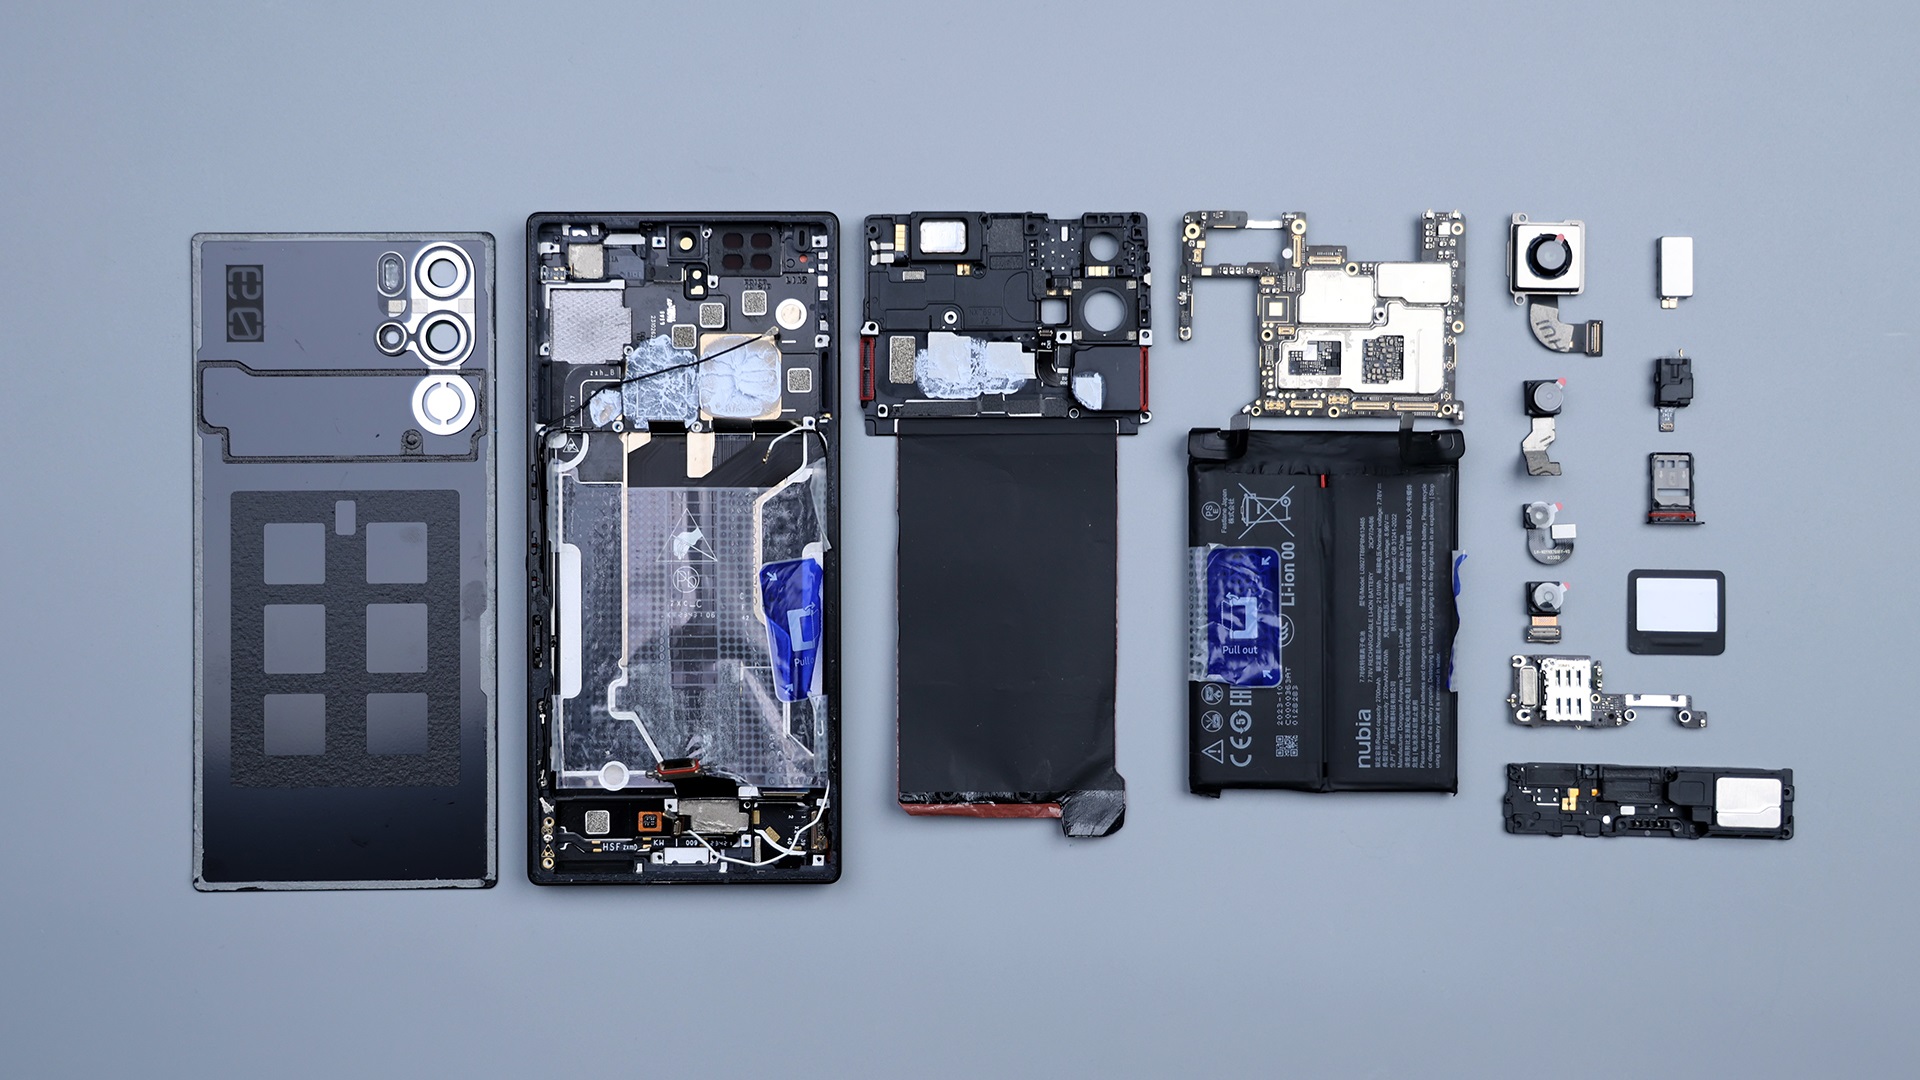
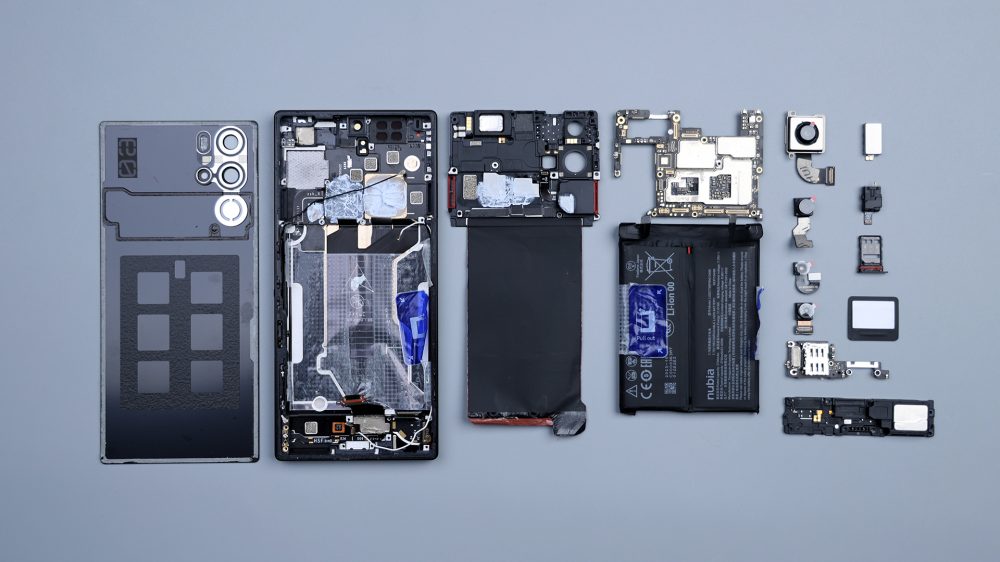
At this point, the disassembly of the Red Magic 9 Pro+ is almost complete. Its overall structure is similar to that of its predecessor, with not much change in the division of large blocks, and the adjustments and optimizations are mainly focused on some details.
The position of the rear camera module has been moved from the middle to the left, and the three lenses and the flash have been lined up vertically from the vertical to a matrix arrangement, which improves the utilization of the motherboard, and the lens sinks as a whole and no longer protrudes from the back cover.

The number of RGB light strips has been reduced from three groups to one. The air ducts are pressed under the cover this time and take up some of the cooling needs of the A-side of the motherboard, and the fan has changed from being assembled separately to being integrated with the air ducts. The flash has been upgraded from a single LED to a dual-LED bead, and an NFC coil has been added to the cover, and the fan has been upgraded from 20,000 to 22,000 rpm, with the addition of infrared remote control. The connector for the main camera has been switched from side A to side B of the motherboard and upgraded with OIS optical stabilization, and the ultra-wide-angle lens has been upgraded from 8MP to the 50MP Samsung JN1. The motherboard fixing screws have been increased from 2 to 3, and the processor has been upgraded to Snapdragon 8 Gen 3. In order to control the thickness of the body and avoid the camera from protruding out, the frames corresponding to the positions of the processor, the fan, and the main camera have been skeletonized and sunk. The bottom speakers have gone from a 1216 specification, to a 1216 specification. The bottom speaker has been changed from 1216 to 1115, the Type-C port has been upgraded to USB 3.2 Gen 2 standard, and the vibration unit has been downgraded from dual X-axis linear motors on the top and bottom to a single motor on the bottom. Battery assembly increased easy to pull the quick release design, convenient for users to replace their own in the future, the capacity has also been upgraded from 5000mAh to 5500mAh. 2 upper and lower shoulder buttons of the connection method, from the contact changed to the FPC + BTB direct connection. From the perspective of disassembly, the workmanship, materials, craftsmanship, detailing, and internal integration of the Red Magic 9 Pro+ have been improved.
The only slot may be the vibration unit, the previous dual X-axis linear motor combination, is quite characteristic and advantageous, at least from the user experience has been weakened, the next generation of products and then adjusted, I think there are two options can be considered, one is to optimize the internal structure by further optimizing the internal structure, to free up space after the return to the dual-motor configuration again. The second is to follow the single-motor design, by upgrading the motor configuration to improve the experience, such as replacing the motor with a larger size and higher specifications, and the supplier to choose a more mature technology Ruixing Technology.

As for the matter of making the back cover flat, it was also mentioned in the previous disassembly, mainly through the skeletonization of the frame sinking and compression of the lens module volume to achieve.
This design, the requirements for the glass is very high, need to meet two conditions at the same time, one is to have a high structural strength and rigidity, strong and durable, drop resistant and build resistant, scratch resistant, the second is to be able to meet the optical requirements of the lens, clarity, transmittance should be sufficiently high, the Red Magic in order to achieve this effect, should be a lot of cost. Let's not talk about whether this thing has any practical significance, at least from the perspective of aesthetics, Red Devil's spirit and attitude of pursuing the ultimate deserves to be recognized. Regarding the purchase, my personal advice is that the Red Magic 9 Pro is more cost-effective if you don't have too much of an obsession with fast charging and memory combinations. Because, buy red magic cell phone, most of the heavy gamers, in the processor, screen, cooling these core configurations are the same, more 1000mAh battery capacity, far more than 165W fast charging to the actual, 12GB of operating memory is basically enough, the budget is not generous, or can save is good, after all, we earn some money are not easy.

Finally end to talk about a disassembly-related topics, this issue is to say that the Red Magic 9 Pro + used on the "Gekko micro GC02M1 macro lens". I guess this brand and model number will be unfamiliar to many people. The full name of Geco Micro is "Geco Microelectronics (Shanghai) Co., Ltd.", the main business includes CMOS image sensors, display driver ICs, as well as the design, testing and sales of related products.GC02M1 is considered to be a popular product under the banner of Geco Micro, and, in fact, its application in the cell phone market is still very wide, due to its own Hardware level is general, the sensor area and pixels belong to the low-end level, so it has become a frequent guest in the number of lenses, so embarrassing parameters, cell phone manufacturers will not be publicized. From some e-commerce platforms can be found, the use of GC02M1 made of UVC camera module, with PCB, USB interface, microphone, and driver-free, plugged into the computer directly can be used, so that the price of a set of 29.9 yuan, and this is the retail price of a single purchase, if a large number of wholesale can be cheaper. And the same from the Gekko Micro's another 2-megapixel lens GC02M2, wholesale price of only 20 yuan a, see how low the cost of the number of lenses, manufacturers only need to spend ten or twenty dollars, you can achieve a single camera into a double camera, double camera into a triple camera, triple camera into a quadruple camera effect, which creates a sense of seniority, to obtain the favor of the consumer, and the wave of operation brought about by retail premiums, which can be far more than one or two dozen dollars. Simply earn hemp.
Generally speaking, whether it is a cell phone or a tablet computer, equipped with a 2 megapixel lens, the probability of two kinds of lenses, one is a macro lens, a depth of field lens, do not care what its function is, in terms of the quality of the hardware, the basic don't expect any effect, think about it, a twenty dollar lens, what can be shot out of the macro and depth of field effect, at best, it is also a code scanning, a picture of a happy just. In addition, in the process of use, most of the daily photo scene, the phone is not going to call this kind of make up the number of lenses, consumers generally do not see their real performance and performance, the user looks good macro shooting, in fact, are completed by the main camera. If you look carefully, it is not difficult to find, when the phone really triggered the macro lens when taking pictures, the picture quality will immediately drop a big cut. So, don't just look at the number of cameras when buying a cell phone, the real reference value, or the hardware quality of each lens, such as the optical size and pixel size of these, the number of more may not be useful.