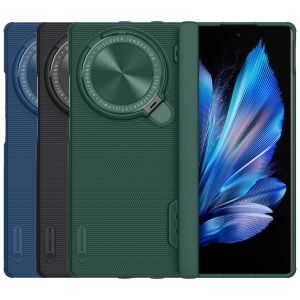
The protagonist of this issue is the recently released vivo X Fold3 (hereinafter referred to as X Fold3), the vivo big folding update, a total of two models, the reason to choose to dismantle the standard version, mainly or want to see, now the lower limit how high? What is the level of work and materials? What are the changes and upgrades compared to the previous generation? Now, let's find it out by dismantling it.
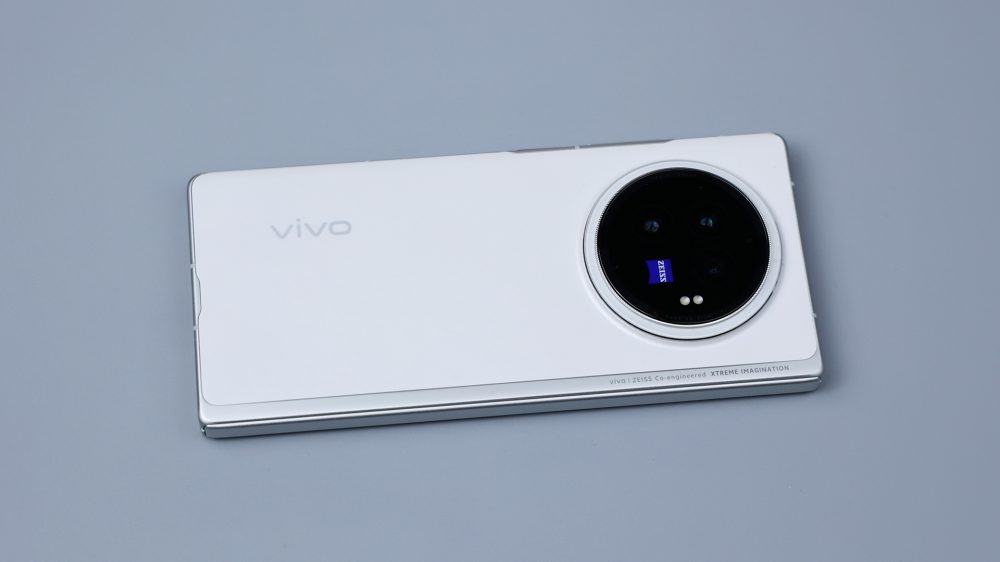

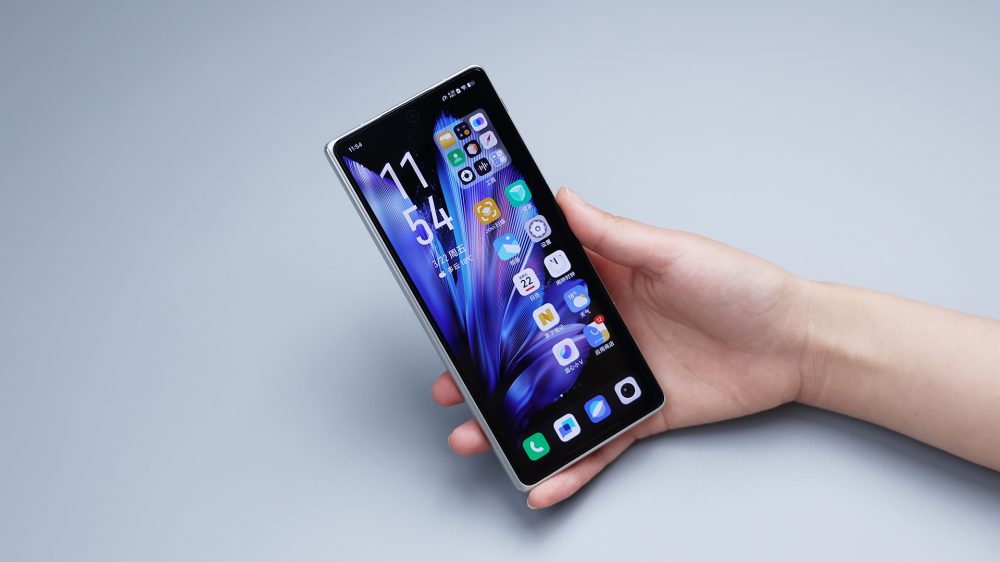
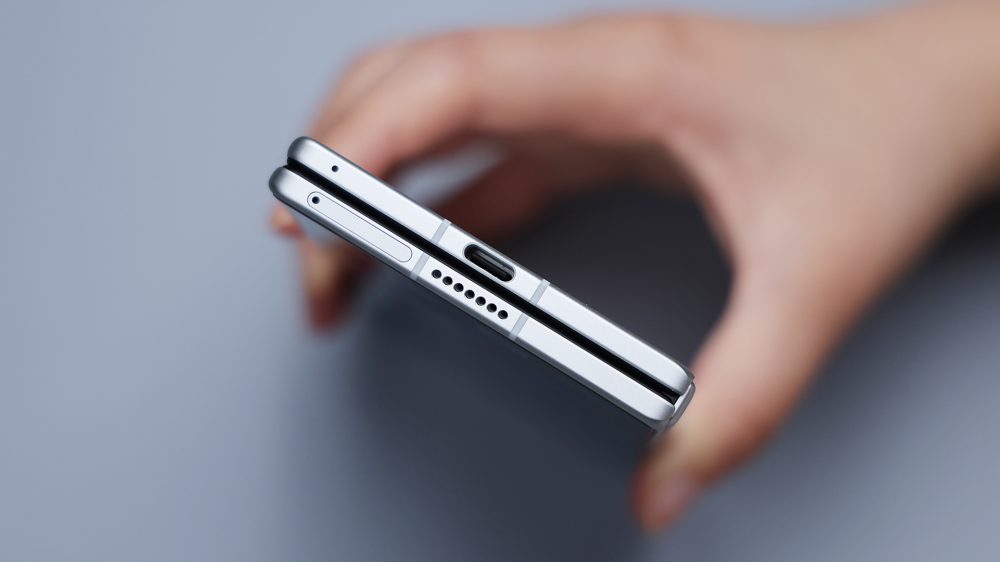
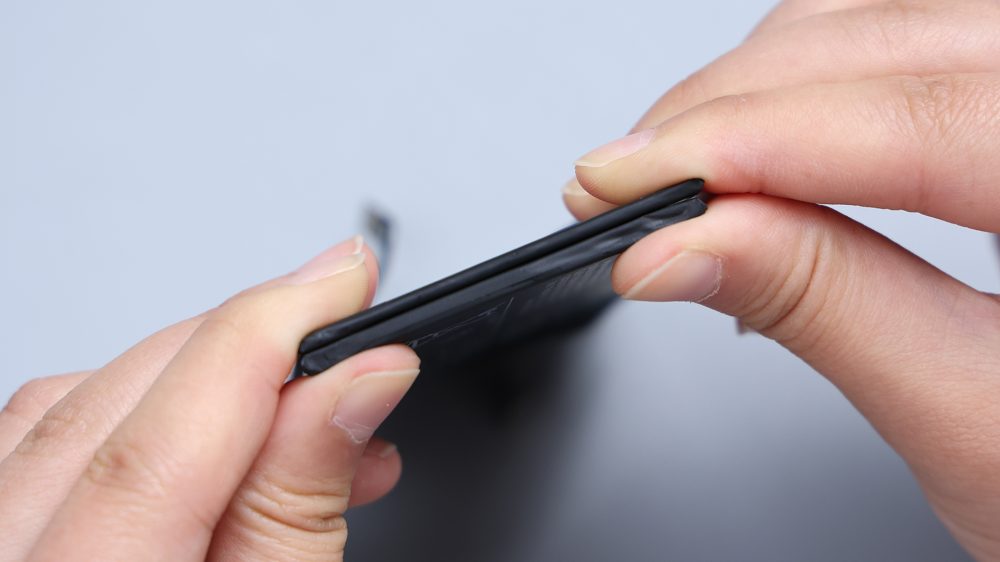
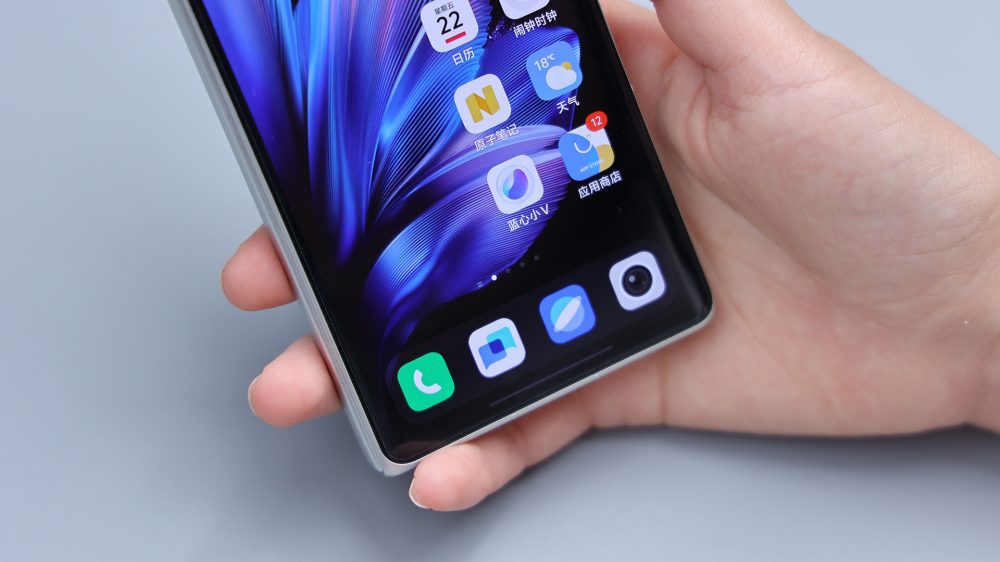
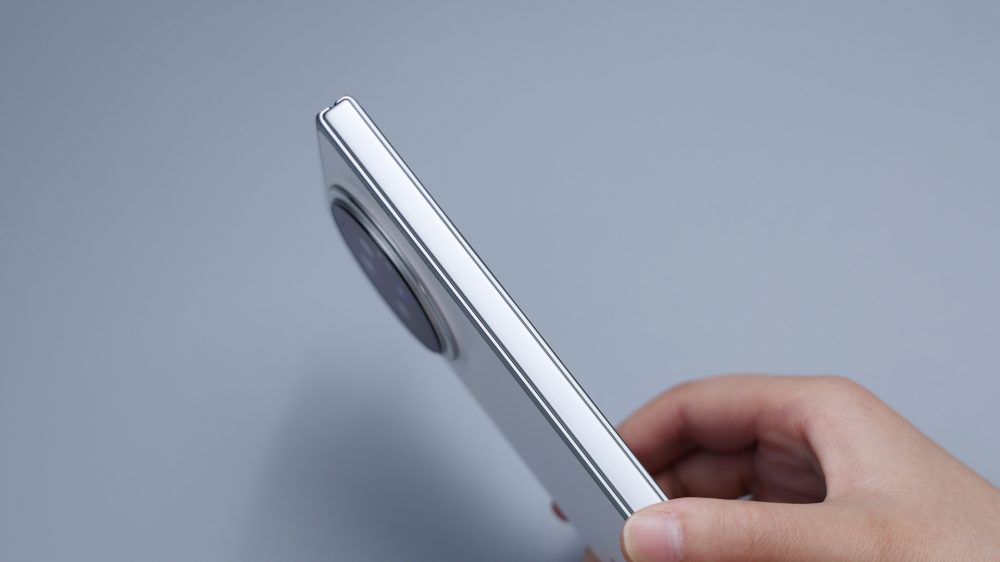
The first feeling of X Fold3 for the first time is "thin". I can't even accurately judge which feeling of "light" or "thin" has entered my mind first. I prefer to receive these two perception signals at the same time, and I feel completely exceeds expectations. When folded, it is 10.2mm thick, 1mm thinner than the Pro, 4 mm only. 65 mm, and 0.55mm thinner than the Pro. The overall weight of the whole machine is 219g, which is certainly not compared with those lightweight straight phones, but as a foldable phone, it can match the weight of many straight flagships, even a little lighter. If compared to the previous X Fold2, the gap is even more exaggerated, slimming effect comparable to "hot hot". Let me, who has always excluded a foldable phone from the purchase list, have a long experience.
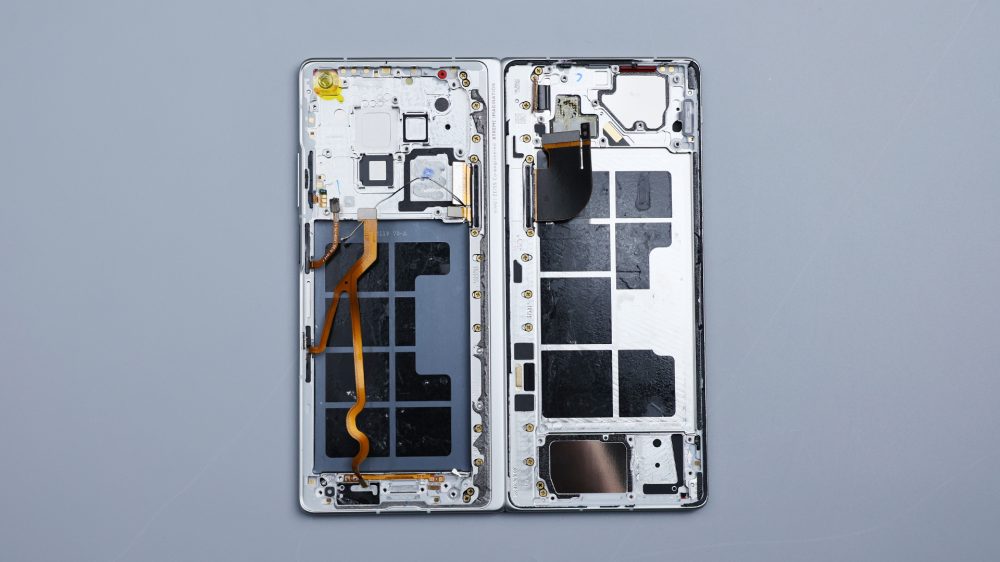
The following began to dismantle, although X Fold3 is a folding screen phone, but the disassembly idea, with the traditional straight machine, there are still a lot of common, to put it bluntly, the appearance of the phone in the same period, how to adjust, the internal structure principle difference will not be too big difference.
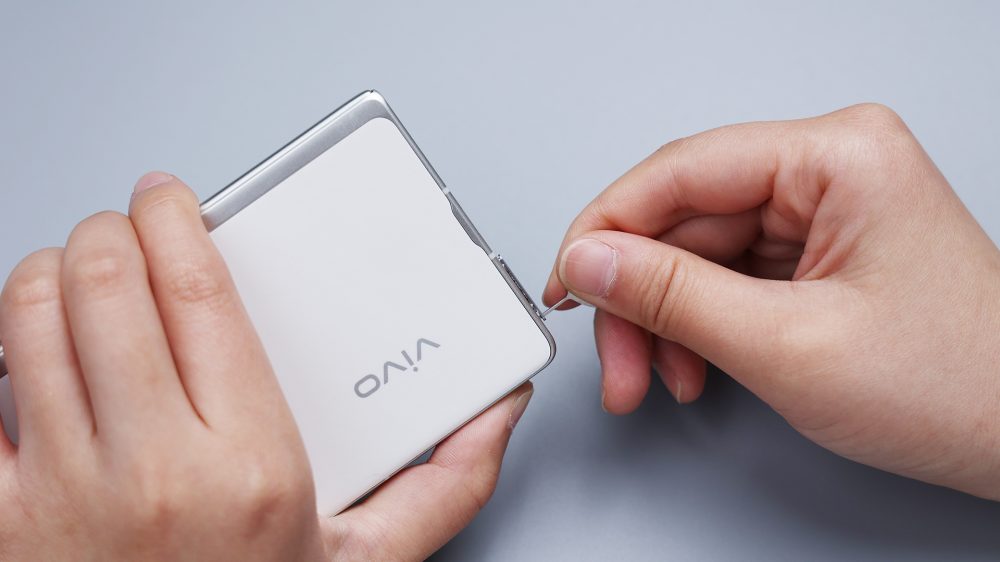
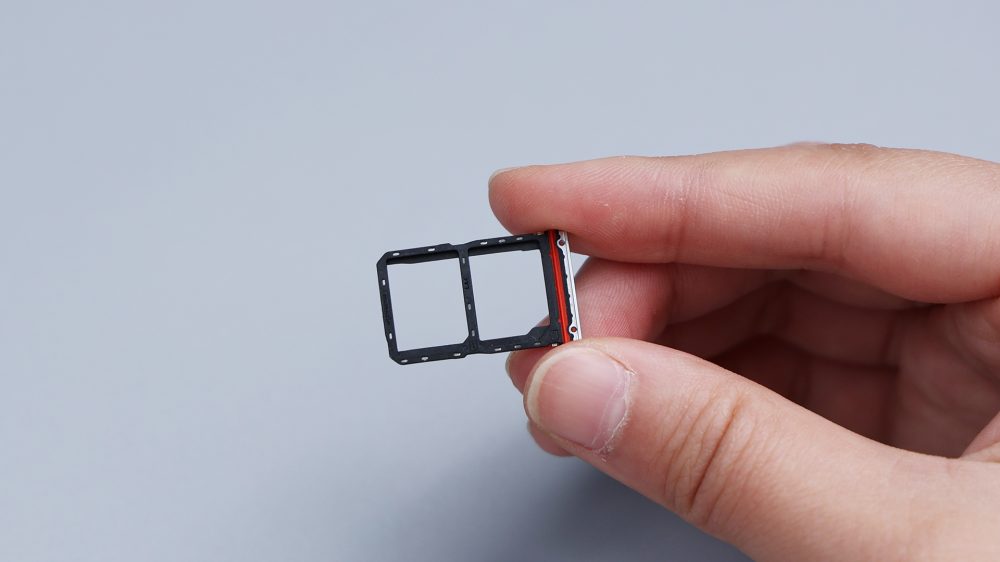
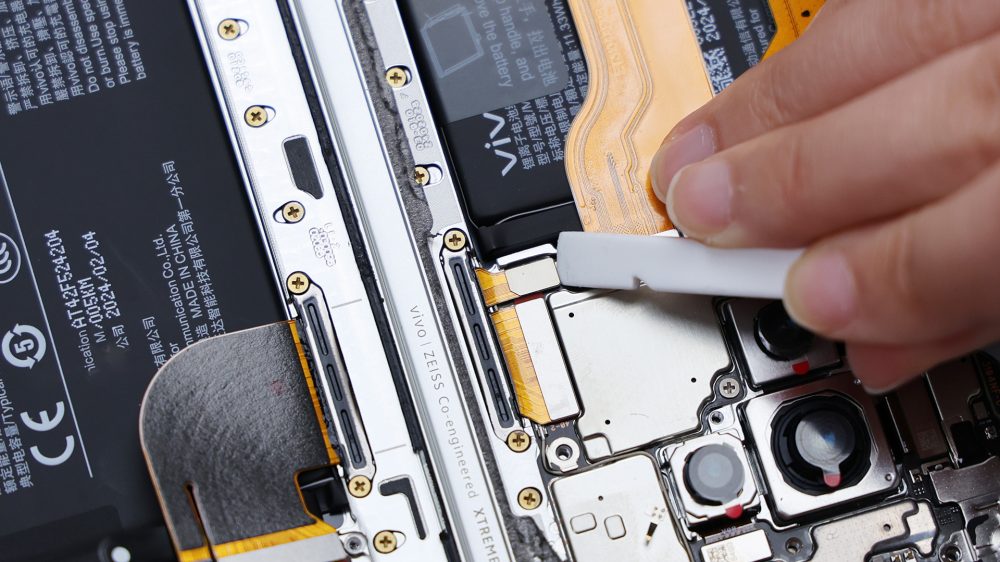
After the shutdown, take out the SIM casto, X Fold3's "slimming" plan began to show from this moment, no longer the mainstream stacked casto, but used the side-by-side scheme of many years ago.vivo is not trying to save money, after all, for thousands of foldable flagship, not save the cost from such small places. It is chosen to reduce the space occupation of the Z axis and control the thickness of the fuselage. The laminated card needs at least twice the thickness of the SIM card, while placing side by side can compress nearly half of the Z axis space occupation, saving a layer of metal baffle in the middle.
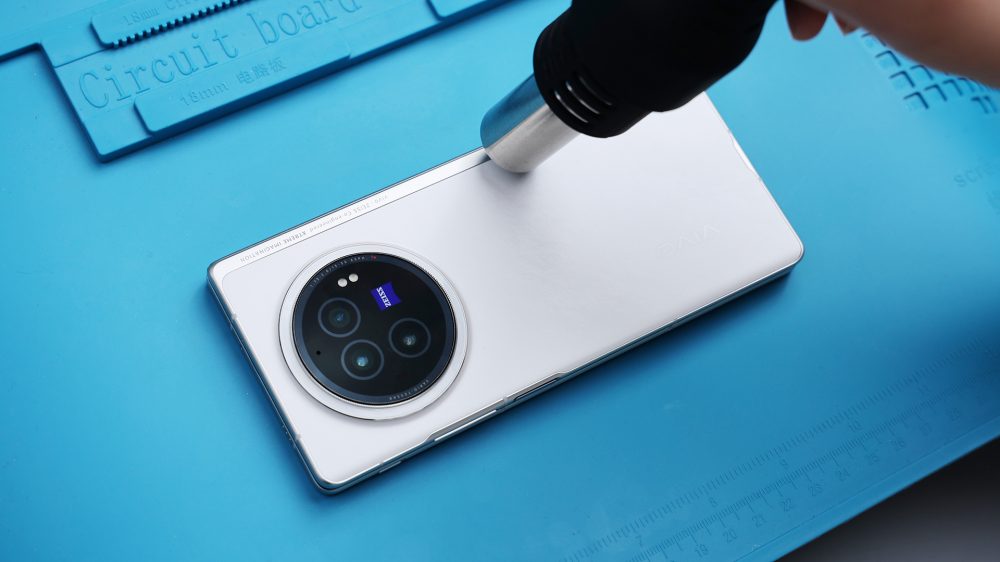
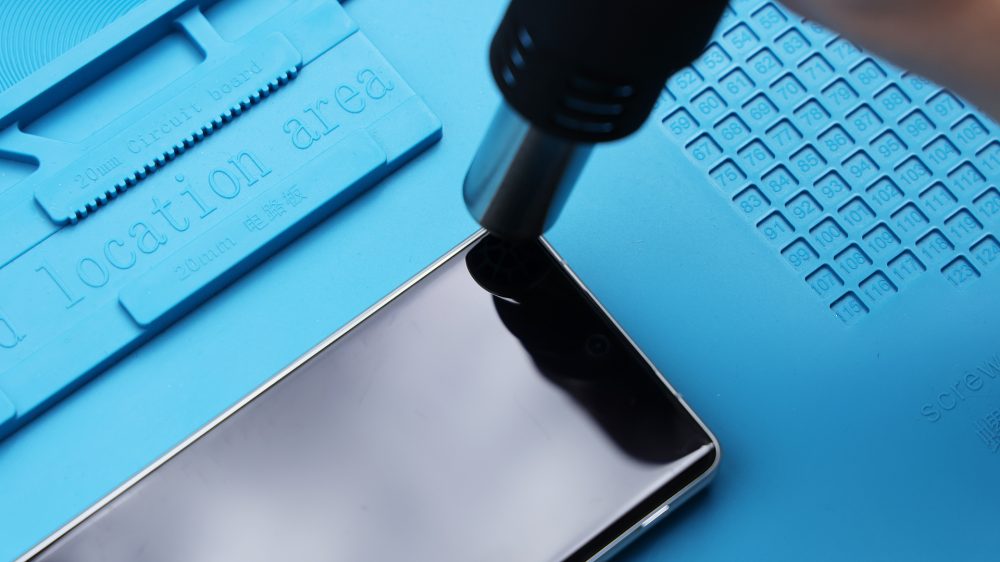
X Fold3 The mirror group convex is obvious, directly on the heating plate, the overall heat will be uneven, score two heating. Given the number of phones with similar designs in the past year, a hot air gun was developed last week to allow the ability to heat around the back cover at once. In order to improve efficiency, turn the temperature of the air gun directly to 200 degrees, rotate twice around the back cover of the phone, and the glue is basically softened.

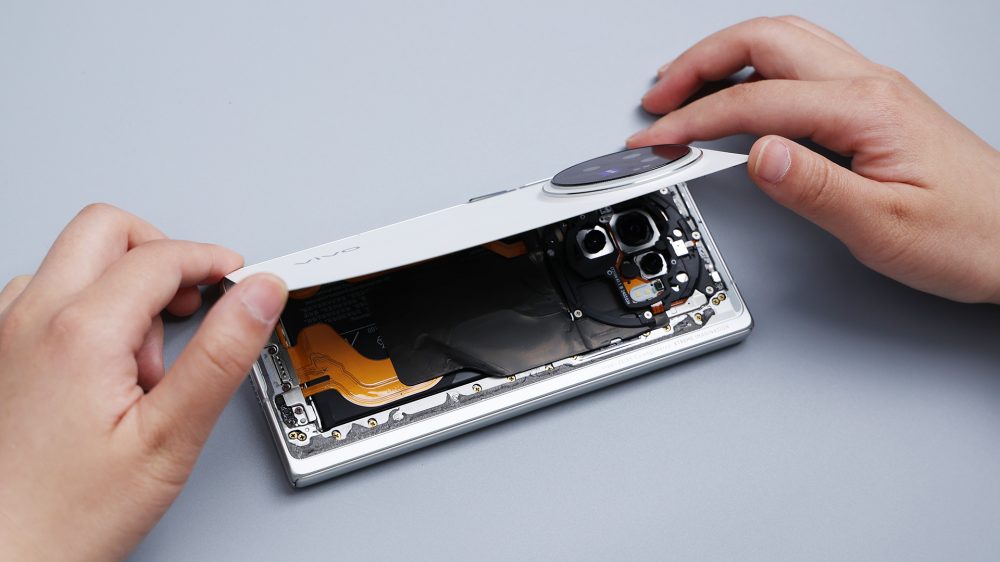
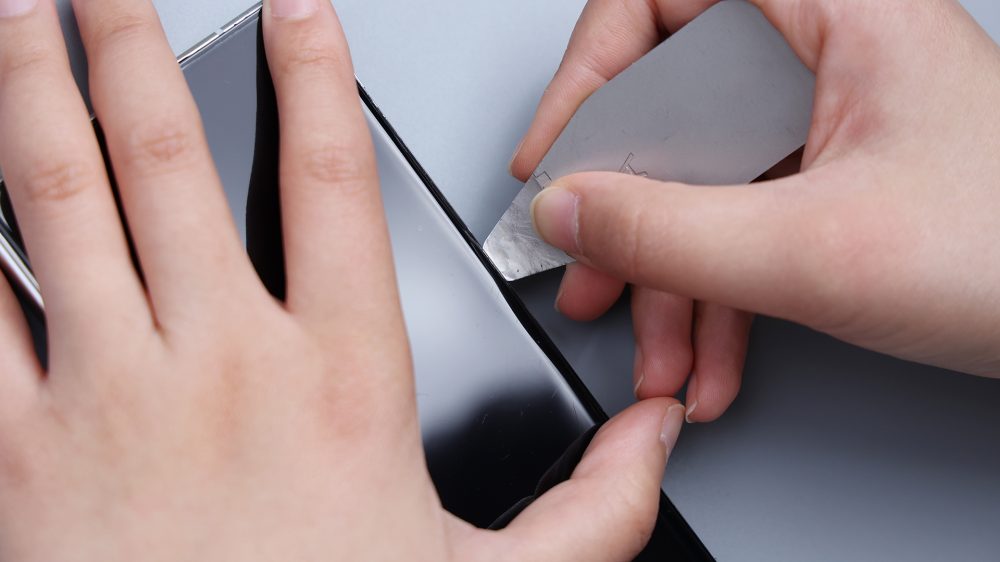
Because the back cover is very tight with the middle frame, and the outer edge of the middle frame is slightly higher than the back cover, you can only choose the metal thin warping film. The process was very smooth, no resistance, the back cover opened.
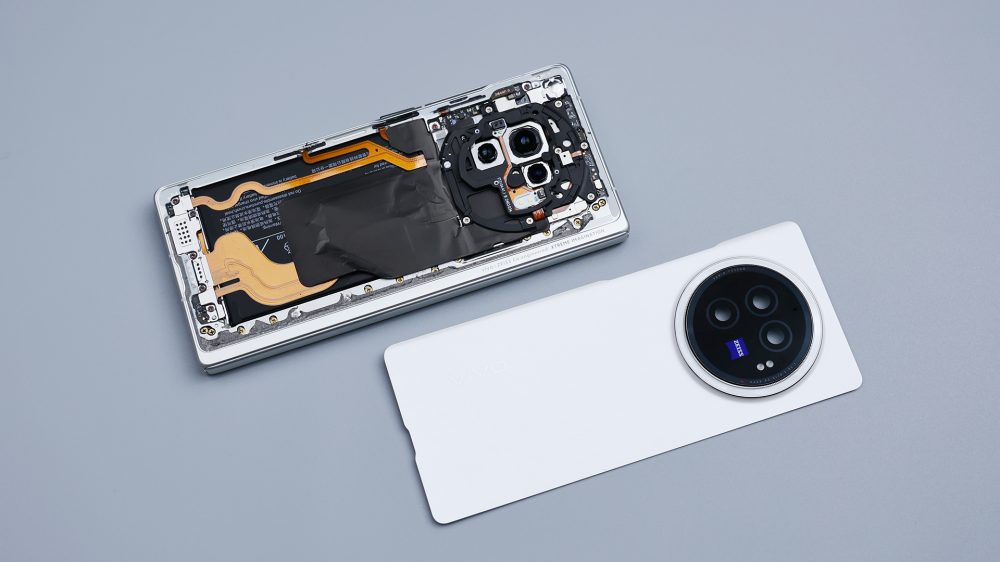
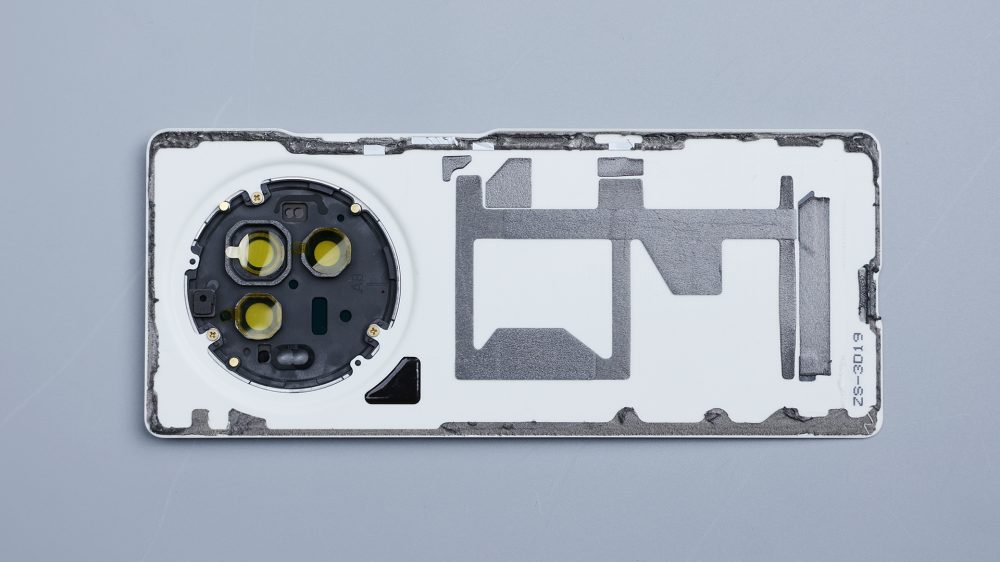
The removed back cover reminds me of the Mi 14 Ultra, not just the similar design, but their back covers are thin and long, the reason is similar, that the metal frame extends inward, squeezing part of the horizontal space.
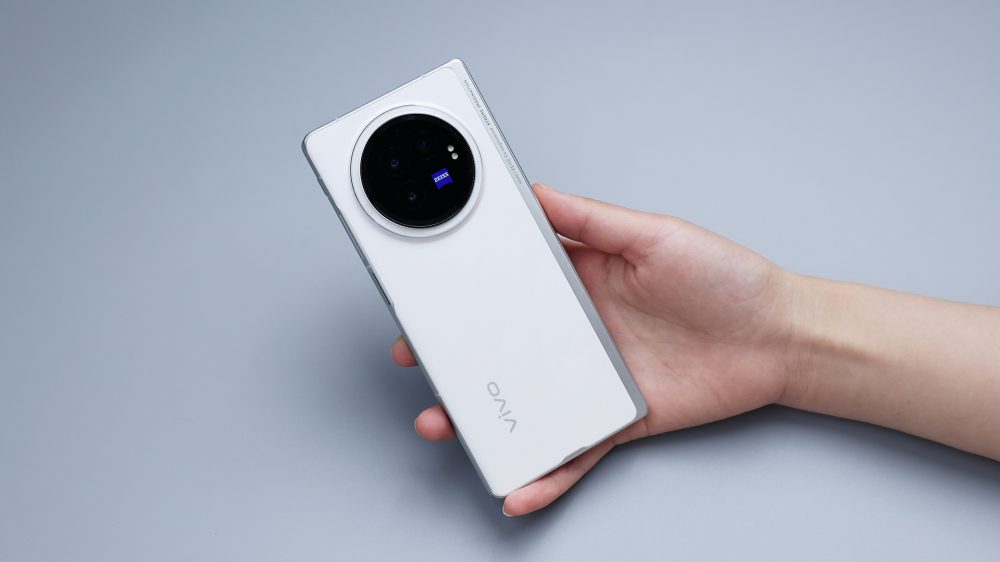
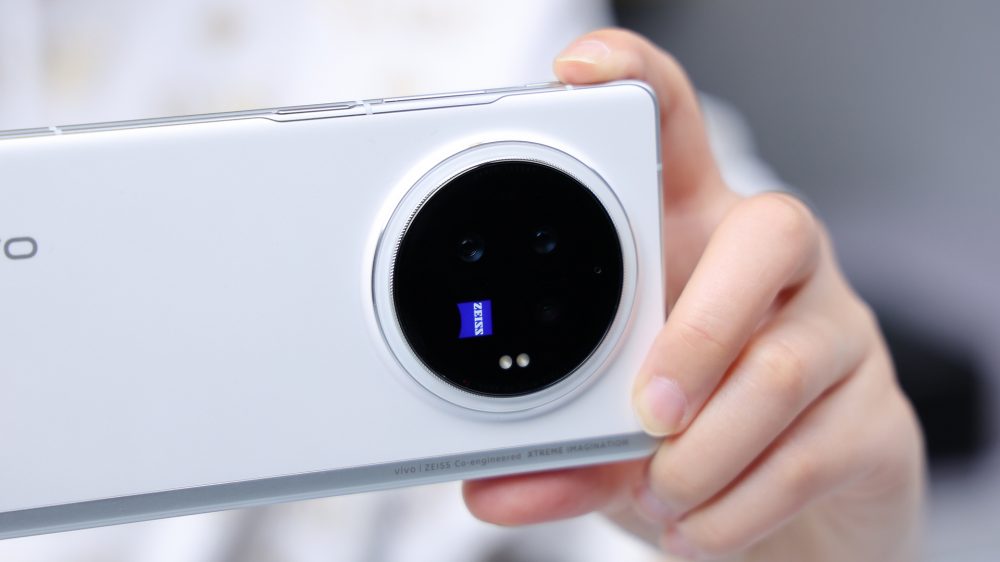
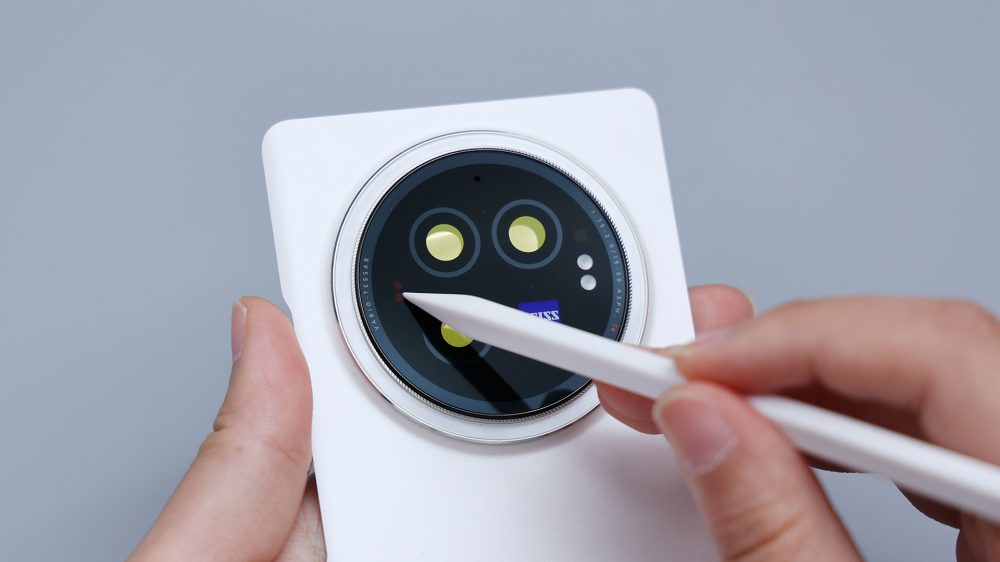
There are three holes in the lens, which corresponds to the rear three shots, X Fold2 is also three shots, but there are four holes, mainly for beauty and symmetry, X Fold3's scheme is to move the Zeiss LOGO to the vacant position, which looks more concise and compact.
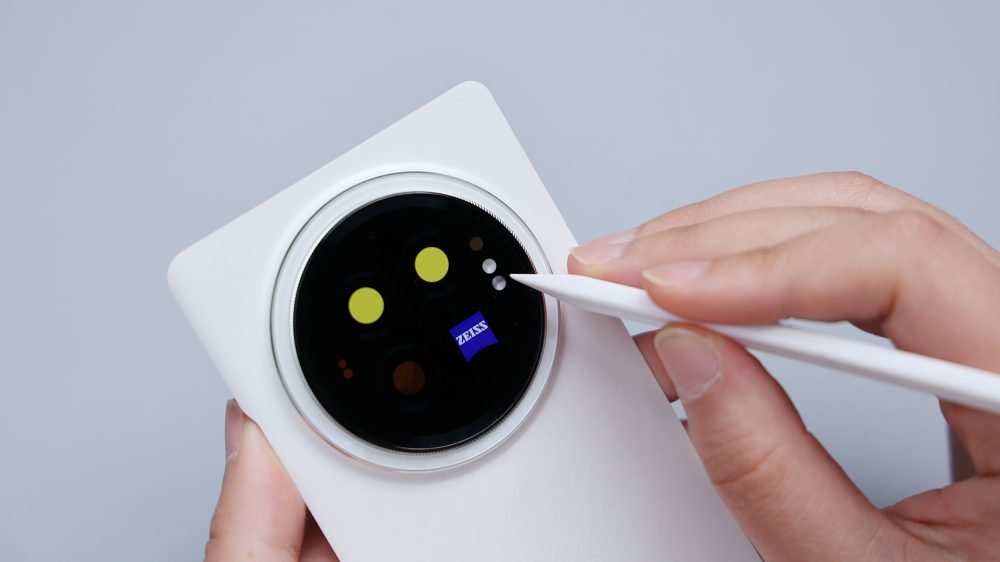
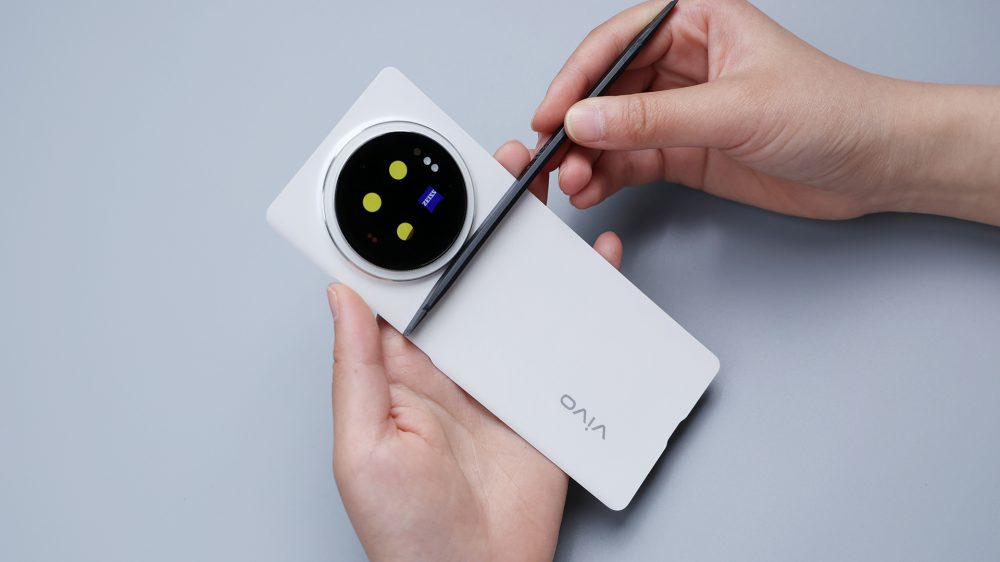
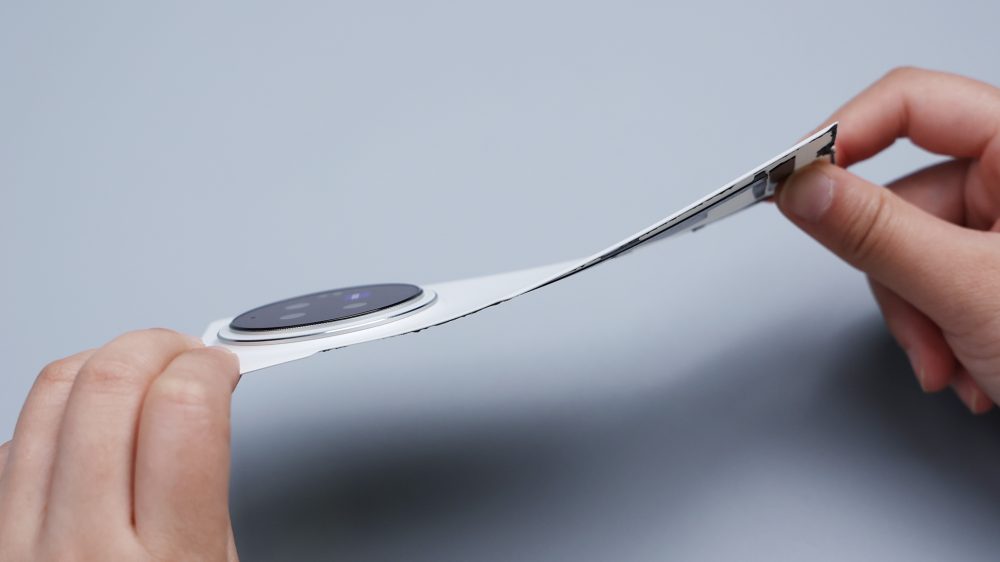
There are several small round holes on the top and left and right sides, two on the right correspond to the flash, one on the rear ambient light sensor, the left two correspond to the laser focus module, which will see more clearly under the light, and the single round hole at the top corresponds to the rear noise reduction microphone. The back cover is thin and soft, and can be arbitrarily deformed under pressure from external force.
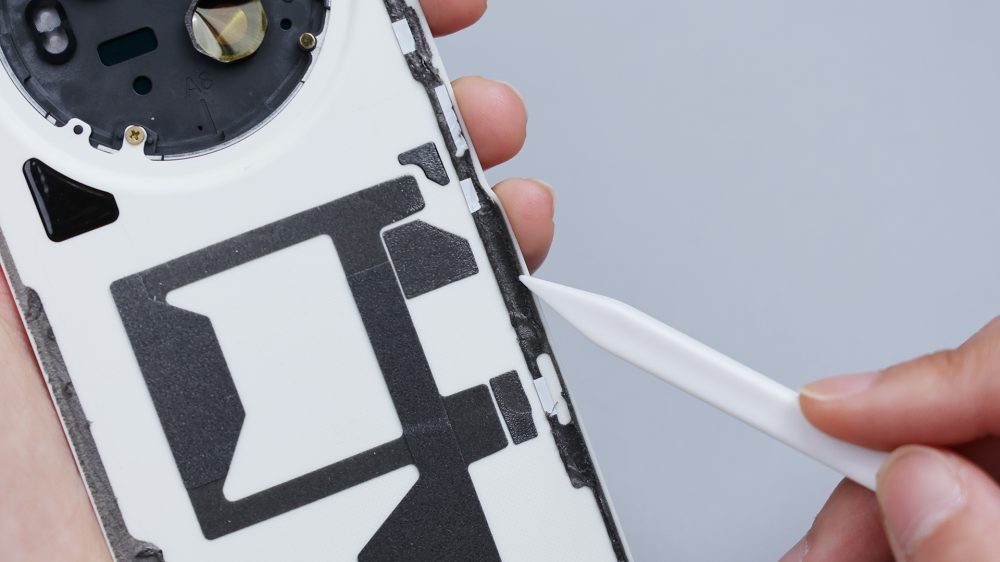
The inner ring of viscose shows an irregular shape and changes with the width of the main body edge that contact it, such as the middle and lower section on the left, which is wide and spaced circular bulge because it corresponds to the position of the hinge screw. And the top and the bottom, because the corresponding positions are relatively narrow, the glue is also very narrow. The white tape and oval space on the right adhesive correspond to the plastic plug on the middle frame and the extended FPC to prevent them from being pasted.
DECO has a black round plastic lining, the shape is consistent with the outer frame of DECO, but the diameter is slightly smaller, and the edge is lower than the horizontal surface. It is also made into the shape of the concave outer bulge. The whole is embedded in DECO, which is slightly different from the common lining before, and the back cover is not sandwiched in the middle together with the outer frame.
The lining looks thin, secured by three screws and viscose, surrounded by three circular metal columns responsible for conducting the signals, with the indentation left from shrapnel on the motherboard.
From the gloss of the rim, the DECO outer frame is made of metal. The black foam ring on the top corresponds to a rear noise-canceling microphone, with the edges of all three lenses, except for a flash, ambient light sensor and laser focus module. In the lower left corner, there is a small heat dissipation film, inside the bread with a thin layer of foam. The large area of buffer foam in the middle and lower parts shows an irregular shape distribution, and is in the state of mutual overlapping, they correspond to several FPC and heat dissipation film on the main board.

There are some viscose residues on the outer edge of the mobile phone, mainly concentrated on the side and bottom of the hinge.
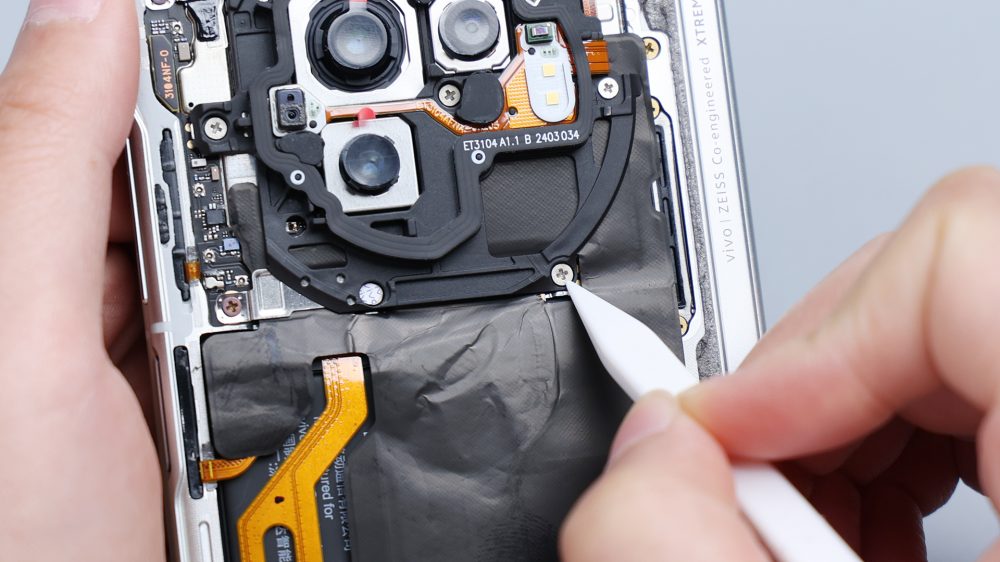
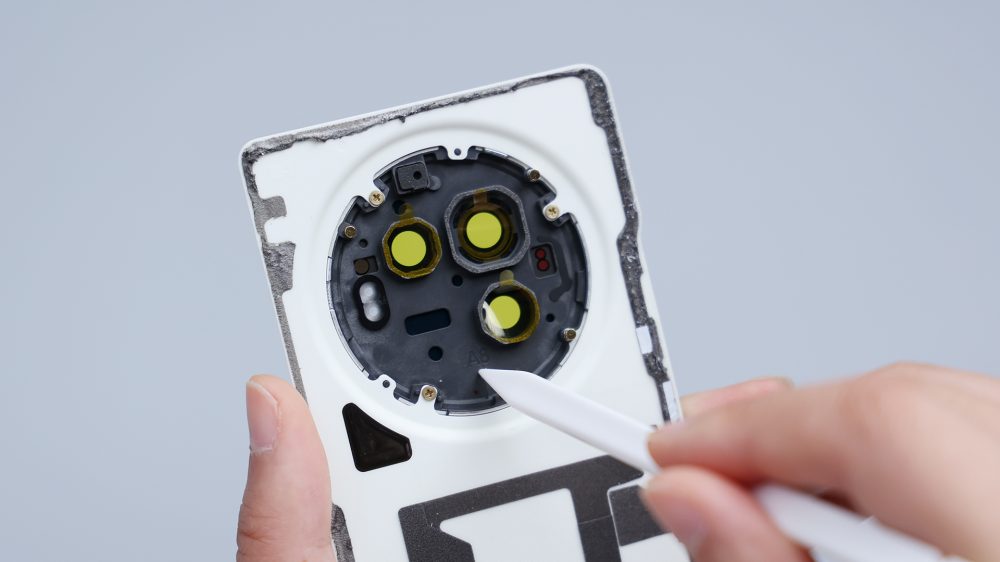
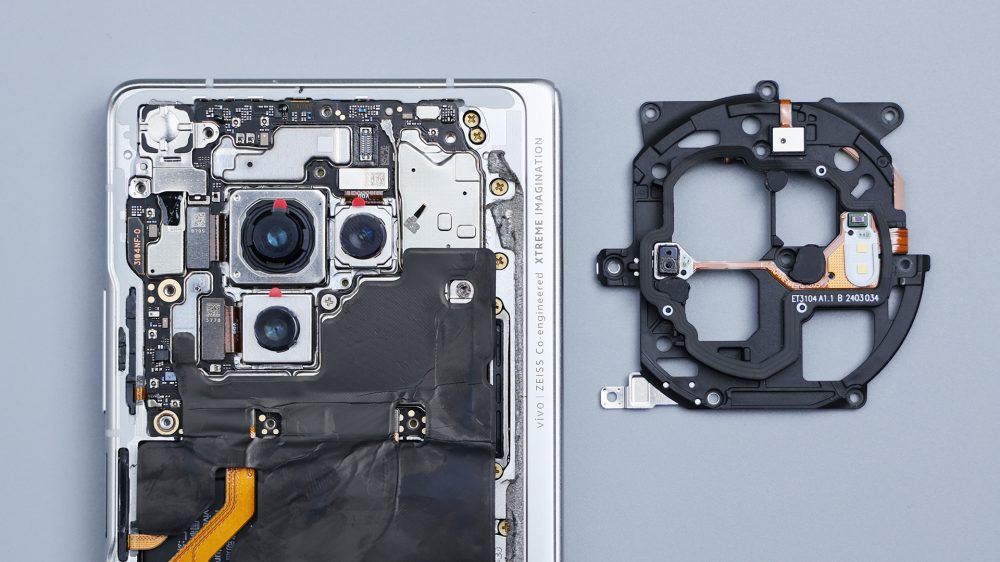
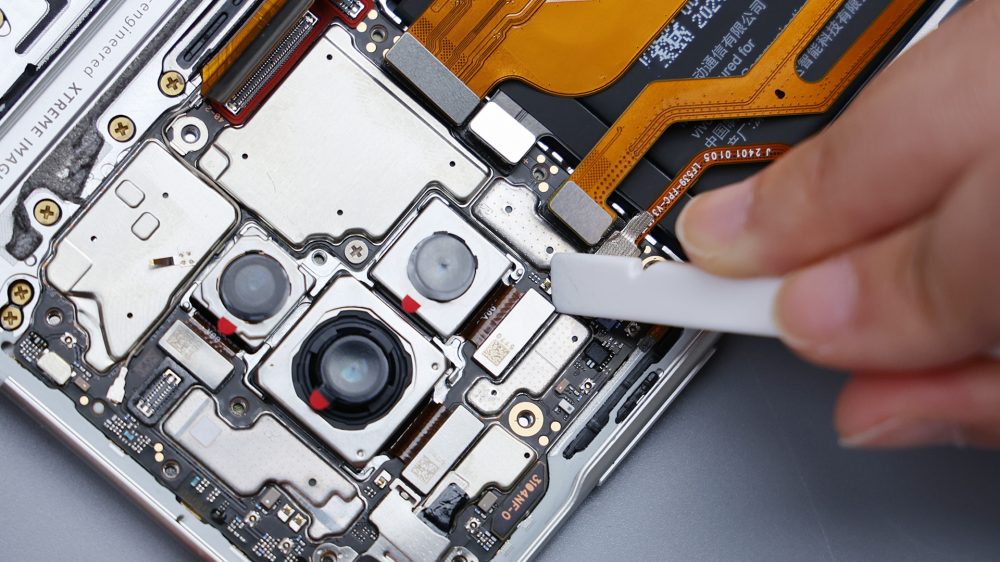
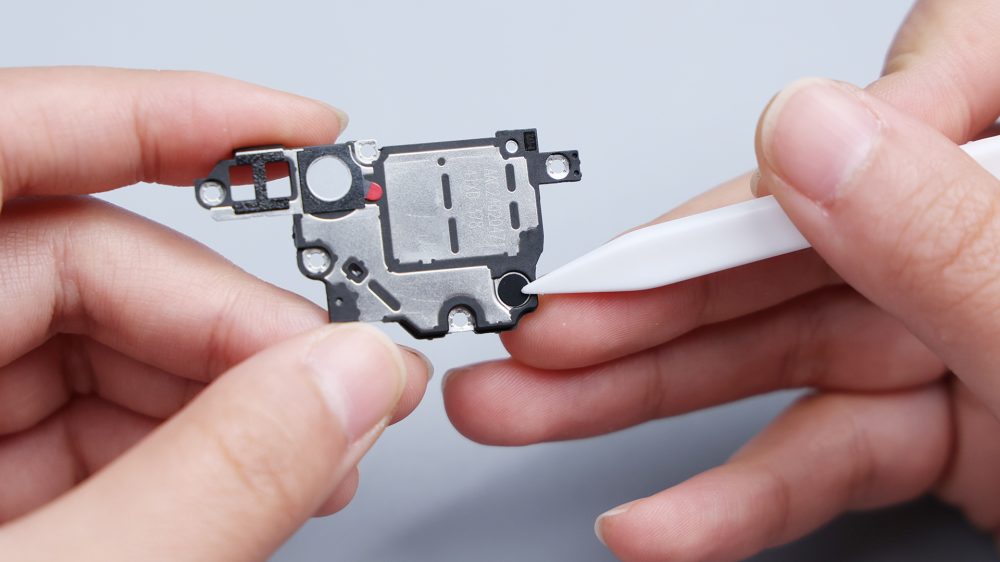
The most striking is the rear camera area, which integrates not only three lenses but also multiple sensors. The cover plate corresponds to the shape of DECO, but also made a circular arc uplift, the overall area is reduced to only cover the camera area. The black coil with the white code printed in the middle is NFC, which connects to the inside of the cover plate from the gap above the main camera. The rear noise reduction microphone is located above the ultra-wide Angle lens, the lower right corner of the main camera is the laser focus module, the flash is located on the right side, using dual LED bead configuration, above is the rear ambient light sensor, they are integrated in a yellow FPC, three shrapnel scattered in the surrounding, corresponding to the metal column in DECO. Under the slightly raised metal plate in the upper left corner, under the front lens of the inner screen, the metal plate is fixed by one screw.
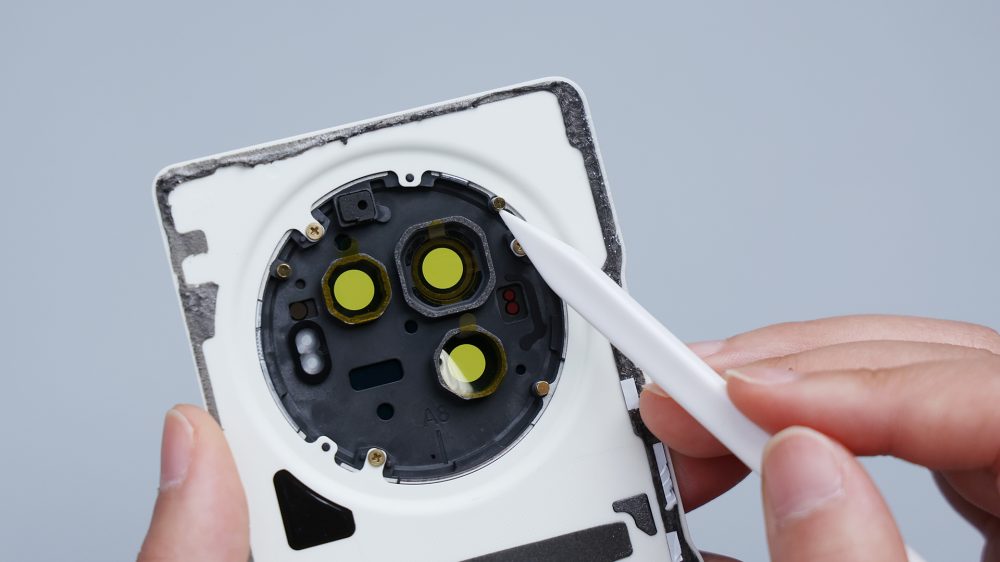
Here is a small detail, the screws in the main body of the phone are three colors, the plastic cover is silver screws, the metal plate is red screws, and the hinge is yellow screws. The different colors are to distinguish the assembly and later maintenance, to avoid confusion. The top microphone is located in the upper right corner, with a metal cover on the outside. The heat dissipation film on the battery is not particularly large, which covers half of the battery area, but it also does a certain extension upward, covering most of the core area of the motherboard.
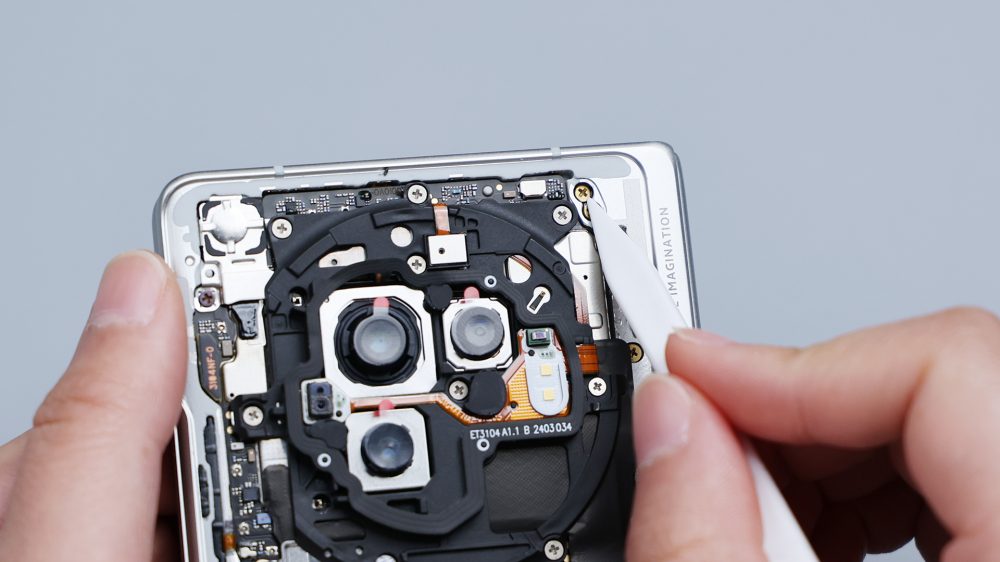
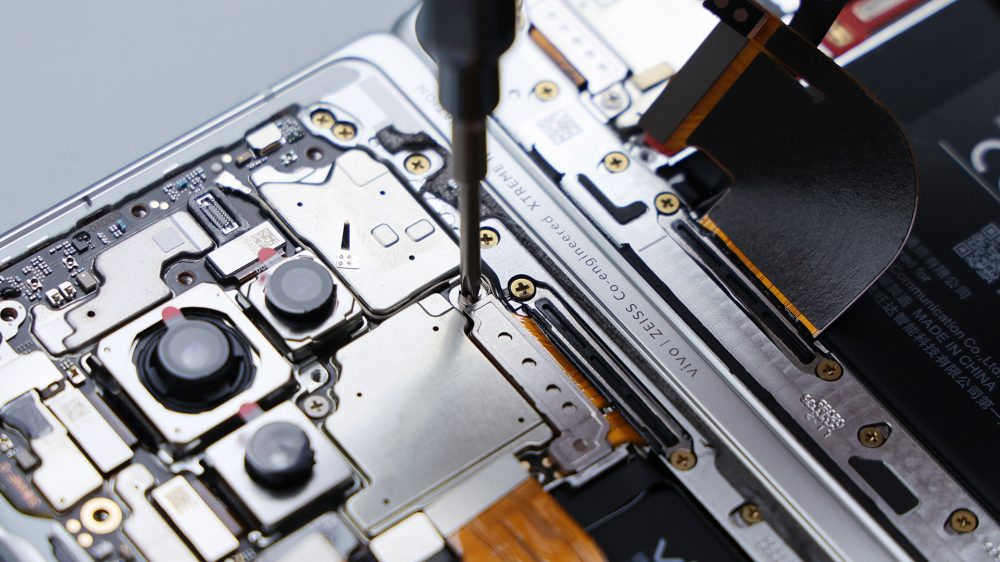
Unscrew all the fixed screws of the cover plate, a total of 10, including 1 red screw in the lower left corner, because the metal plate is one with the cover plate, the front lens in the upper left corner is separate, the screw is also screwed, adding up to 11.
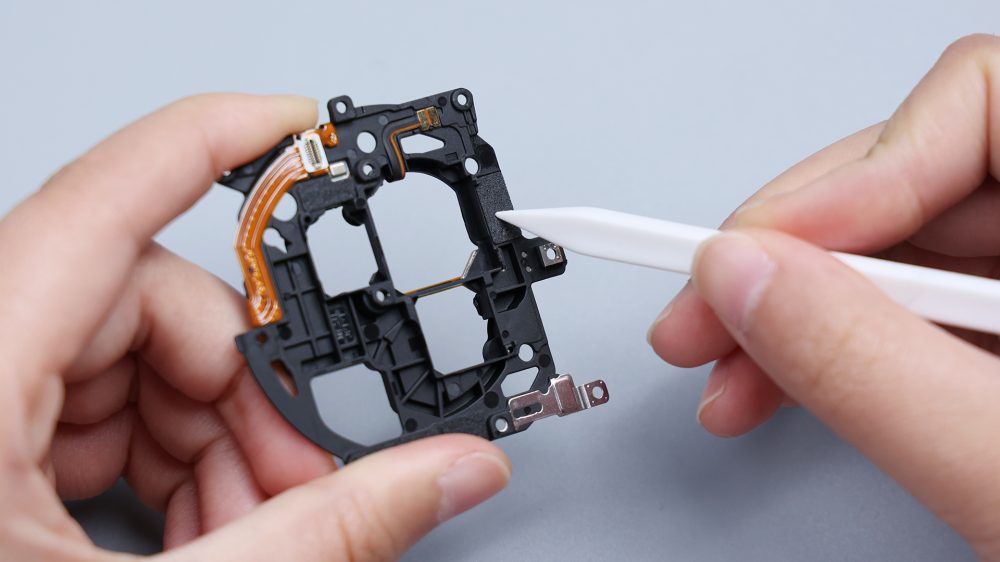
Pry up and take off the cover plate, its shape is similar to DECO, because it contains many hollow out, the area is more than half smaller than the previous generation, in addition to the small metal plate with corners and screw holes, most of the cover plate is made of plastic.
The main shot, ultra-wide Angle lens and most of the BTB in the row below are equipped with foam pads, no portrait lens, and the power key BTB is protected by a small metal block. The two contacts in the upper right corner correspond to the NFC coil, and the BTB on the left corresponds to the flash light.
The subsequent disassembly steps need to be powered off. The X Fold3 has two batteries, the other under the outer screen. Still use a hot air gun, change the temperature to 200, evenly heated around the screen. After the glue is softened, open the breakthrough with metal thin metal piece, the screen is obviously much more difficult to remove than the back cover, on the one hand, because the gap is smaller, the adhesion is tighter, slowing down the propulsion speed. On the other hand, because the screen glass is relatively thin, can not be too hard, so as not to damage the screen. The warping film should not be too deep, because of the curvature of the corner, but also have to be very careful, along the surrounding slowly swept two or three laps, before completing the glue removal.
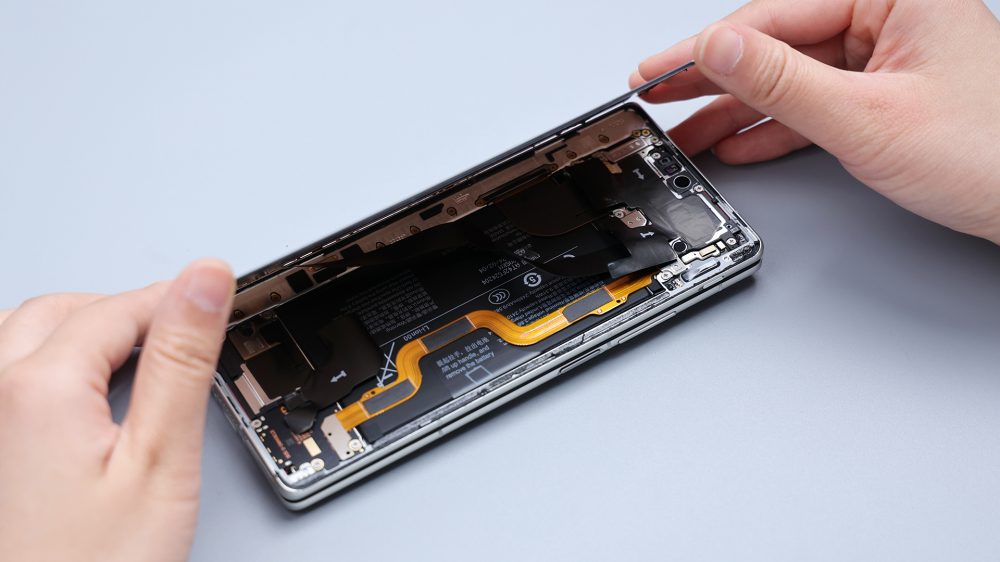
At this time, the screen can not be directly taken away. There is an FPC behind it, whose BTB is pressed under the metal plate. It is necessary to unscrew four fixed screws and pick up the metal plate to break the screen BTB and complete the disassembly.
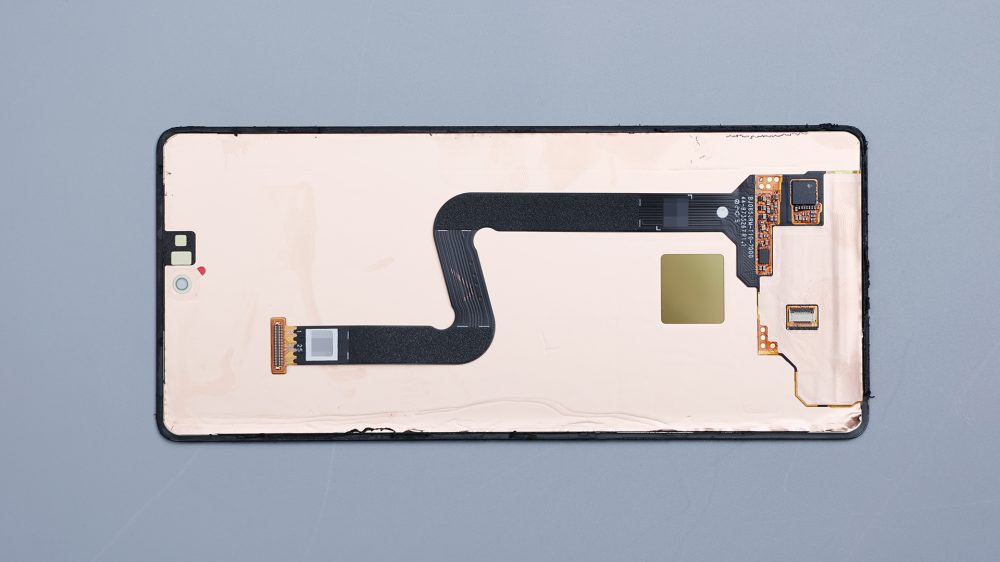

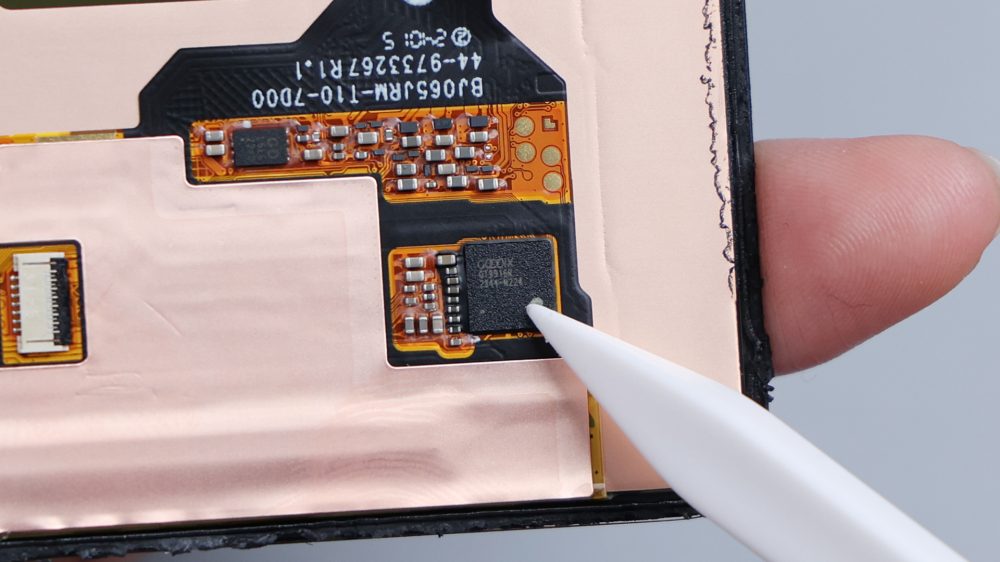
On the inside of the screen is a whole piece of copper foil, the two square openings in the middle of the top correspond to the ambient light sensor and the distance sensor, and the next round hole corresponds to the front lens. The larger square opening in the middle, and the ZIF connector on the lower left, are reserved for the ultrasonic screen fingerprint, but the X Fold3 uses a side fingerprint, so it is empty. The chip in the lower right corner is a touch IC from Huiding Technology, model GT9916R.
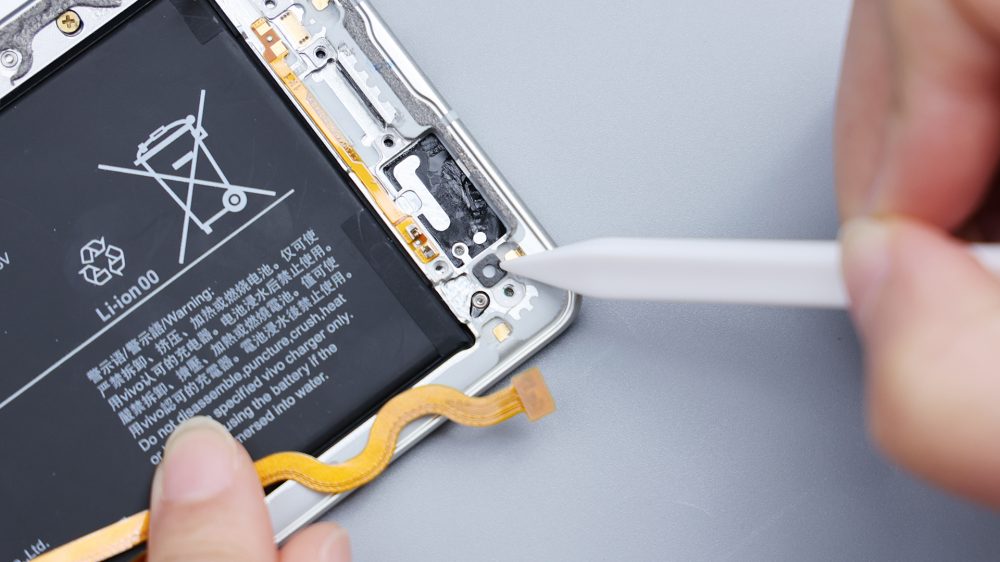
Tear off the heat dissipation film above both sides and disconnect the BTB of the two batteries.
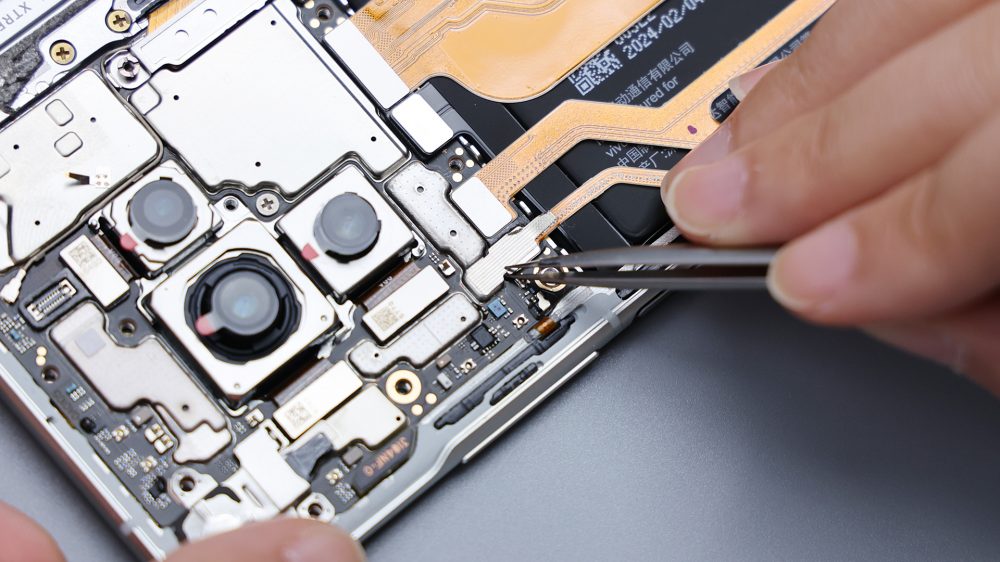
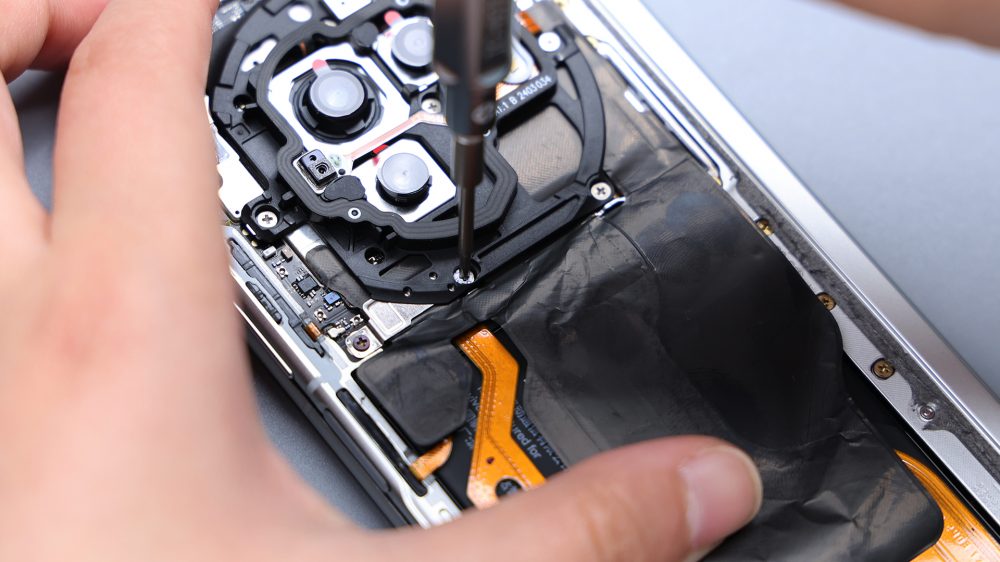
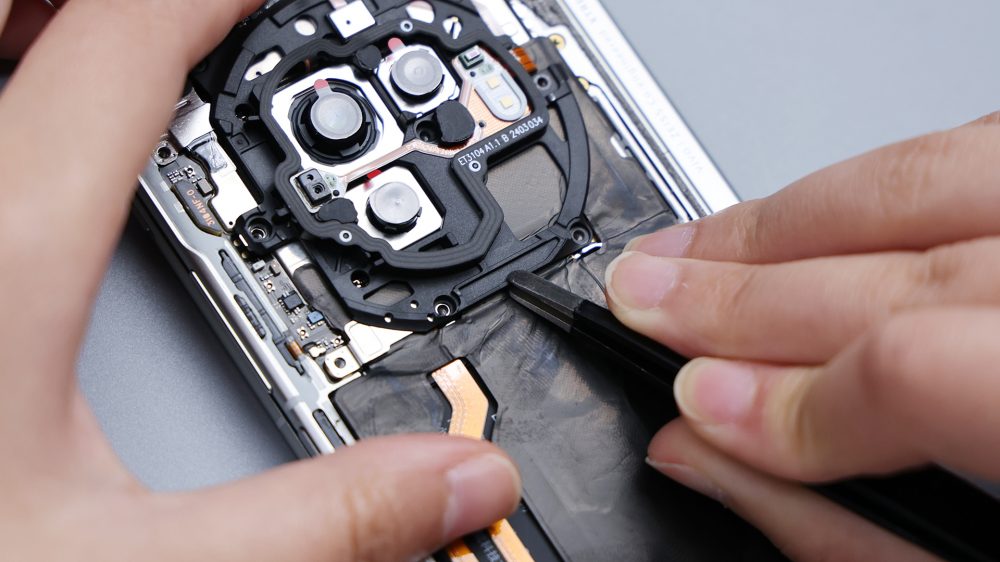
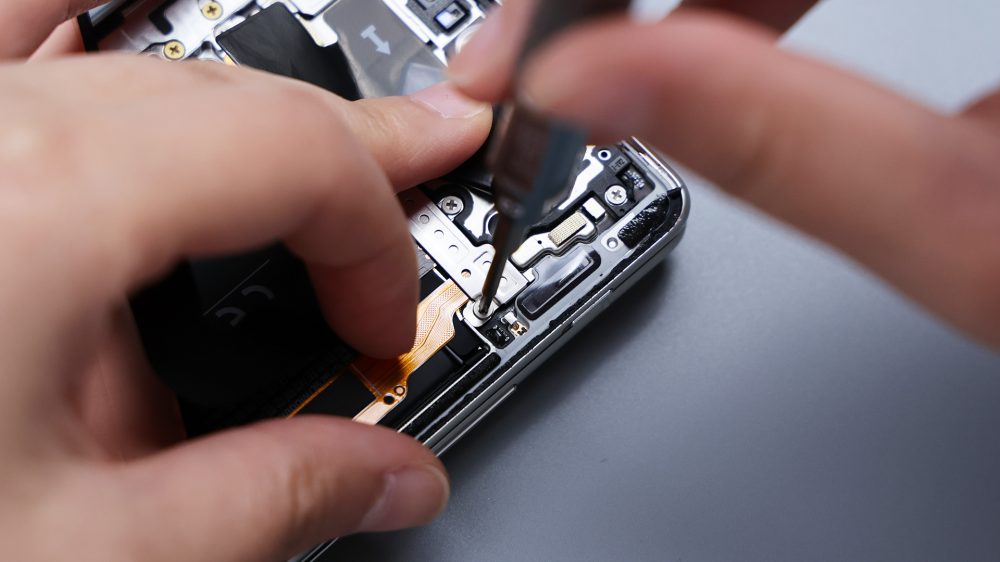
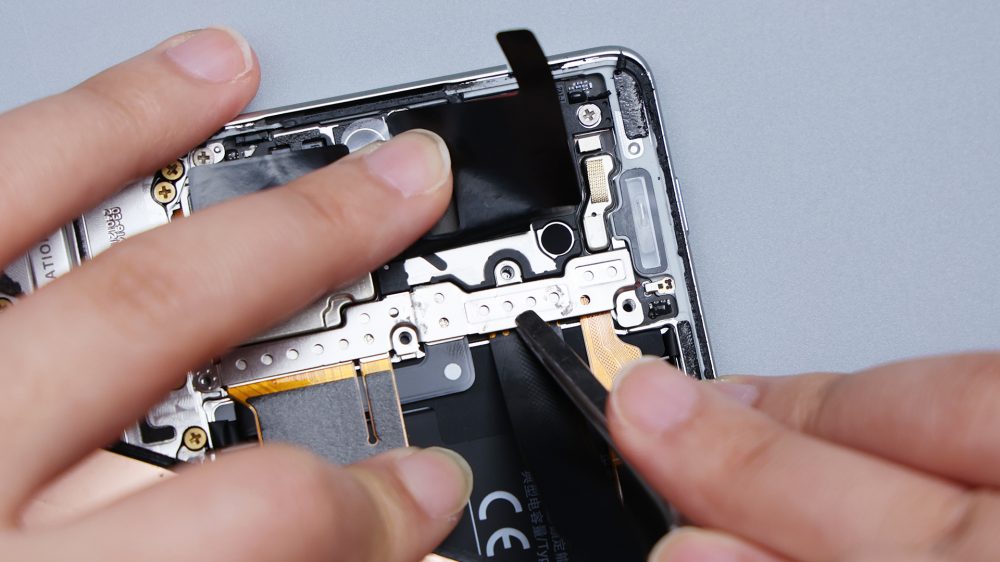
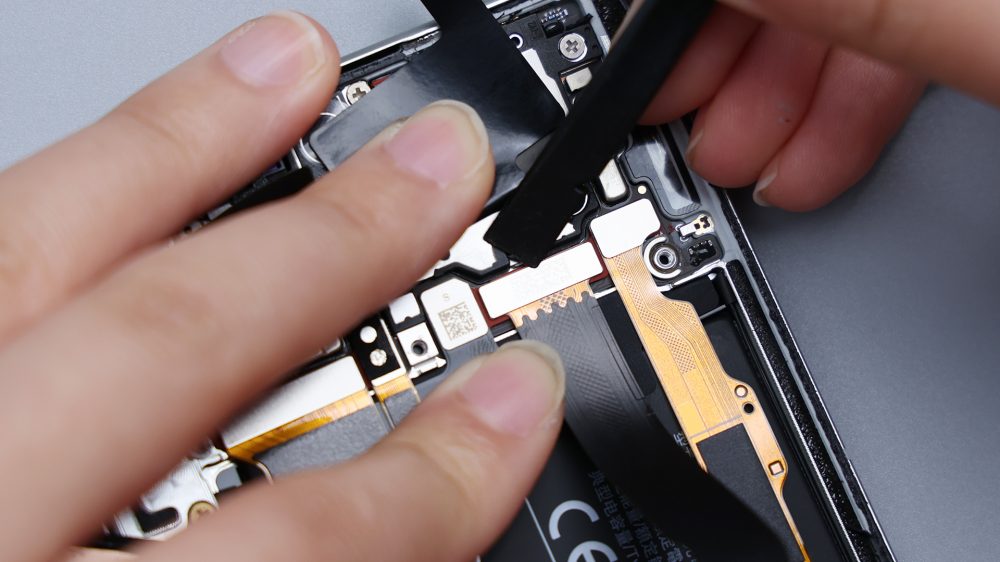
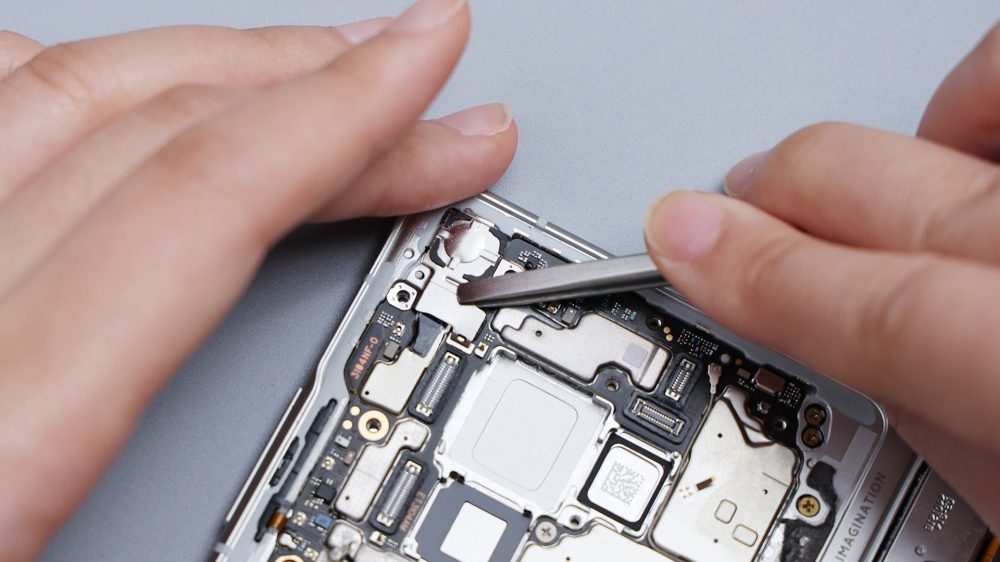
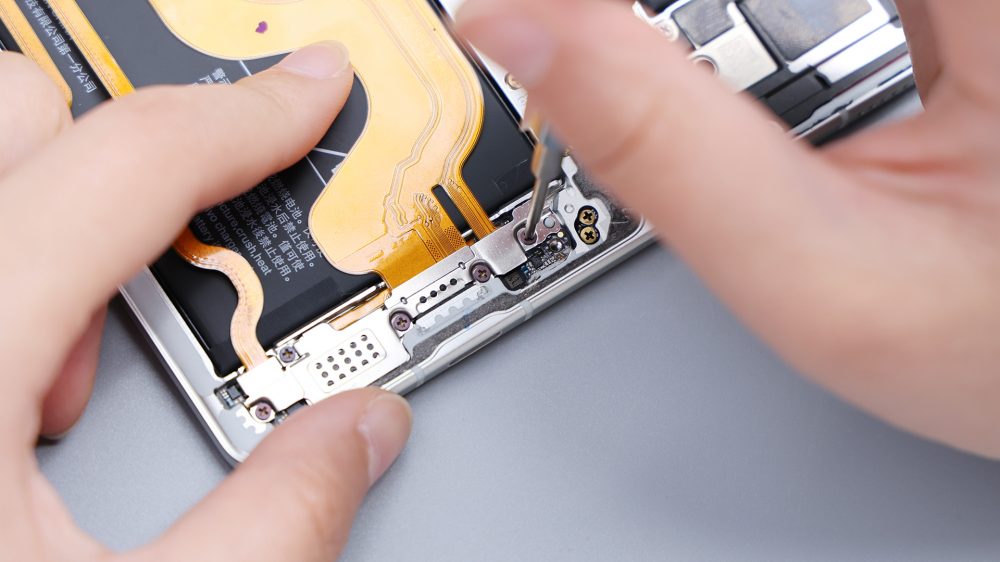
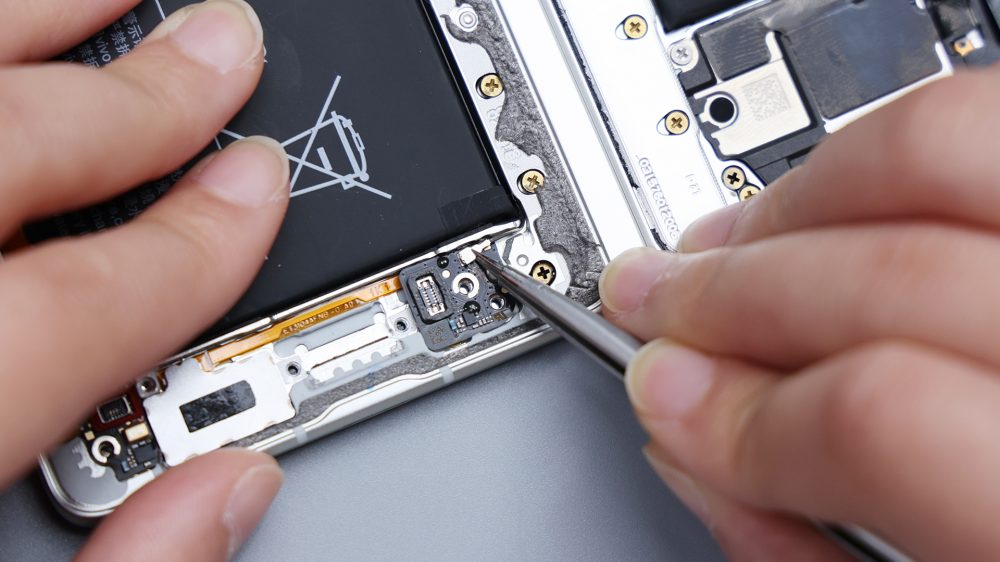
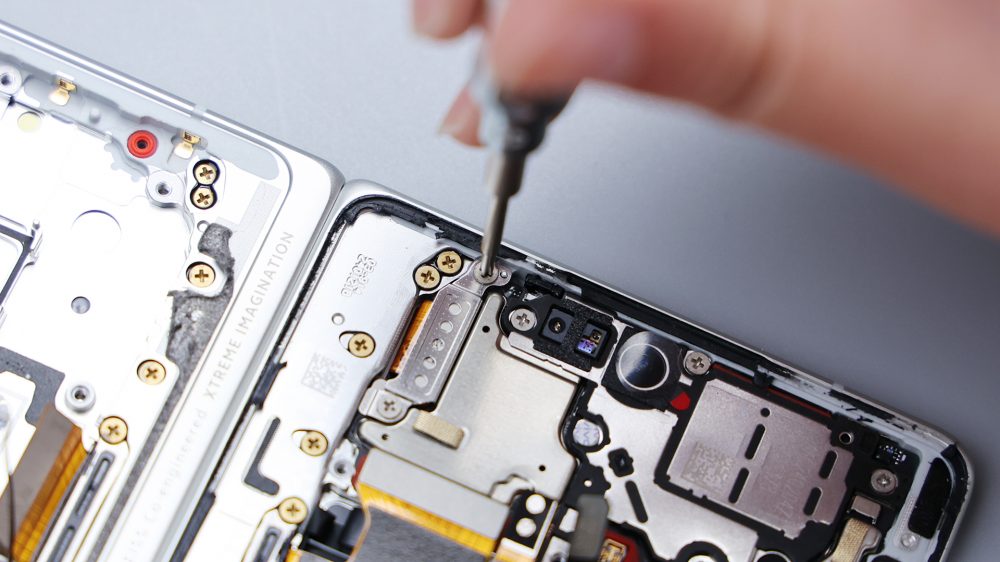
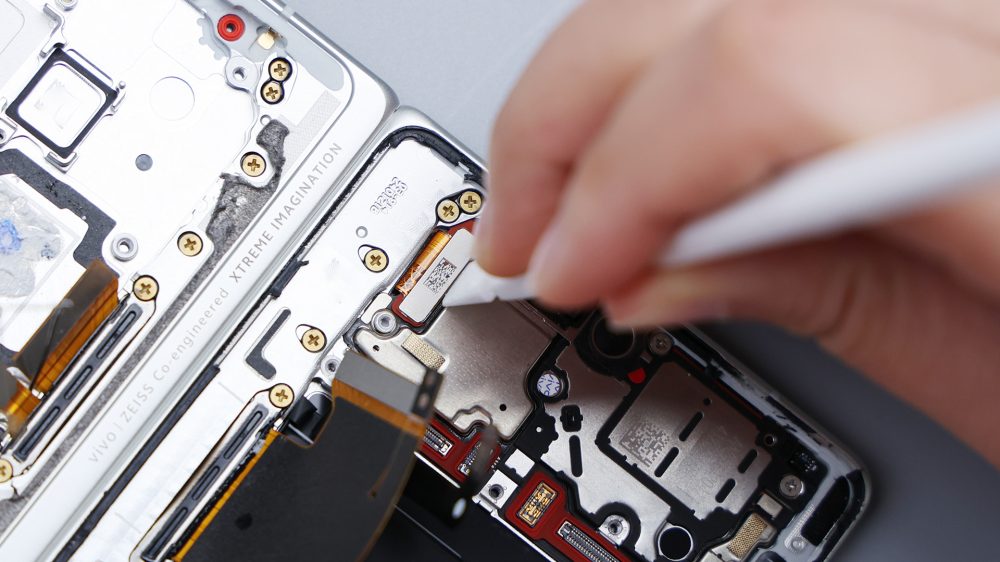
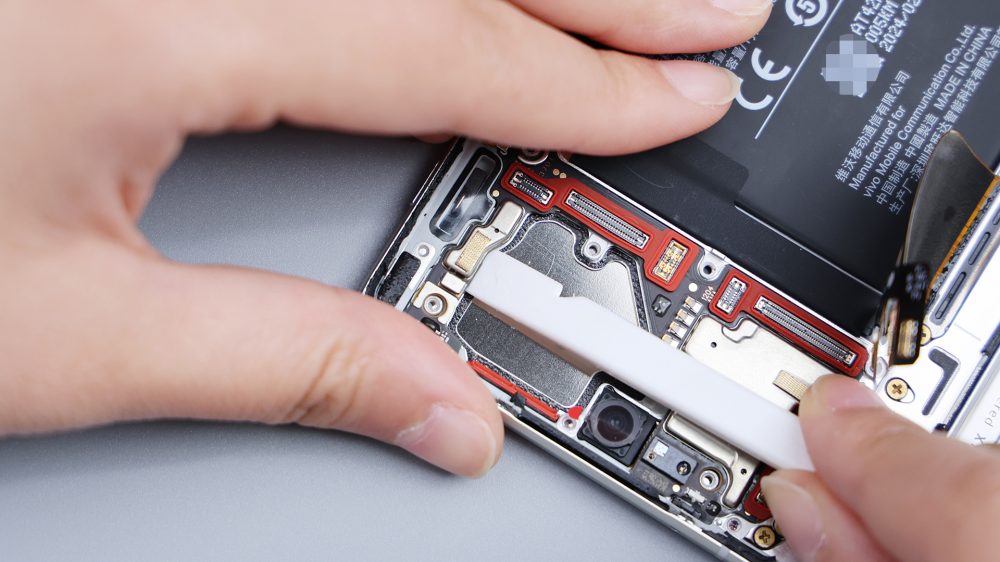
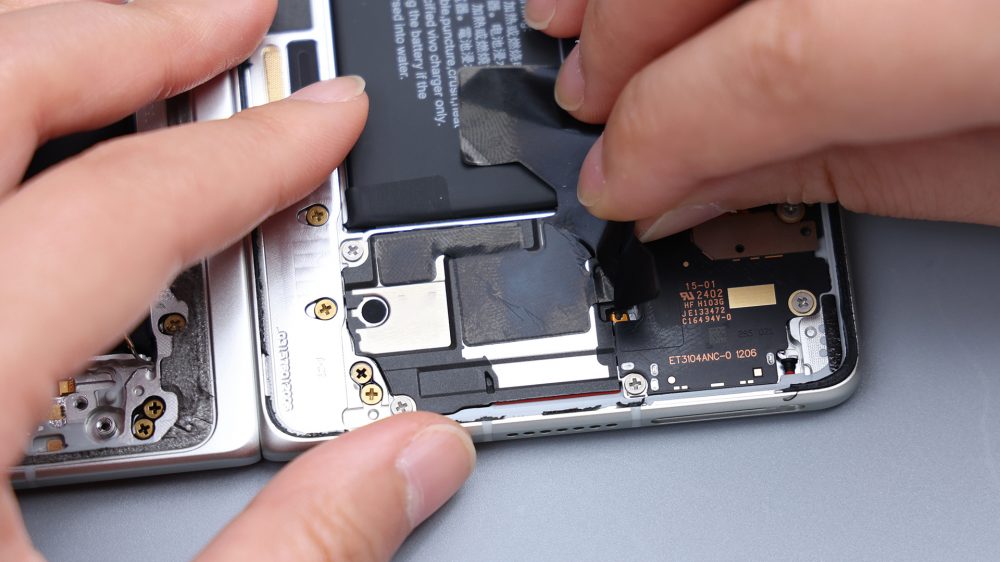
Or start from the main board area, including the rear three shots, disconnect all BTB, the power button BTB needs to tear open the conductive cloth, the right next to the hinge BTB, is pressed by the metal baffle, through 1 child screw fixed, screw, pry up the baffle, to disconnect the BTB below.

All three rear lenses can be removed directly, and the front lens in the upper left corner can be followed.

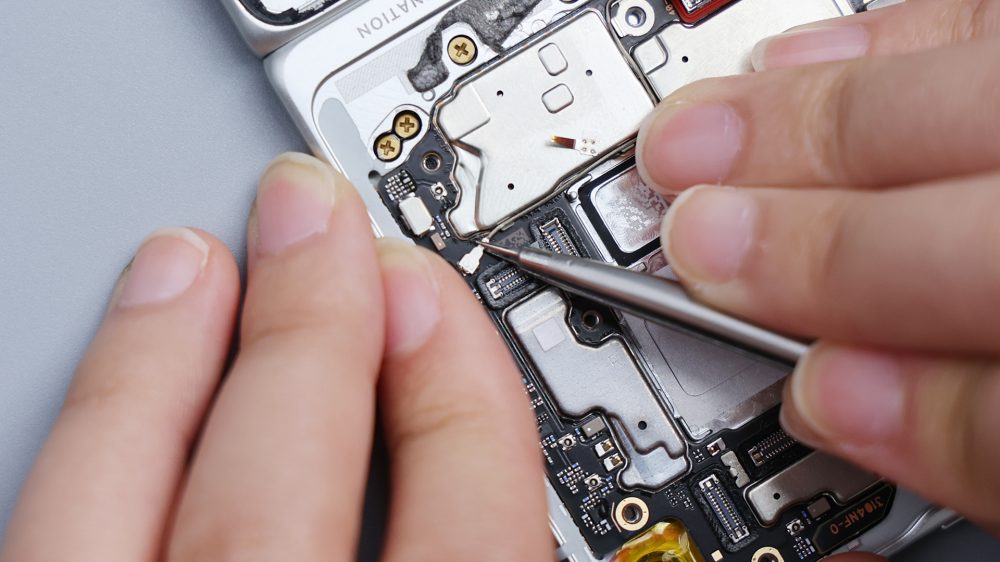
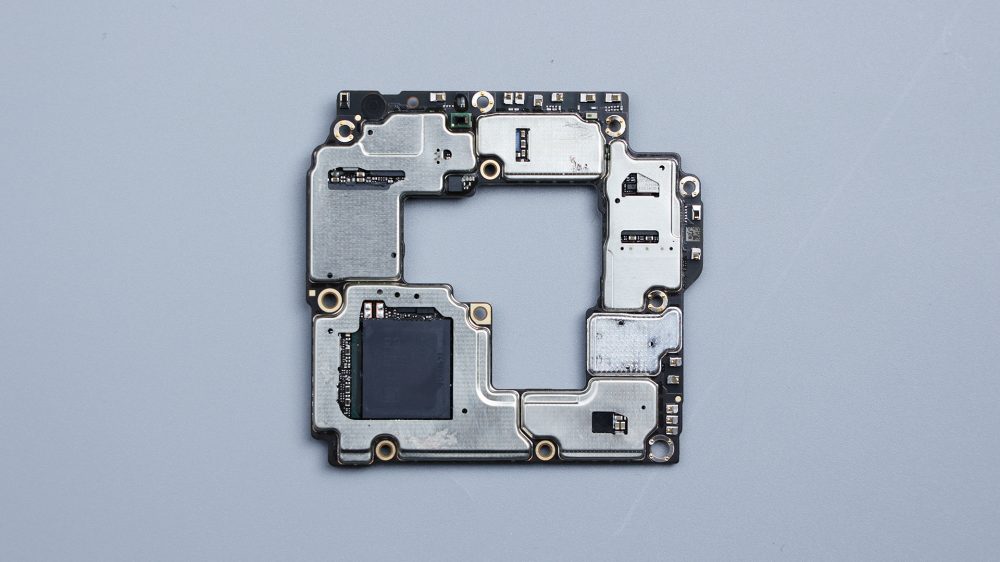
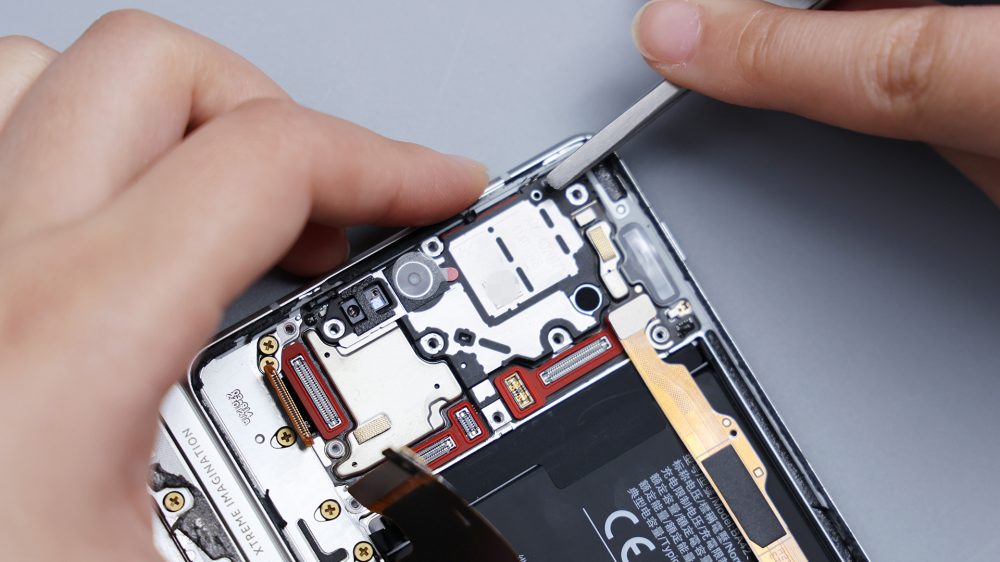
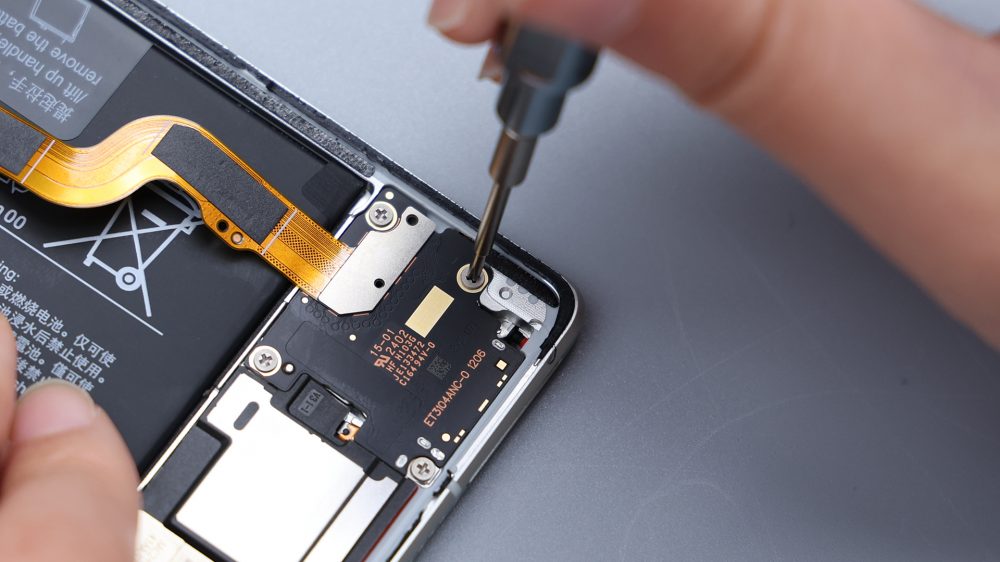
The motherboard also has a separate fixed screw, screw, disconnect the right side of the axis, can remove the motherboard.
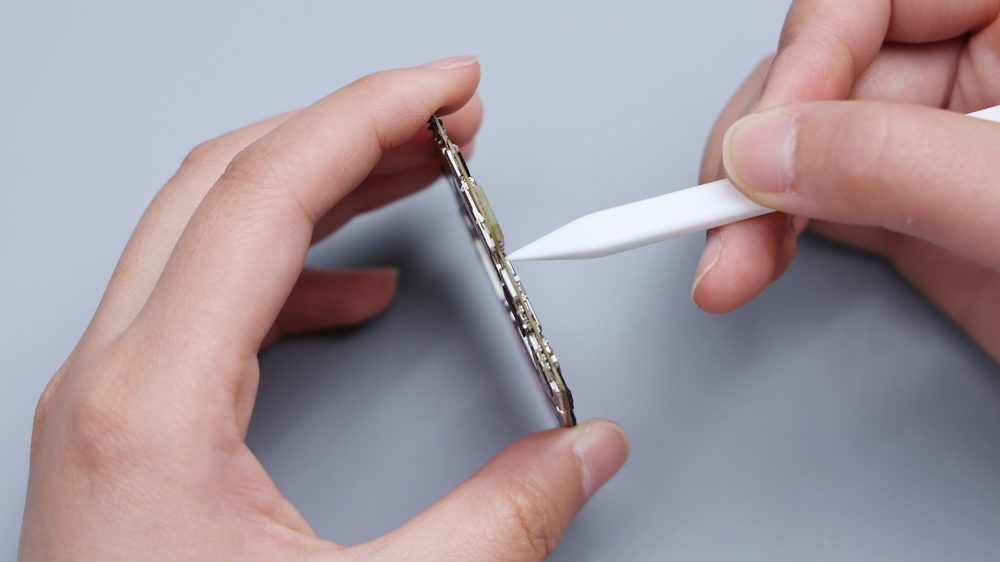
It uses a single layer PCB, the plate is very thin, on the one hand is conducive to heat dissipation, on the other hand is also conducive to control the thickness.
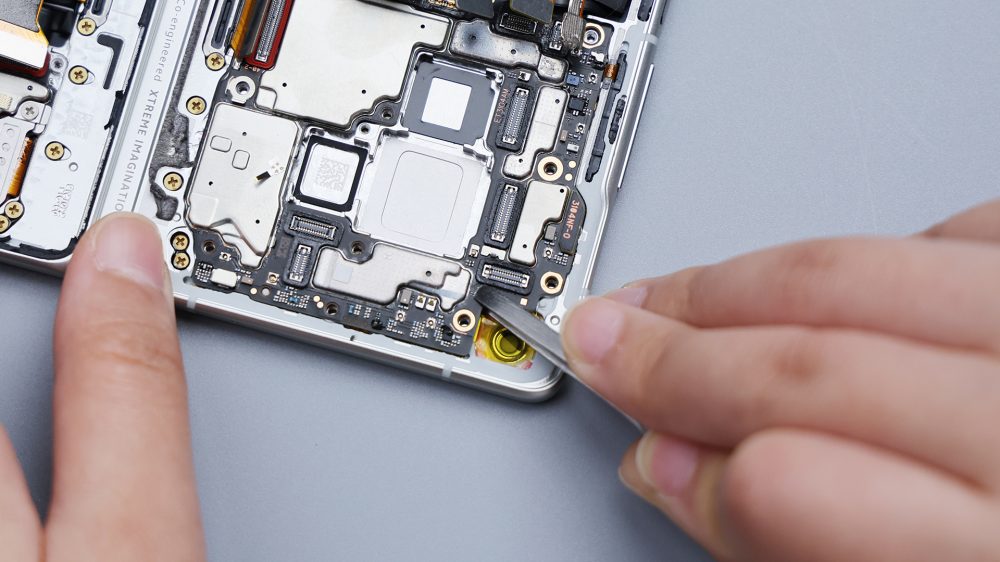
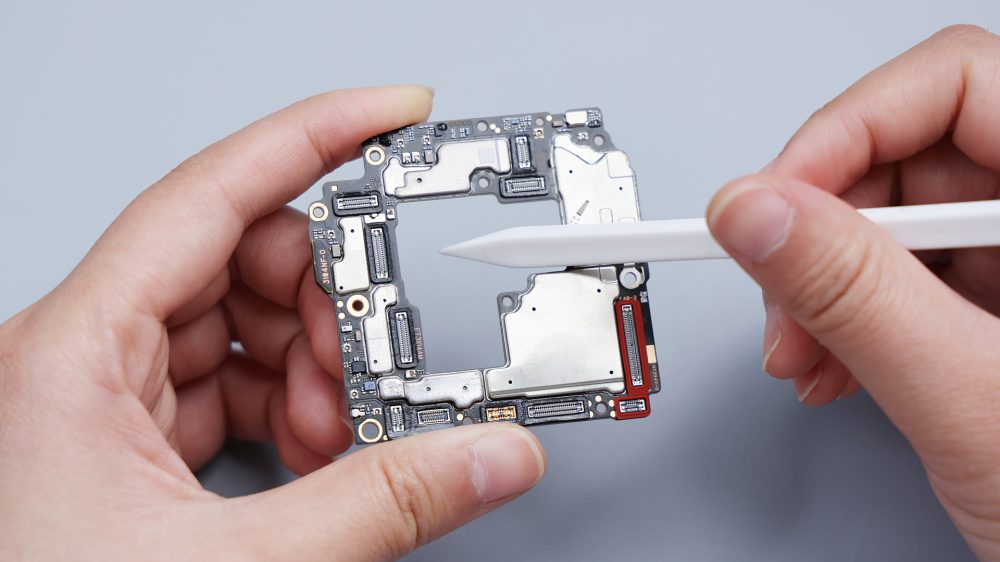
In order to accommodate the rear three shots, the corresponding position in the middle of the PCB is broken down, and directly connected into a piece, forming a large L-shaped hollow out. The embedded lens reduces the protruding problem of DECO to a certain extent.
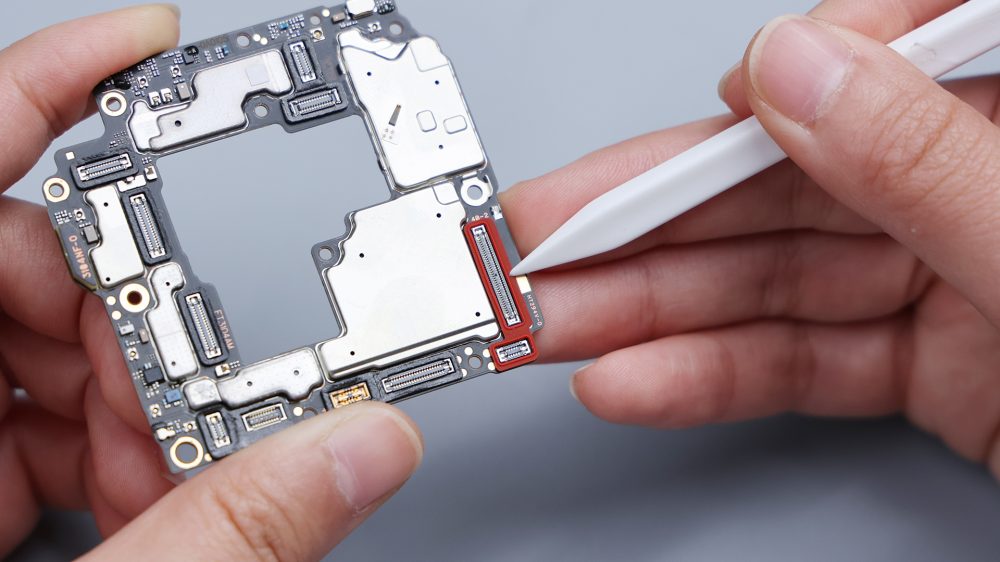
All BTB bases of the motherboard-side A have been protected, mostly with black foam rings, and the two in the lower right corner with red rubber rings. Important capacitors and small parts are also treated dispensing.
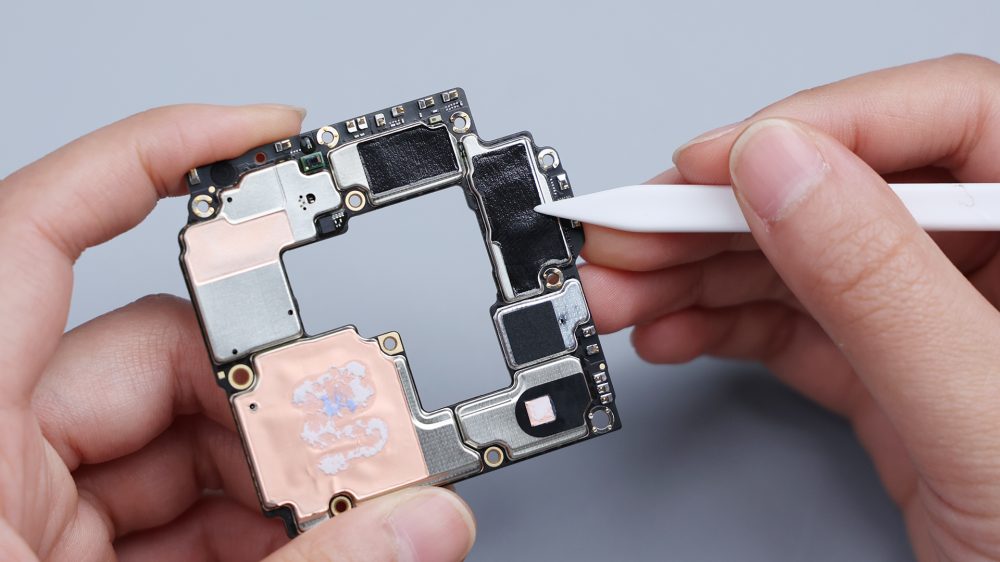
The B shield is covered with copper foil and heat dissipation film, and the core area is coated with silicone grease to assist heat dissipation. The round hole in the upper left corner corresponds to a noise reduction microphone with a layer of dust net. The ambient light sensor of the inner screen is integrated in the main board, which is located in the middle of the B side. The surrounding capacitors and small parts are also glued down.
Tear open all the copper foil and heat dissipation film, and there is a layer of heat dissipation material inside the core area. With the silicone removed, the largest memory on the bottom left is Samsung LPDDR5X, a larger green chip is the Qualcomm Snapdragon 8 Gen 2 processor, and the smaller one is the UFS 4.0 flash chip. The black chip in the lower right corner is the fast charge IC of the SC8551A charge pump from Nanxin Semiconductor. The silver chip in the upper right corner is a radio frequency IC from Qualcomm.
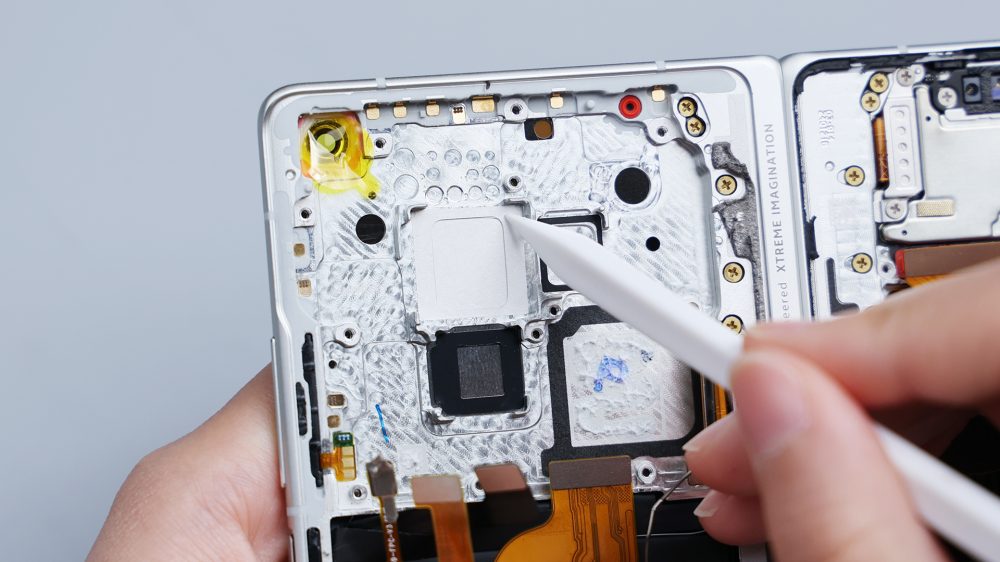
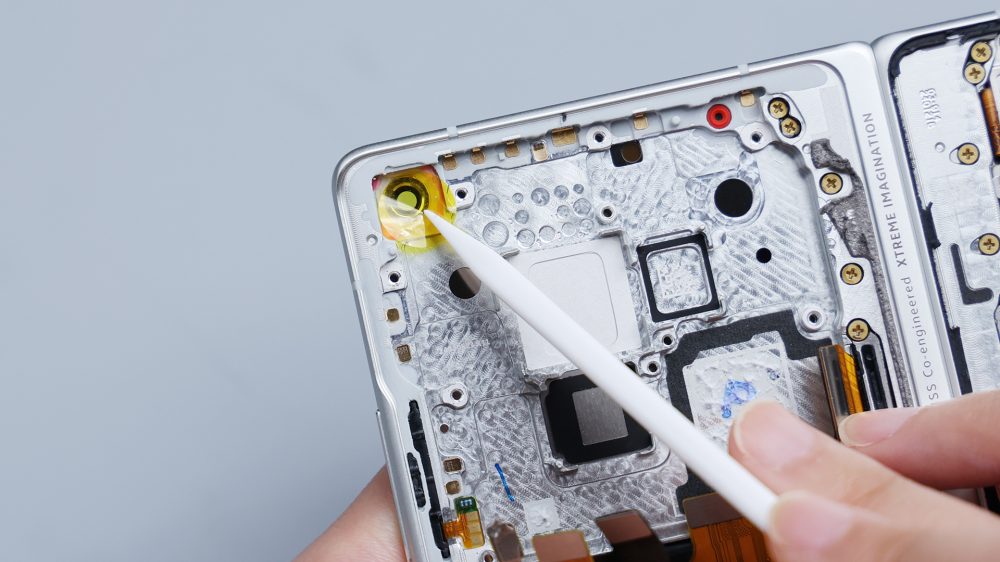
In the empty metal frame area, the round hole in the upper left corner corresponds to the front lens of the inner screen, equipped with foam ring buffering protection.
Red rubber ring in the upper right corner, corresponding to the top noise reduction microphone. The rear three shots have made a limit design, and the corresponding position has been polished. Although it is not hollow, it still achieves a certain degree of sinking to reduce the height of the mirror group.
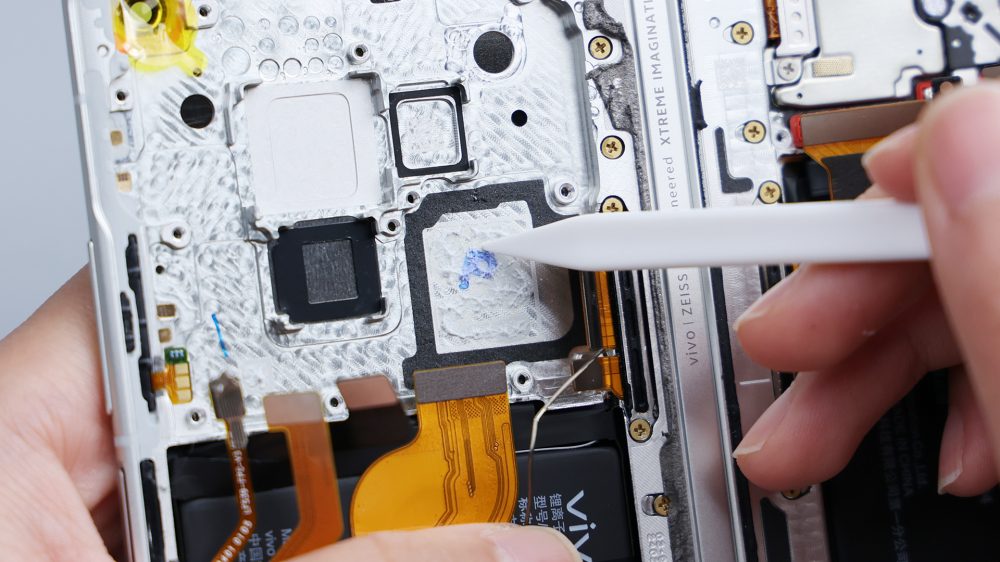
In the lower right corner is a thin circle of foam, with a large amount of silicone residue inside, corresponding to the core area of the motherboard. The three contacts in the lower left corner correspond to the volume button, surrounded by a large number of metal points, responsible for signal overflow.

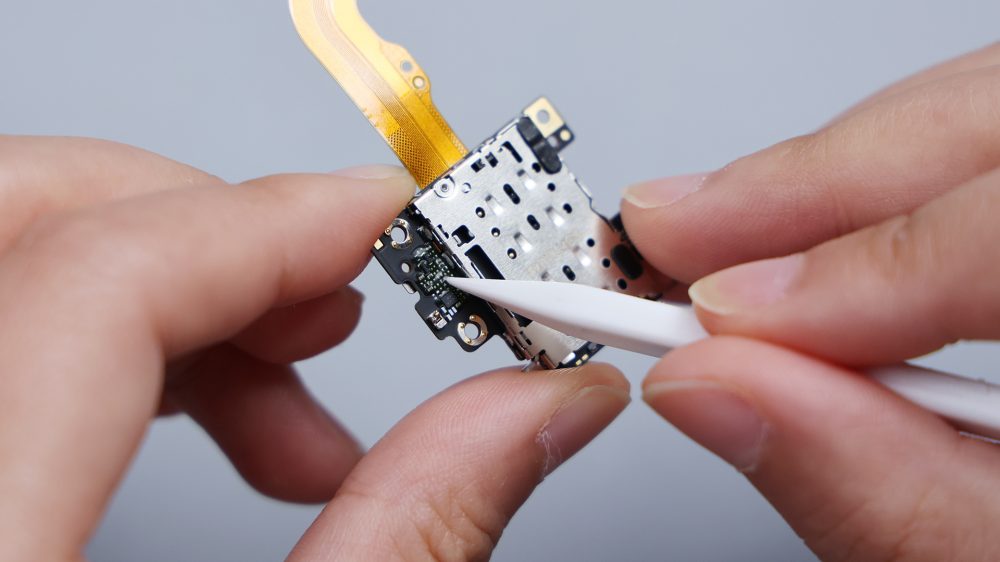
Turn below, remove all the fixing screws in the secondary plate area, and pick up the metal cover plate. Inside it, the two buffer foam, corresponding to the vibration unit and USB interface, and one BTB glued to it.
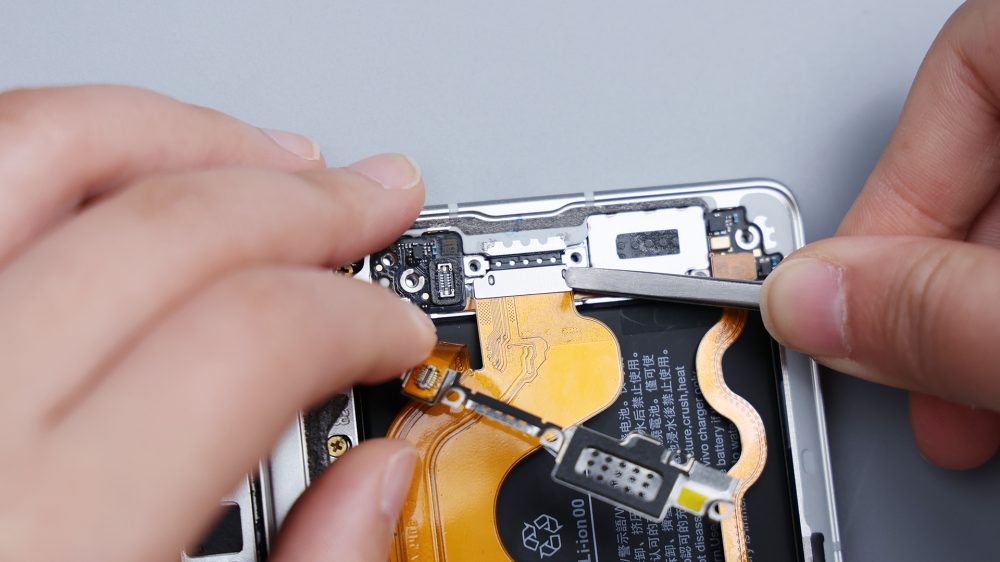
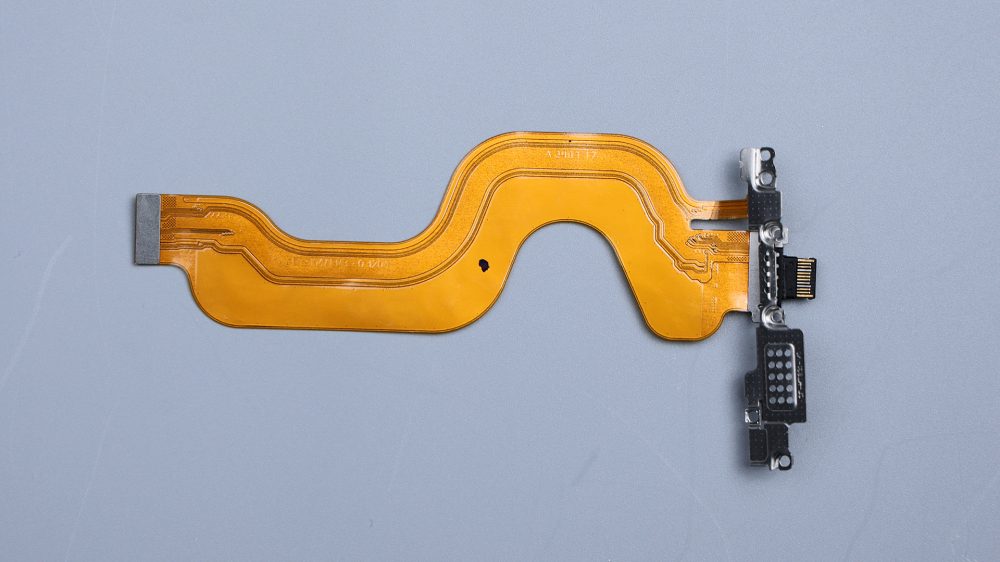
The USB interface is directly connected to the motherboard through an FPC, which has a ring of viscose on the outer edge and holds it very tightly.
Disconnect the remaining BTB and coaxis, two small PCB are distributed on the left and right sides, fixed by the limit measures similar to the buckle, they are very tight, remove the need to pay attention to, a little too hard may damage the PCB.

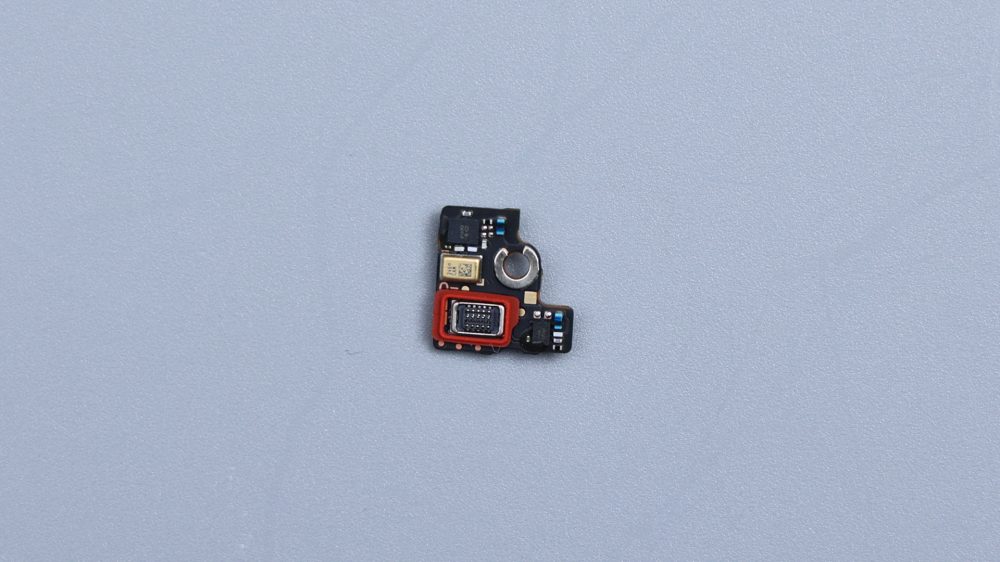
Although these two PCB are small, the protective measures are not ambiguous at all. The BTB base above has foam rings or rubber rings, the capacitors and small parts are also treated with dispensing, and the microphone is integrated in the small board on the left side.
The vibration unit is very thin, fixed by adhesive, and it uses the 0815 specification, which is 0.5mm thinner than the common motor of the same specification. The position of the microphone is equipped with a black foam ring, under the anti-dumb design, the pin insertion will not damage the microphone.
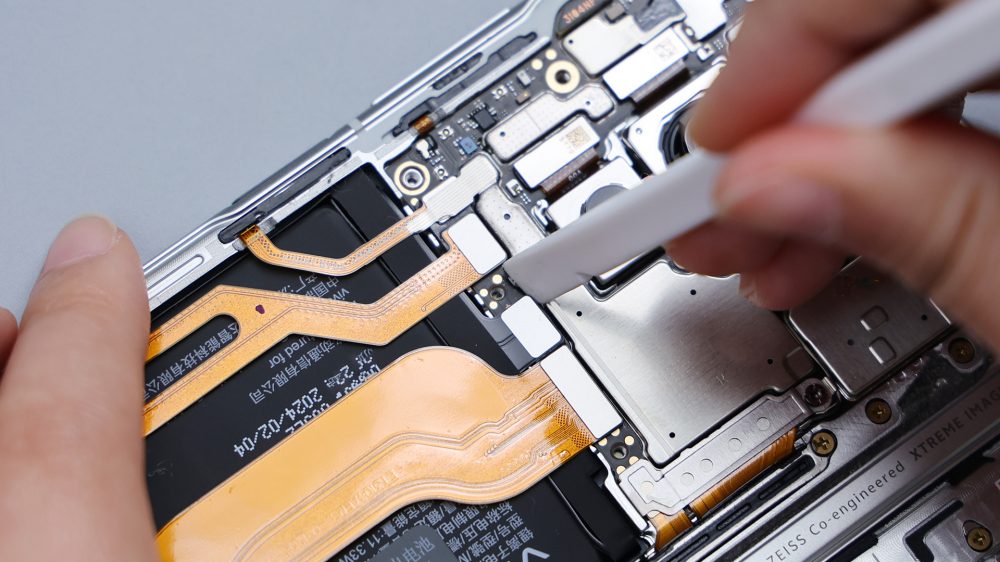
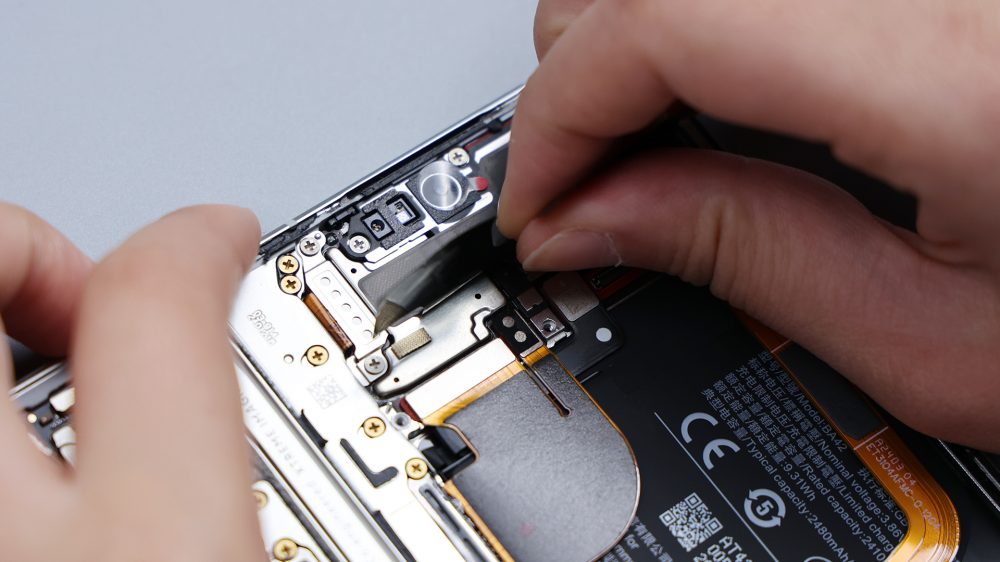
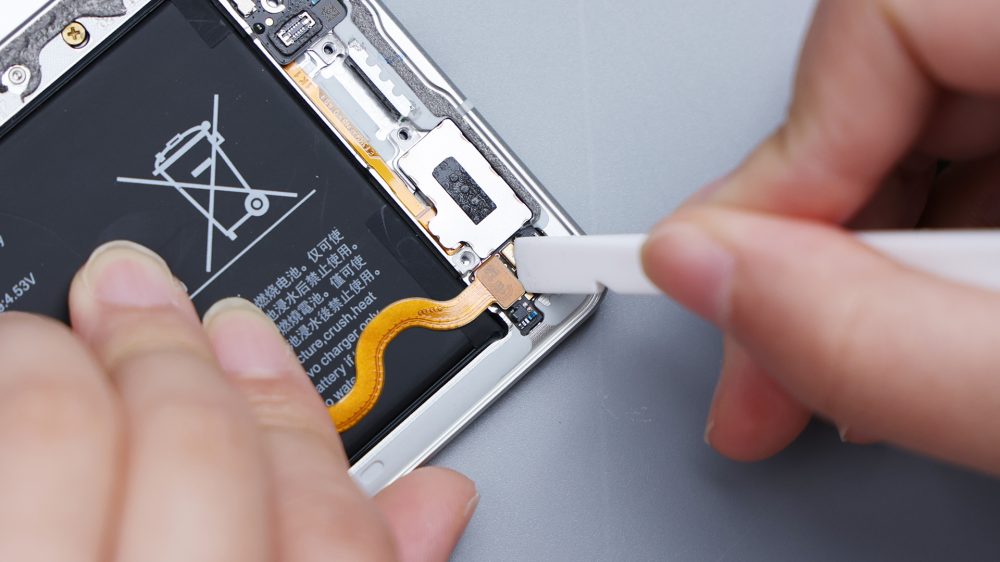
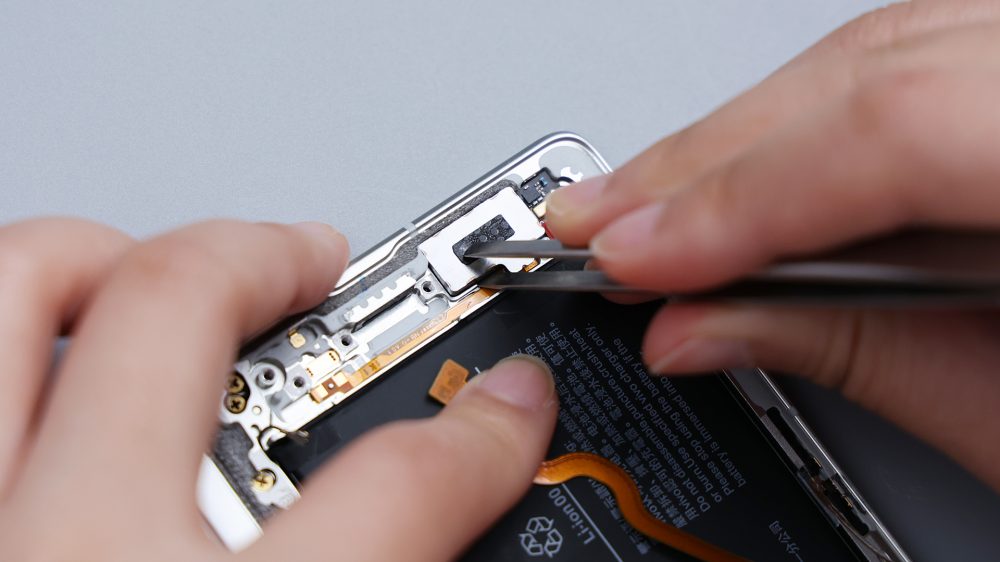
Most of the work on the left side is done, following the right side, which is mainly used for assembling speakers. Unscrew the 2 fixing screws on the upper left, remove the metal baffle, and disconnect the BTB of the screen.

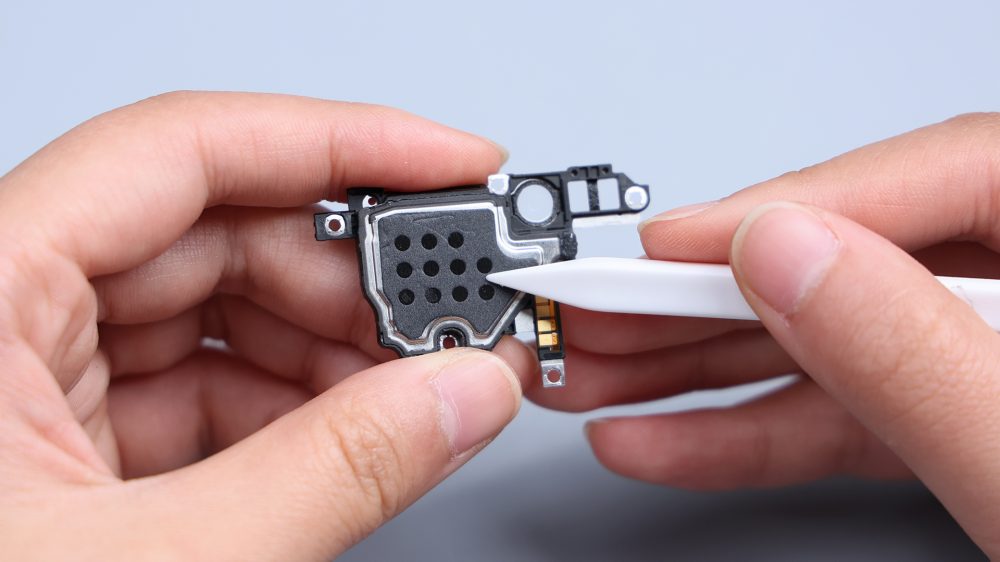
Then remove the screw to fix the upper speaker and pry out the speaker. It also has the responsibility of a little cover plate. Although the area is small, it still covers the front environment light sensor and distance sensor, as well as the front lens of the outer screen, which are equipped with buffer foam. The speakers, from Resound Technology, look very thin from the side and connect to the PCB through four contacts. There is a large area of buffer foam and heat dissipation film on the inside, and adhesive reinforcement near the screw holes.

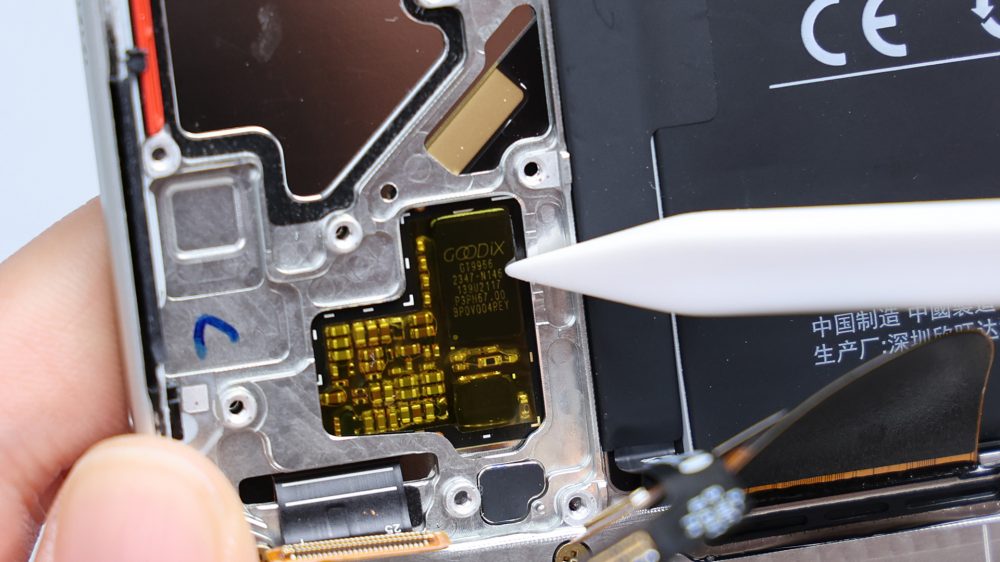
After prying up and taking out the PCB, there is a chip in the hollow area of the lower frame, which is the touch IC of the inner screen, from Huiding Technology, the model is GT9966, the same as the previous generation.
Disconnect the BTB of the front lens, at this time, the vivo X Fold3 front and rear five shots are all together.
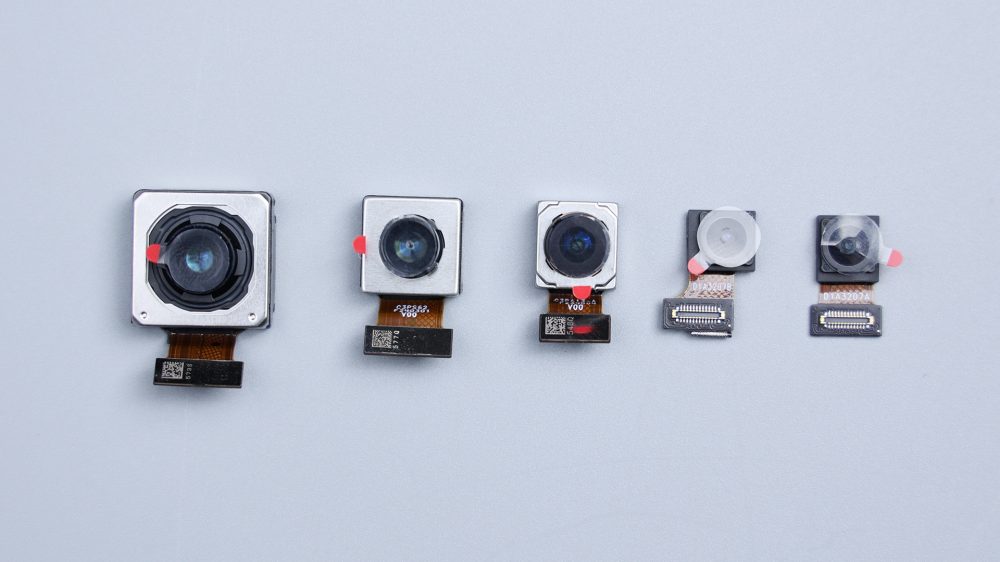
5000W pixel main camera, SONY IMX920 sensor, physical area 1 / 1.49 inch, actual imaging area 1 / 1.56, support OIS optical anti-shake and ultra-sensitive VCS bionic technology, aperture f / 1.75, equivalent focal length of 23mm.50 megapixel portrait lens, SONY IMX816 sensor, 1 / 2.93 inches, support OIS optical stabilization, aperture f / 1.85, equivalent focal length of 50mm.50 megapixel ultra wide Angle lens, Samsung JN 1 sensor, 1 / 2.76 inch, aperture f / 1.85, equivalent focal length of 15mm. Both front lenses are 32 megapixels, 1 / 3.6 inch, and support pixel aggregation technology.
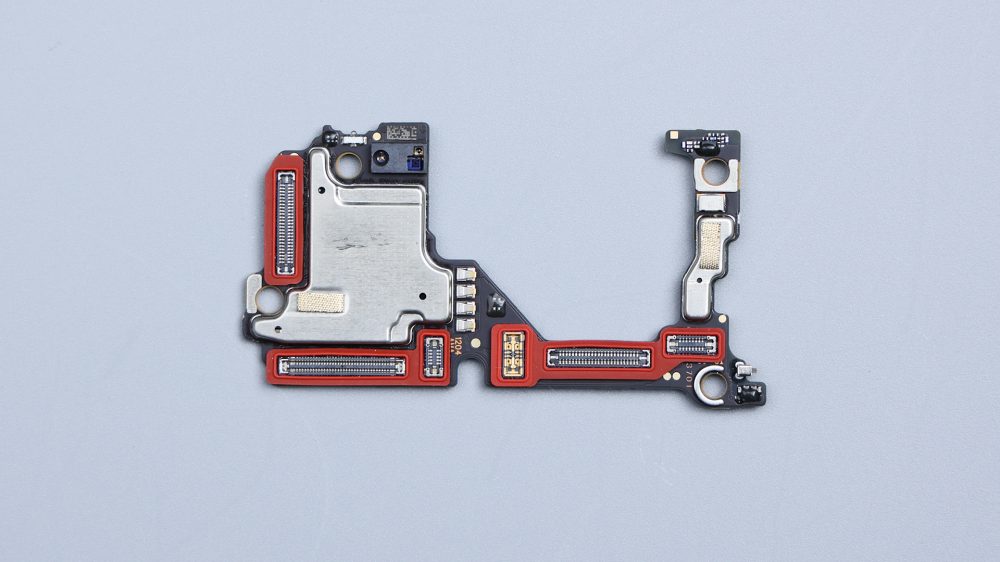
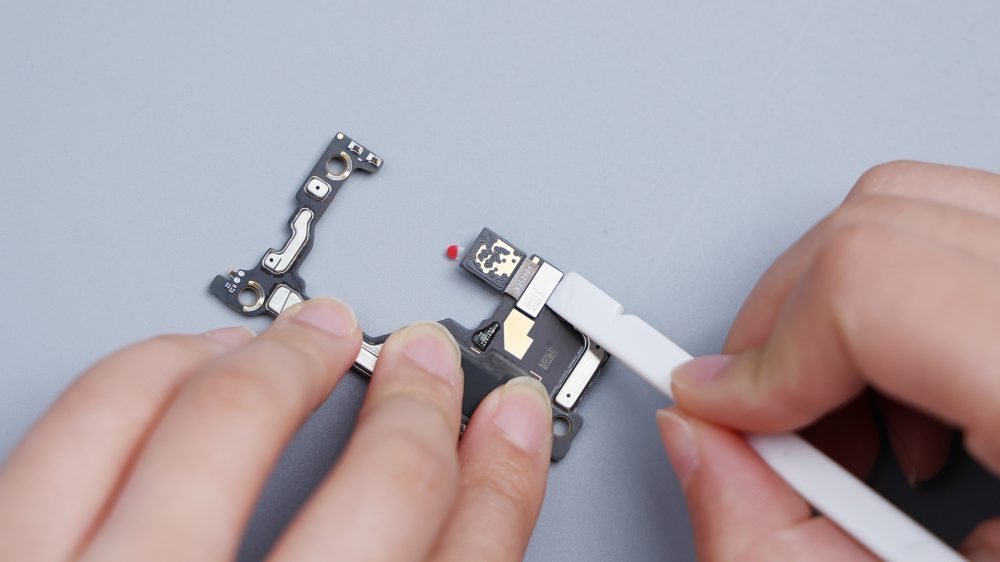
Because to place the speaker, this PCB also lacks half of the area, side A all BTB base are set with red rubber ring, infrared is located in the upper left, next to the front environment light sensor and distance sensor, the surrounding small capacitor are done dispensing treatment, and the left and right each has a thick conductive cloth. The BTB base of side B is equipped with foam rings, and there is a layered cooling film + foam mat below, and the surrounding capacitor is also point with glue.

Tear off the heat dissipation film of the bottom speaker, remove all the fixing screws, and take out the SIM slot, which is integrated into a PCB and connected to the top PCB through the FPC. The slot is very thin, and the next capacitor is connected with glue.
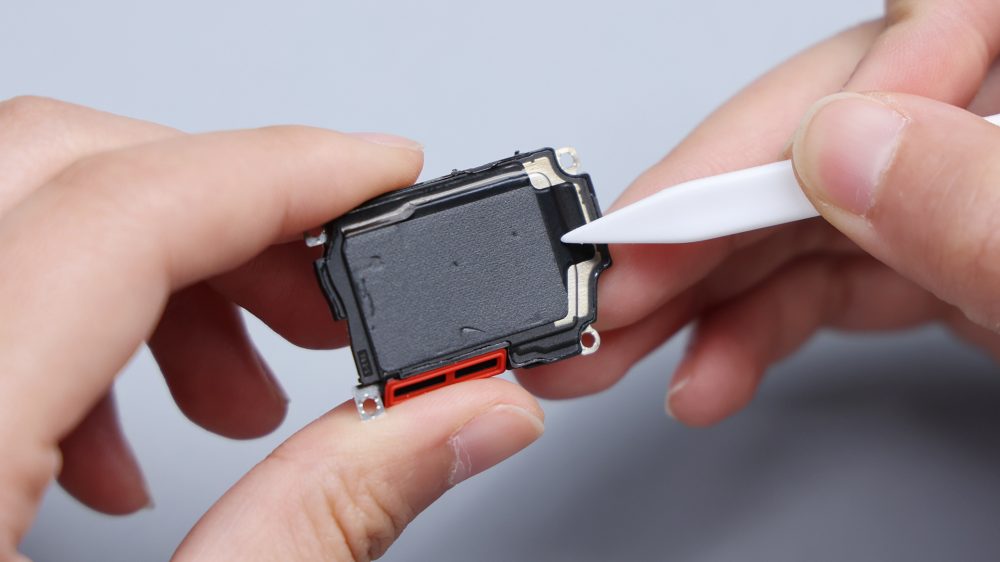
The bottom speaker is also from Resound Technology, and the specifications are the same as the speaker, forming a symmetrical stereo double Yang combination. It also adopts an ultra-thin design, connects the PCB through two contacts, the inside is stacked with cooling film + buffer foam, and the bottom is equipped with a red closed rubber ring.
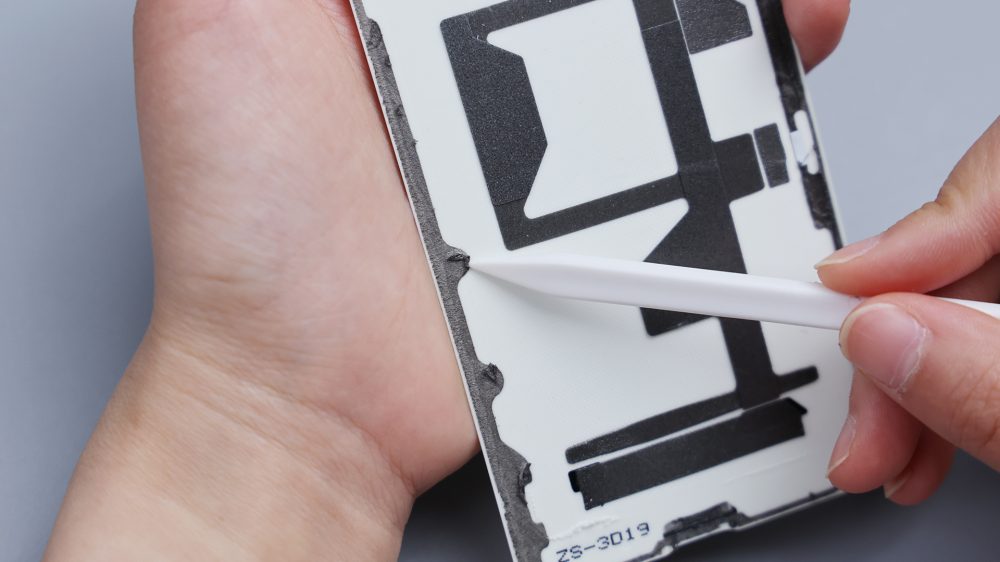
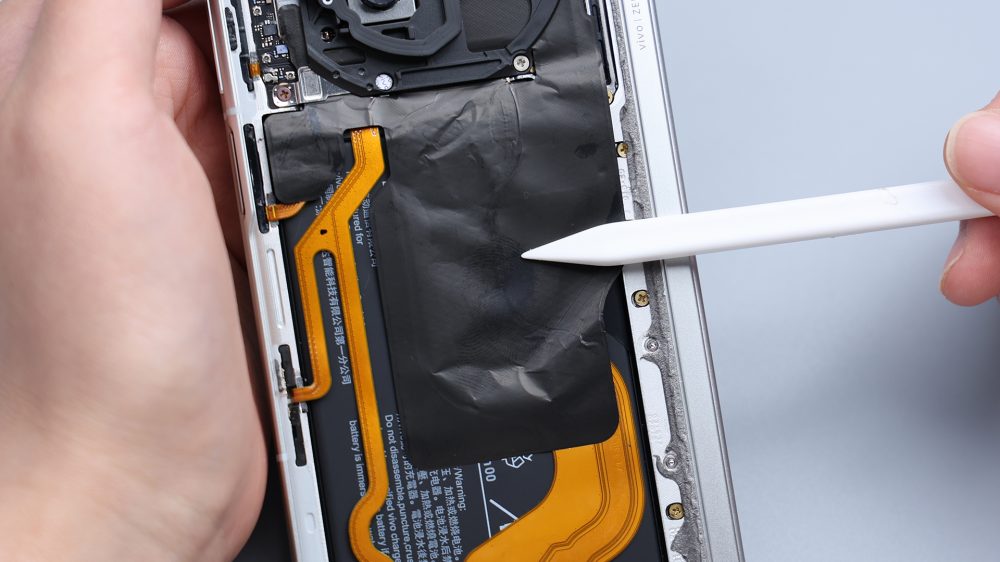
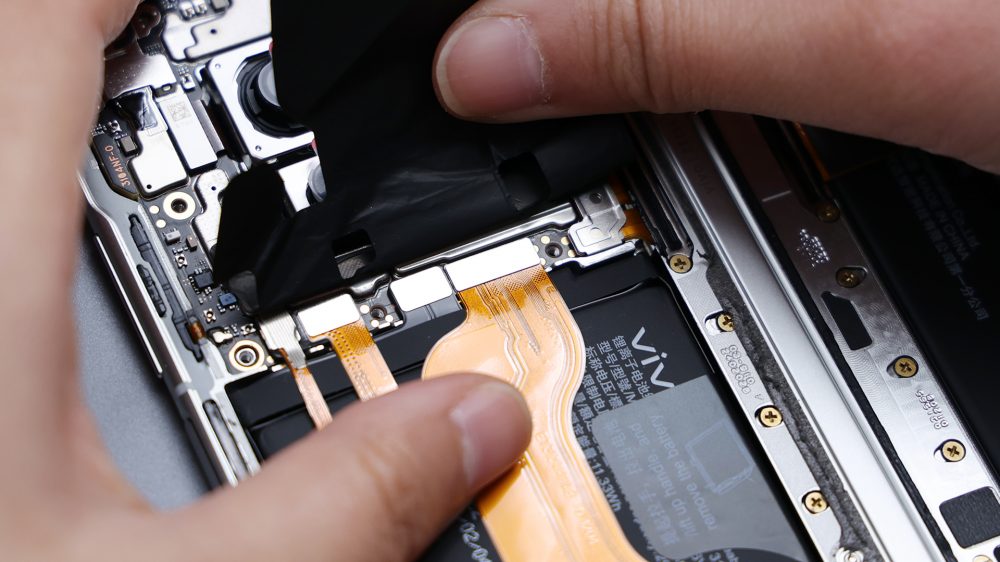
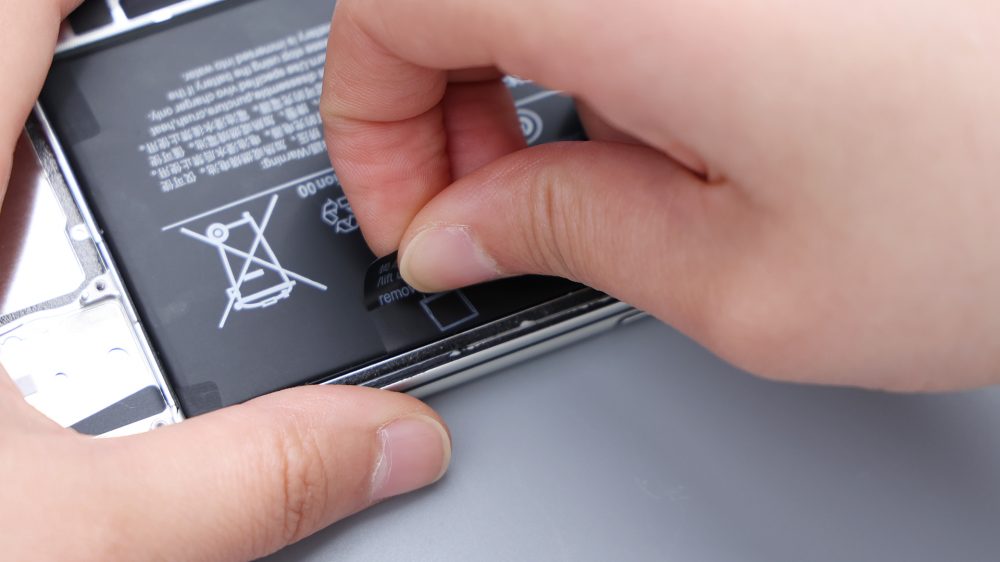
Both batteries are fixed by one side easy to pull glue. Open the tape according to the diagram. The battery is fixed very firmly, and it needs to use more force upward to remove it.
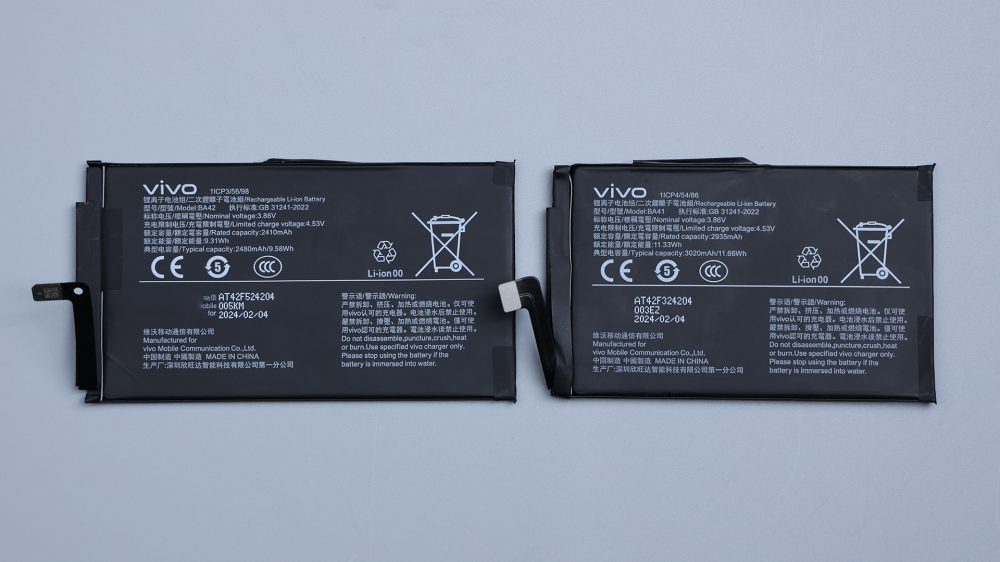
They are different in sizes, the one on the left is smaller and the one on the right is bigger. But, interestingly, the smaller capacity is larger, reaching 3020 mAh, while the larger capacity is only 2480 mAh.After comparison, I found that their thickness is also different, the larger capacity is nearly twice as thick, so it is sense. The X Fold3 battery equivalent total capacity is 5500 mAh and supports 80W wired fast charging. The black parts of the battery compartment are viscose, look at their area and distribution to see why it is difficult to remove.
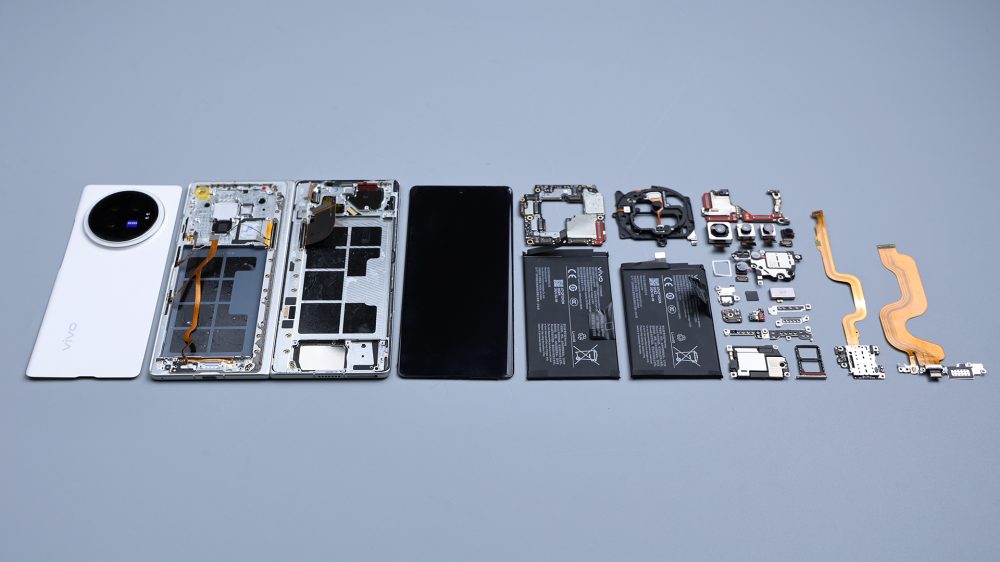
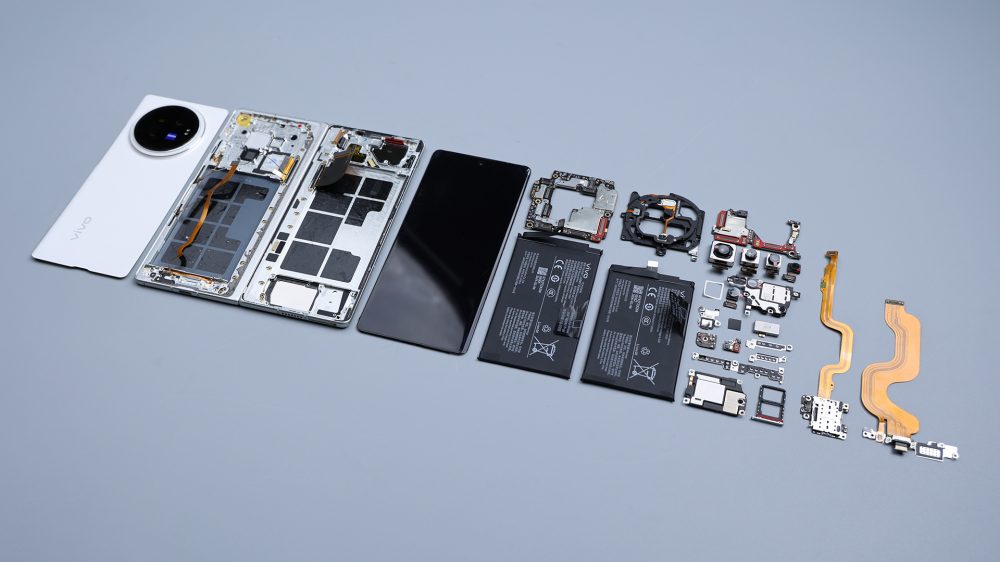
Here, the vivo X Fold3 disassembly is basically complete. Compared to the previous generation, its changes are still quite a lot, the most intuitive is the thickness and weight, which can be called "hot and boiling hot type thin body". The SIM Cato was changed from the laminate scheme to the side-by-side scheme.

The back cover was changed from plain leather and glass to thin plastic. The DECO lining is thin, compressed and embedded, the position of the outer frame glass round hole is adjusted, the large holes are reduced from 4 to 3, the empty position is filled by the Zeiss LOGO, along with multiple sensors around the camera. Fingerprint recognition is changed from internal and external double ultrasonic combination scheme to side fingerprint. Outer screen touch IC, changed from GT9916S to GT9916R. The heat dissipation film area of the left battery is reduced by more than half, and the previous generation has achieved complete coverage. The battery on the right side is missing a layer of foam pad, and the previous generation was originally full. Up and down two speakers, the thickness is further compressed. The flash interface is changed from a separate cover plate + a separate connection to the inside of the cover plate. In addition to the LED beads, ambient light sensor and laser focus module, a noise reduction microphone is added to the PCB. The NFC coil is no longer a single piece, but integrated into the outer frame of the cover plate. The cover area of the motherboard is reduced, only the lens area is retained, and the arc uplift is made. At the same time, the large area of metal plate sandwich is removed, and the wireless charging function and the corresponding coil are cancelled. The upper speaker area cancels the overall cover plate, and the speaker is directly embedded in the hollow position of the PCB, and a small amount of extension covers the ambient light sensor and distance sensor, and plays a certain limit role. The RF lines were reduced from two to one, and the line diameter was also thinner. The motherboard and other PPBs were reduced in size, integration was further improved, and the rear microphone was moved from the motherboard to the flash FPC. The RAM supplier changed from magnesium to Samsung, the vibration unit from Z axis motor to X axis motor, and the Type C interface from auxiliary board integration to FPC direct connection. The inner screen ambient light sensor is reduced from 2 to 1, and the assembly is changed from independent embedding to motherboard B-plane integration. The battery becomes thinner, the total capacity increases, the left and right two pieces are no longer evenly distributed, but changed to one large and one small, the cell density is further improved, and the wired fast charging is reduced from 120W to 80W. The outer screen has been changed from Samsung E6 to BOE Q9 +, and the inner screen has been upgraded from Samsung E6 to Samsung E7.
After a review, it is not difficult to find that the core concept and design idea of X Fold3 is to have a wave of "extreme slimming", the pursuit of "thin" priority higher than performance and image system. Most of the changes mentioned above are for "slimming", and their combination eventually creates the X Fold3's extremely thin body, greatly improving the grip and handling experience of the foldable phone. If I had to pick one in X Fold3 and X Fold3 Pro as the main machine, I would choose the former. Although the configuration of X Fold3 is slightly weaker than that of the latter, the comprehensive performance can fully meet the daily needs of most users. With a long time and high frequency use, the advantages of thickness, weight and grip feel make the perception difference far more obvious than the poor performance.

As usual, the end is about a dismantling topic, and this issue is about the two touch IC used on the X Fold3. Among them, the outer screen is GT9916R, which is also an old face, which has been widely used in vivo phones, such as X100 Pro, X90 and X90 Pro use GT9916R. In addition, Redmi K60 Supreme and Red Devil 8 Pro also use this touch IC.
The inner screen is equipped with GT9966, the same as X Fold2. Previously, Huawei's foldable flagship Mate X3 also used GT9966.
In fact, this situation is also expected, is not this generation of products temporary intention, but inherited the legacy of the previous generation, after all, the X Fold2 is also used on the Shuanghui top IC combination. As to why not use new IC, guess should be out of the consideration of product positioning.