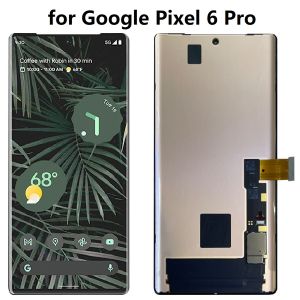
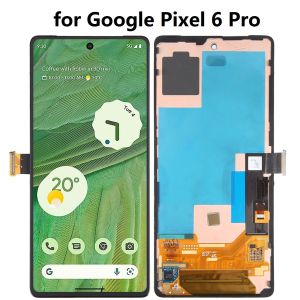
Use this guide to replace a cracked or broken screen on your Google Pixel 6 Pro.
Your new replacement screen will come with the fingerprint reader already attached. If not, you will need to reinstall the original fingerprint reader to your new replacement screen. If you are replacing the fingerprint reader, you will need to recalibrate the reader to maintain its functionality.
If the frame is deformed, it's important to replace it to make sure the new screen will mount correctly and won’t suffer damage from uneven pressure.
If your battery is swollen, take appropriate precautions. Before disassembling your device, discharge the battery below 25%. This reduces the risk of a dangerous thermal event if the battery is accidentally damaged during the repair.
Caution: The Pixel 6 Pro contains class 1 lasers. Disassembly could result in exposure to invisible infrared laser emissions.
Retaining water resistance after the repair will depend on how well you reapply the adhesive, but your device will lose its IP (Ingress Protection) rating.
Before you begin this procedure, be sure to have a set of replacement adhesives for both the rear glass and the screen.
Step 1 Loosen the display adhesive
![]()
Before you begin, power off your phone. Press and hold the power and volume up buttons for a few seconds, then tap "power off" on your screen.
Apply a heated to the screen to loosen the adhesive underneath. Apply the heater for at least 3 minutes.
A hair dryer, heat gun, or hot plate may also be used, but be careful not to overheat the device.
Step 2 Anti-Clamp instructions
![]()
The next two steps demonstrate the Anti-Clamp, a tool we designed to make the opening procedure easier. If you aren't using the Anti-Clamp, skip down two steps for an alternate method.
For complete instructions on how to use the Anti-Clamp, check out this guide.
Pull the blue handle towards the hinge to disengage opening mode.
Position the suction cups near the bottom edge of the phone—one on the front, and one on the back.
Push down on the cups to apply suction to the desired area.
If you find that the surface of your device is too slippery for the Anti-Clamp to hold onto, you can use packing tape to create a grippier surface.
Step 3
![]()
Push the blue handle away from the hinge to engage opening mode.
Turn the handle clockwise until you see the cups start to stretch.
Make sure the suction cups remain aligned to each other. If they begin to slip out of alignment, loosen the suction cups slightly and realign the arms.
Wait one minute to give the adhesive a chance to release and present an opening gap.
Insert an opening pick under the screen frame when the Anti-Clamp creates a large enough gap.
If the Anti-Clamp doesn't create a sufficient gap, apply more heat to the area and rotate the handle clockwise half a turn.
Don't crank more than a half a turn at a time, and wait one minute between turns. Let the Anti-Clamp and time do the work for you.
Step 4 Insert an opening pick
![]()
Once the screen is warm to the touch, apply a suction handle to the bottom edge of the screen.
If your screen is badly cracked, covering it with a layer of clear packing tape may allow the suction handle to adhere. Alternatively, very strong tape may be used instead of the suction handle. If all else fails, you can superglue the suction handle to the screen.
Lift the screen including its safety frame with the suction handle to create a small gap between the screen and the phone assembly.
Insert an opening pick into the gap between the screen frame and the phone assembly.
Make sure to insert your opening pick in the right position to avoid separating the screen from its safety frame instead of the phone assembly.
Slide the opening pick to the bottom left corner of the screen to slice its adhesive.
Leave the opening pick in place to prevent the adhesive from resealing.
Step 5 Slice the adhesive
![]()
Insert a second opening pick at the bottom edge and slide it to the bottom right corner of the screen to slice the adhesive.
Leave the opening pick in place to prevent the adhesive from resealing.
Step 6
![]()
The screen of the Google Pixel 6 Pro is not only held in place by adhesive but also small plastic pins. In case your opening pick gets blocked during the screen removal procedure it means you inserted your pick too deep underneath the screen. Only insert the tip of the opening pick (~3-4 mm) when slicing the display adhesive.
Insert a third opening pick underneath the bottom left corner of the screen.
Slide the opening pick along the left edge of the screen to slice the adhesive.
Leave the opening pick in the top left corner to prevent the adhesive from resealing.
Step 7
![]()
If the adhesive becomes hard to cut, it has most likely cooled down. Use your heat gun for 1-2 minutes to reheat it.
When you slice near the front facing camera, insert only the tip of the opening pick (~2-3 mm) to avoid damaging or smearing the camera.
Insert a fourth opening pick at the top left corner of the screen.
Slide the opening pick along the top edge of the phone to slice the adhesive.
Leave the opening pick in the top right corner to prevent the adhesive from resealing.
Step 8
![]()
Insert a fifth opening pick and slide it along the right edge of the phone to slice the remaining adhesive.
Do not try to remove the display all the way yet, the screen is still connected to the phone assembly.
Step 9 Open up the phone assembly
![]()
Avoid straining the display cable during the following procedure.
Carefully fold the screen to the left side of the phone assembly like you would open the front cover of a book.
Step 10 Unfasten the display bracket screw
![]()
Use a Torx T3 screwdriver to remove the 2.0 mm-long screw securing the display cable metal bracket.
Throughout this repair, keep track of each screw and make sure it goes back exactly where it came from.
Step 11 Remove the display cable bracket
![]()
Use a pair of tweezers to remove the metal bracket sitting on top of the display cable connector.
Make sure to keep this component to reinstall it during reassembly.
Step 12 Disconnect the display cable
![]()
Use a spudger to disconnect the display flex cable by prying the connector straight up from its socket.
Step 13 Remove the screen
![]()
During reassembly, apply new adhesive where it's necessary after cleaning the relevant areas with isopropyl alcohol (>90%).
Follow this guide if you're using custom-cut adhesives for your device.
Follow this guide in case you're using a pre-cut adhesive card.
If your replacement screen's display cable is held down by tape, remove the tape before installation.
Be sure to remove all adhesive liners from your replacement screen. Check the selfie camera recess and make sure you've removed the liner there.
During the boot-up process after reassembly, the screen will go through a calibration sequence. Do not touch the screen during this process, as it could result in improper touch calibration and create touch issues.
If installing a different fingerprint reader, you will need to recalibrate the reader before it will work.
CONCLUSION
If possible, turn on your device and test your repair before installing new adhesive and resealing.
To reassemble your device, follow these instructions in reverse order.
The best way to secure the new screen is to apply a sheet of custom-cut double-sided tape to the back of the screen.