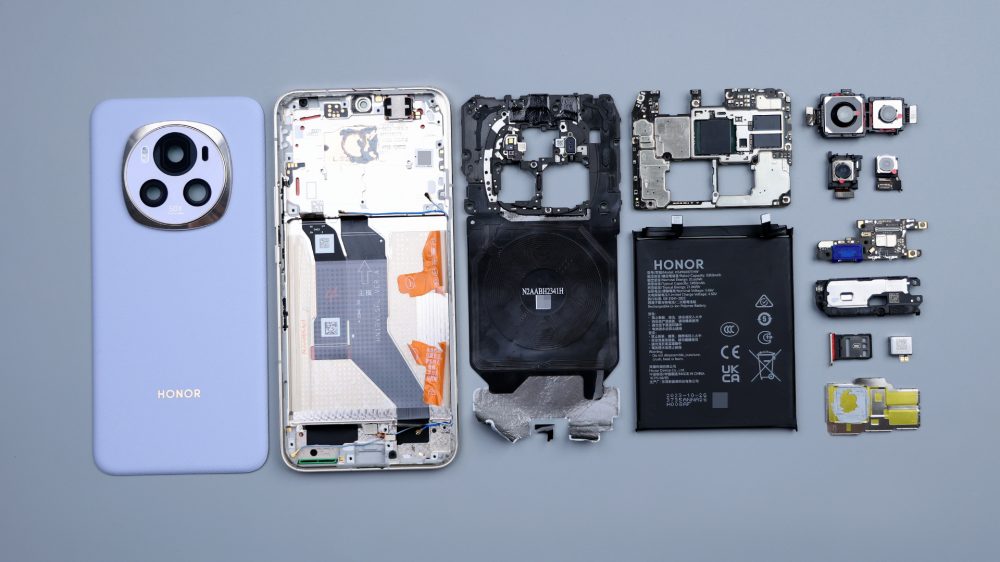
The protagonist of this dismantling, it is the Honor has just released Magic6, it is also the main product of Honor, with the previous dismantling of OPPO Find X7, we still want to go through the standard version, to see what kind of quality foundation this new series of products, what level of materials and workmanship is, and what kind of internal structure is.
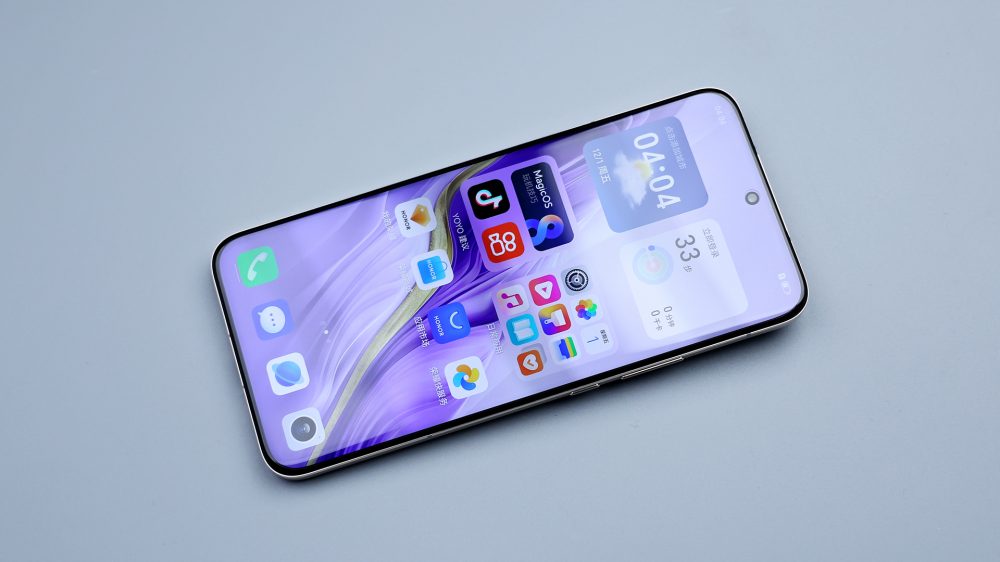
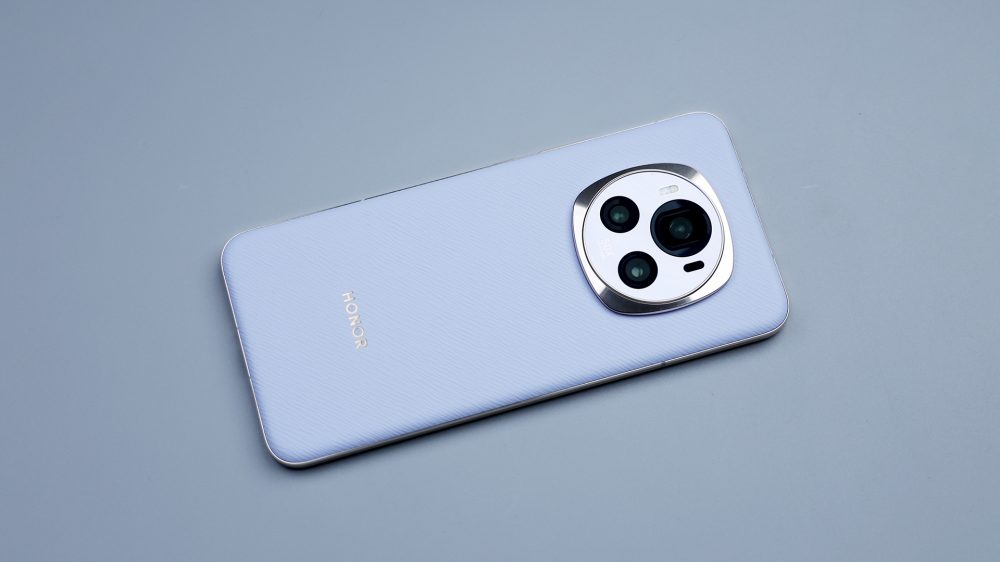
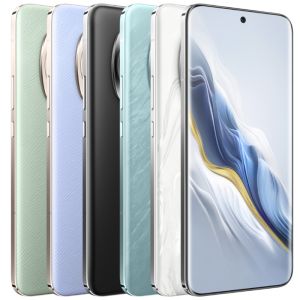
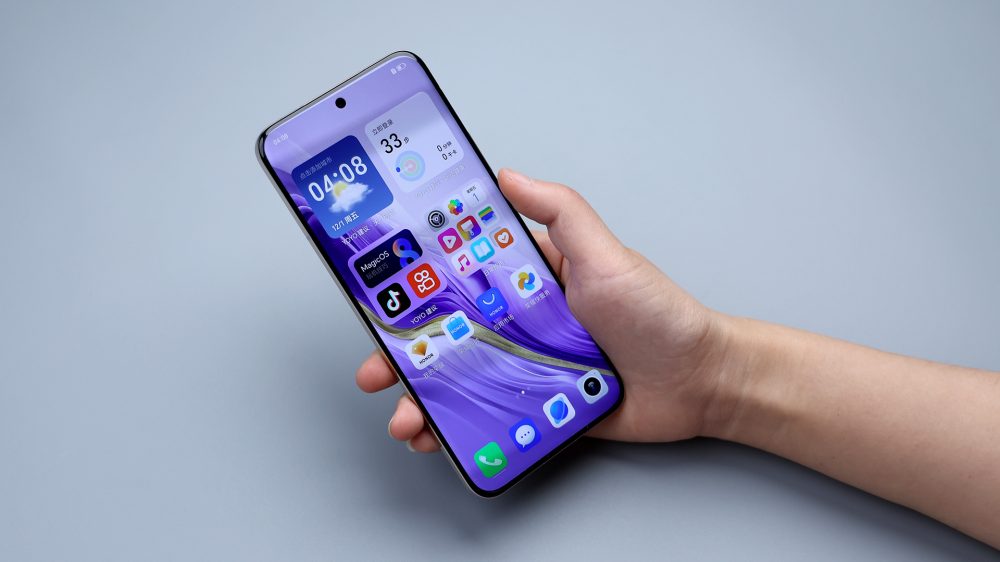
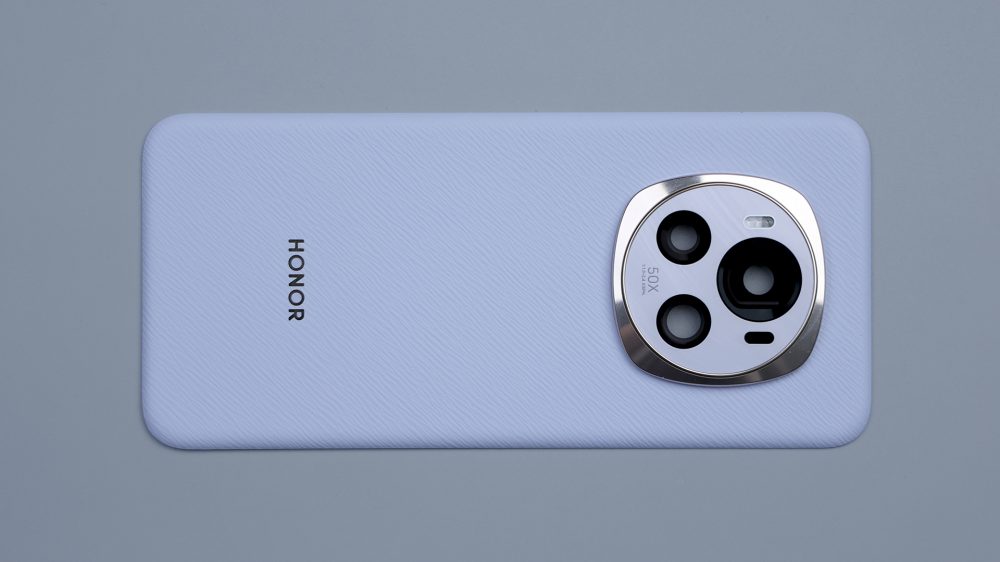
The Honor Magic 6 has a brand new design, and if you look at the exterior alone without talking about the model number, it's hard to find anything from its predecessor. The shape of the fully symmetrical iso-depth micro-curved screen + quad-curved closing arc back cover is a bit special for the first time on the hand, and the phone is very thin, but not light, not that kind of absolute sense of weight, but the middle frame has a high proportion of the total weight, which increases the local force.
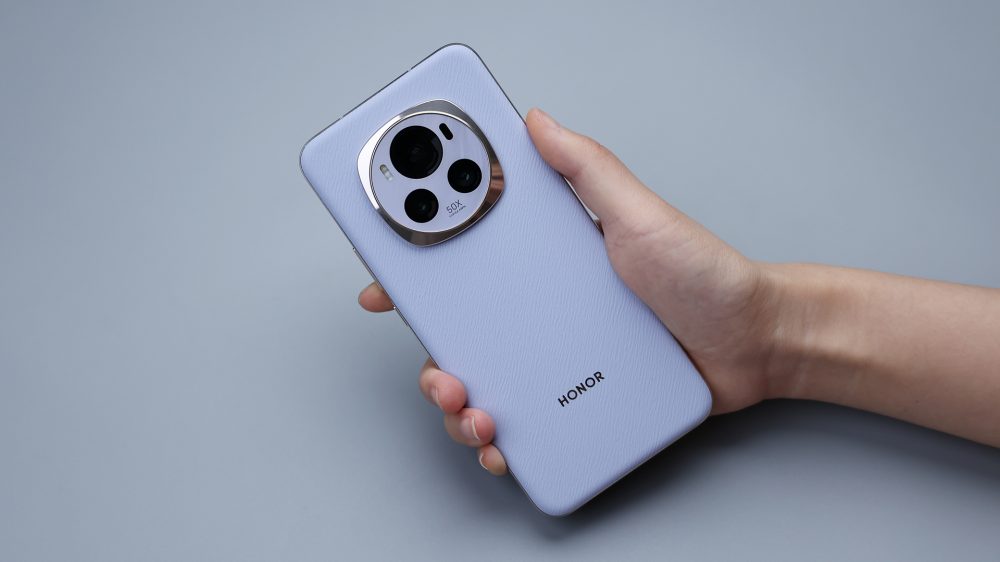
The reason for this is that the Magic 6 is only 8.1mm thick, and this "thin" feeling is very uniform. The good thing is that the overall curved lines, combined with the vegan leather back cover, make it a good fit and comfortable to hold in the hand.
The bad thing is that the "thin" and "weighty" together, but also rounded shape and smooth frame support, so that the grip becomes less confident, always feel that, without a protective case, the phone will slide out of the hand. One detail I like is the texture of the back cover, which is different from the usual plain leather, with a bit of paper texture and folds, which also brings differentiation to its appearance.
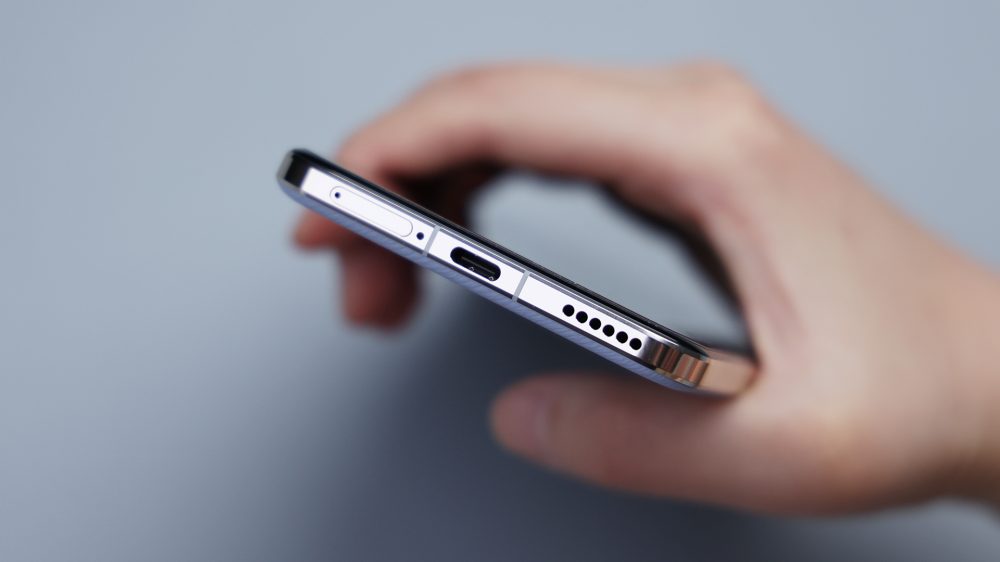
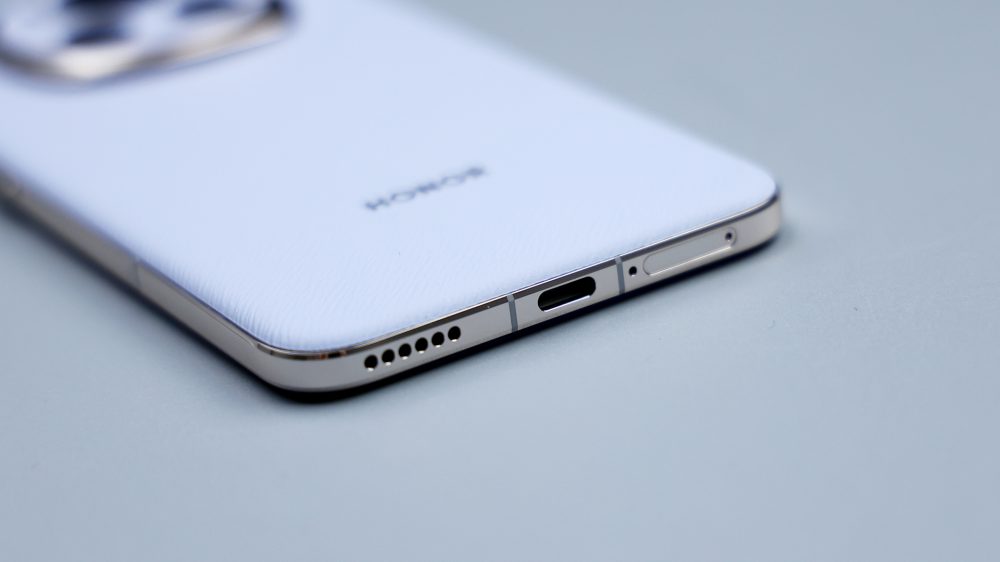
Here's how to start disassembling, after turning off the phone, take out the SIM card tray at the bottom, the common metal bezel + plastic frame combo, with a red rubber ring used to enhance the airtightness.

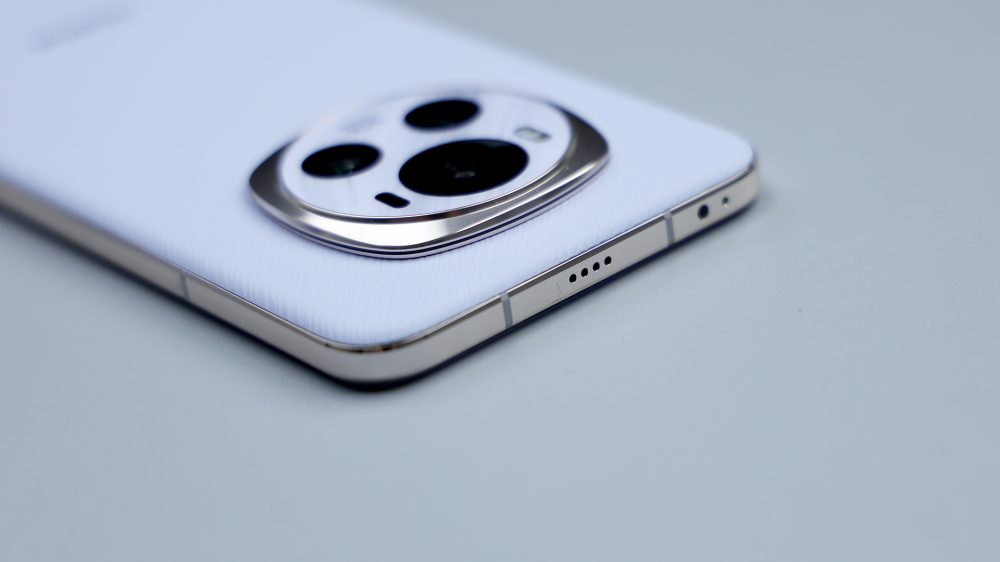
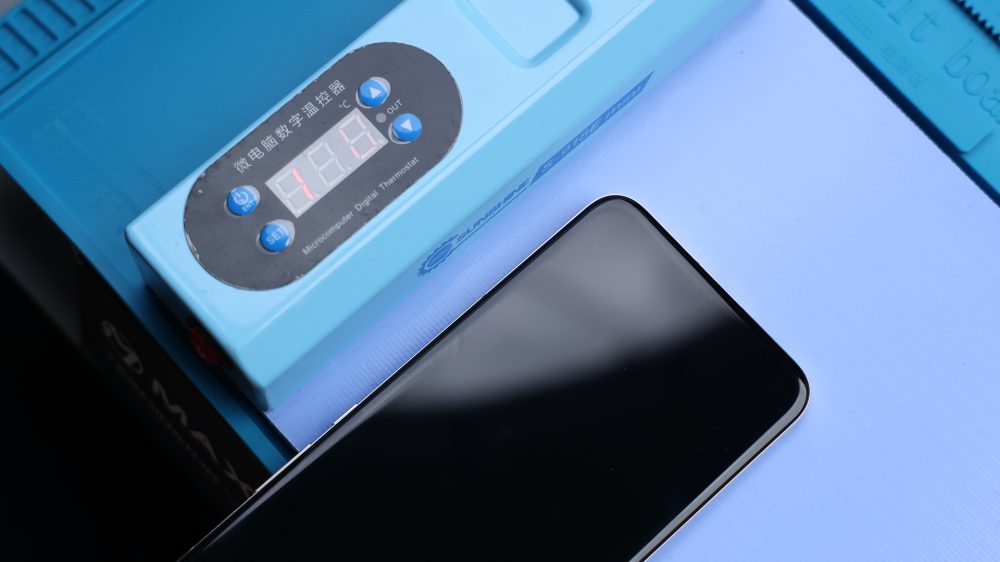
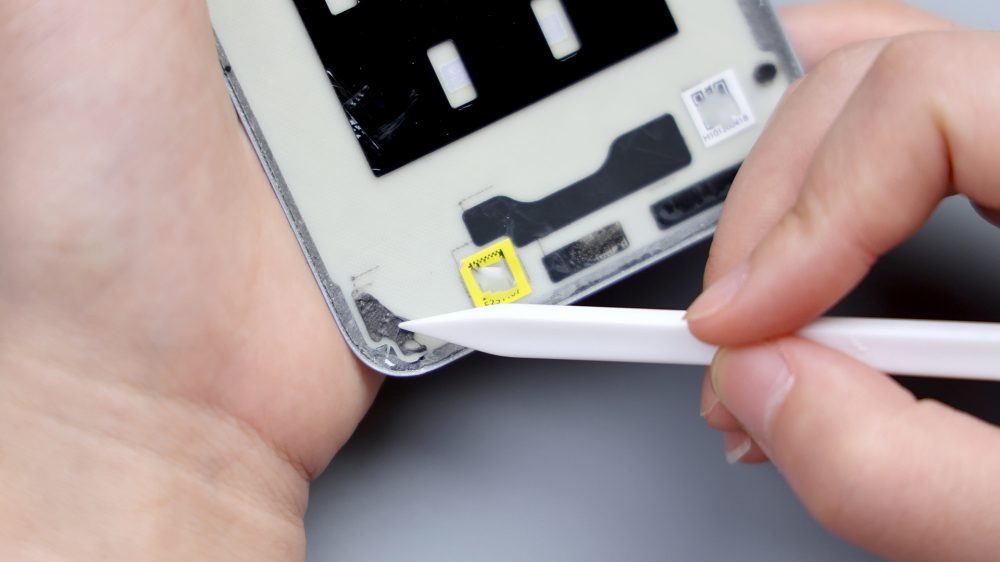
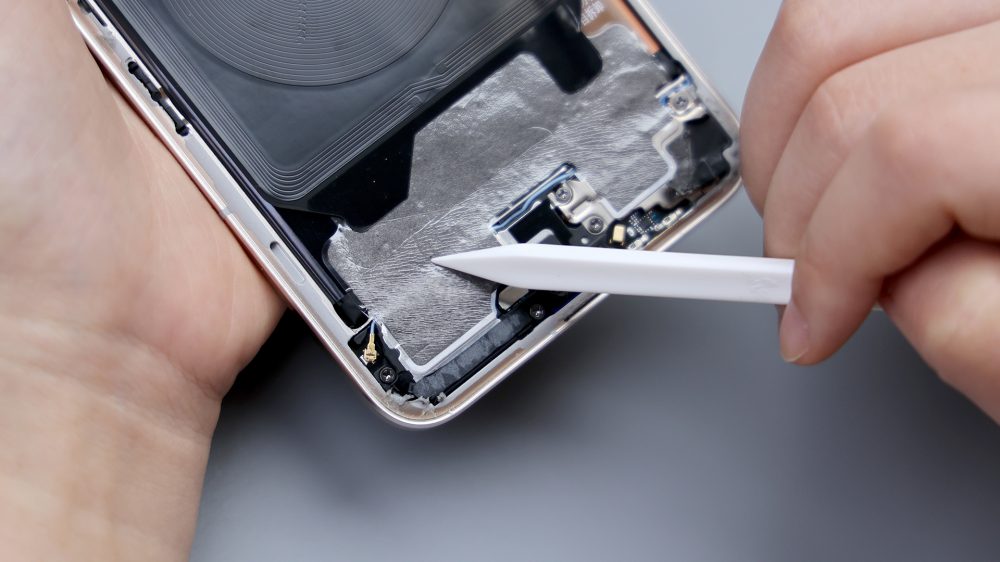
Magic6's camera module also protrudes significantly, so you can only heat the flat lower and middle part of the back cover first, with the temperature set to 100 degrees for 3 minutes. Quad-curved closing arc back cover, bringing a better fit and sealing, inwardly closed back cover, tightly buckled around the center frame, the outer edge of a circle of metal chamfer, slightly higher than the edge of the back cover, forming a kind of diagonal downward embedded effect, resulting in the combination of the gap is very small, commonly used plastic warps can not be inserted, you can only choose to be thinner, and with a very high degree of flexibility of the metal warps to open the way.
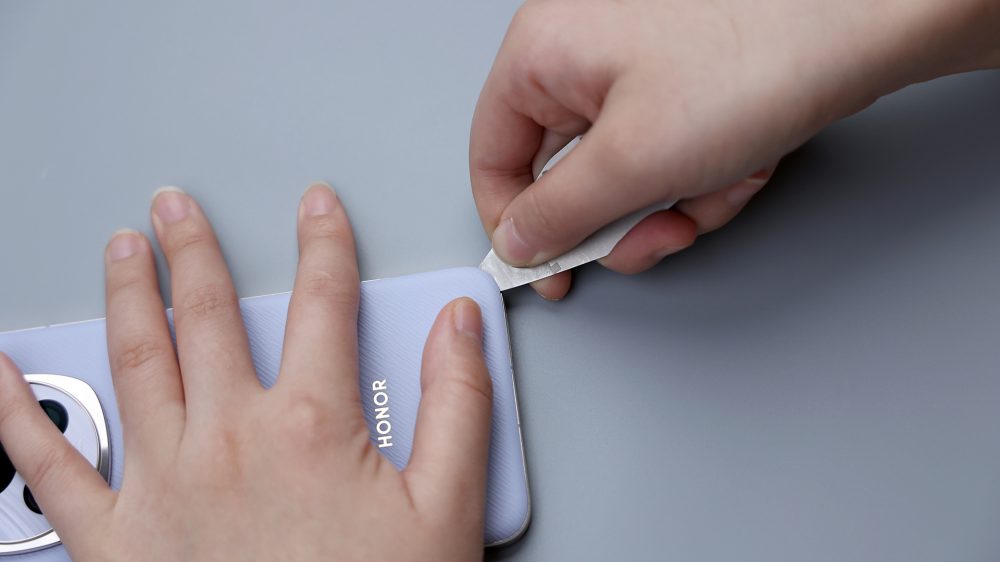
Here again reflects the benefits of uniform thickness of the metal frame, warming significantly, uniform heat, and heat can be quickly transferred to the adhesive, so that the adhesive softened, thin metal warps sticking to the curvature of the edge of the back cover, it is very easy to insert the adhesive layer, and successfully open the breakthrough.
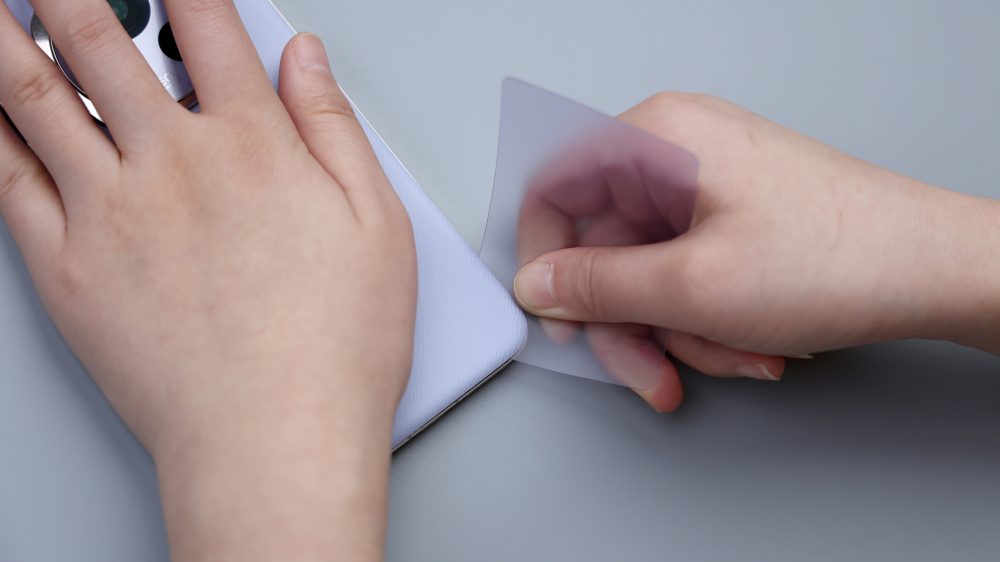
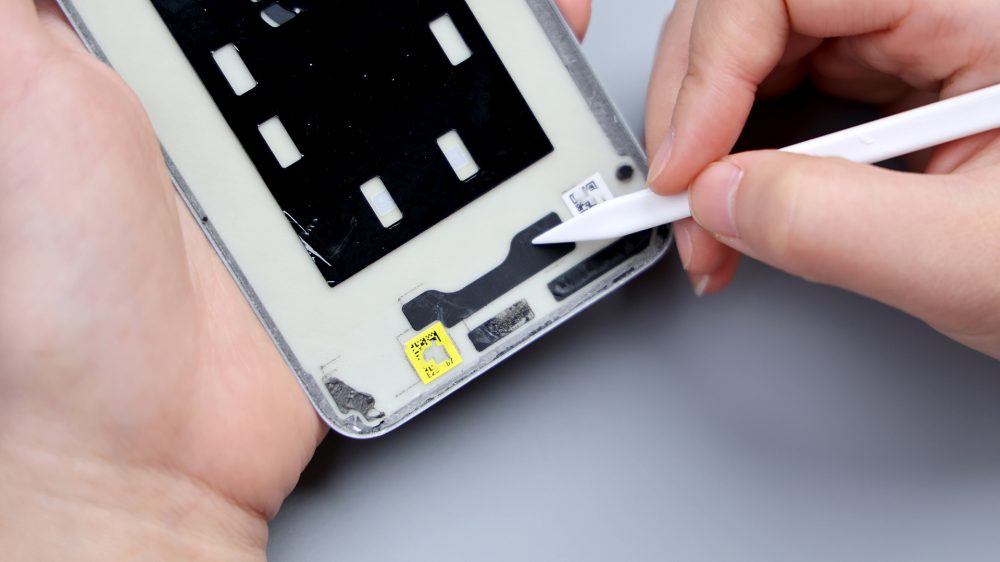
Magic6's back cover on this one difficult, the latter step is relatively simple, along the perimeter of a little forward, open a large enough gap on the replacement of the plastic thin warps, in addition to the corners of the slight resistance, most of the area is relatively easy to open the back cover very quickly. It may be that recently encountered the back cover are more difficult to remove, suddenly come to an easy, more or less still a little uncomfortable.

The overall structure of the back cover, similar to a number of flagships that have been disassembled recently, consists of two main parts: the entire plastic lining, which is equivalent to the main frame of the back cover, and the violet-colored pigmented skin on the outside. The inner outer edge of the back cover can be seen in a circle of gray adhesive, the left side of the slightly narrower, the right side of the relatively wide, it belongs to the kind of soft rubber, although it is easy to disassemble, can be adhesive strong enough, the back cover assembly is solid.
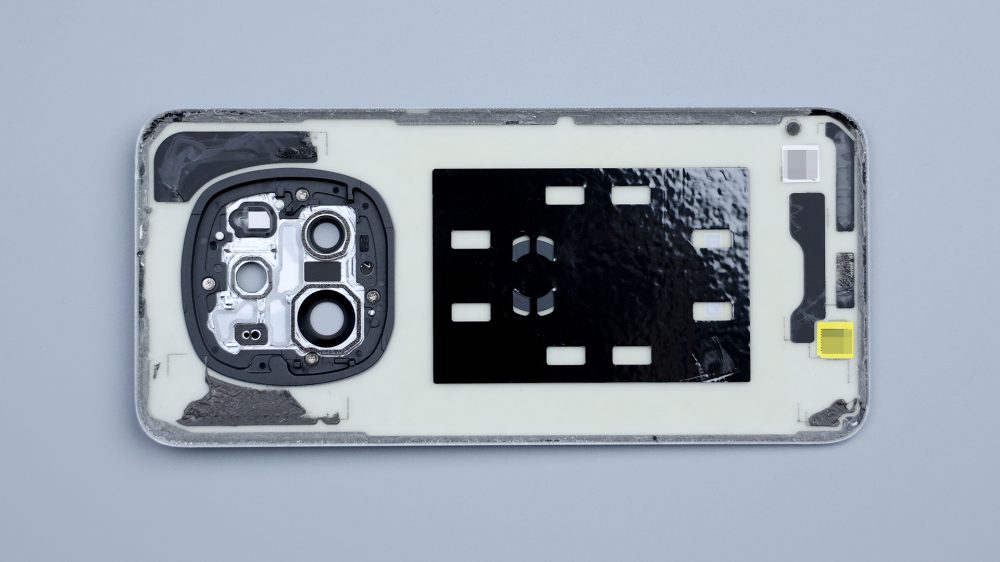
The top two corners, each has a piece of heat dissipation film, when removing because you can not see the interior, the metal pry piece also scratched one of the adhesive.
In the lower left corner and the lower center, there are also independent adhesive spots to help strengthen the back cover, and there are also two pieces of thermal film next to them.
The small round piece of foam in the lower right corner corresponds to the coaxial cable connector in the secondary board area, which serves as padding and cushioning to prevent the coaxial cable connector from disconnecting or falling off in case of dropping or dropping. A large piece of hollow foam in the center covers the entire battery area, providing corresponding protection for the battery and wireless charging coil.
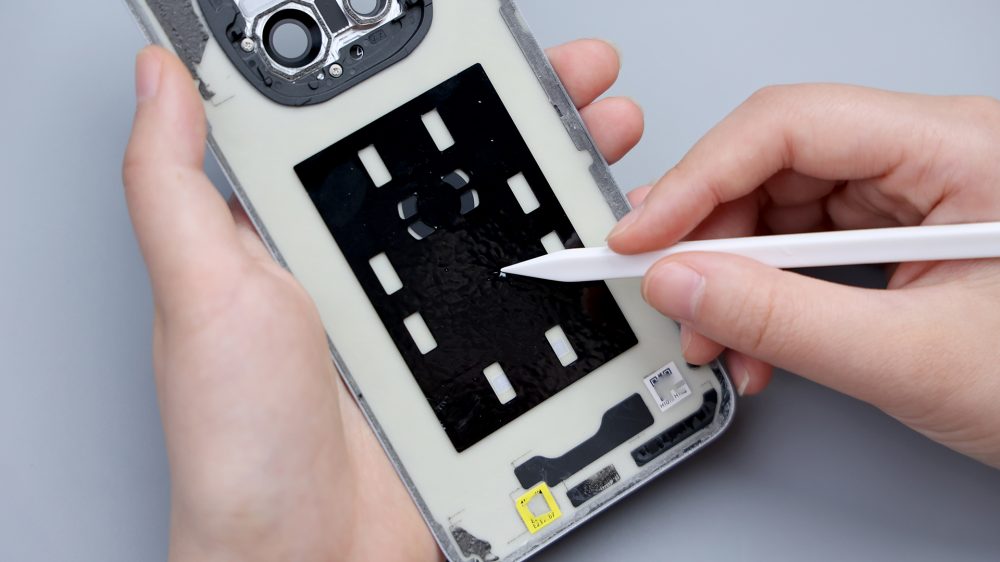
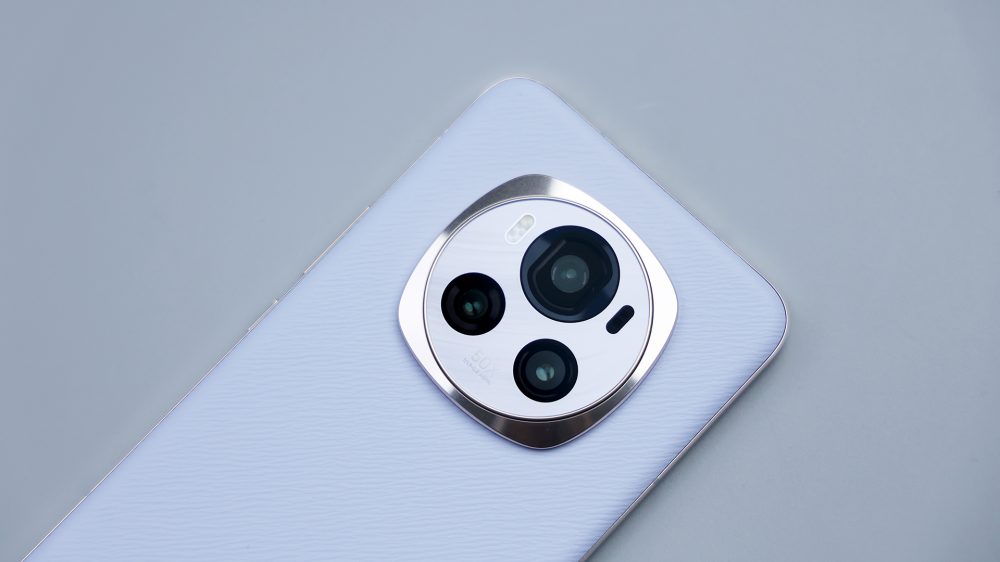
The DECO area features a structure popular with flagships these days, and it too consists of two parts, a metal lens bezel, and a black lining made of plastic. Only, the details are slightly different, most similar structure DECO, the lining is a whole piece, only the corresponding position of the lens open round hole, while Magic6 DECO lining most of the area is empty, only a similar rounded rectangle plastic circle remains.
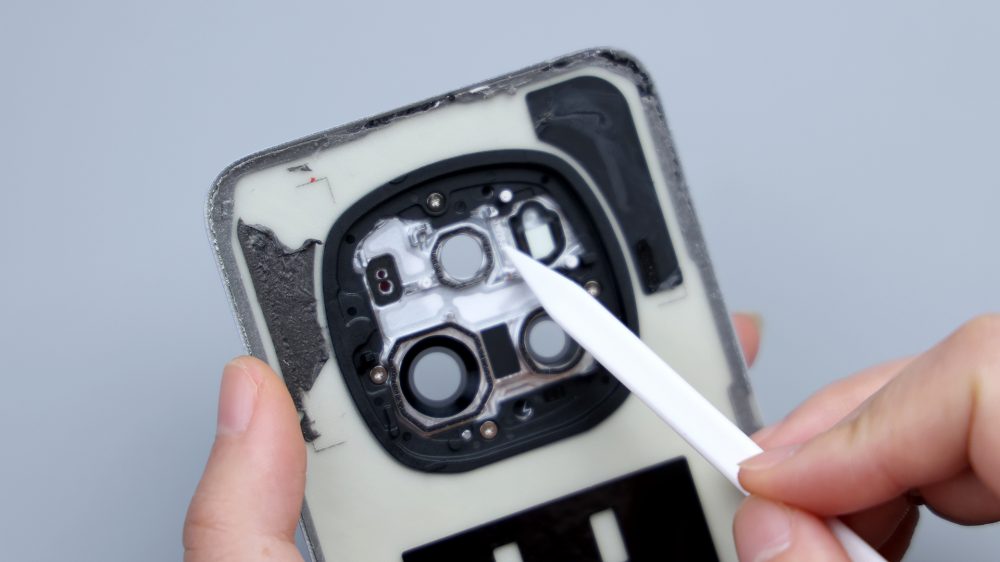
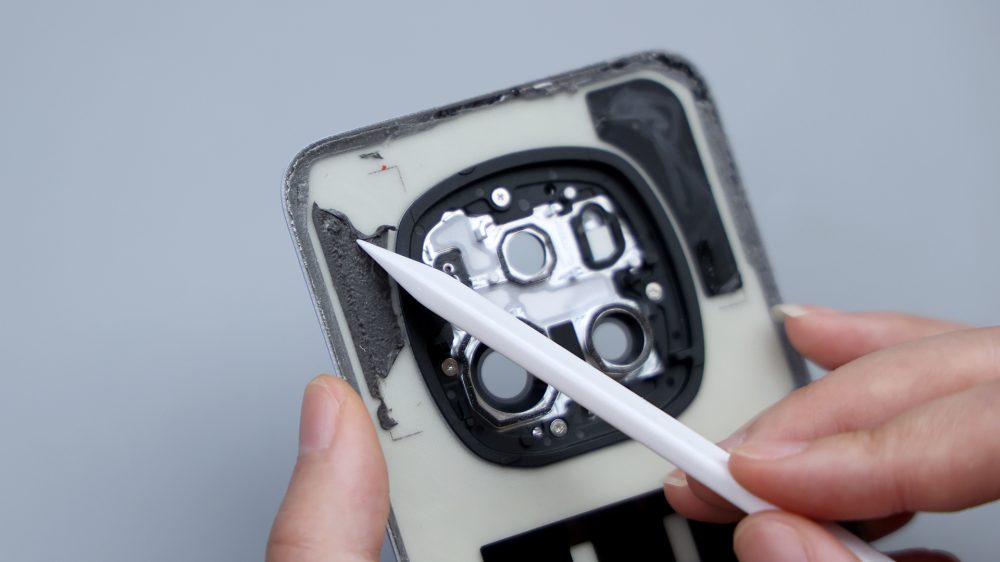
Judging from the bare metallic sheen, the outer frame should be made of aluminum alloy. The inner liner and outer frame, both of which are a circle larger than the DECO opening, where the inner liner is also made to bulge out and then embedded in the outer frame, are doubly secured by four screws and adhesive, while they both fit right through the opening and sandwich the back cover, which is equivalent to another layer of reinforcement for the DECO combo. There are also several metal and plastic limiting posts on the inside, so that the body of the phone can find their corresponding positions, which is also considered a form of reinforcement.
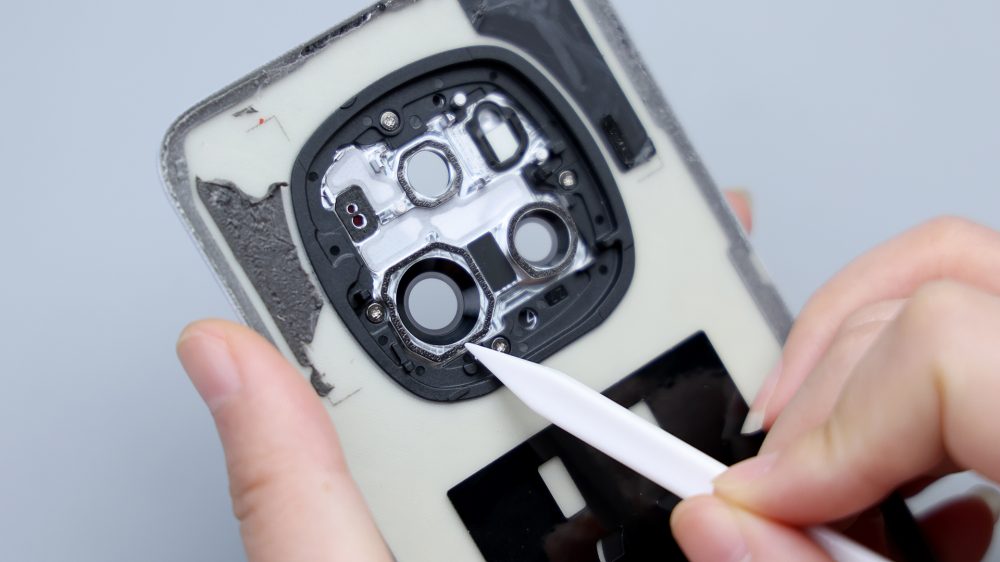
This makes a total of four reinforcements in the DECO area. The openings in the upper left corner correspond to the laser focus module, and the ones in the upper right corner correspond to the flash and ambient light sensor. All of the openings are positioned with foam rings to provide cushioning protection.
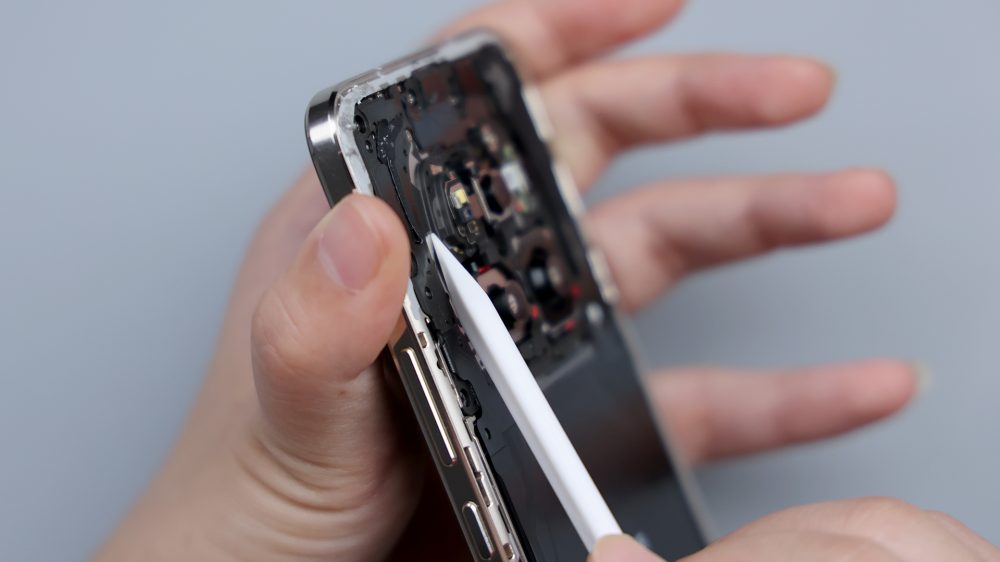
Probably because there are more components integrated in the rear camera area, it can look a bit more complicated.
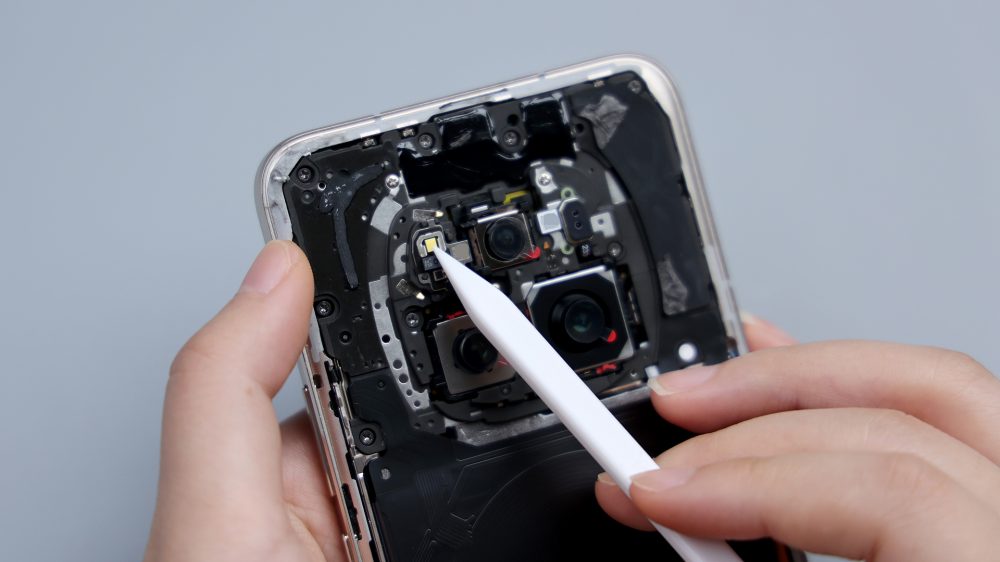
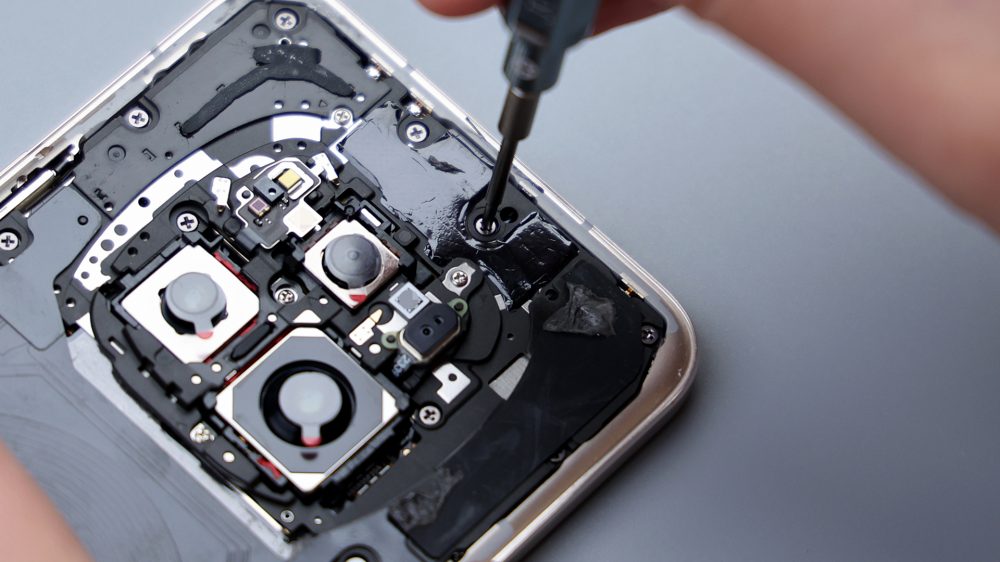
It also has a special structure and cover design, which can be seen from the side, similar to the Real Me GT5 Pro, the cover is also made with a rounded bulge, only it's not as exaggerated as the GT5 Pro. All three rear cameras have been retrofitted with anti-roll bars, which serve as a form of protection as well as padding and reinforcement. The exposed metal plate on the left side is a cover sandwich that aids in heat dissipation.
 >
>
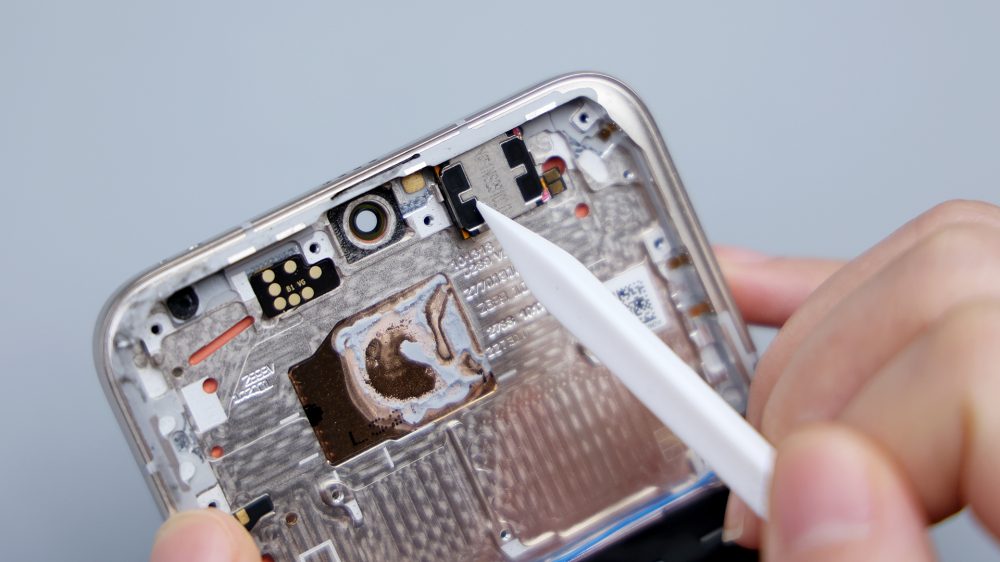
The flash is located in the upper left corner with a single LED bead configuration, below which is the rear ambient light sensor, the laser focus module is located in the upper right, and the metal shrapnel in the split spread is responsible for the antenna signal overflow.
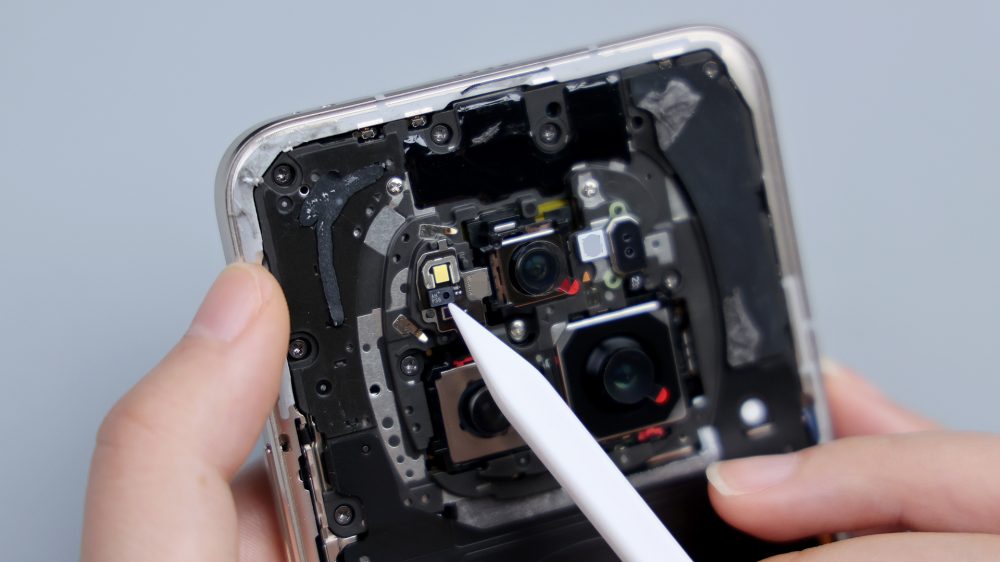
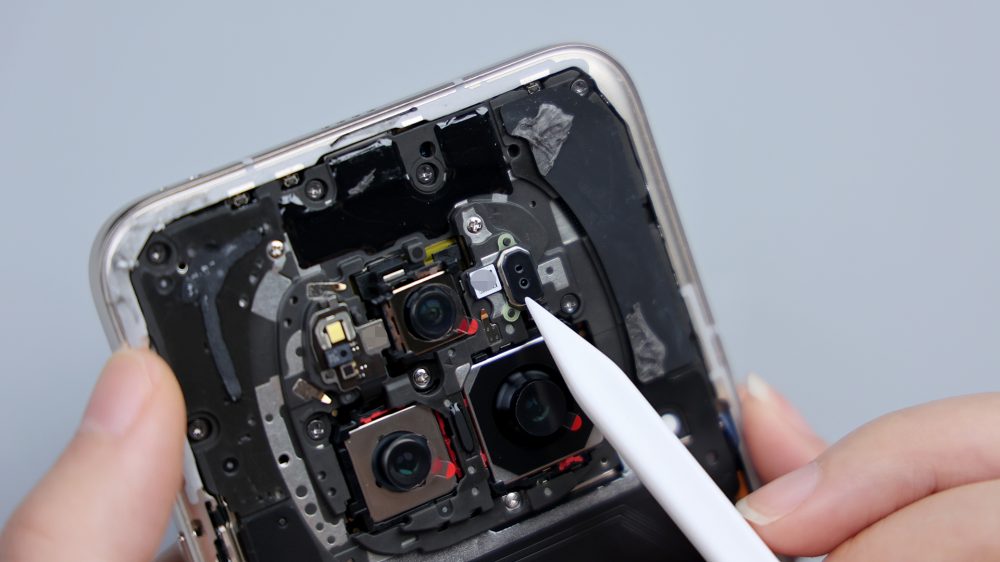
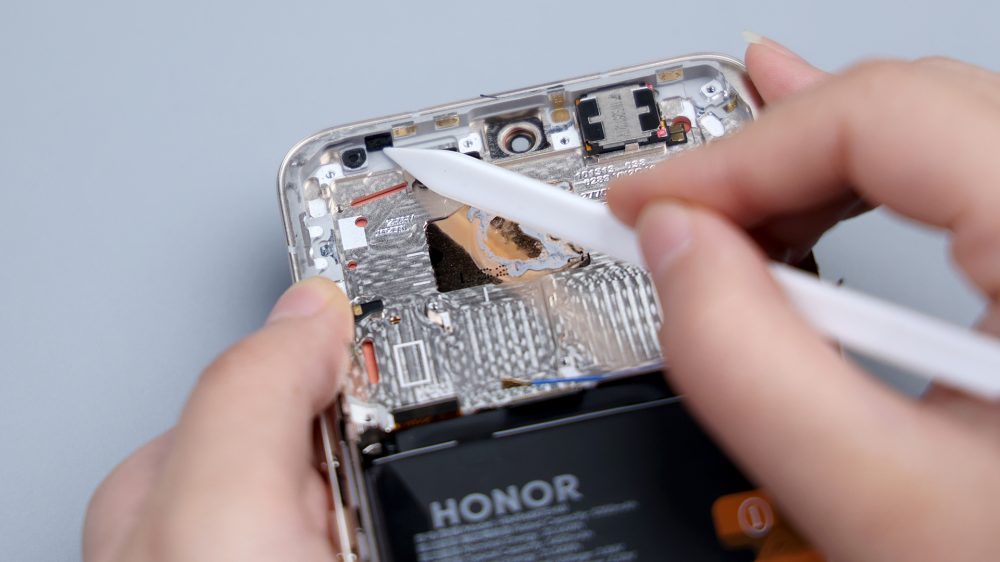
At the top center, there's a graphite thermal patch that covers the front lens and the top speaker.
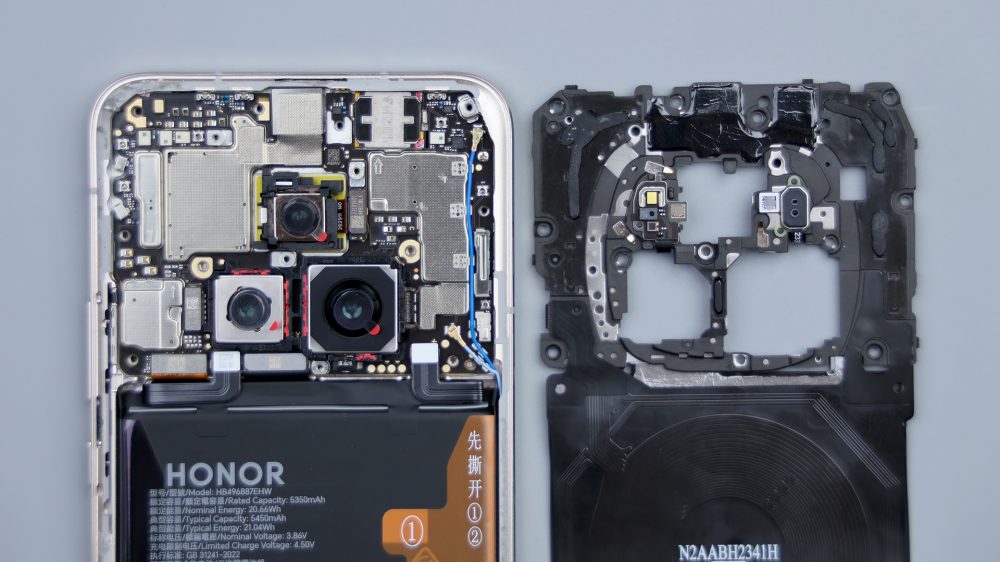
The wireless charging coil covers the top of the battery, and the Magic 6 supports 50W wireless fast charging. The battery and the area underneath are adequately cooled, and in addition to the charging coil having a thermal film, there's a large gray graphite thermal patch pressed underneath it that extends upward all the way to the inside of the cover, and a portion of it can be seen exposed underneath the lens, which, along with the charging coil, is secured to the sound chamber via adhesive.

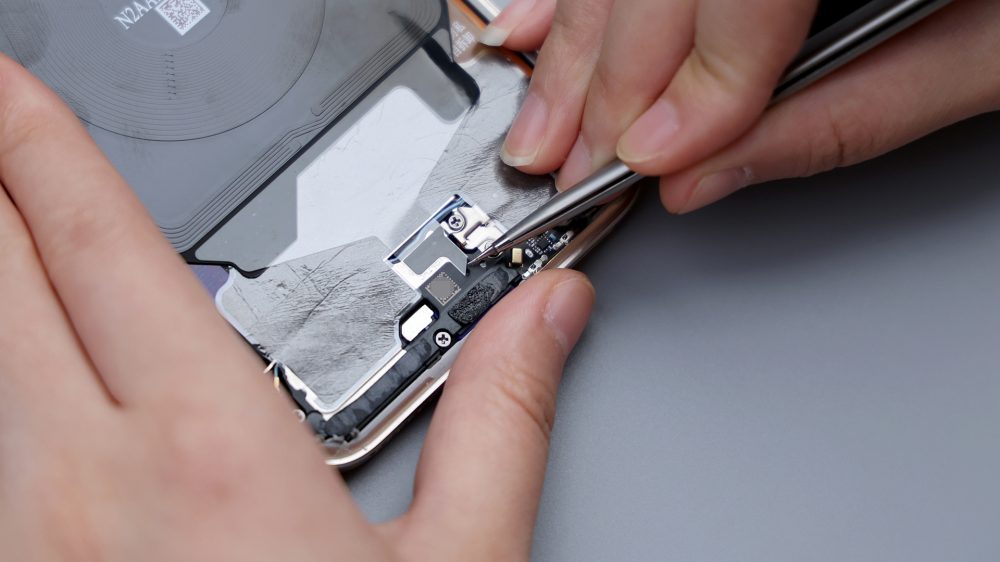
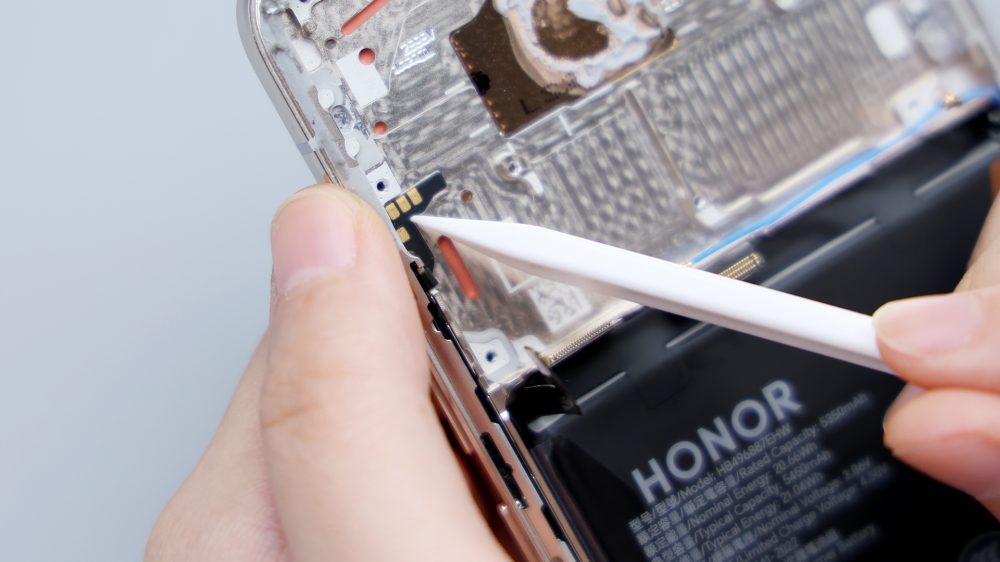
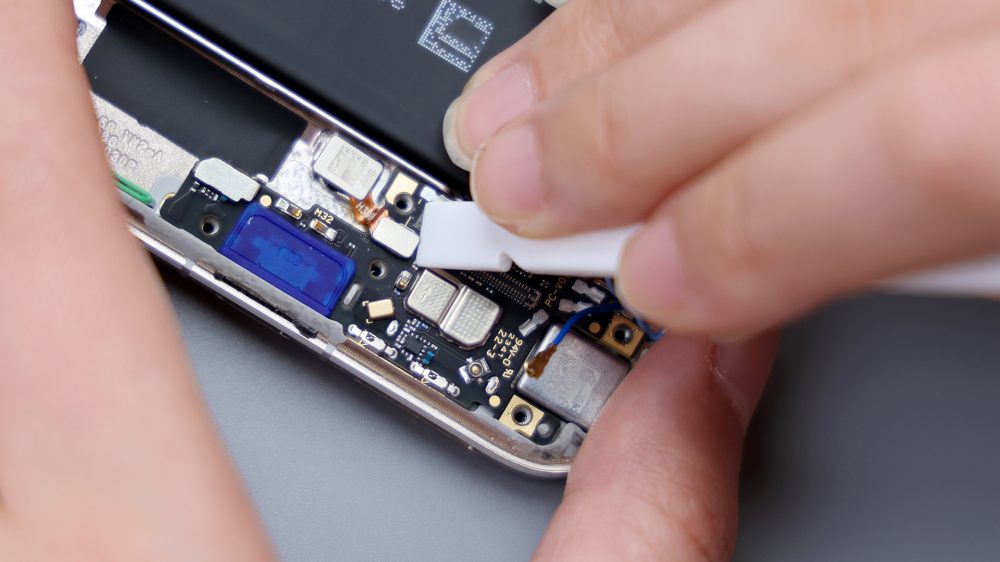
The secondary board area is relatively special, the cover piece is not only divided into two parts, metal and plastic, at the same time, the metal plate has not been covered all the way, you can see the microphone at the bottom, the plastic plate is also exposed, the area is relatively small, only the coaxial cable connector is exposed, which is why a small piece of round foam is added to the inside of the back cover.
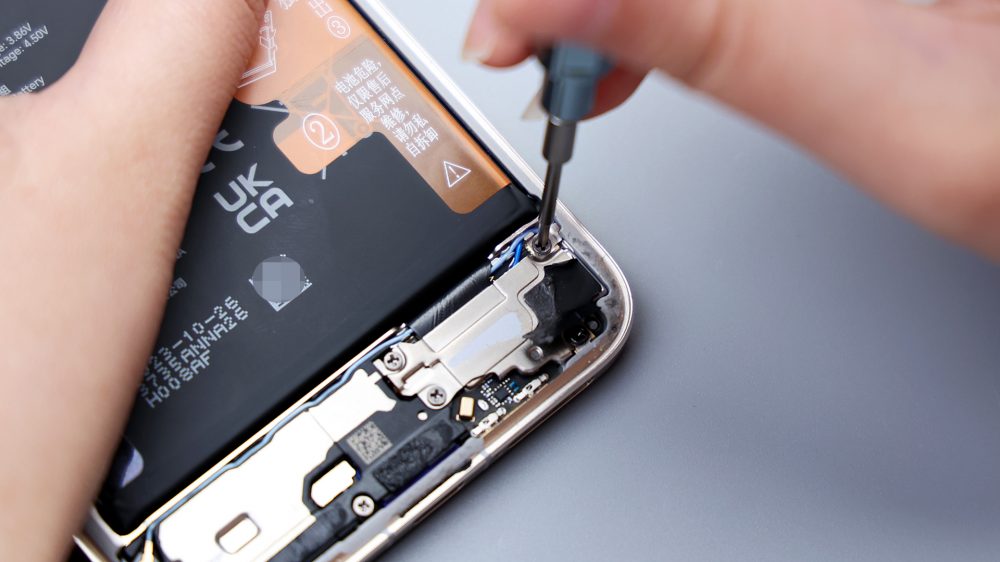
Tear off the adhesive at the bottom that holds the wireless charging coil and graphite thermal paste, the cover is fixed by two kinds of screws totaling 14 screws, unscrew all the screws, pry up and remove the cover.
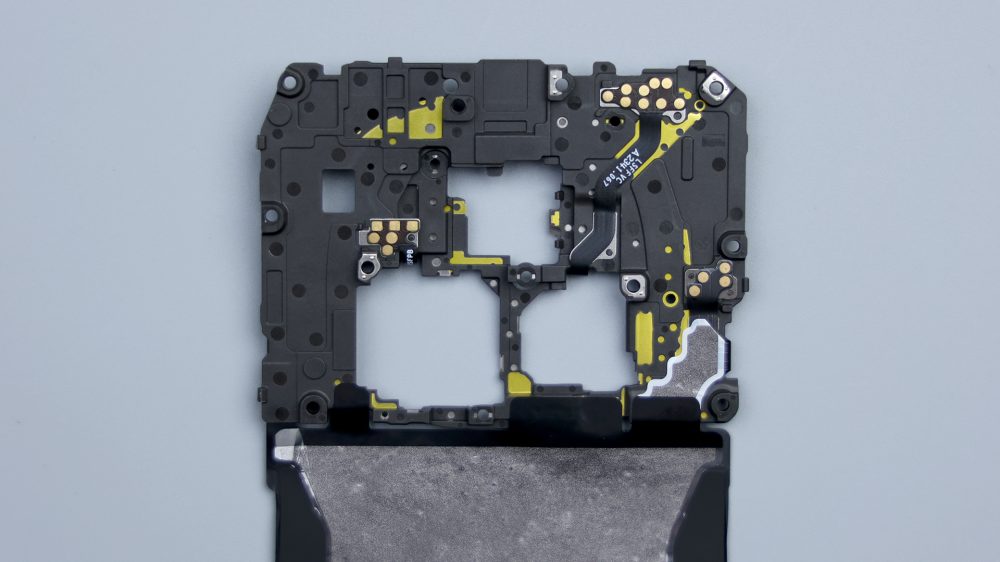
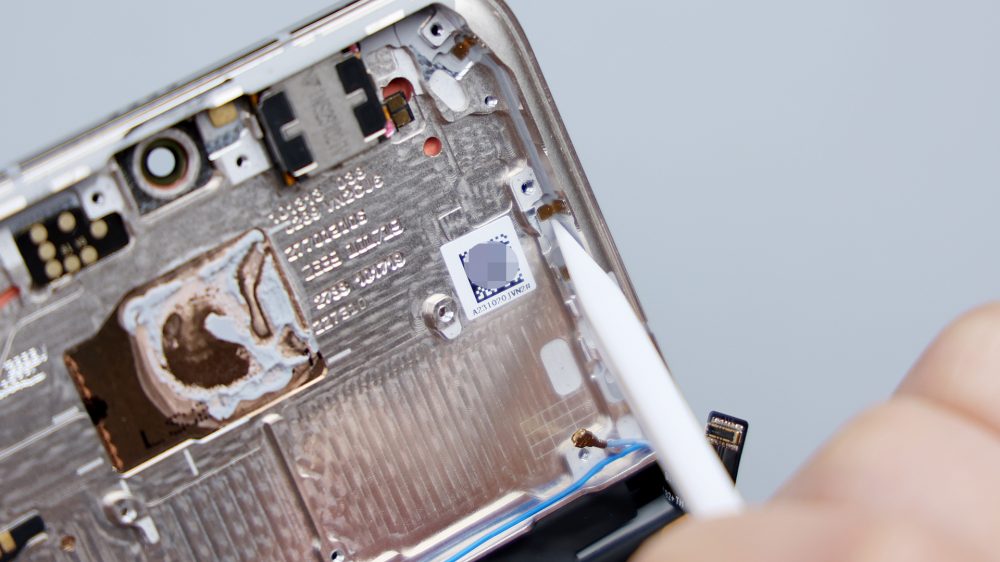
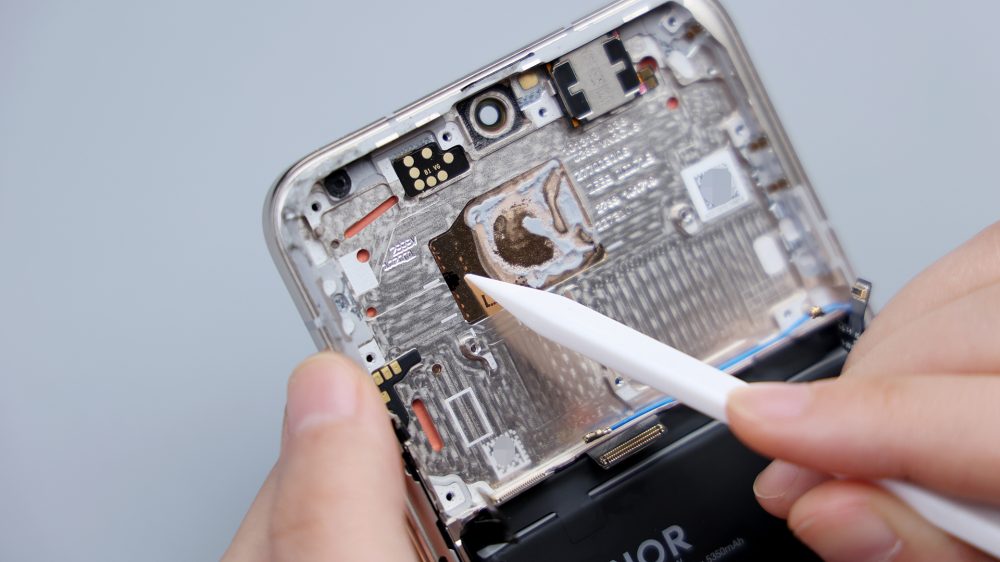
The contacts on the inside are quite numerous and not very regularly distributed, with nine contacts in the upper right corner corresponding to the flash and ambient light sensor, six contacts in the left center corresponding to the laser focus module, and four contacts on the right side corresponding to the wireless charging coil, which is extended underneath by the graphite thermal paste. Slightly surprisingly, there is no foam pad for cushioning protection on the inside of the cover.
The A-side of the motherboard is now in full view, with a noise-canceling microphone in the upper left corner, no metal cover on the outer side, and next to it is the location of the IR sensor.

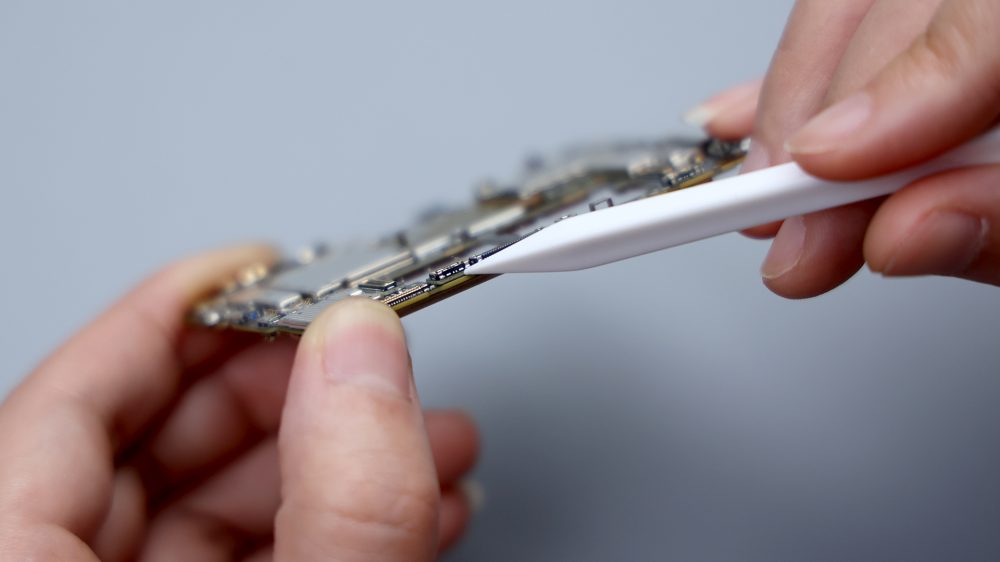
From the side, you can see that this small area features a laminated motherboard.
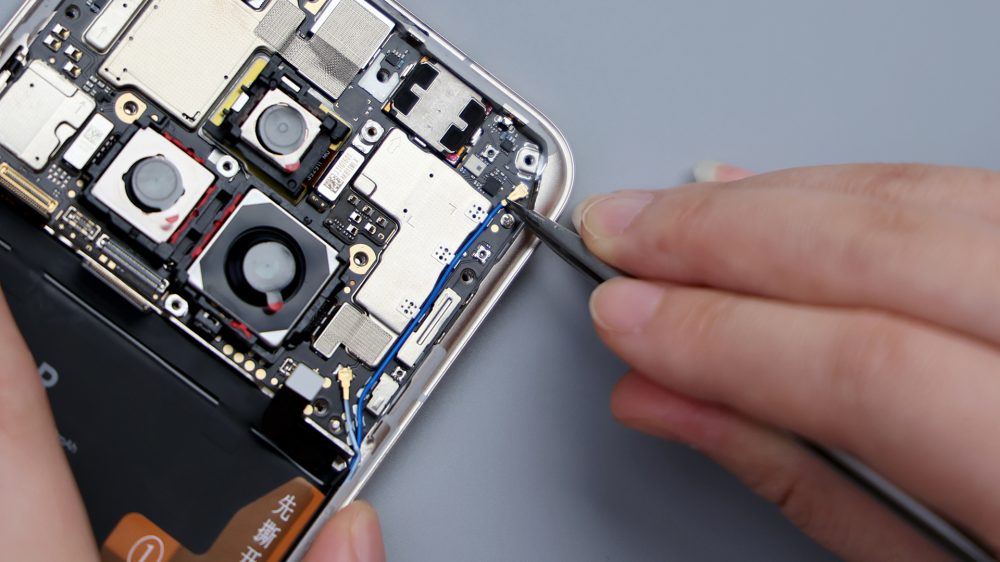
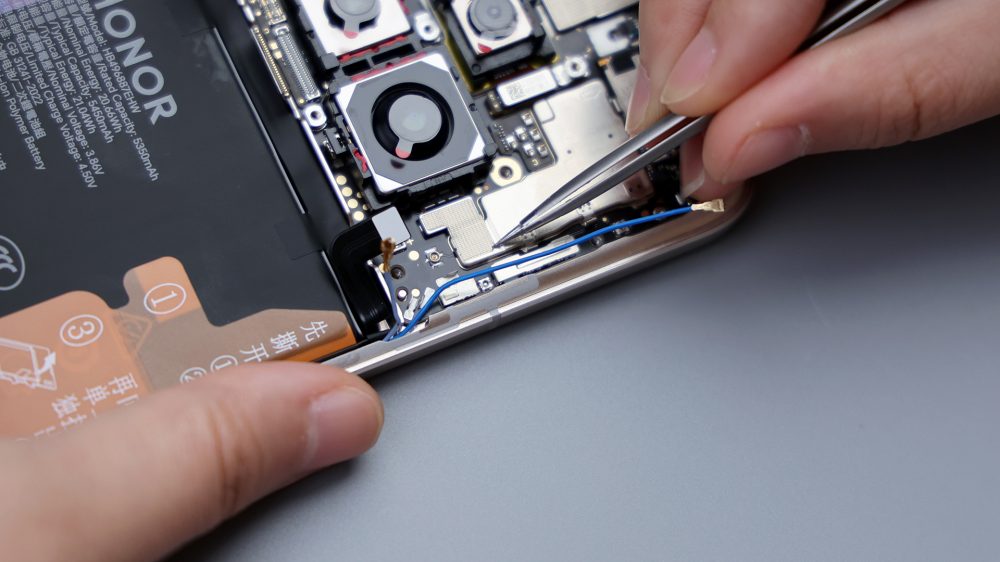
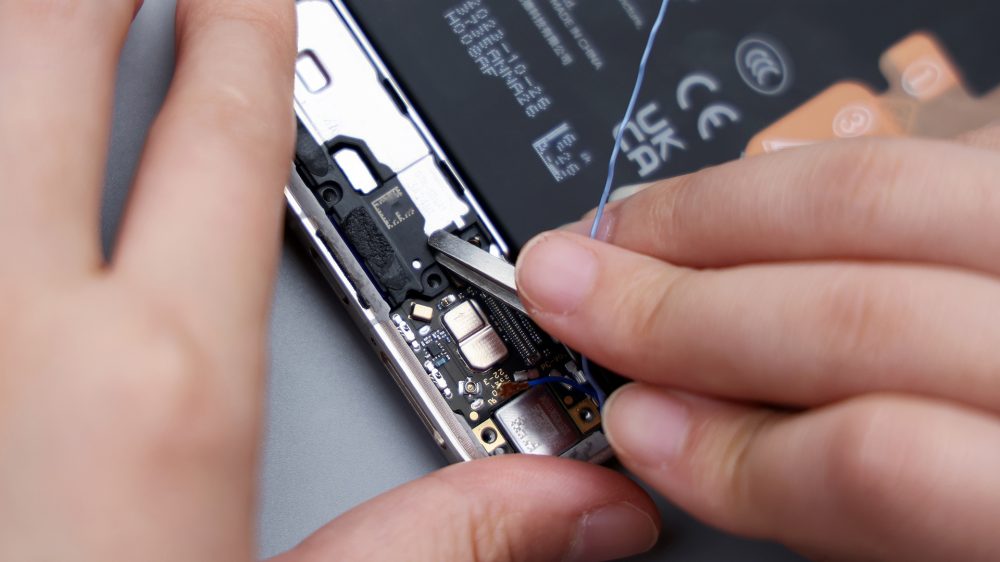
Conductive cloth has been applied to the back of the front lens and to the BTB of the main camera, and the speaker on the right has an integrated earpiece function. There are two blue coaxial cables, one dark and one light, on the right side, and next to the dark connector, you can see 1 screw used to secure the motherboard.
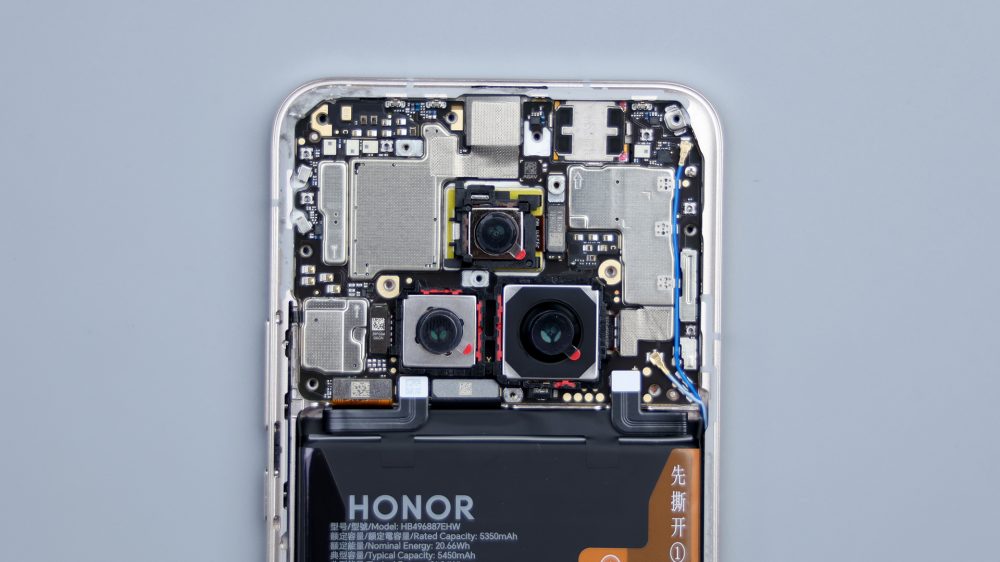
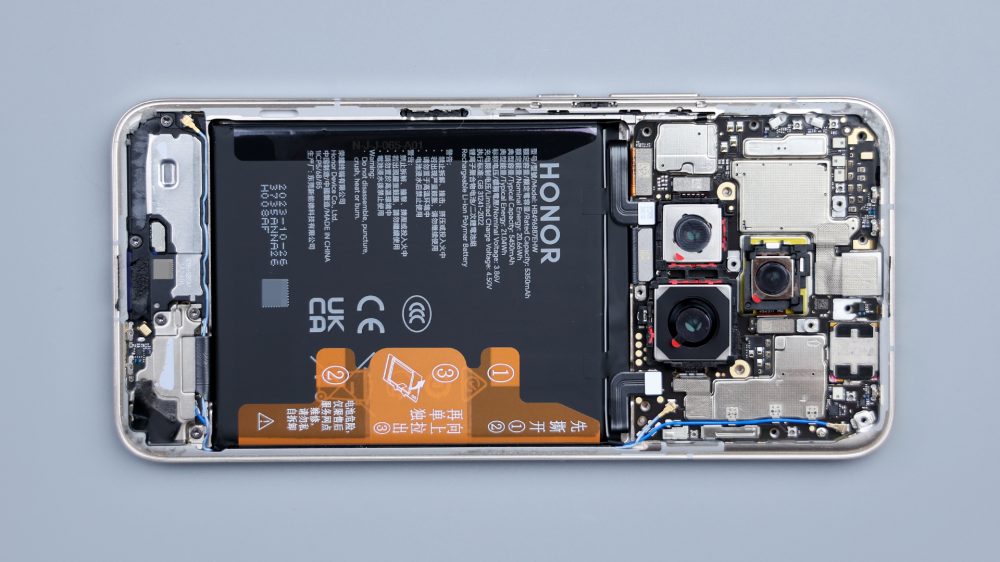
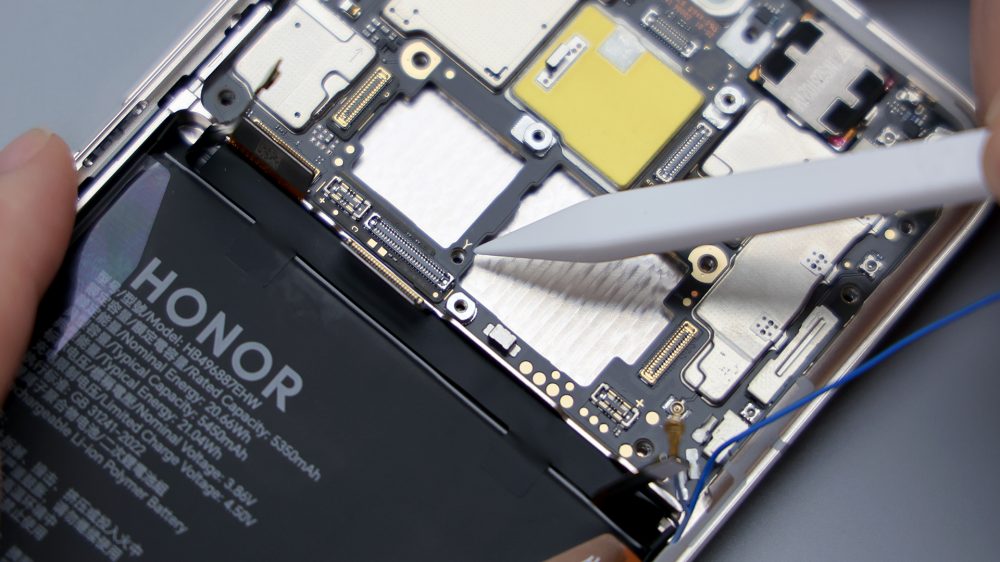
Magic6's battery uses a single-cell, dual-connector scheme, with two connectors, one on the left and one on the right, located on both sides of the motherboard.
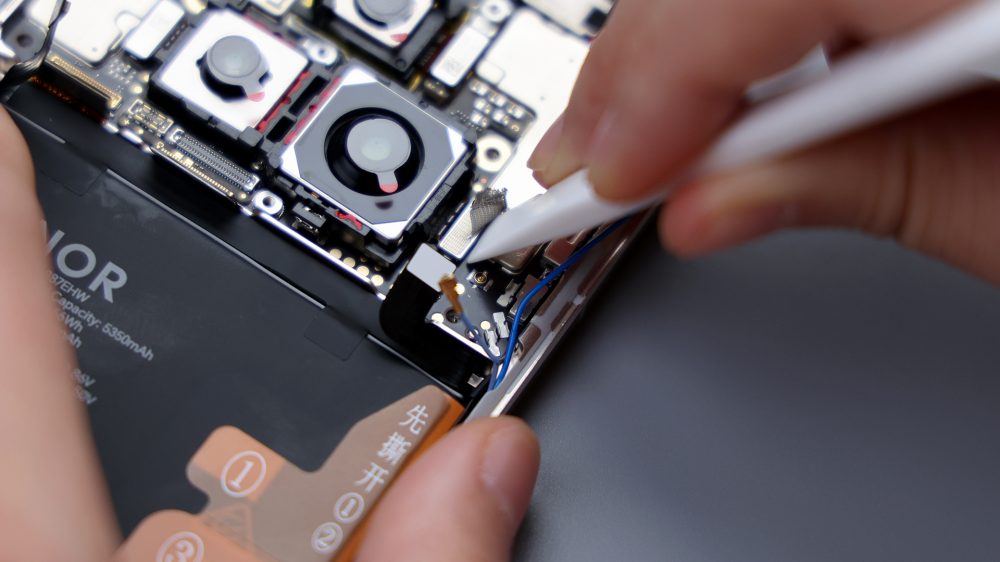
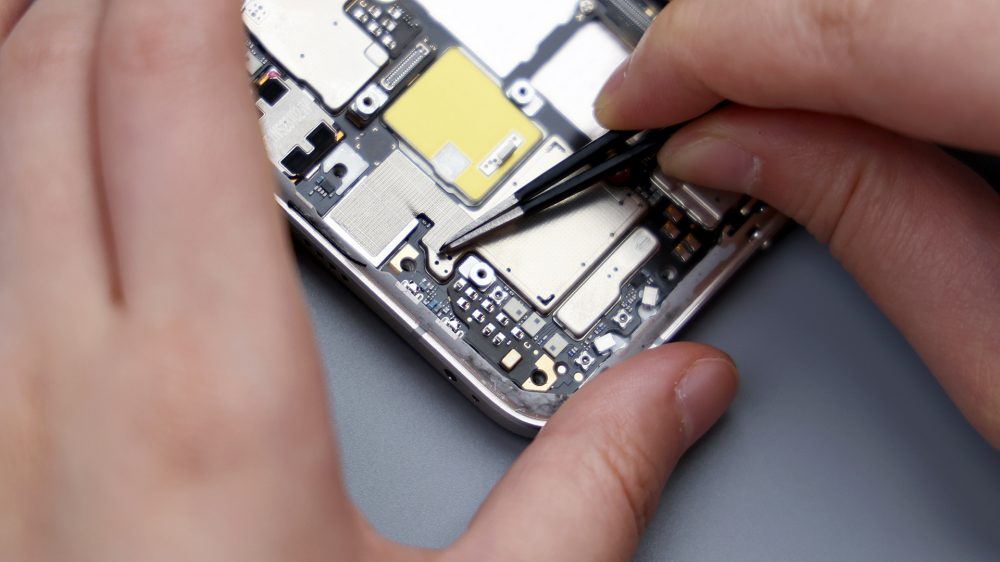
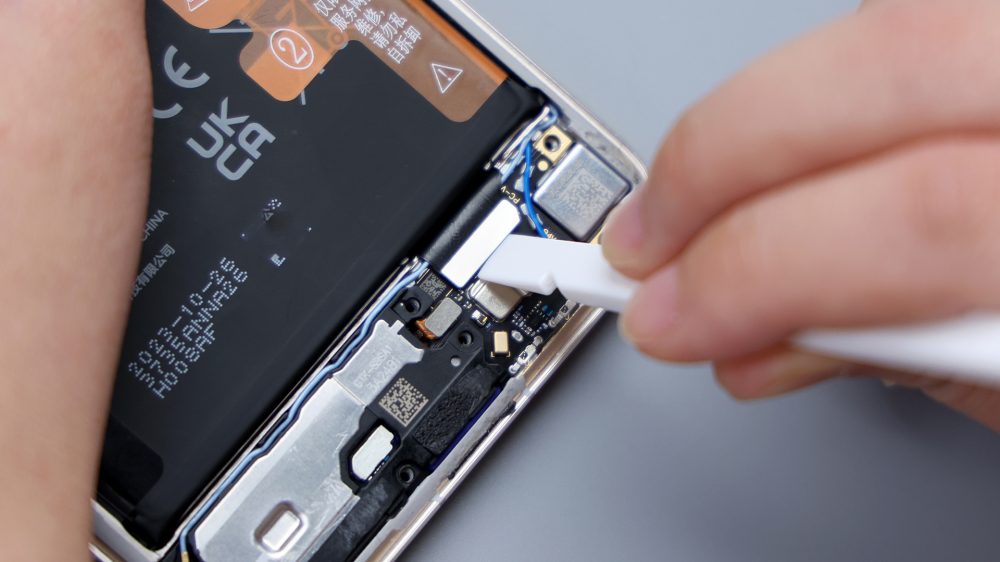
Disconnect the two BTBs of the battery in turn, followed by the BTBs of the main and screen FPCs, and the two coaxial cables.
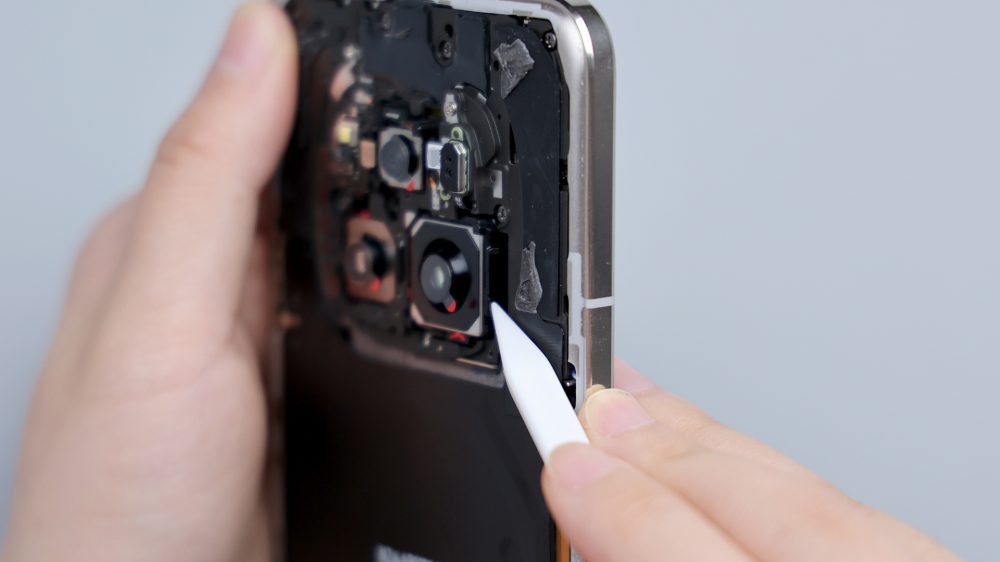
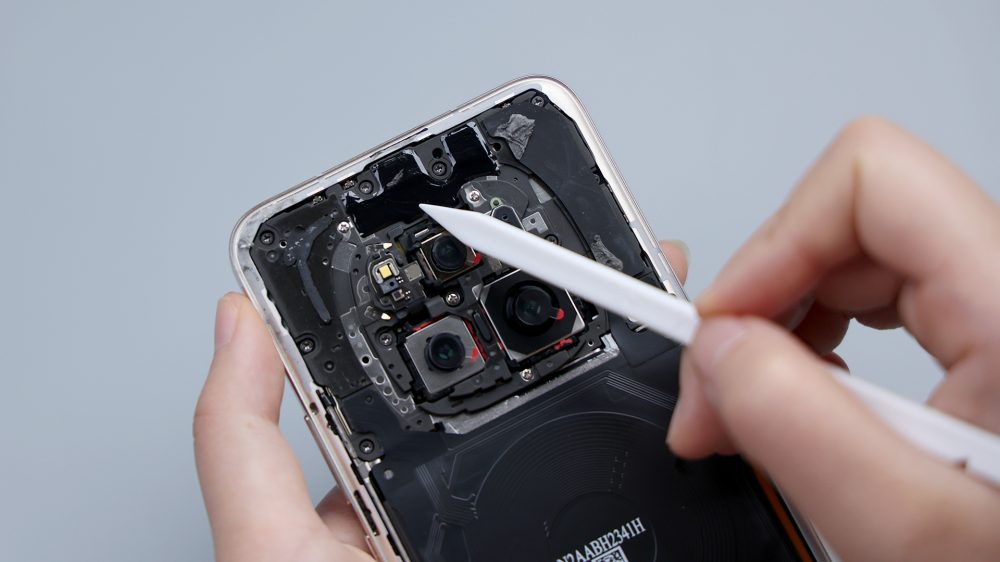
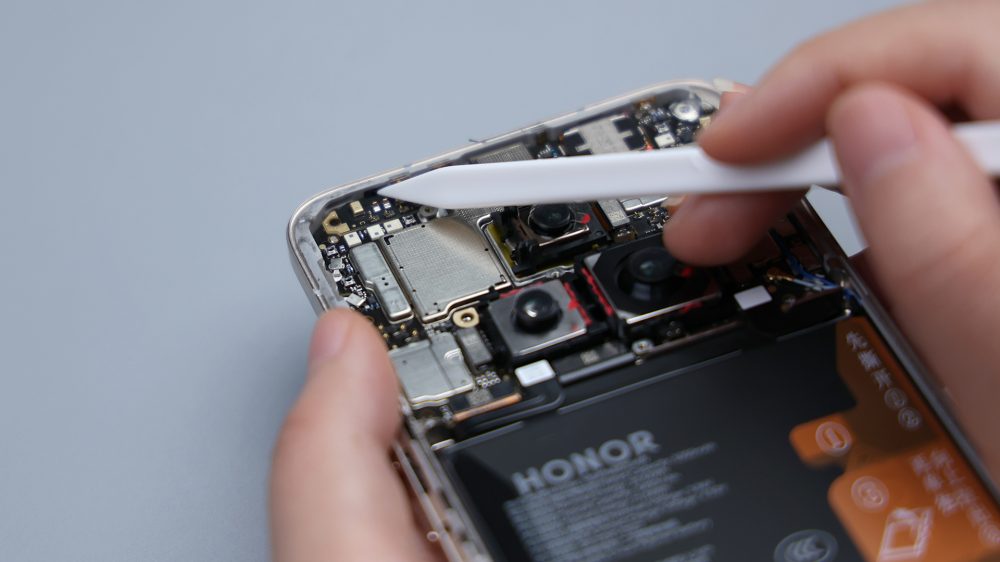
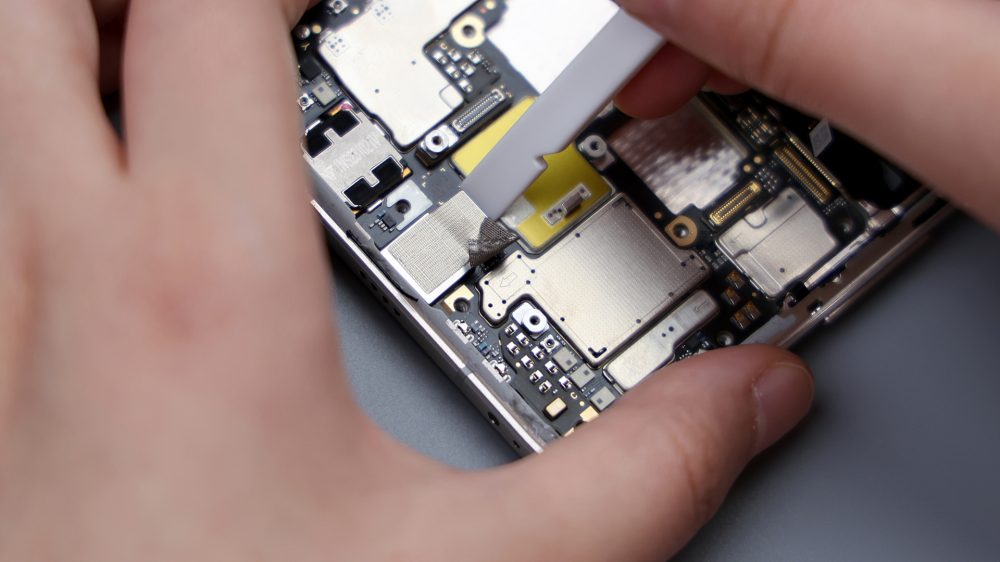
Tear off the conductive cloth affixed to the main camera, disconnect it and the BTB of the telephoto lens, the two lenses and the anti-roll bar can be removed together, the ultra-wide-angle lens is not fixed with adhesive, but with a metal buckle, be careful not to break it when removing it, tear off the conductive cloth of the front lens, disconnect the BTB and then remove it.
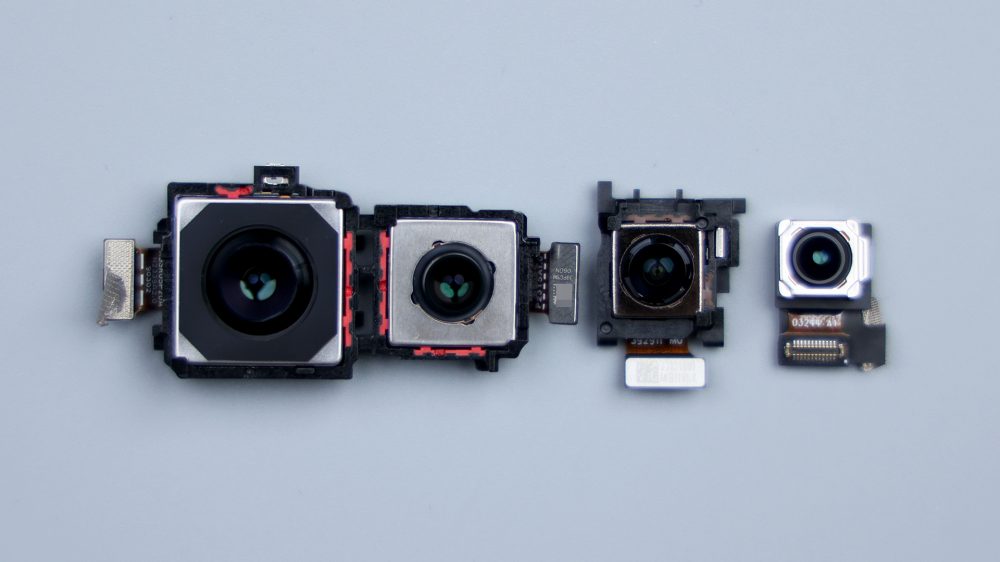
At this point, all four front and rear cameras come together, and the three rear cameras are equipped with anti-roll bars.50-megapixel Howell H9000 Ultra Dynamic Hawkeye main camera with ultra-high dynamic range, aperture f/1.9, supports OIS optical stabilization.32-megapixel telephoto lens, supports 2.5X optical zoom, up to 50X digital zoom, aperture f/2.4, supports OIS optical stabilization.50-megapixel ultra-wide angle lens, 122-degree ultra-wide angle of view.50-megapixel front lens, supports AF autofocus. Pixel ultra wide-angle lens, 122-degree ultra-wide viewing angle.50MP front lens, support AF autofocus.
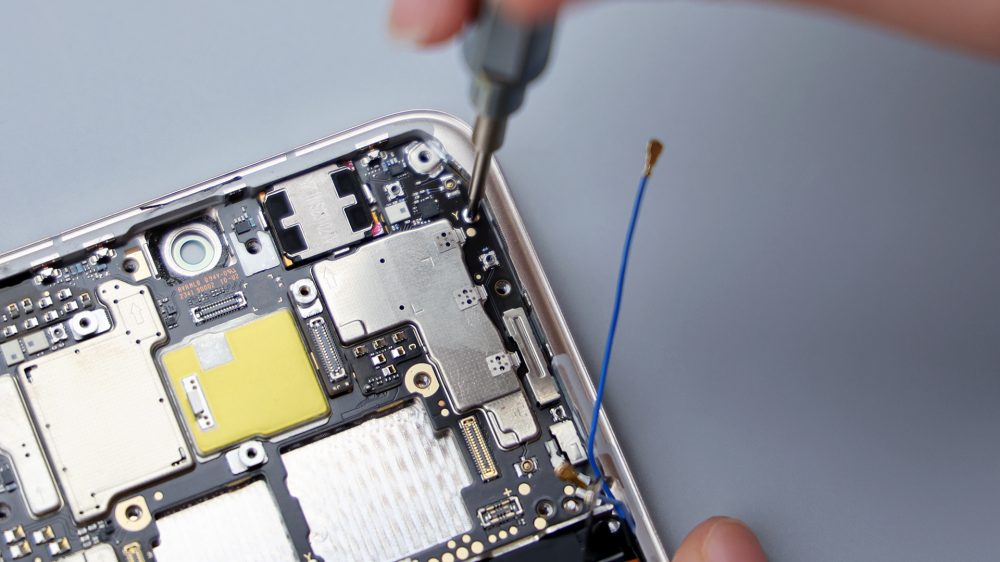
The disassembly continues, there are 2 fixing screws on the motherboard, in addition to the one in the upper right corner mentioned earlier, there is also 1 pressed in the middle of the main camera and telephoto, in order to facilitate assembly and maintenance, these two screws are next to the motherboard, both made a "Y" logo.
The PCB of the motherboard is very thin, many interface positions are made of laminated processing, mainly for the purpose of padding to meet the assembly requirements, the core area of the motherboard is still a single-layer PCB design.
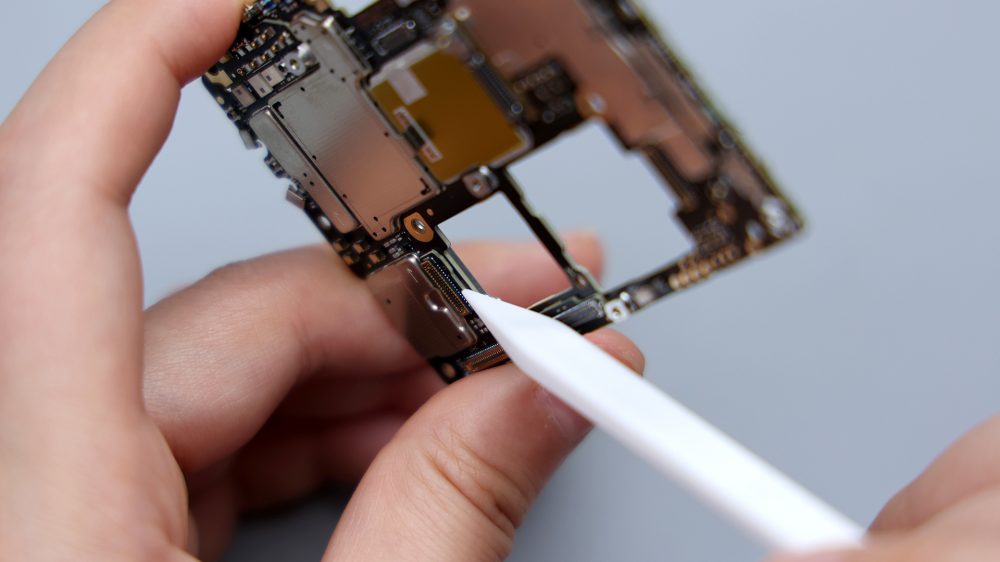

All BTB bases have no rubber ring or foam ring, and neither do their corresponding connectors. Similarly, the corresponding position of the cover plate is not equipped with foam pads, and all capacitors and small parts have not been dispensed with, which is really almost interesting, not to mention the OV flagships compared to the same level of Xiaomi cell phones, at least, will be equipped with foam pads on the inside of the cover plate, to provide appropriate protection for the interfaces.
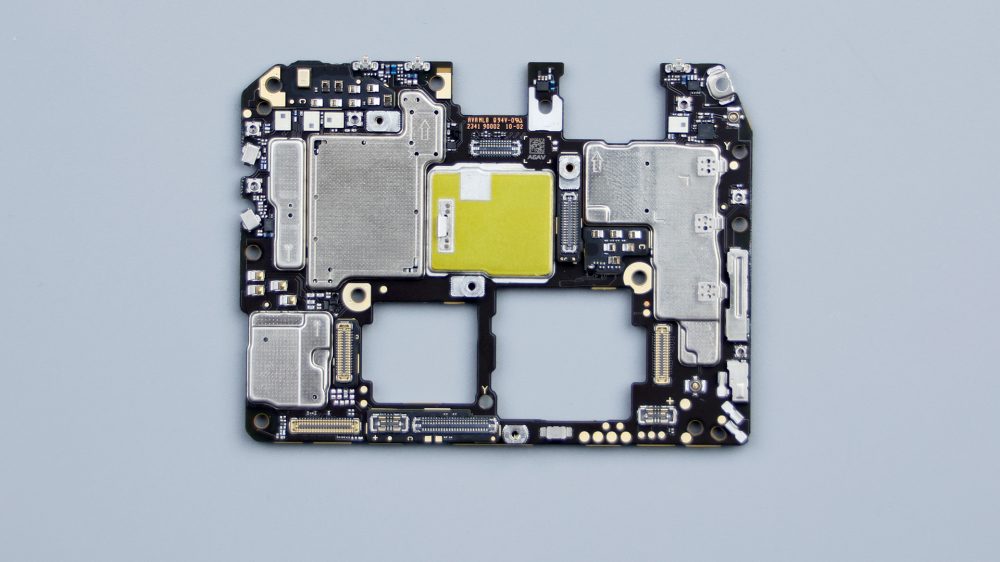

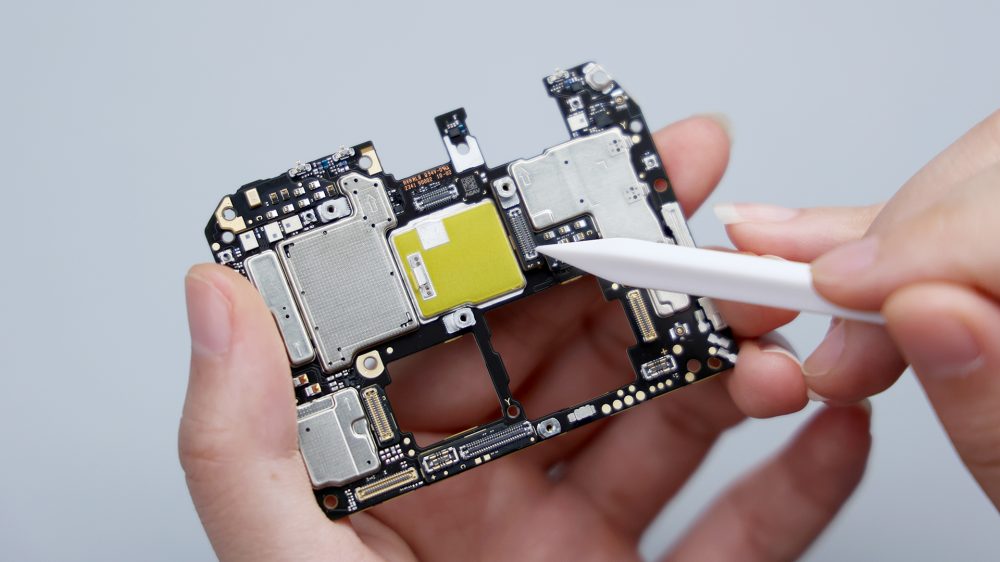
The noise-canceling microphone can be seen in the upper right corner of the motherboard's B-side, next to the infrared sensor, Magic6 also supports infrared remote control.PCB relatively weak position, are installed with a metal sheet, used to improve the rigidity, to avoid assembly or drop breakage.
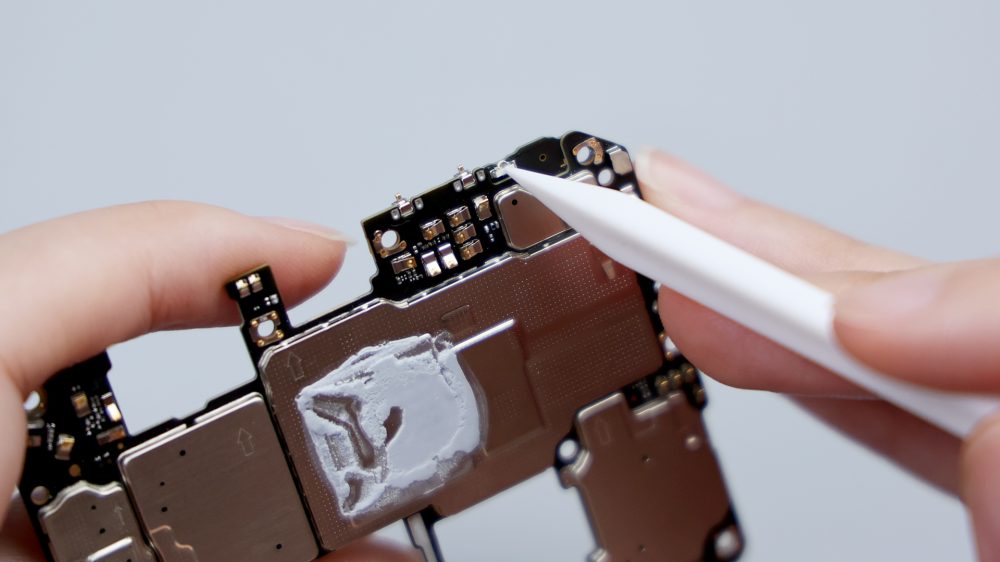
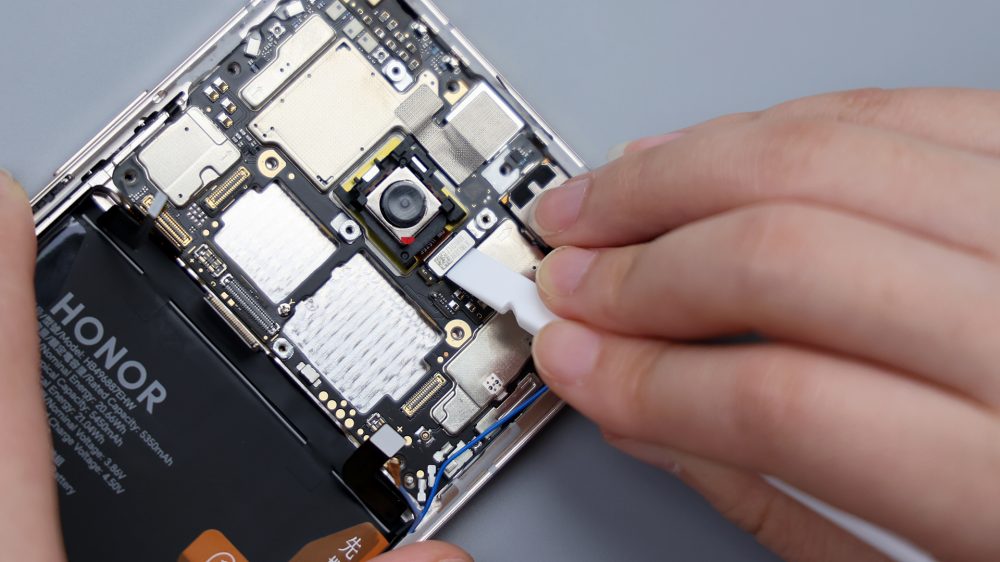
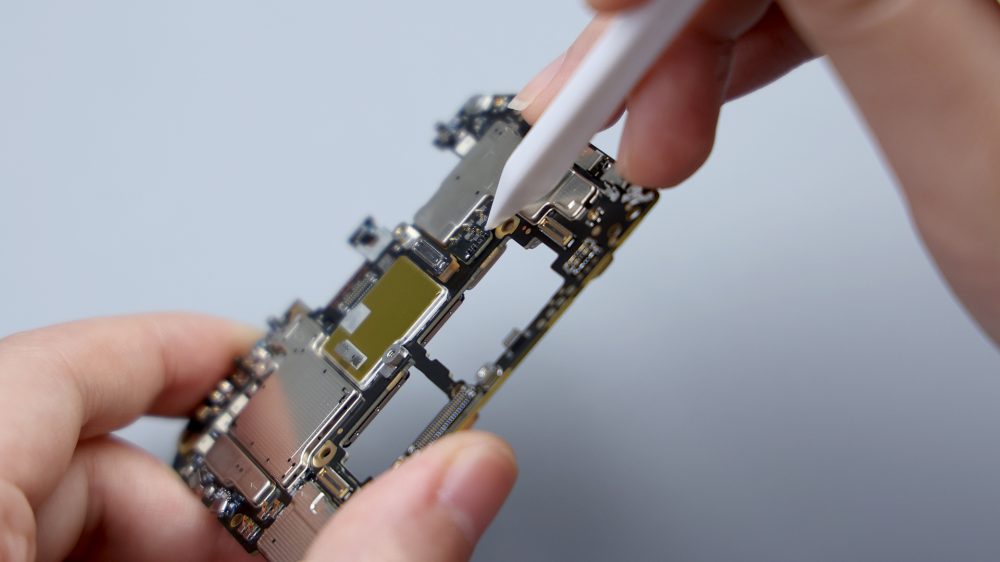
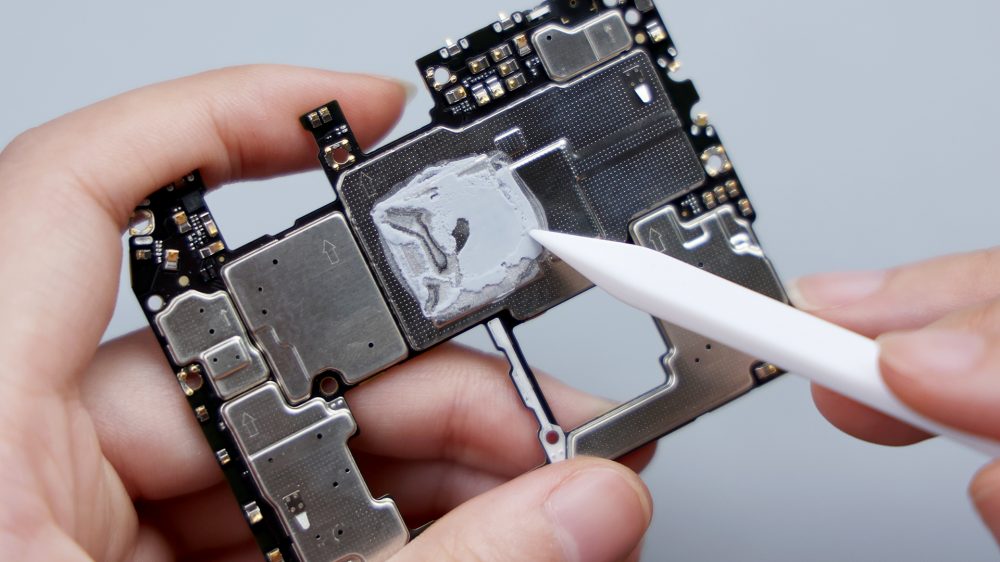
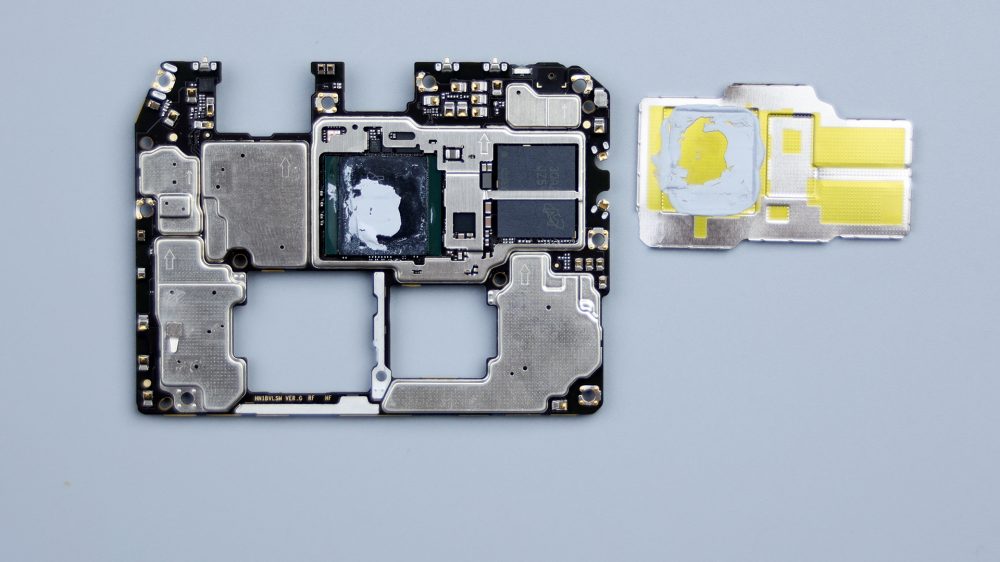
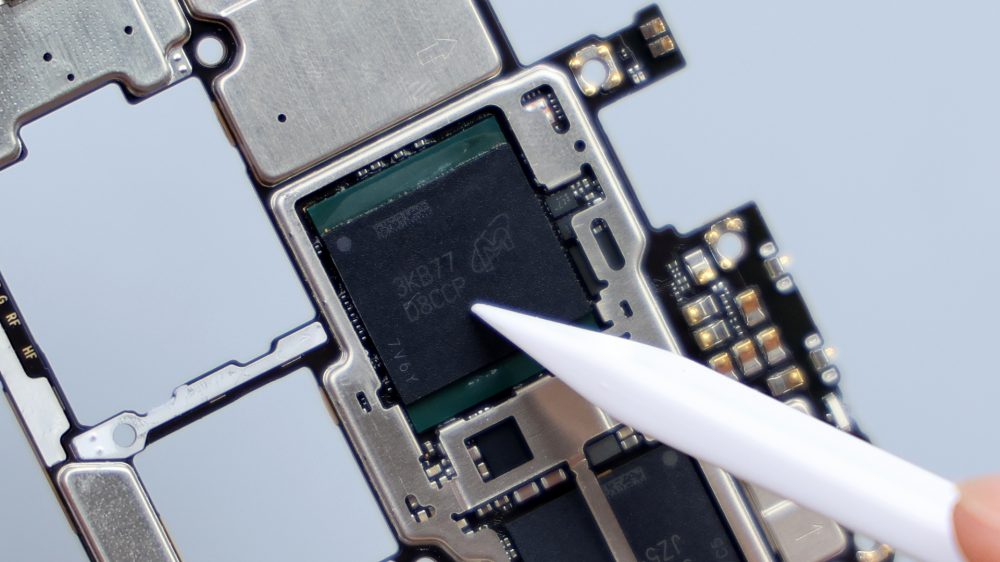
The largest shield on the B-side is removable, and part of it is slightly raised and coated with silicone grease, which is probably where the processor and other core chips are located. Pry up and remove the shield, which is also coated with a layer of silicone grease. After cleaning off the silicone grease, the one with the Magnesium logo underneath is the LPDDR5X running memory, the bigger green chip it's pressing against is the Snapdragon 8 Gen 3 processor from Qualcomm, and the other one next to it, with the Magnesium logo, is the UFS 4.0 flash memory chip.
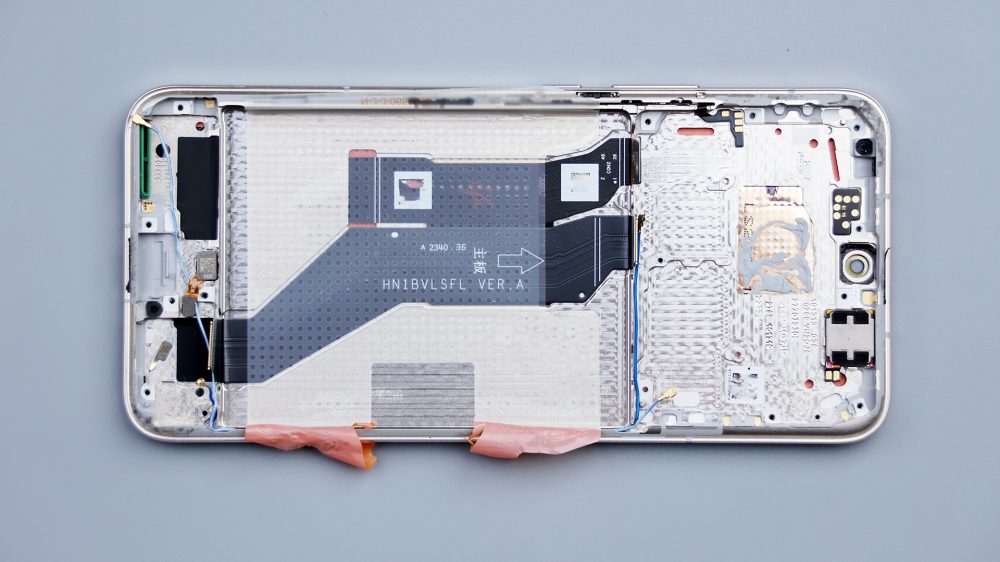
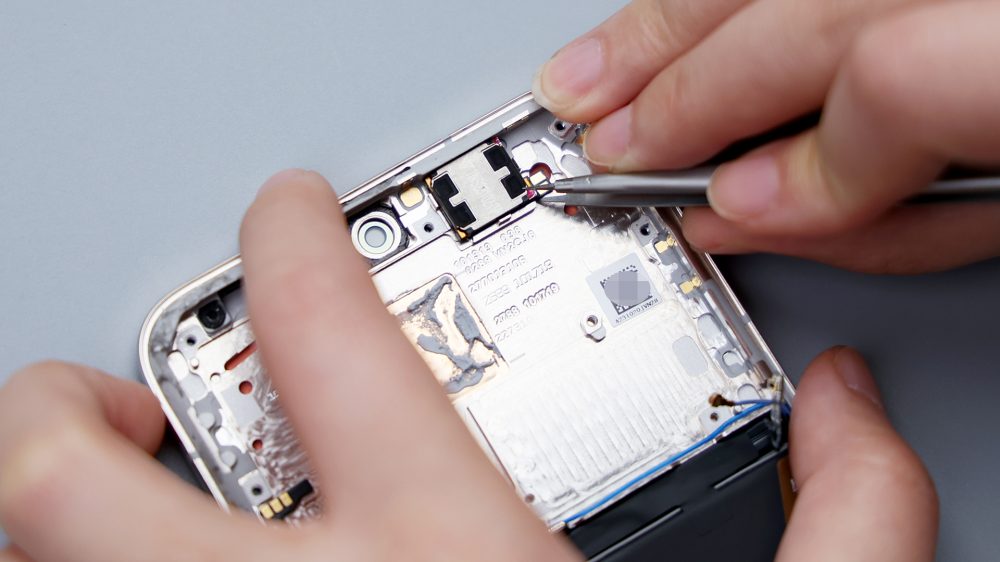
With the motherboard removed, the main frame of the phone is empty, with the black foam ring in the top left corner corresponding to the microphone, the foam ring next to it corresponding to the infrared sensor, and the metal pieces scattered around it for the antenna signal overflow.
The four contacts in the lower left corner correspond to the power and volume buttons. A piece has been cut out of the middle of the frame to form a skeleton sink, and the silicone residue on it suggests that it corresponds to the core area on the B-side of the motherboard.
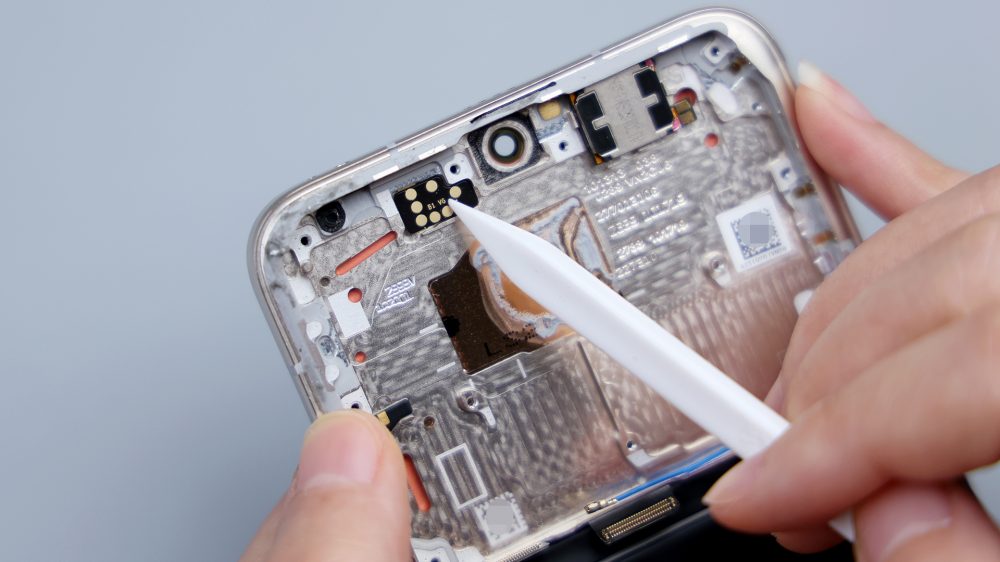
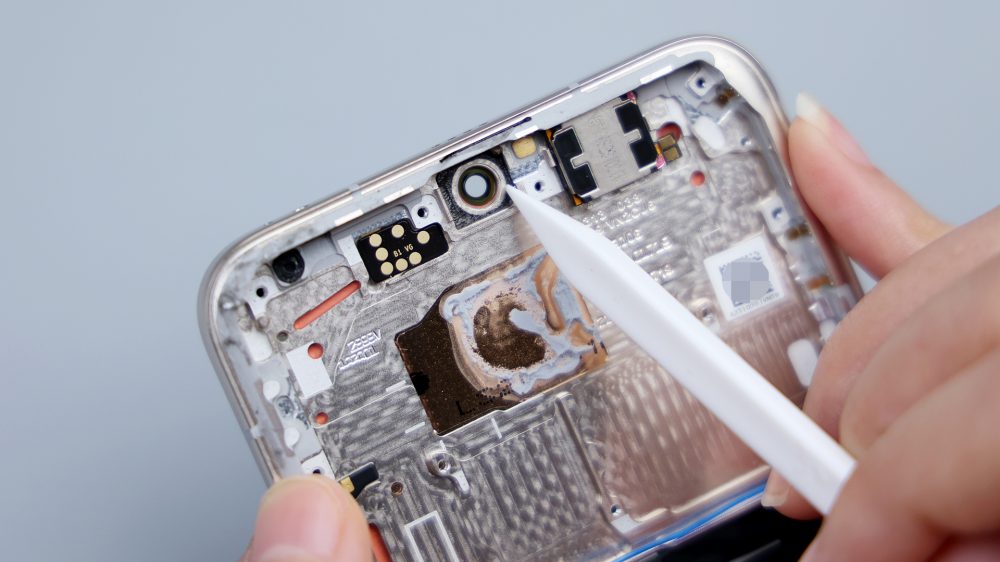
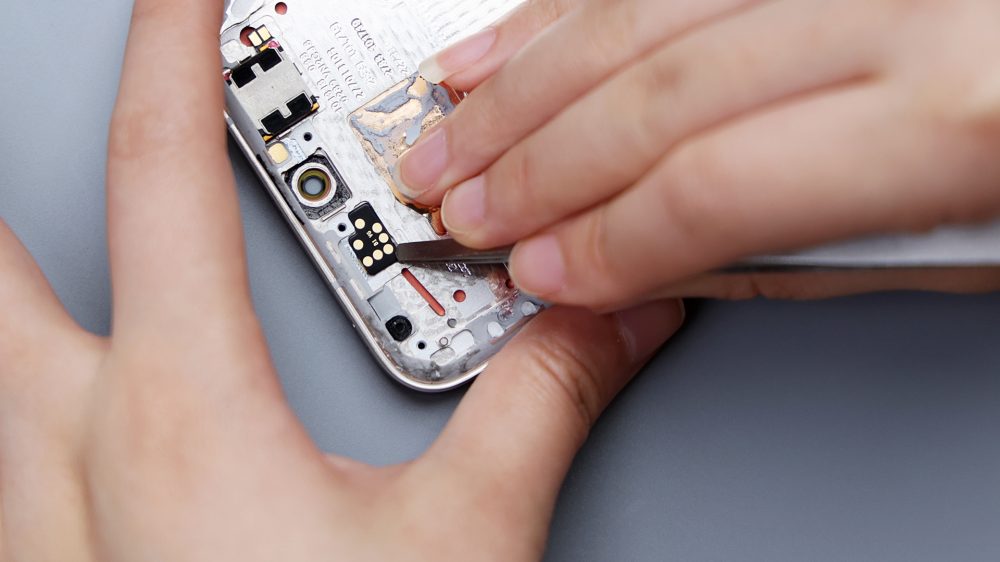
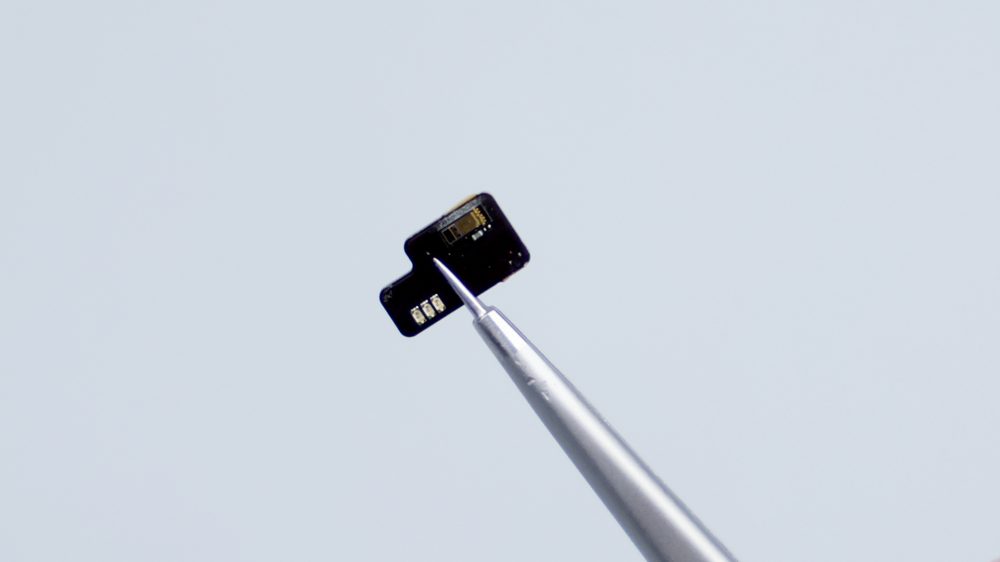
As mentioned earlier, that part of the metal shield protrudes slightly, and in order not to take up more vertical space, it is sunk down to accommodate this protrusion, avoiding an increase in the overall thickness of the machine. Pry up the black PCB on the top left, which has the front ambient light sensor integrated on it. The speaker is held in place by adhesive and removed by prying up with tweezers, and the 2 contacts on top are used to connect to the motherboard.
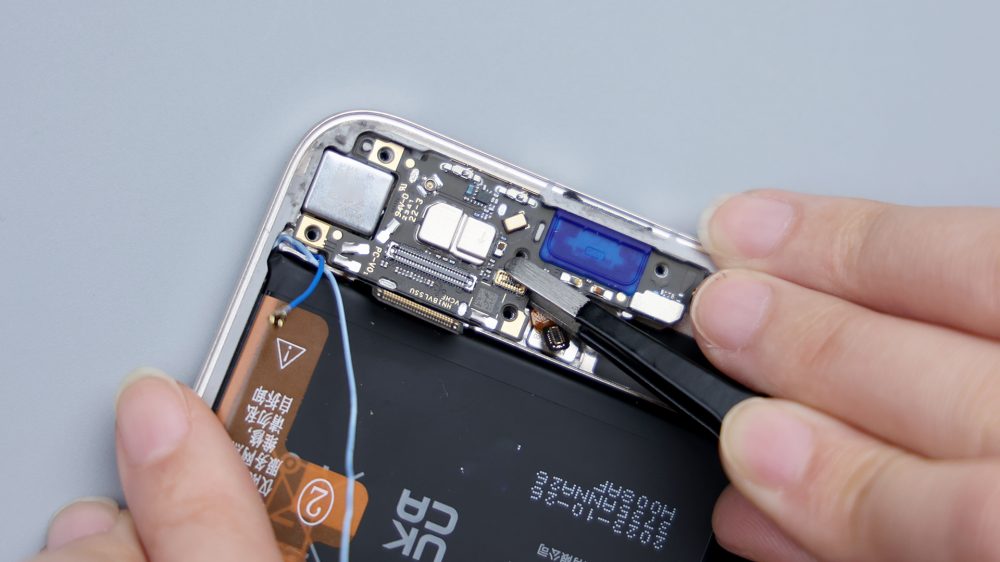
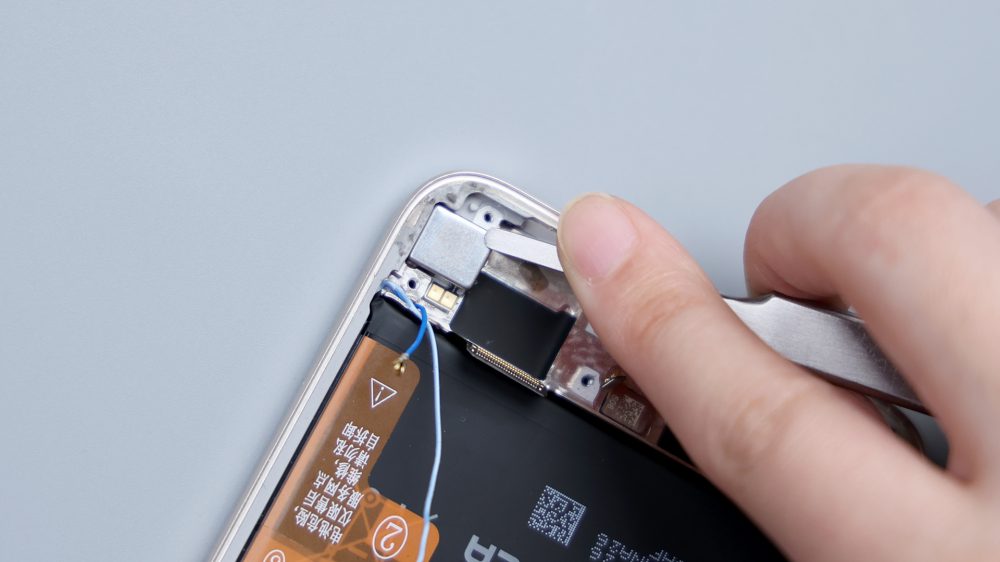
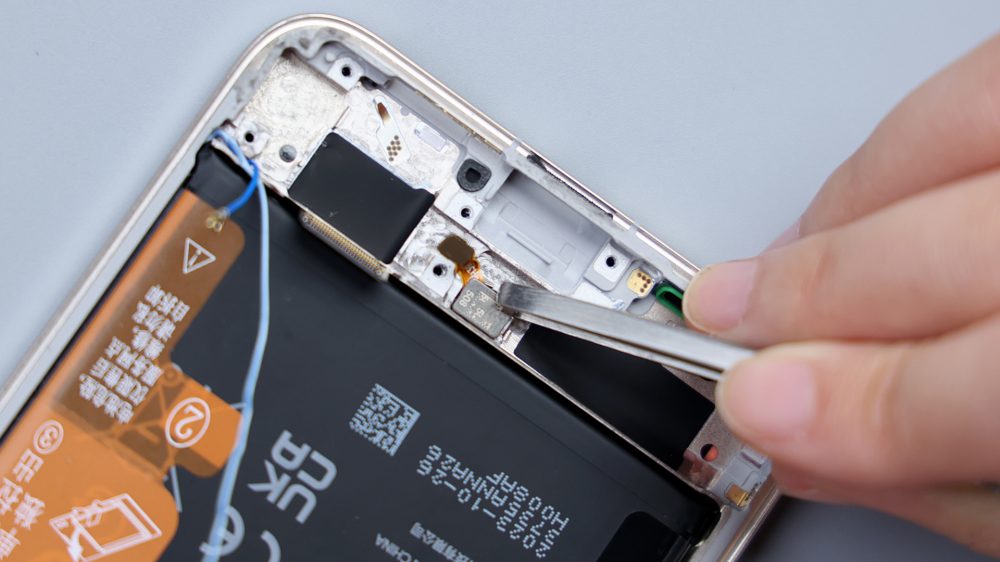
Turn to the bottom, unscrew all the fixed screws in the area of the secondary board, pry up the metal cover, disconnect the BTB and two coaxial cables of the FPC of the main board and the secondary board, then pry up and remove the audio cavity, disconnect the BTB of the fingerprint identification, and the secondary board can be dismantled.
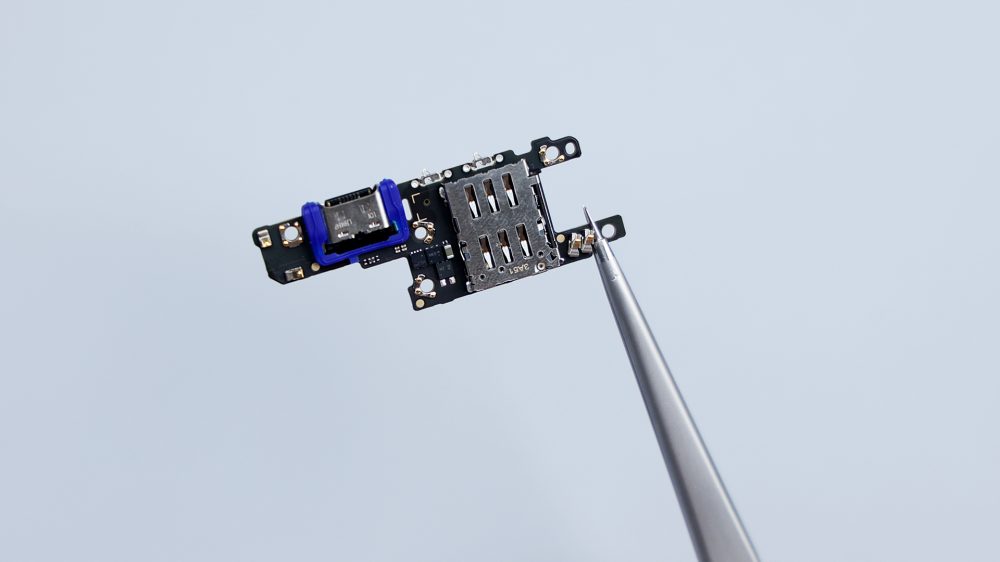
Like the main board area, all BTB bases on side A of the secondary board do not have rubber or foam rings, components do not have a dot adhesive treatment, and there is no metal cover on the microphone.The USB ports are integrated on the secondary board, and there is a blue rubber pad wrapped around the outside to protect against dust and sealing.
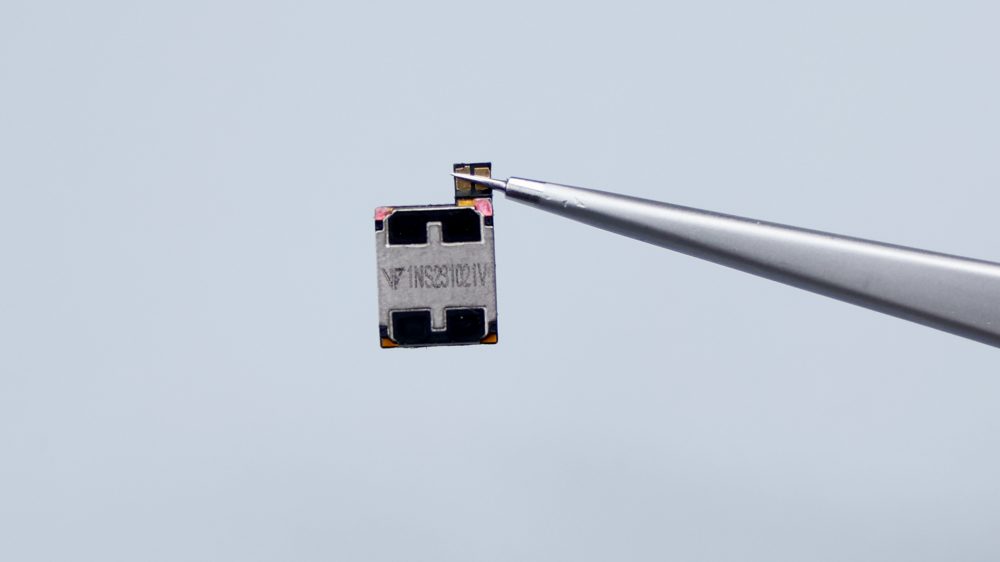
The vibration unit is fixed by adhesive, the supplier is Ruixing Technology, the size is also 0809 specifications, it should be the upgraded ESA0809.
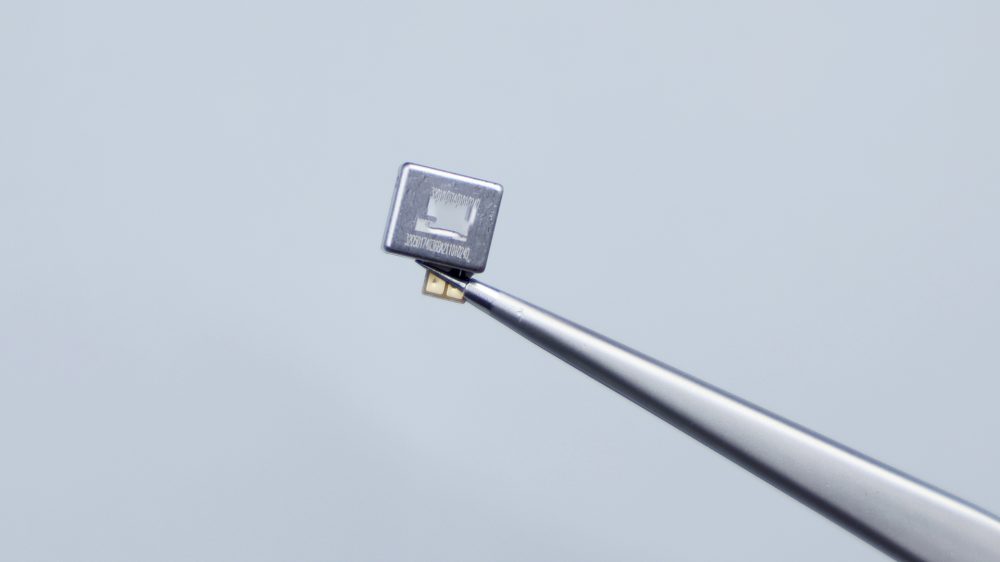
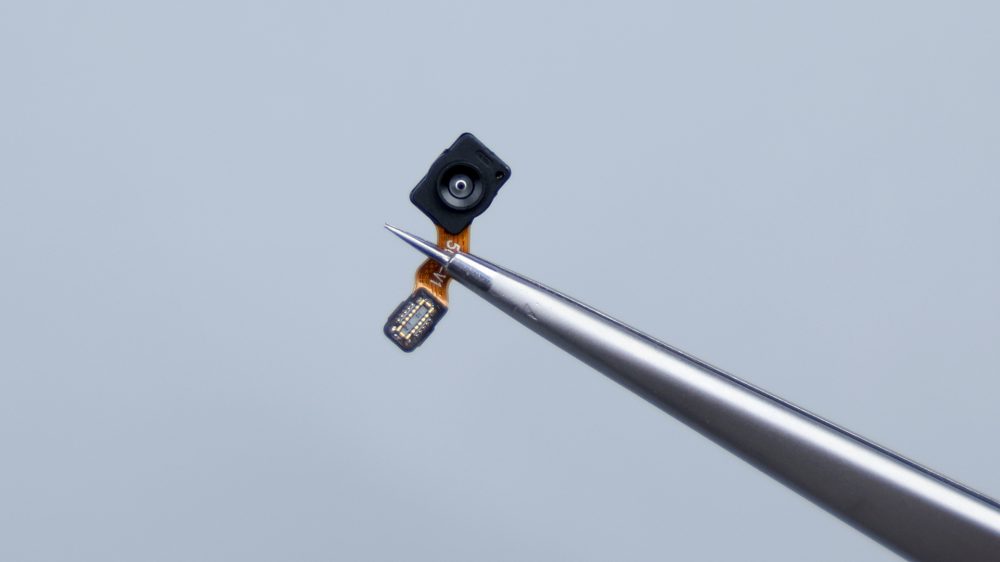
Pry up the fingerprint identification module next to it, Magic6 adopts a short-focus lens solution.
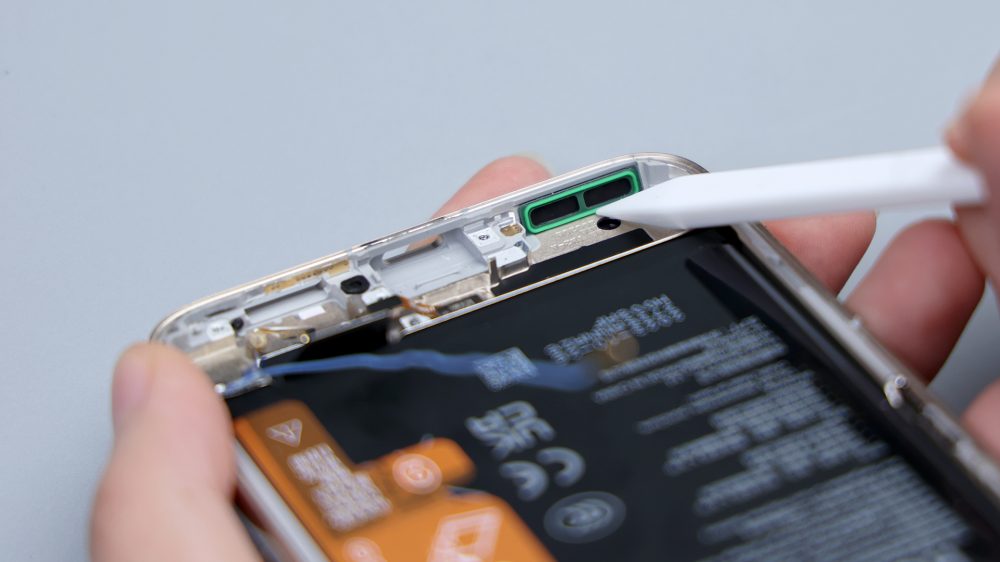
There is a rubber ring at the speaker position and a foam ring at the corresponding position of the microphone, with a dud-proof design underneath to avoid inserting the card pin wrongly and damaging the microphone.
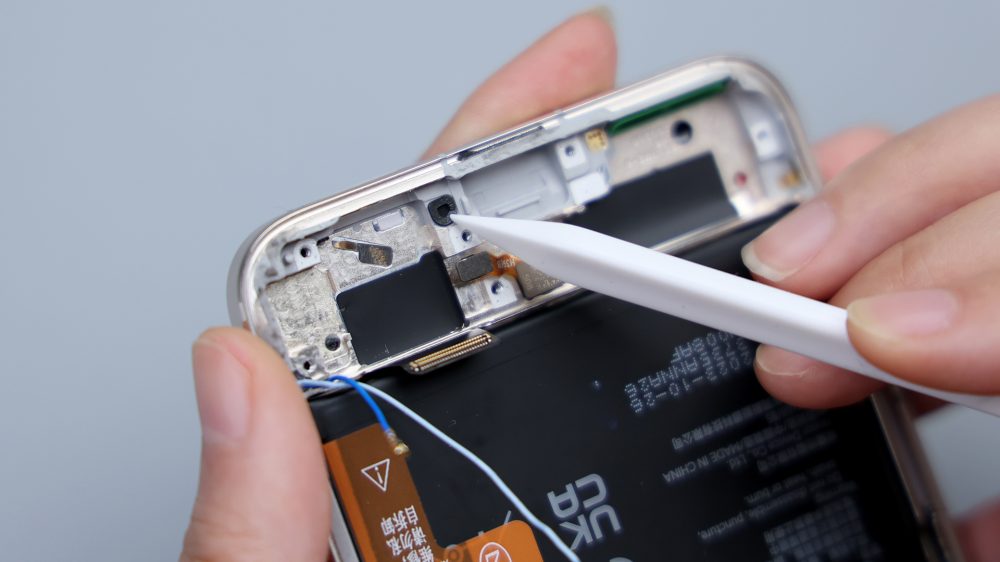
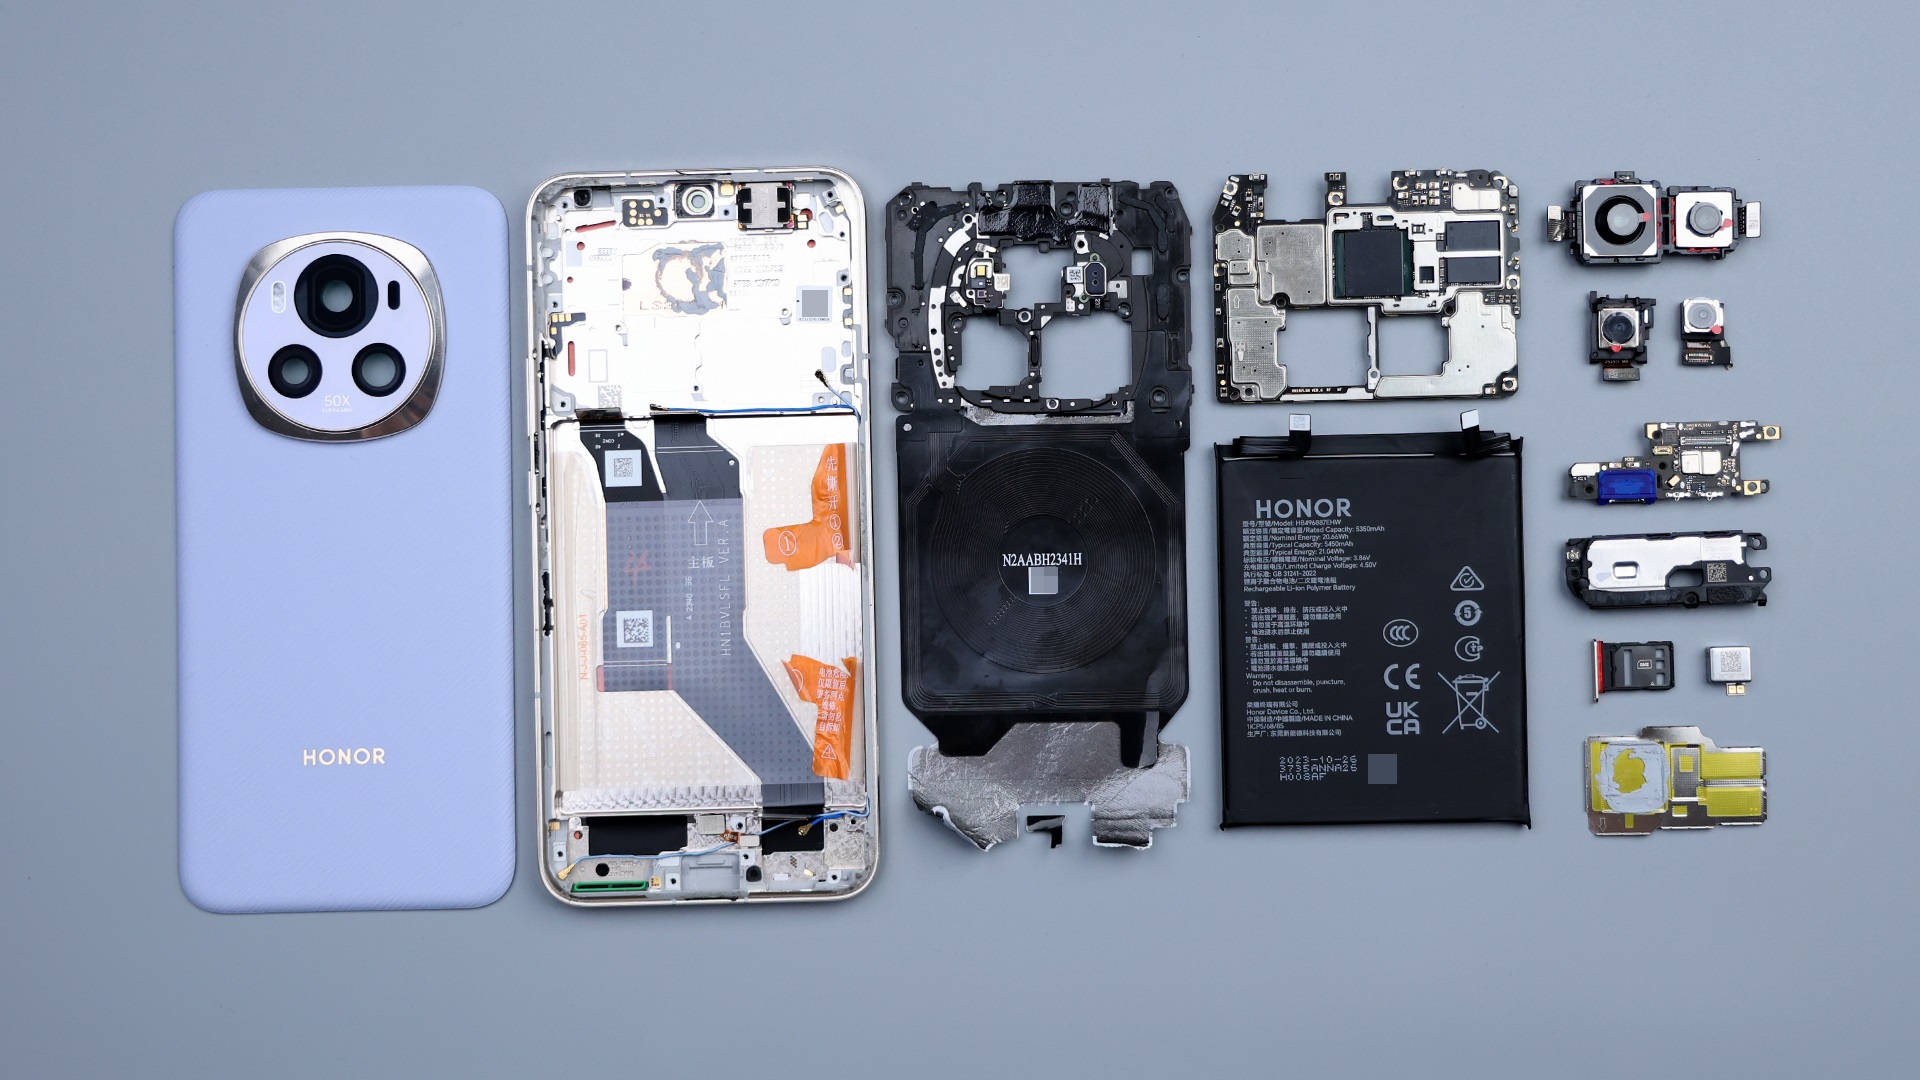
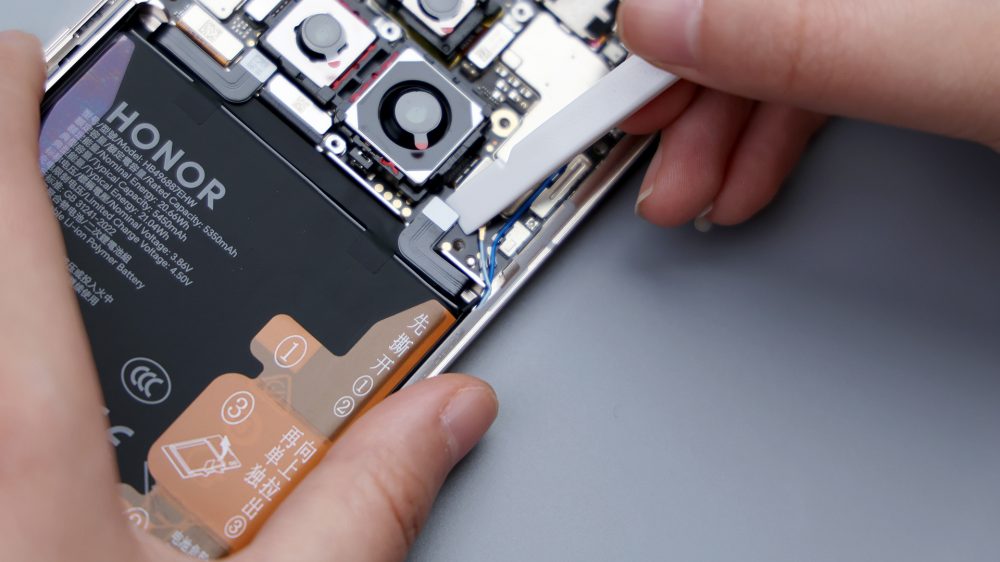
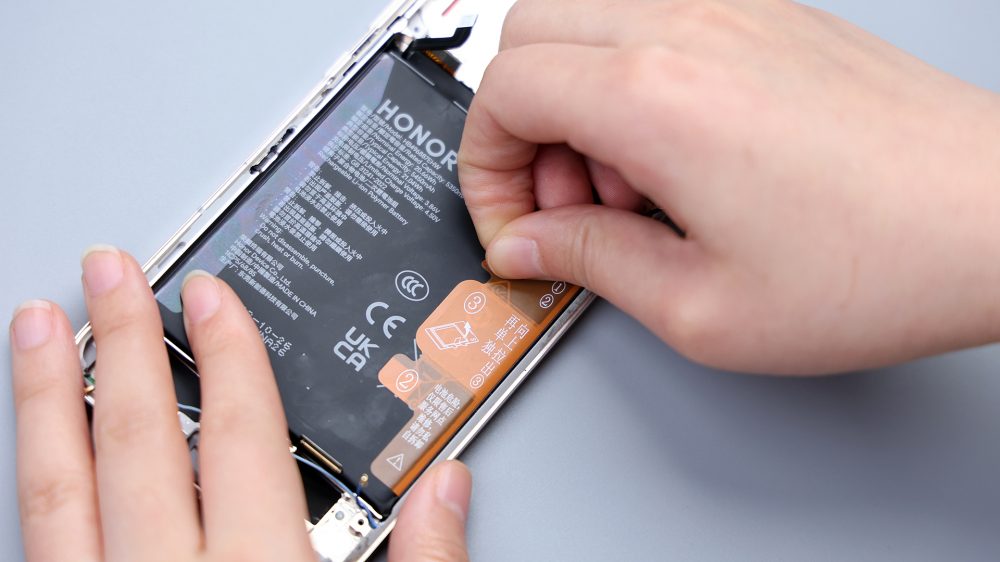
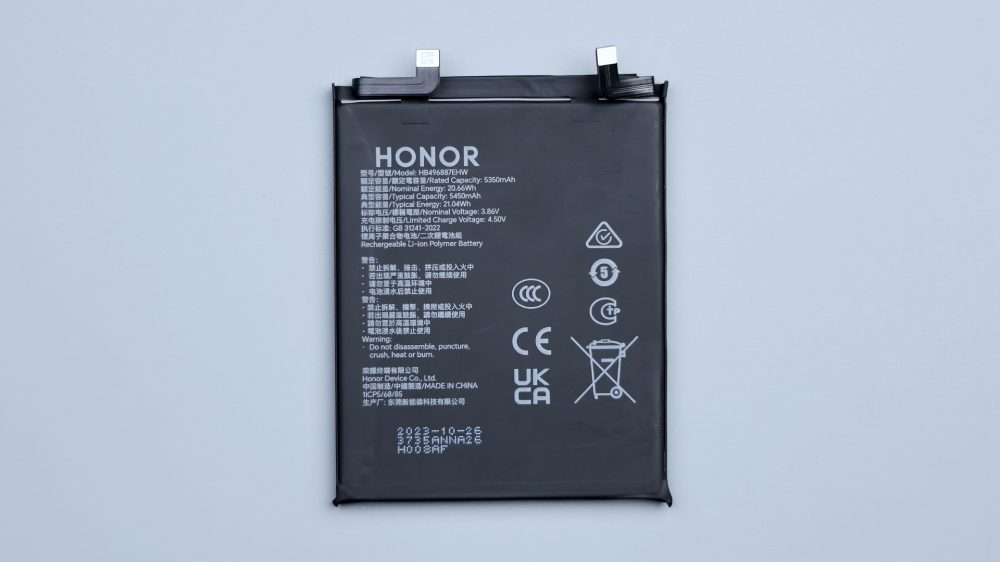
The battery is designed to be easy to remove, and it's easy to do so by following the instructions.The battery capacity of the Magic6 is 5450mAh, and the manufacturer is Dongguan Xinnengde Technology Co Ltd, and the ATL logo on the back indicates that the battery cell supplier is Ningde New Energy.
By this point, the disassembly of the Honor Magic6 is basically complete. There is nothing special about its overall structure, and the common layout and hardware distribution, including the alignment, is relatively traditional. However, in some details, there is still some differentiation, such as the uniformly curved quad-curved back cover, the vegetal leather with a sense of paper texture, the shape and assembly of the inner lining of the DECO area, and the relatively concentrated and highly integrated camera area. However, when it comes to the details of workmanship and materials, for example, the protection of the main and secondary BTB bases, the motherboard component spot gluing, the range of cushioning foam, etc., Magic6 still leaves much to be desired in these areas. This situation is mainly due to the cost constraints, Honor put more investment in the user perception of the stronger core hardware, such as more eye protection ultra-high-frequency dimming screen, customized eagle eye main camera, as well as the processor, operating memory, flash memory core three major components, these are the cost of the composition of the big head. On the whole, Honor Magic 6 chooses the practical route, focusing on high configuration and high performance, so in some internal details, it is dealt with in a simple way.