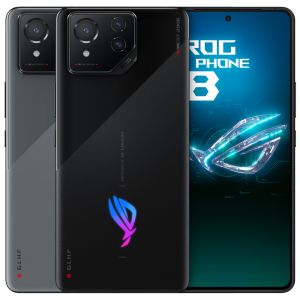
Not long ago, ASUS released the new ROG 8 Pro gaming phone, we will look through the disassembly to see what kind of internal structure it has, and what changes and upgrades it has compared to its predecessor.
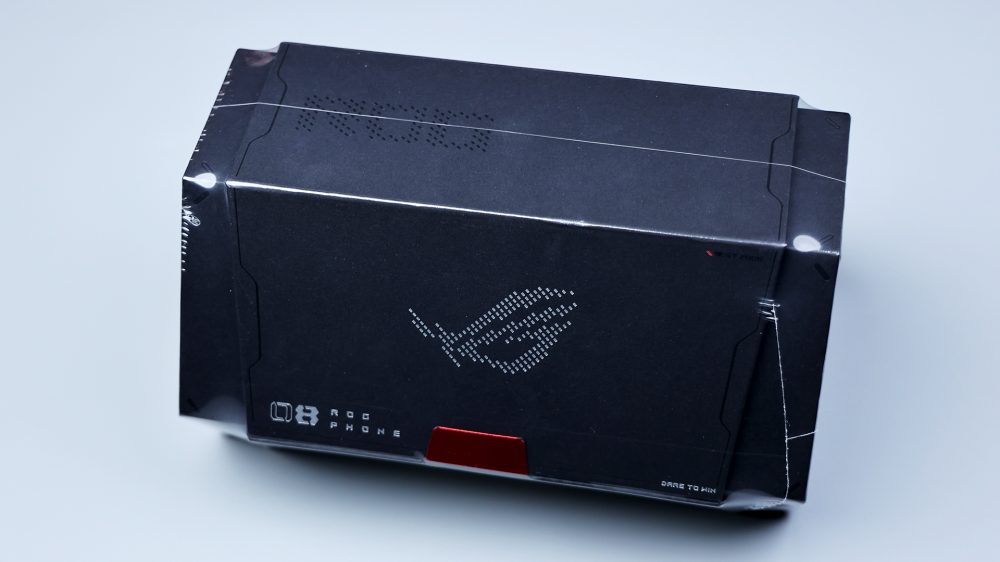
The box is still very special, this aspect of the ROG has always been very hard work, but also the characteristics of the defeat of the eye, must make the user's unboxing full of ceremony, the box is not only used to contain the phone, but also to complete the initial unboxing and boot ceremony carrier.
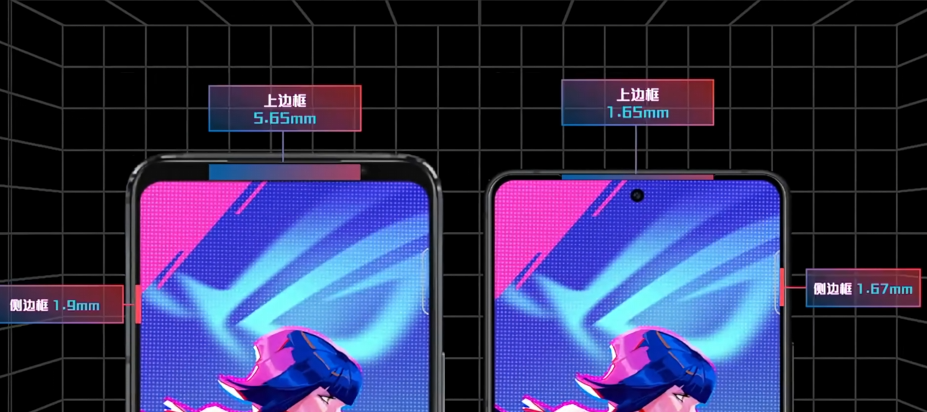
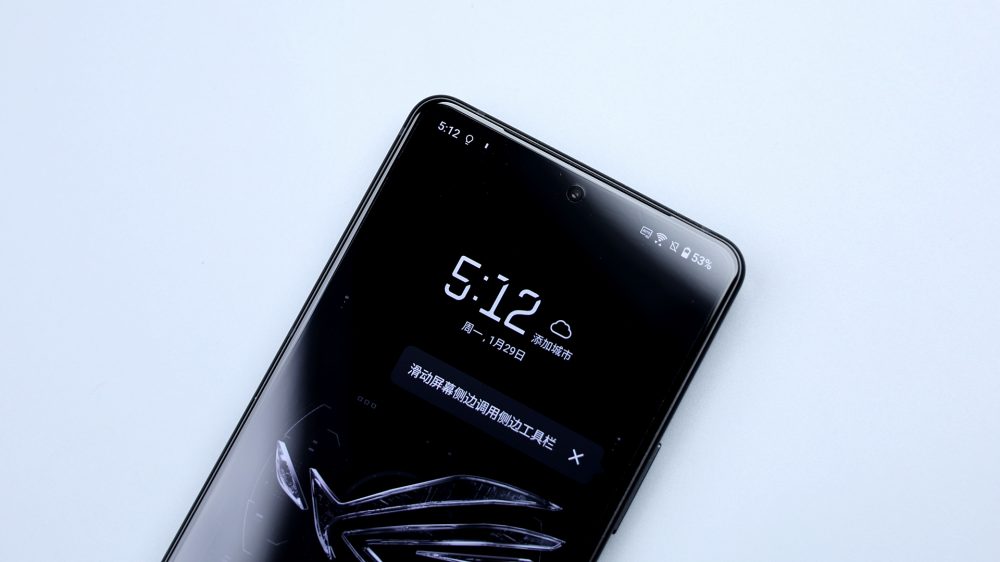
ROG 8 Pro changes are still very big, the most intuitive is that the forehead and chin become narrower, the visual outlook is better, and after switching to the hole digging screen, the front lens is moved from the outside to the middle of the forehead.
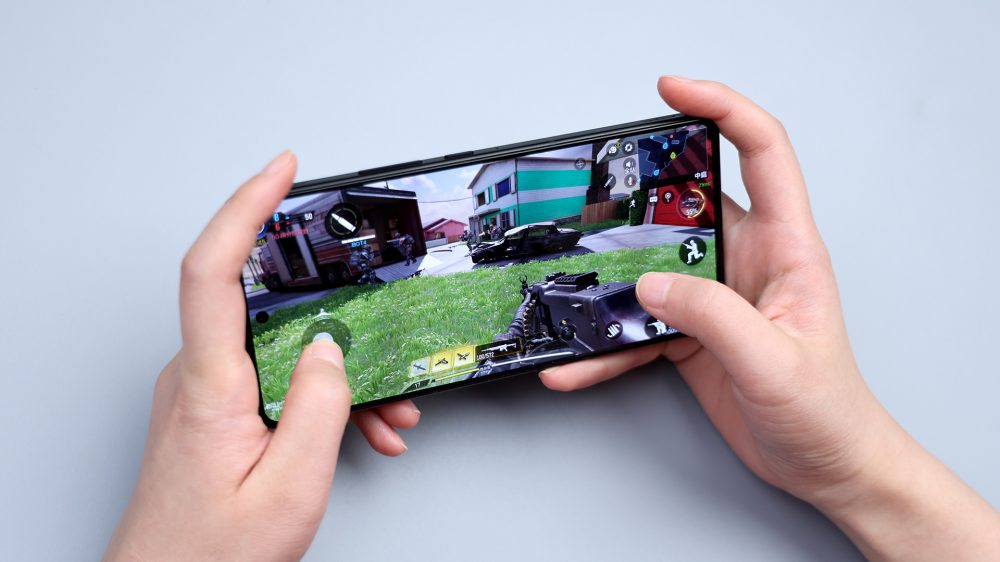
After hands on, I felt another change, it became thinner and lighter, the three circumference dimensions further contraction, the center frame is also changed to a right angle edge, the two sides of the back cover convergence arc has been converged, but it still maintains a high degree of fit, and the feel of the hand is more close to the mainstream comprehensive flagship.
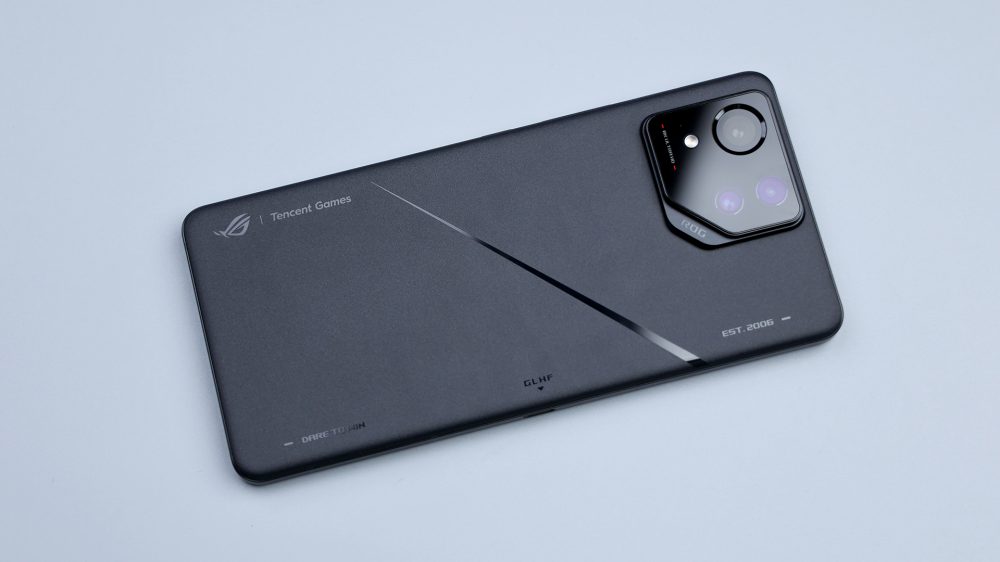
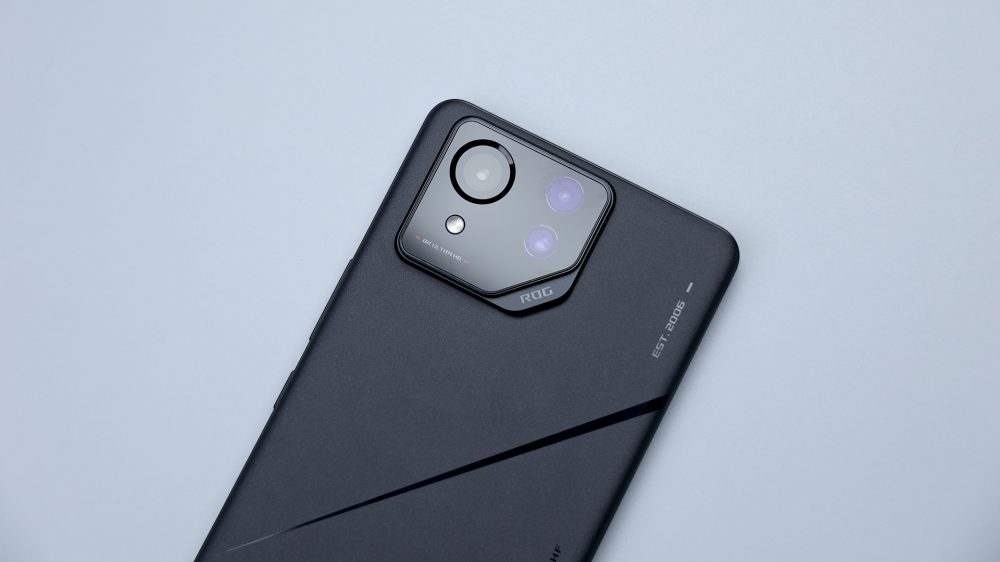
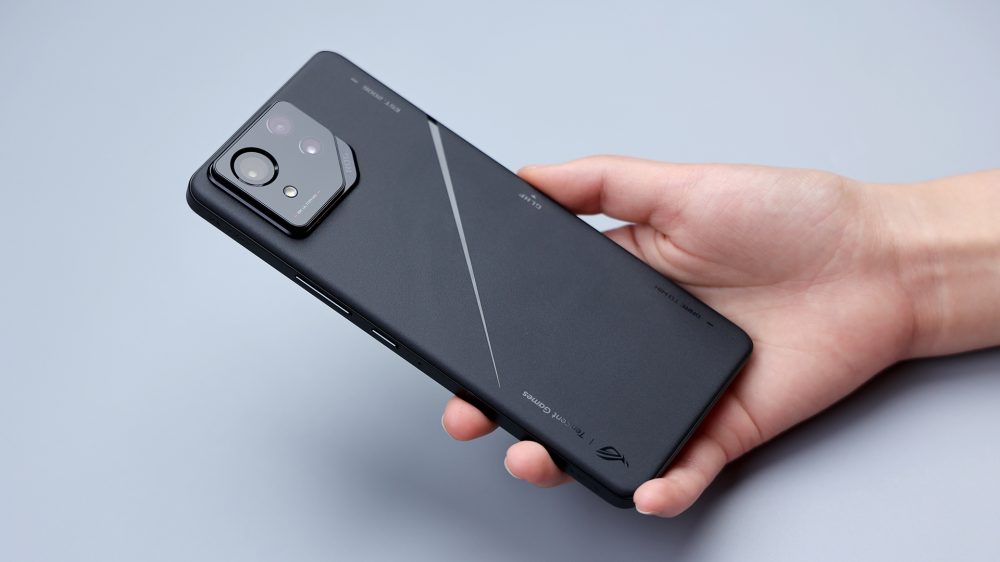
Turned over, the back cover design is more simple, in addition to the letters of the logo, the only decoration is a diagonal stripe in the center. Of course, the most eye-catching is the lens module, the style has not changed, but the shape has changed, similar to the missing corners of the cloud step, with a high degree of recognition. Elevated is also the magnitude of the lens protrusion, highlighting the comprehensive upgrade of the image system.
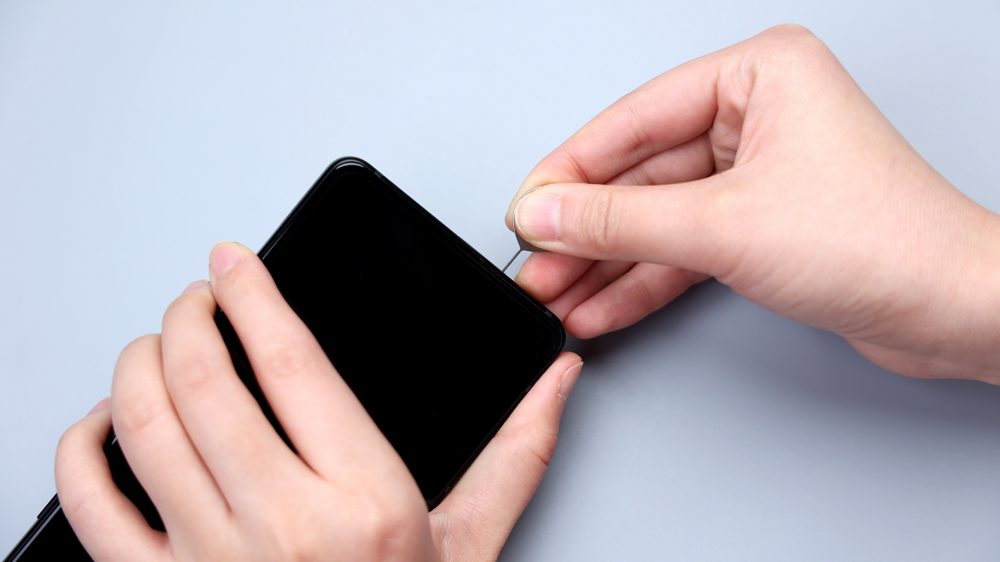
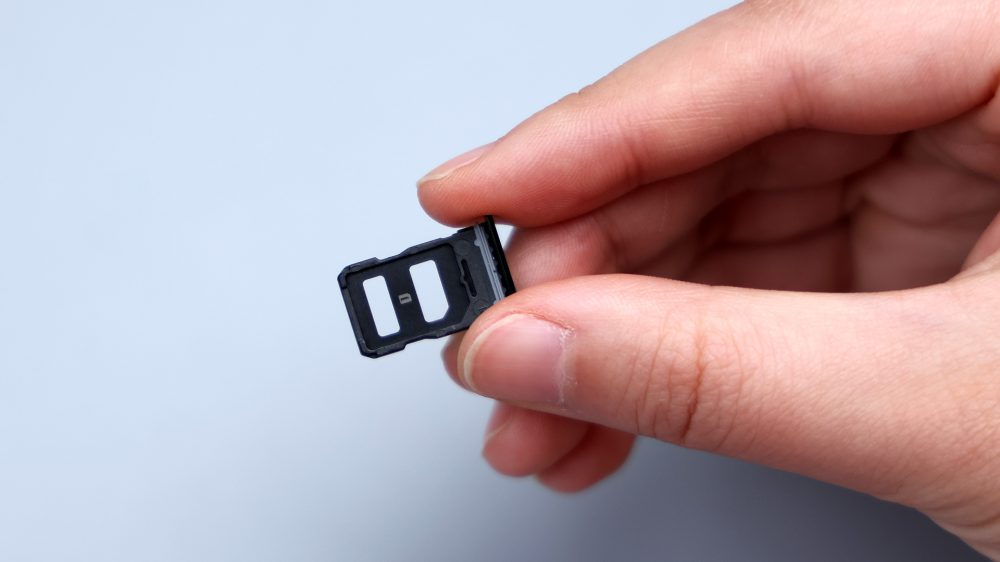
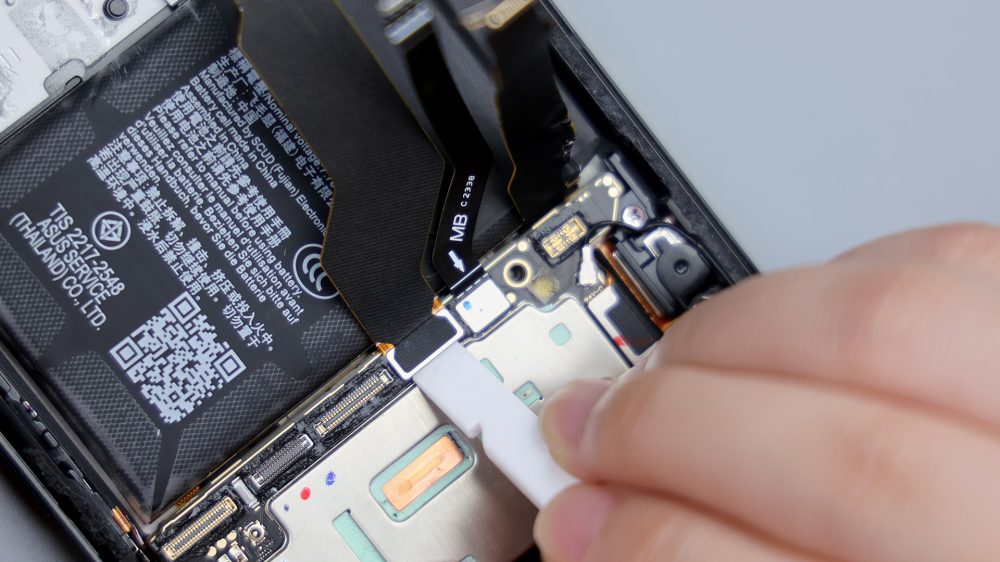
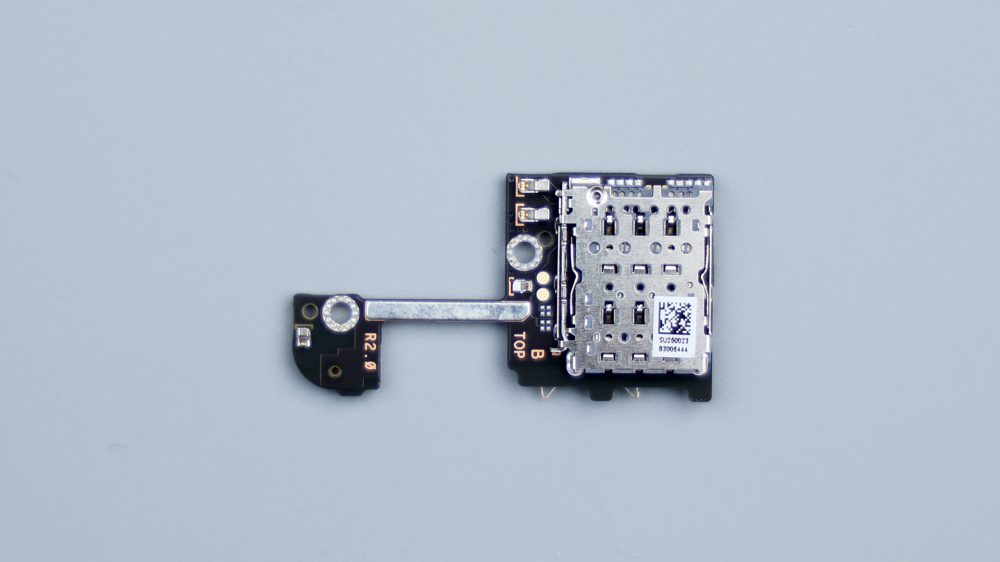
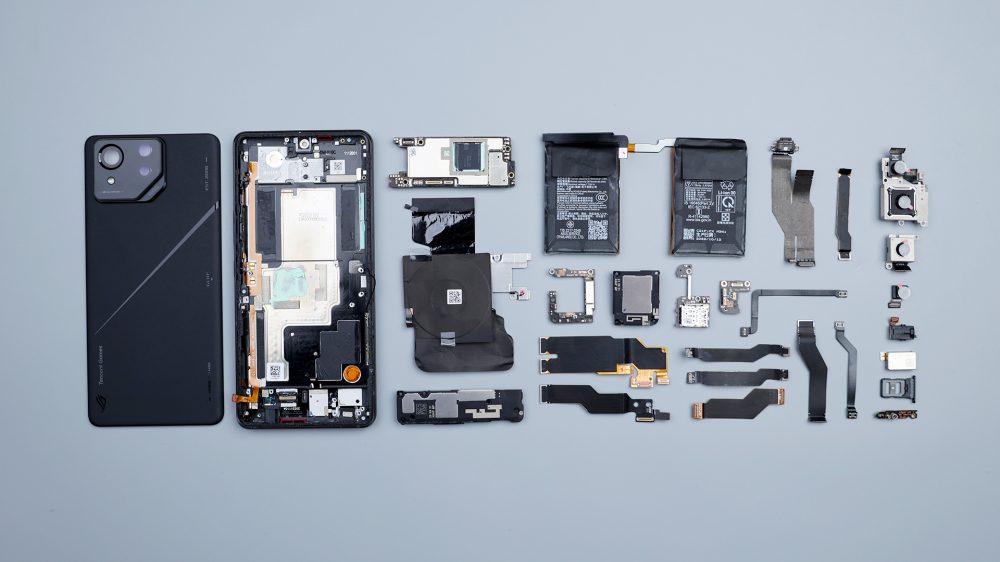
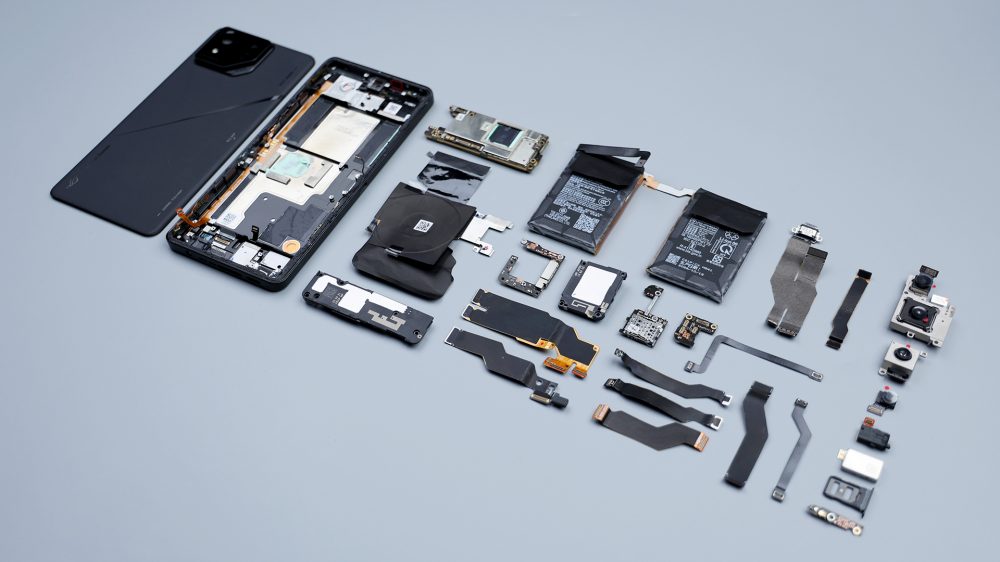
The following began to disassemble, after turning off the phone, remove the SIM card tray, dual nano stack design, metal bezel and bezel + plastic frame, the edge of the gray rubber ring to play a role in dust and waterproof.
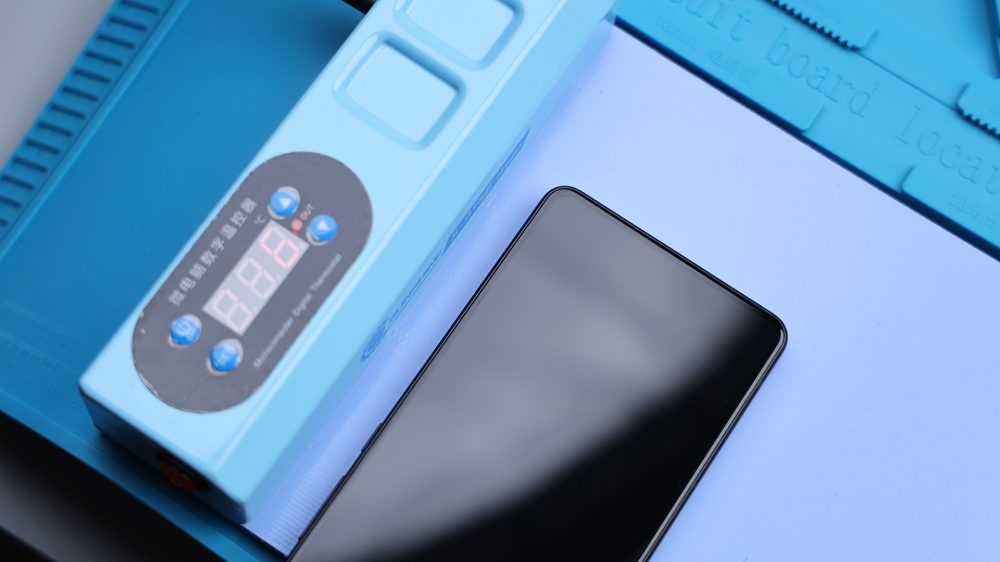
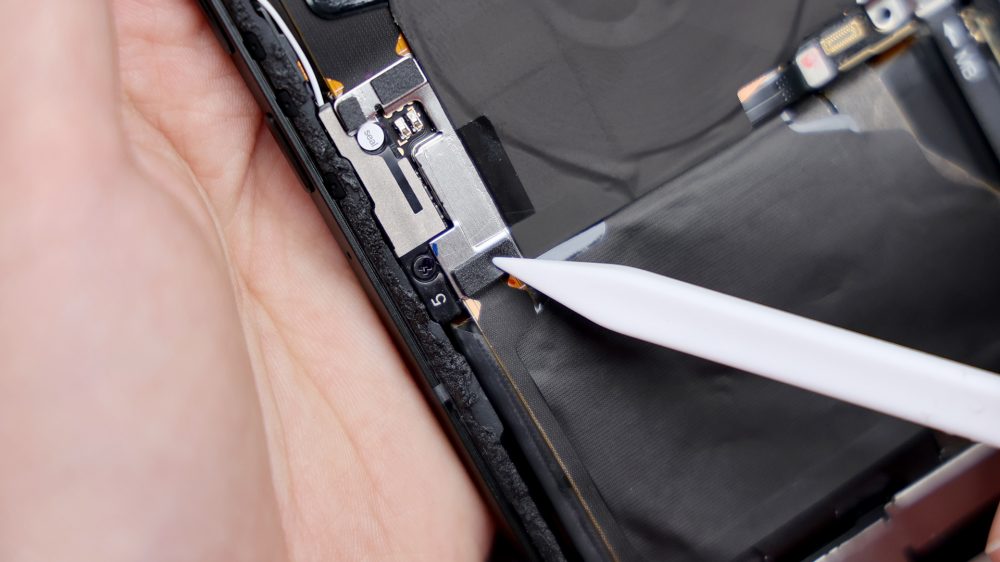
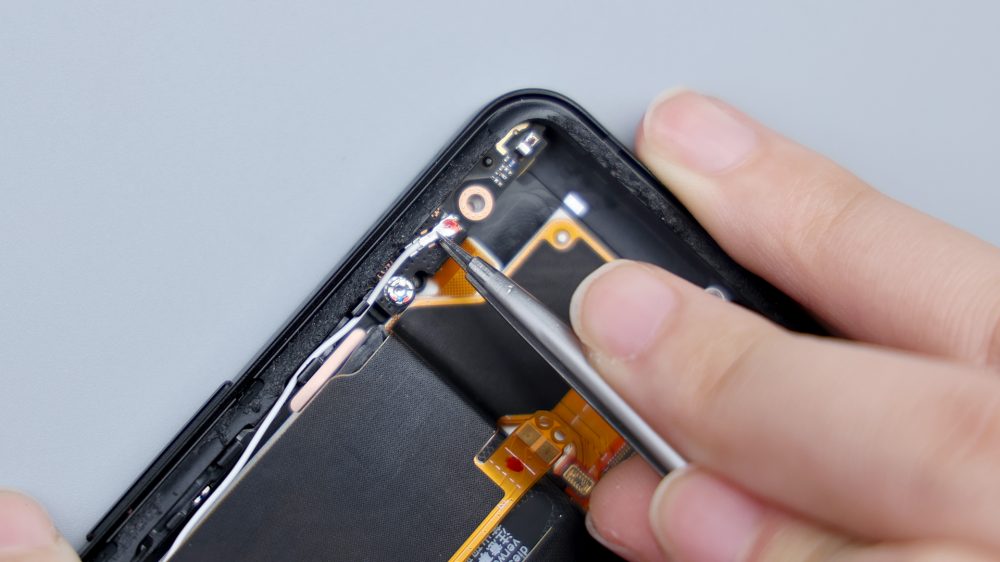
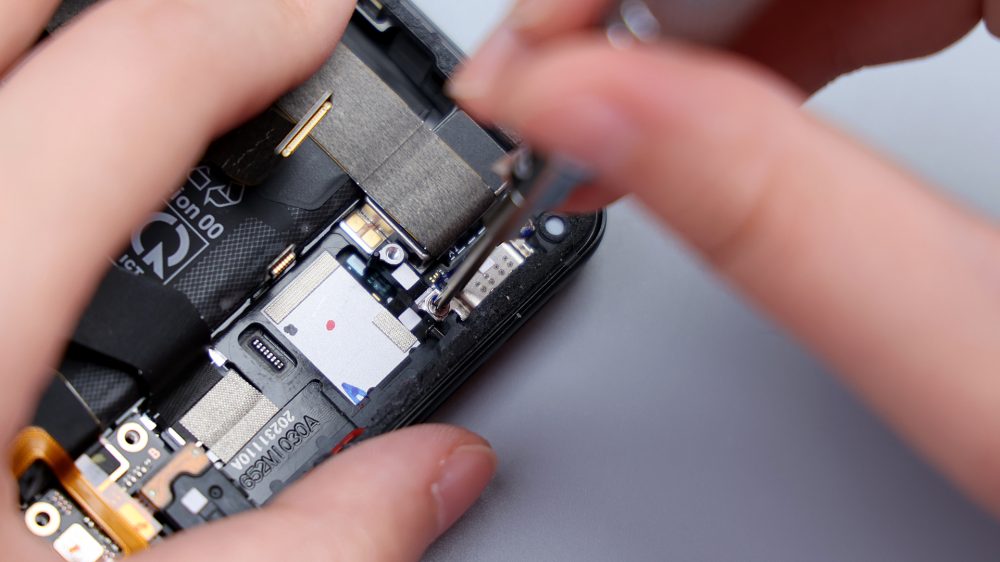
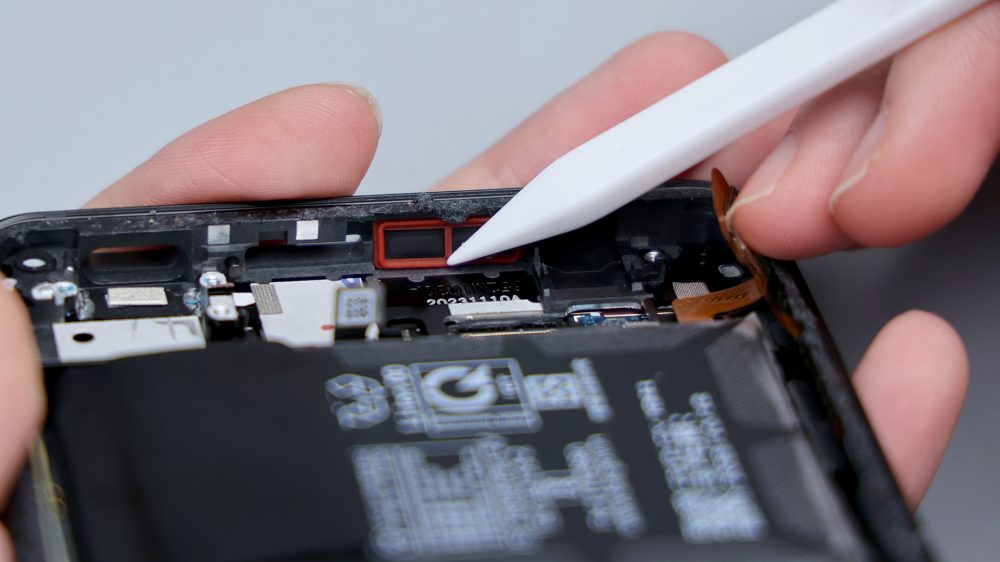
Heating still starts from the flat lower middle part, temperature 100, about 3 minutes, the adhesive is softened. Insert a thin plastic cocking piece into the gap at the edge, don't insert it too deep so as not to damage the row of wires.
The process of opening the back cover was very smooth, except for the corners of the slight effort, the surrounding did not meet any resistance, and soon opened.
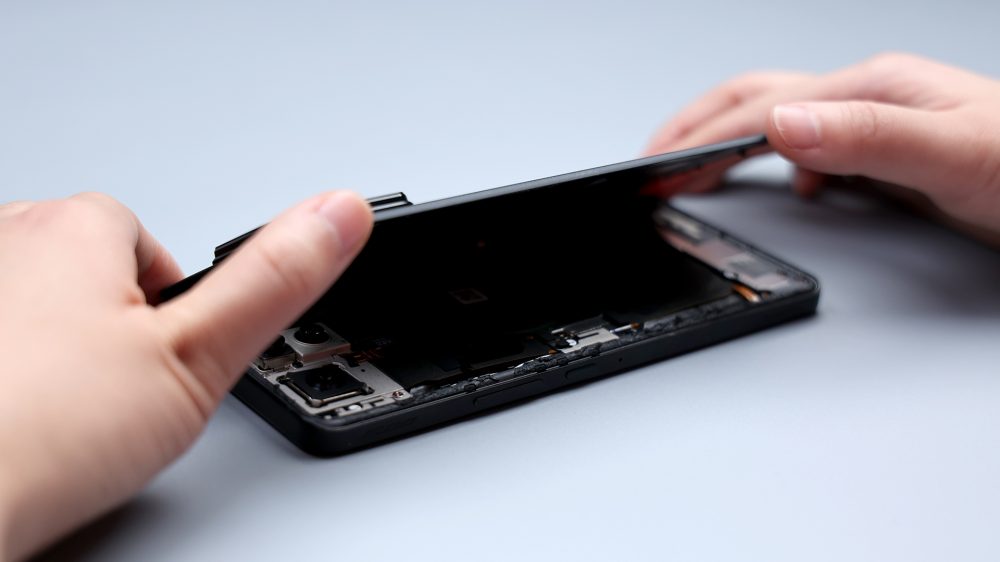
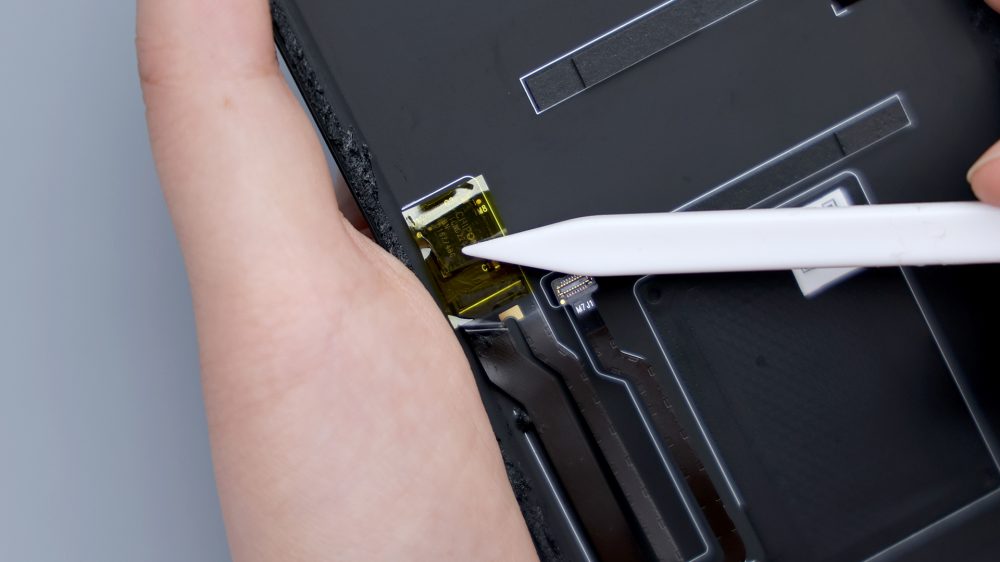
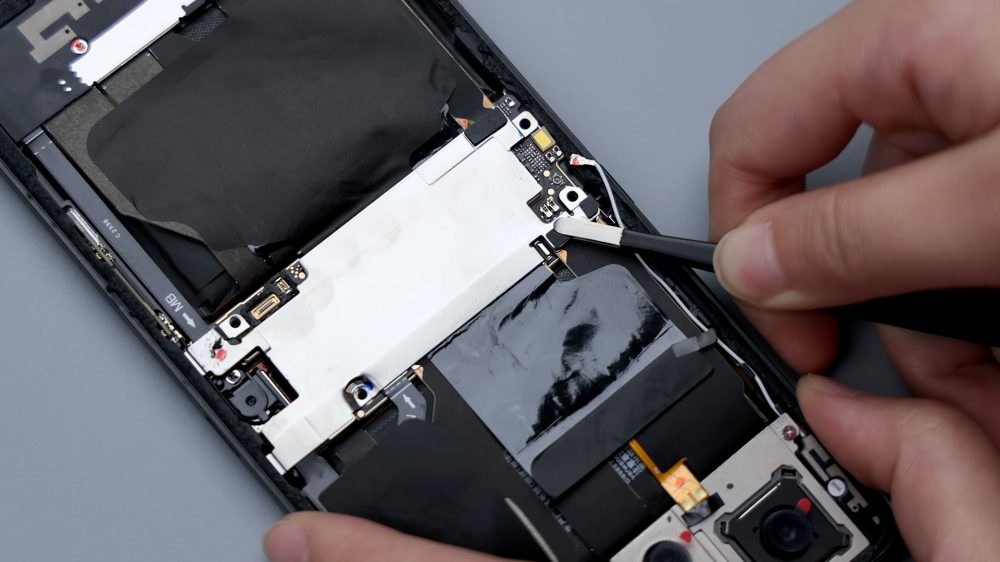
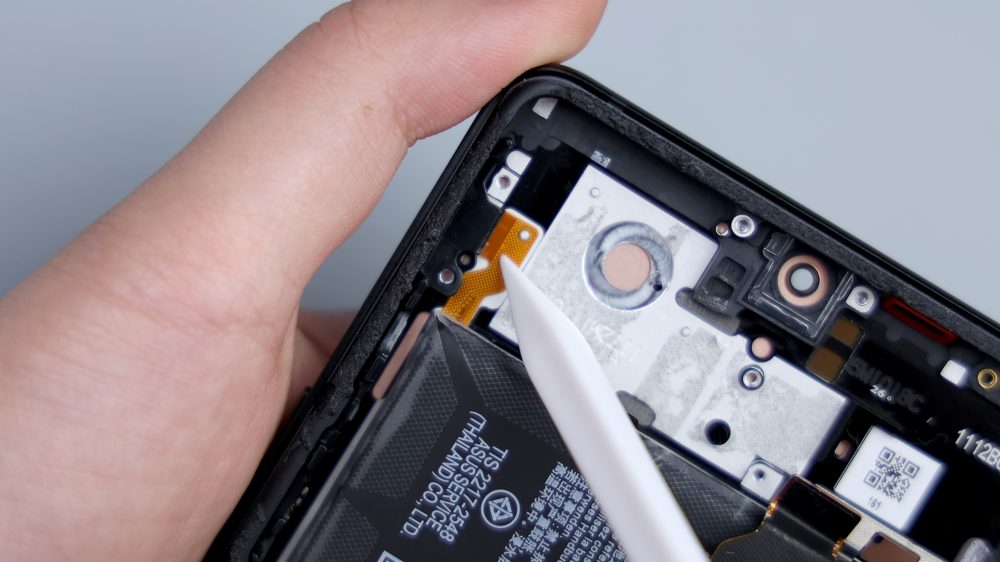
At this point, you can not directly remove the back cover, because it is still connected to the FPC of the optical display matrix screen. from the power button side, slowly lift the back cover, the FPC is in the middle of the opposite edge. Its BTB is pressed by a metal baffle, which is fixed by 1 screw. After unscrewing the screw, pry up the baffle and disconnect the BTB, then you can remove the back cover completely.
The ROG 8 Pro supports IP68 level dust and waterproofing, and there is a ring of waterproof adhesive around the inside of the back cover, which is wide and thick and sticky. Among other things, the corners are also reinforced to some extent, and the prying piece is hindered for this reason.
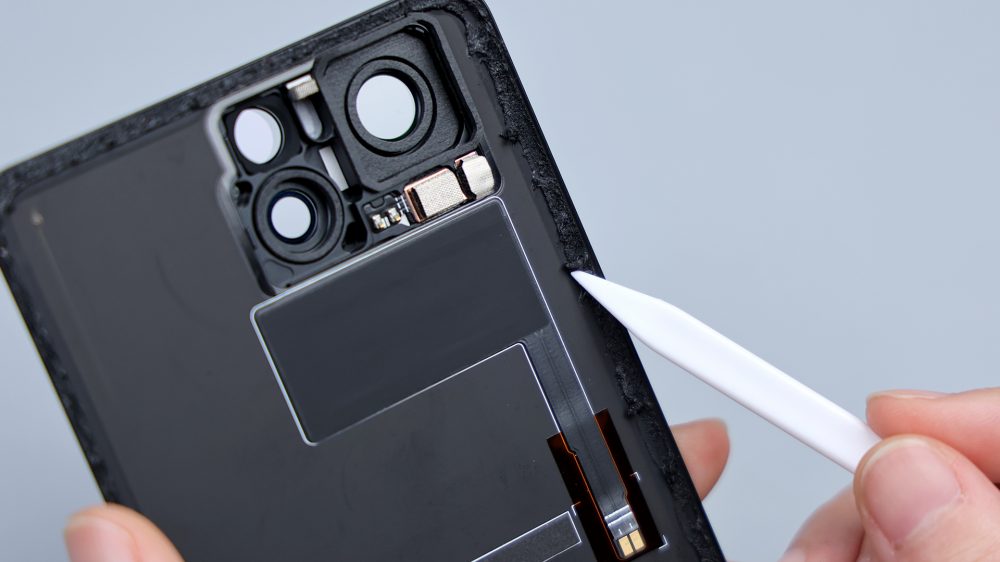
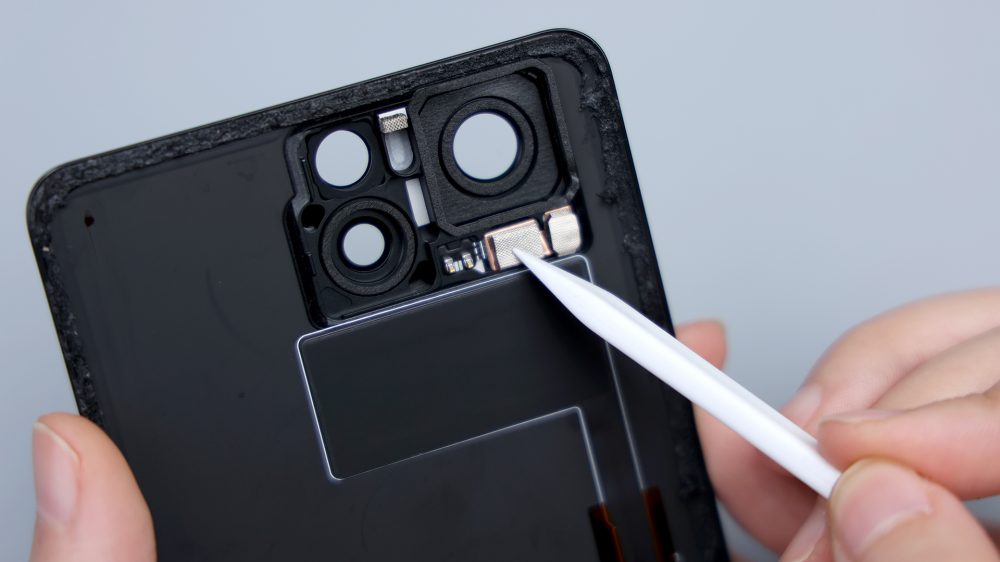
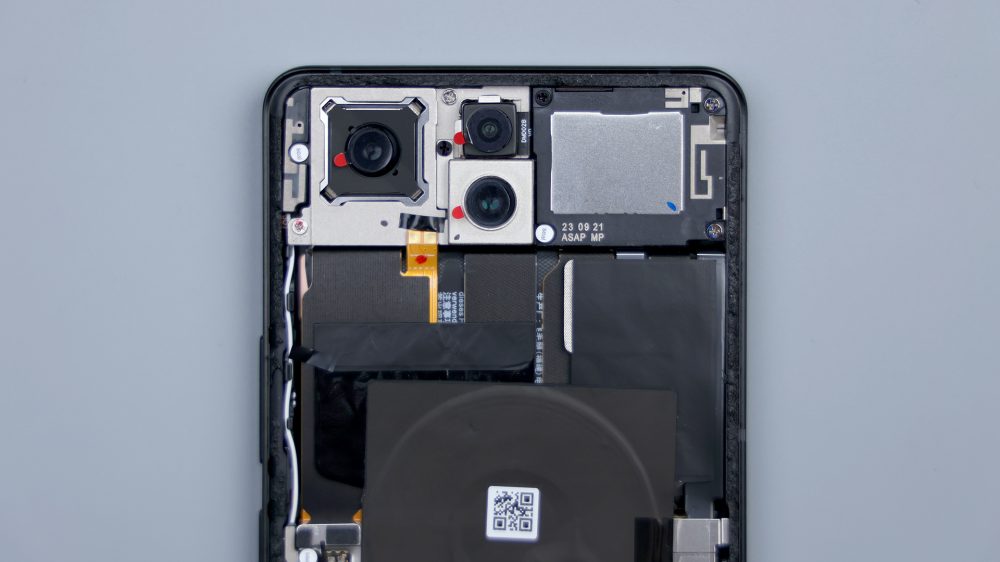
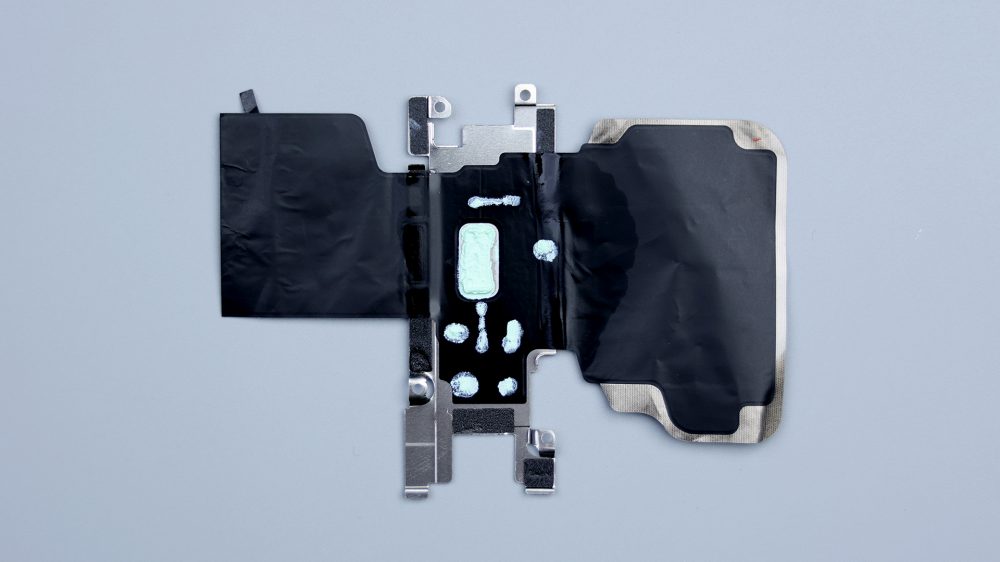
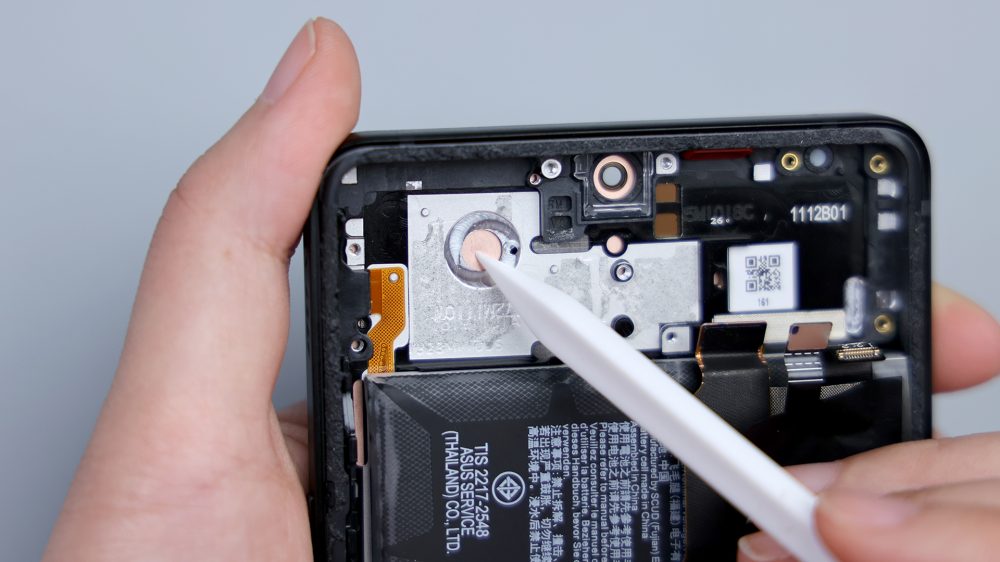
The three openings in the DECO area correspond to the three rear cameras, the ultra wide-angle lens features a black rubber ring, the telephoto lens is a black foam ring, the main camera is even more exaggerated, the outer square and the inner circle, directly affixed to the three layers of foam ring, the lens plays a buffer to protect the role.
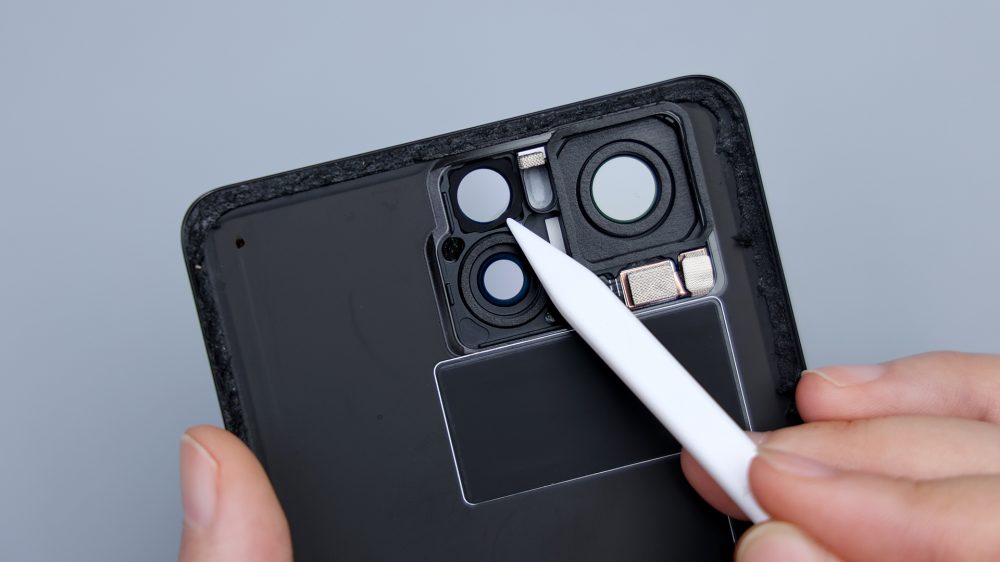
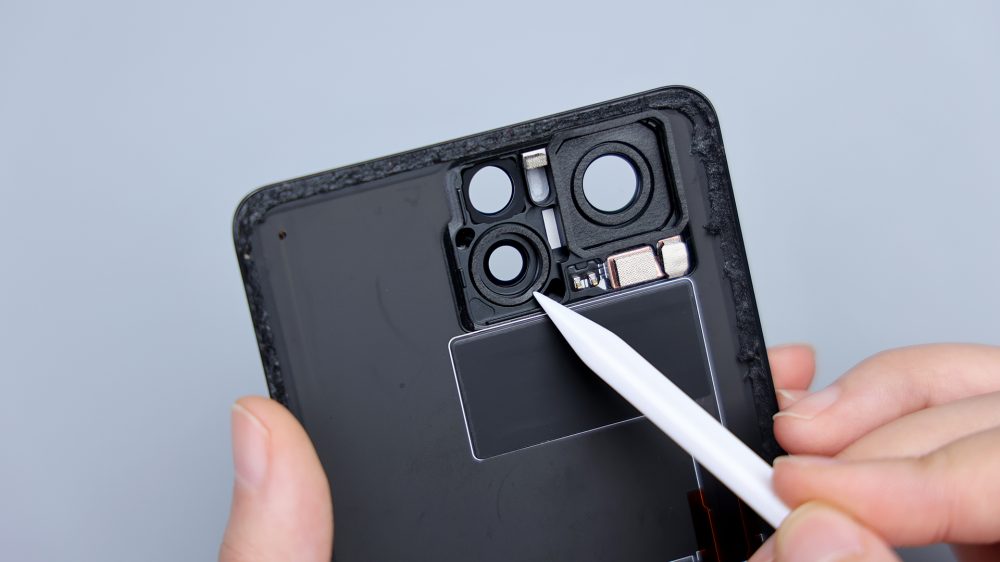

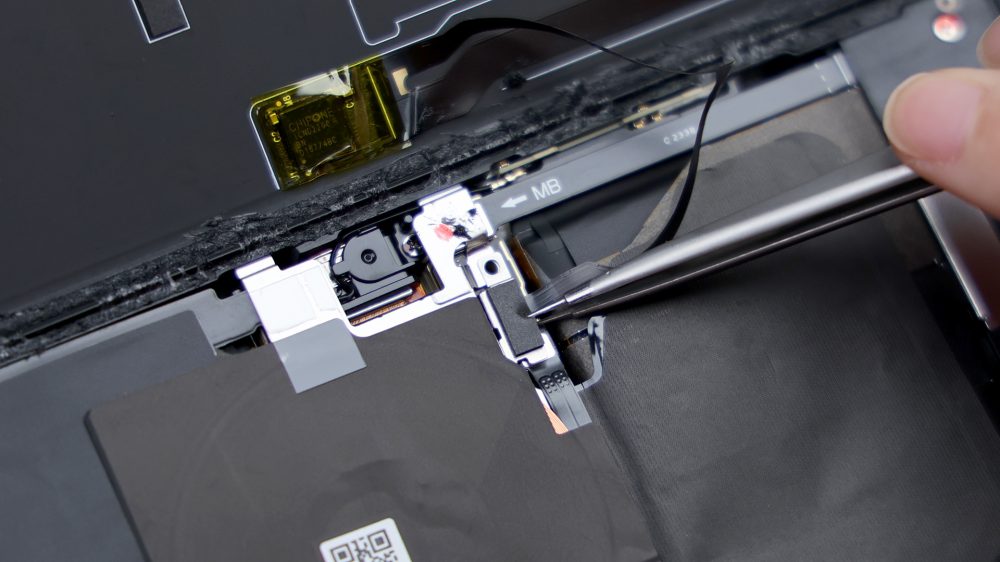
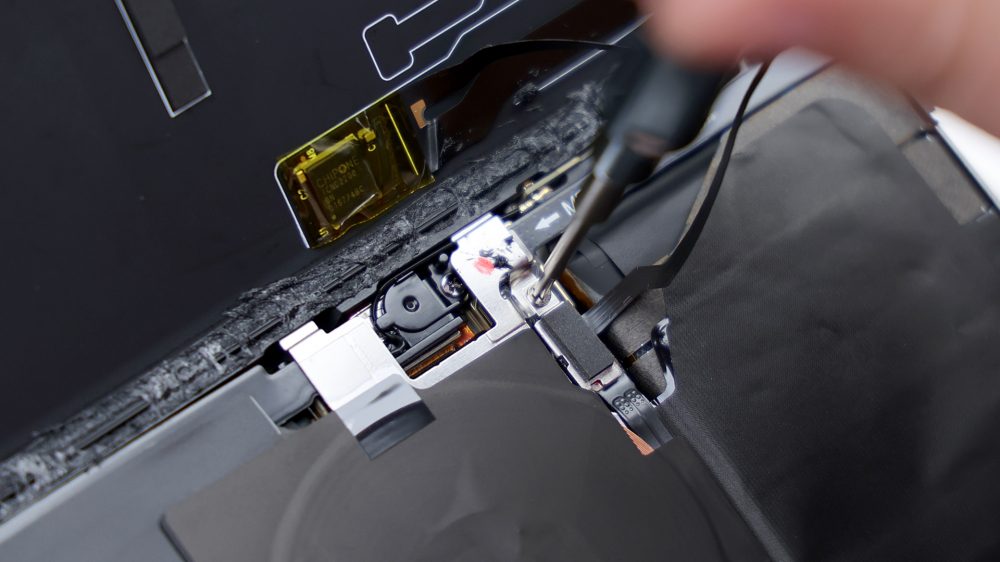
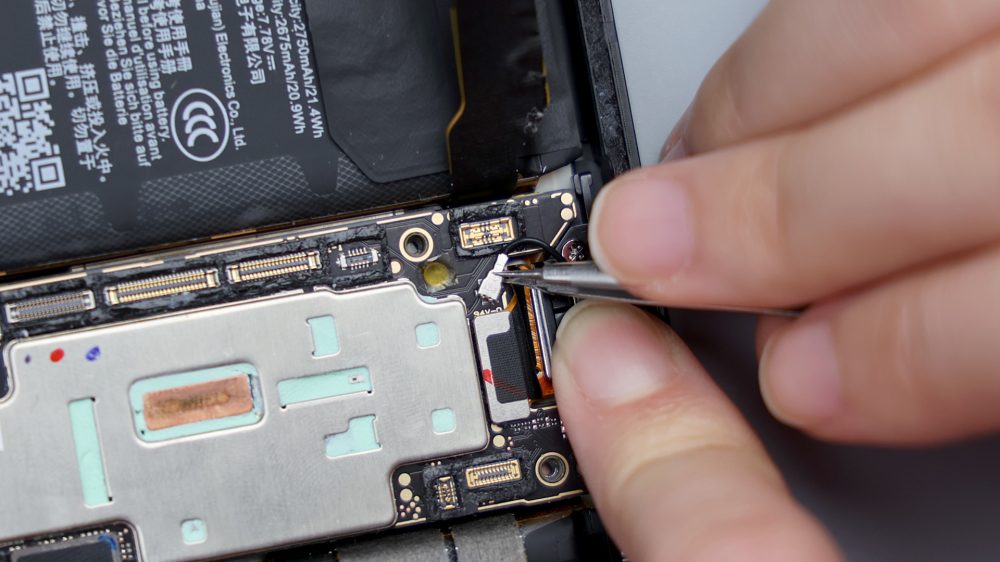
Below the main camera there are two pieces of thick conductive cloth, the left piece of pressure on the flash, through the 2 metal shrapnel connected to the PCB. below a large rectangular black heat dissipation film covers the NFC coil, through the right side of the PFC and 2 contacts connected to the motherboard. The 2 long foam pads in the center correspond to the two rows of core BTBs on the motherboard, serving as padding and cushioning protection.
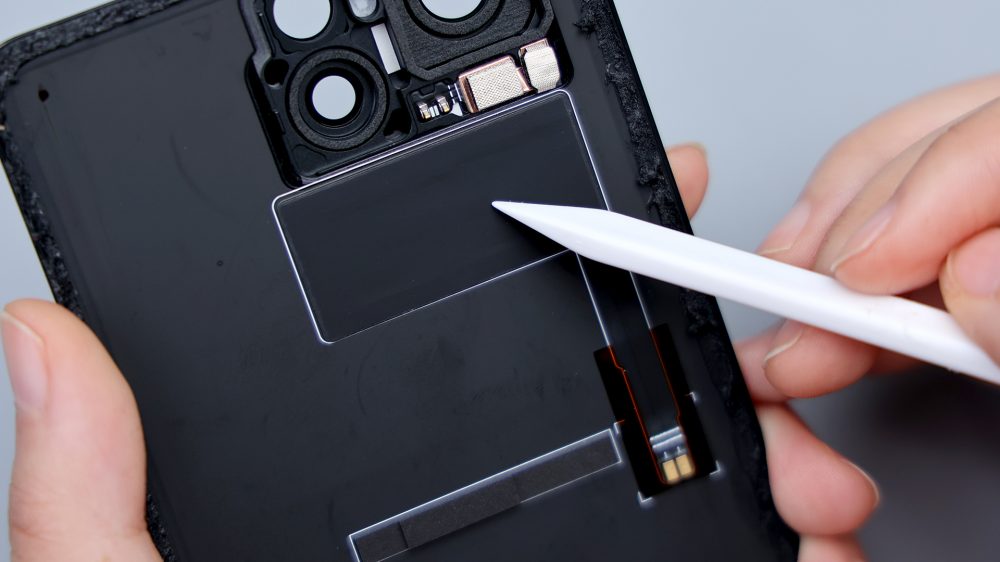

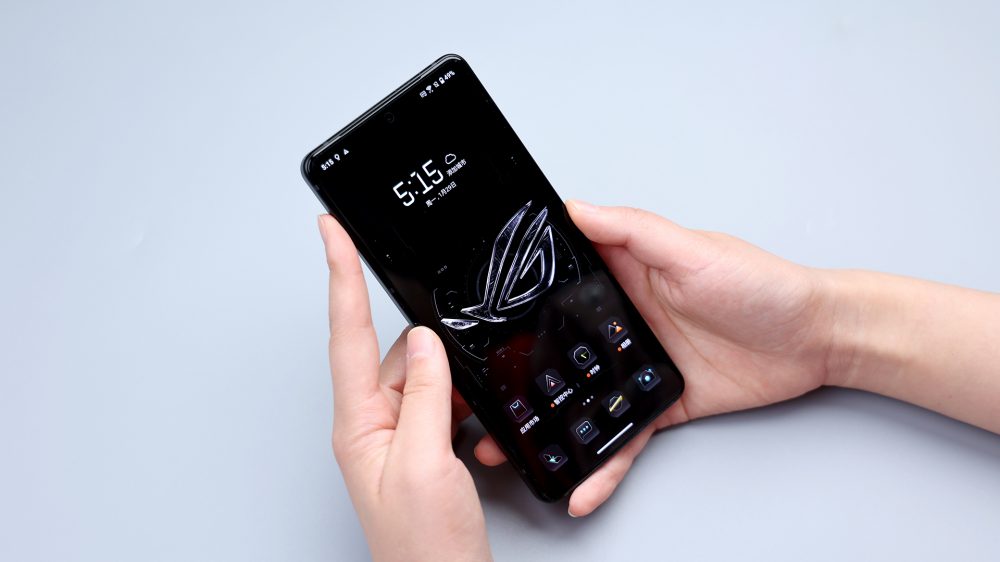
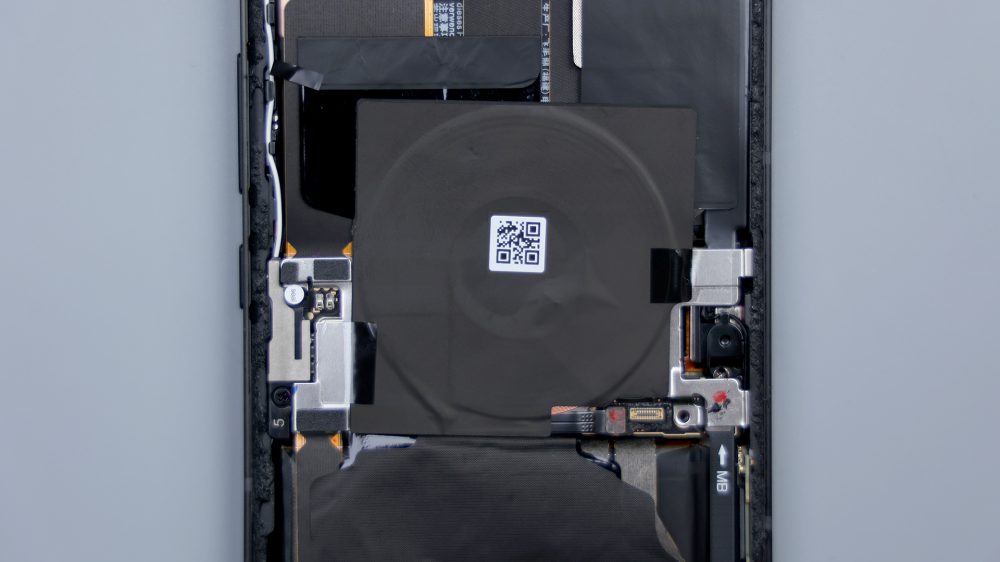
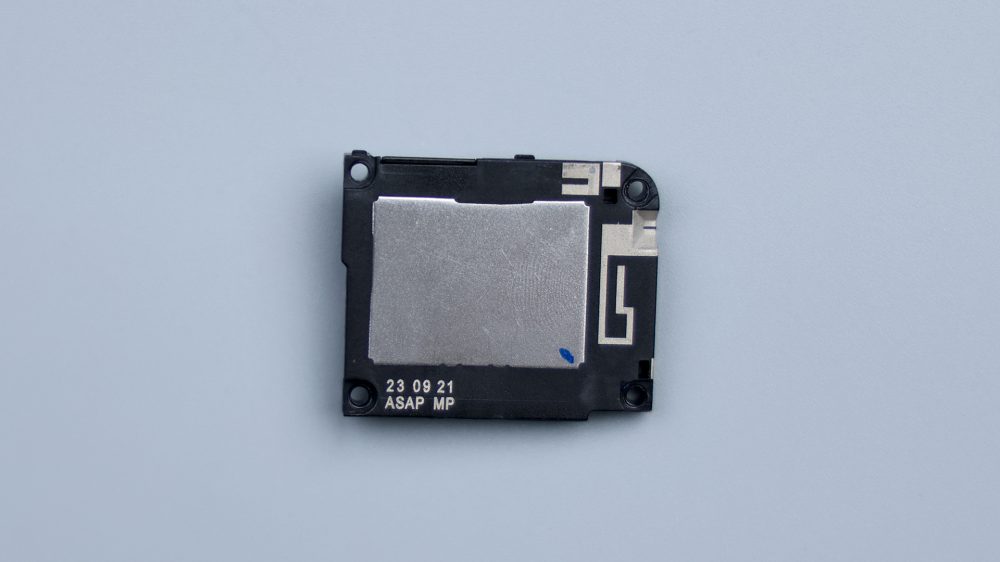
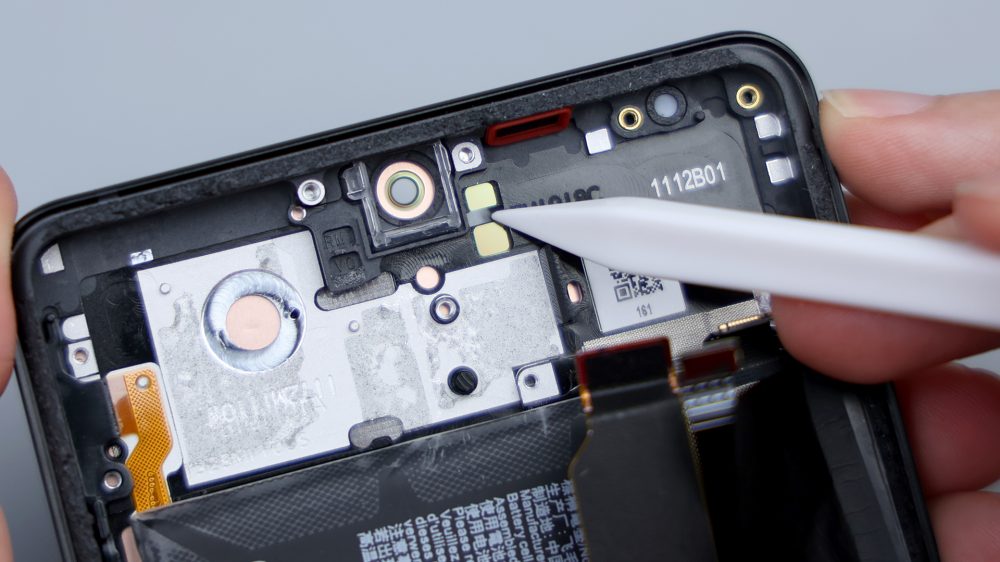
The black square area further down is the ROG 8 Pro's optical display matrix screen, which consists of 341 programmable LEDs with dozens of preset animations and support for customization.
After the console is launched, you can select the light effects corresponding to functions and scenes such as playing music, incoming calls, notifications, charging, brightening the screen, dimming the screen, and so on, according to your needs.
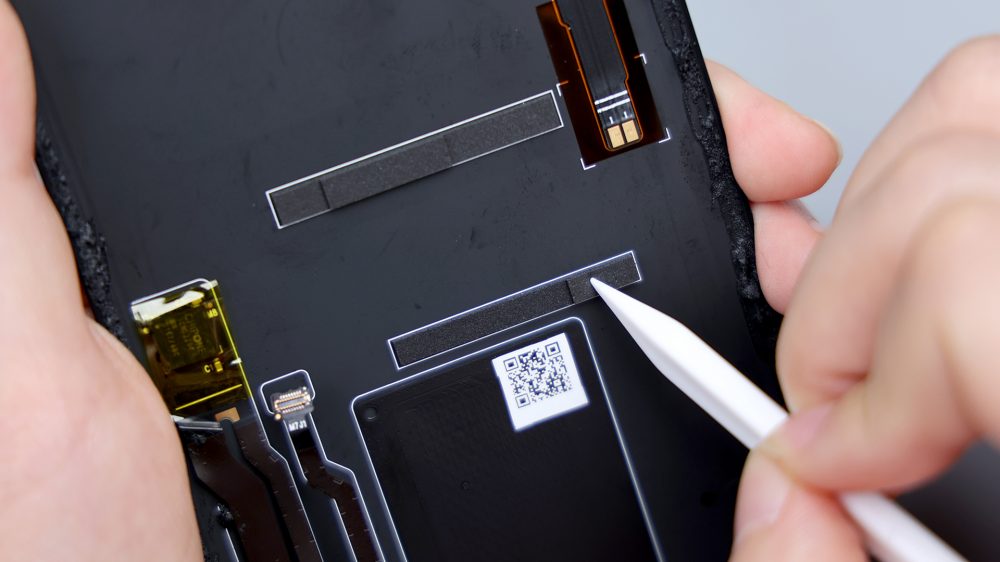
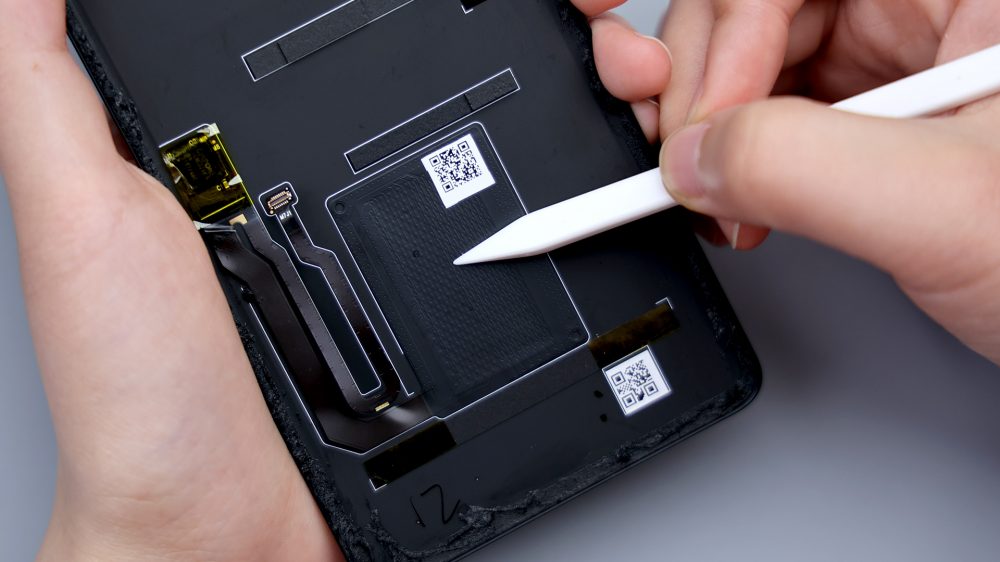
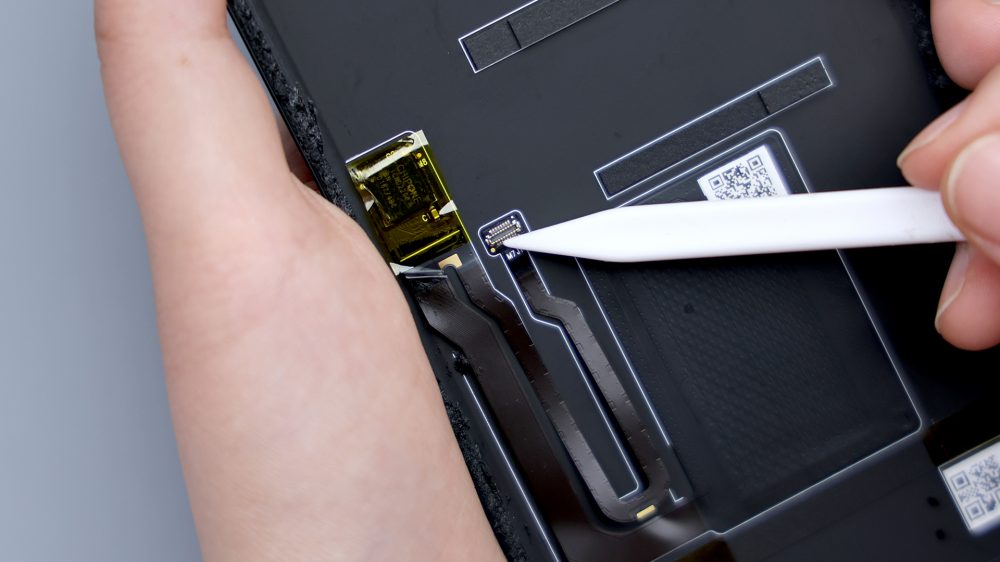
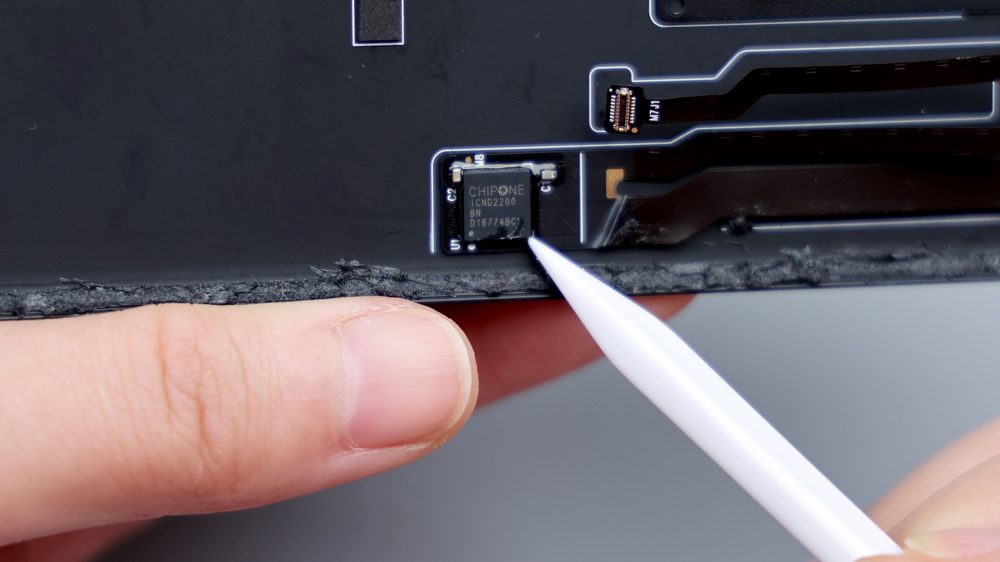
It connects to the motherboard via a strip of FPC and BTB on the left, with a piece of yellow tape on the upper left, and underneath is an LED driver chip from Beijing Tiburon, model ICND2200, which is used to control the various light effects we see. Below the back cover, there is also 1 long foam pad, corresponding to the multiple FPCs in the sub-panel area, providing buffer protection.
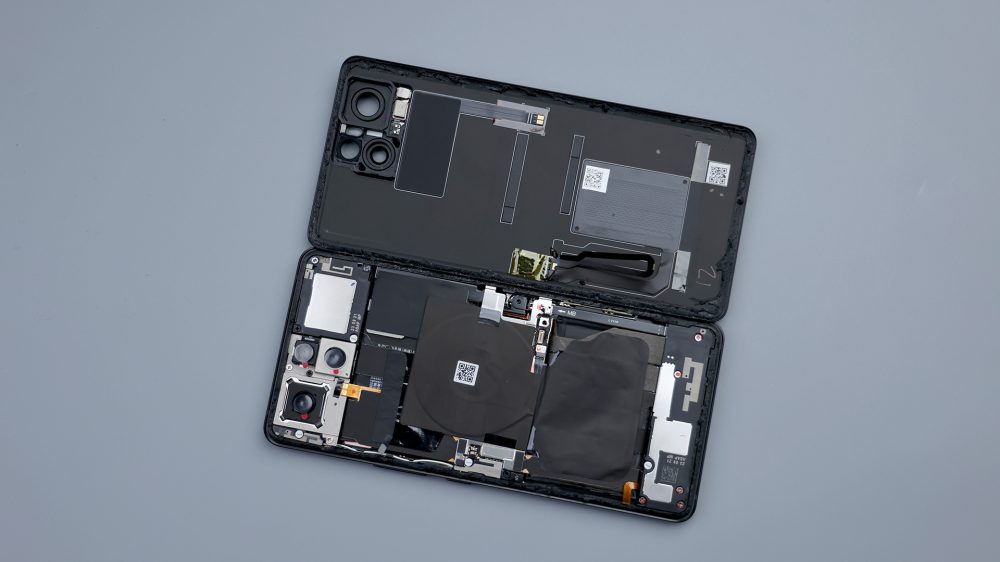
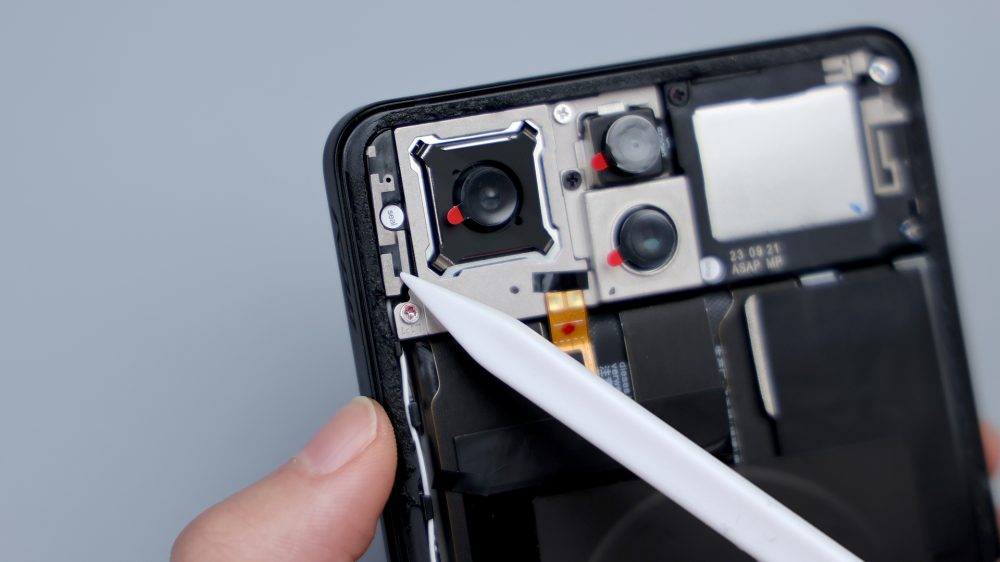
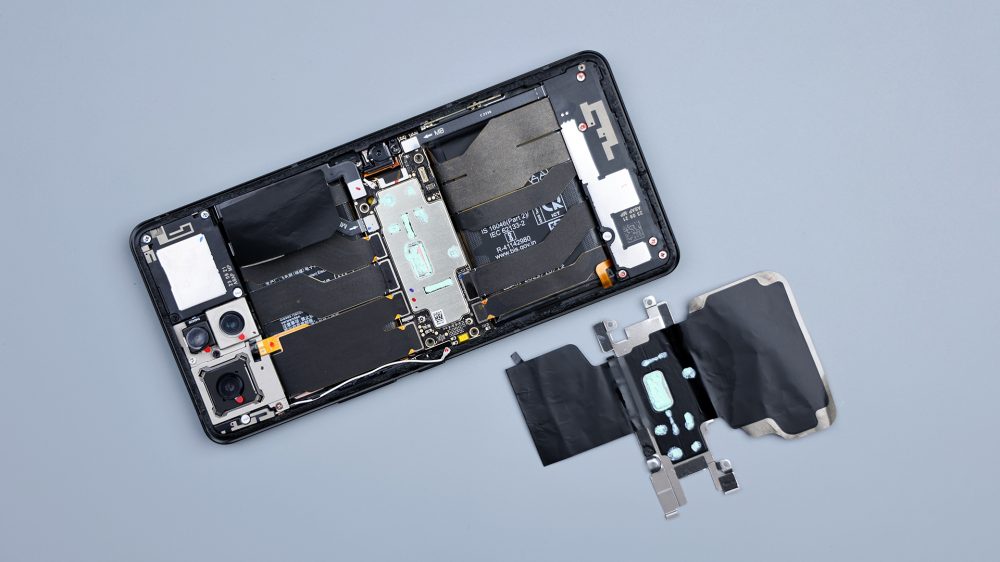
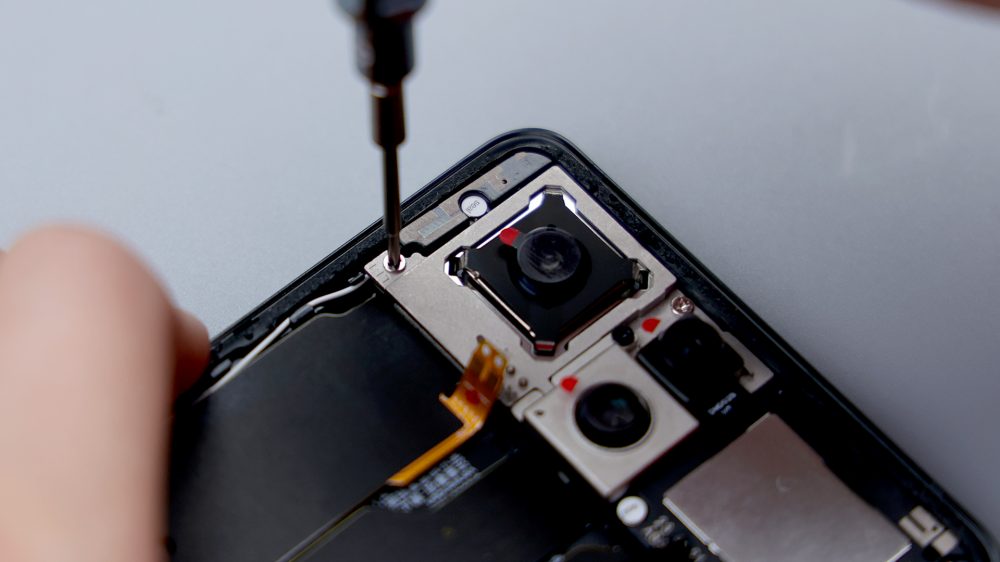
The layout of the main body of the phone is similar to its predecessor, and instead of the usual three-part structure, it consists of five parts. The most striking is the rear camera and the center area, the main camera is significantly larger and wrapped with a metal anti-roll frame. The lower 2 contacts correspond to the flash, the telephoto lens is equipped with a separate roll cage that is fixed by 1 screw, and the ultra-wide-angle lens is integrated with the main camera on another large roll cage.
There is an extra layer of wireless charging coil in the middle of the phone, connected to the motherboard via 1 FPC, it supports 15W wireless charging, Qi 1.3.3 standard.
A layer of waterproof adhesive residue can also be seen around the bezel, and the adhesive is very thick. There are multiple LDS laser laser antennas in the upper left and right corners to ensure signal strength.
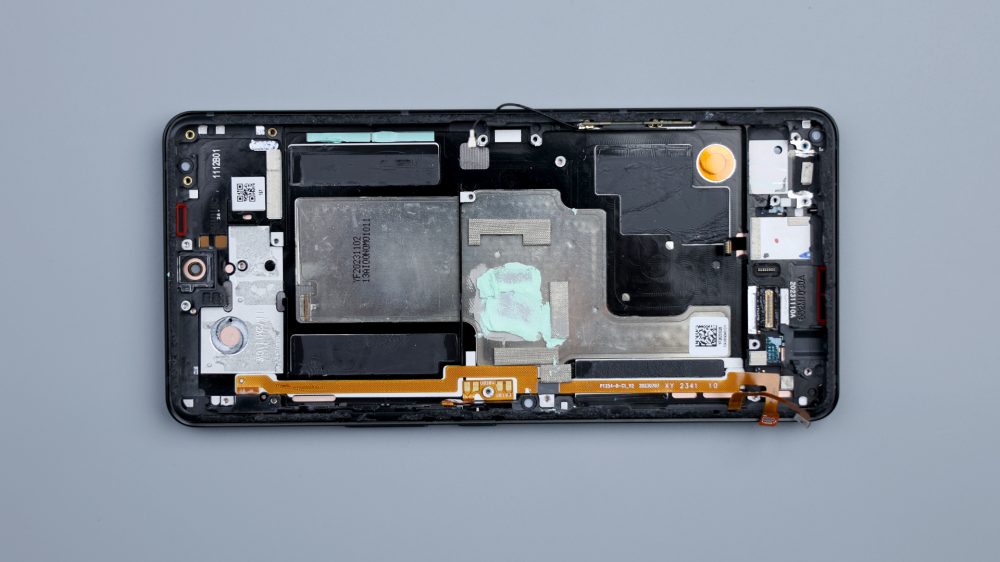
The speaker BOX of the upper speaker is integrated into the cover, and judging from the position of the screws, it is just pressed against the lens anti-roll bar to fix it. Downwards there are two heat sinks split between left and right, covering the battery, FPC and part of the wireless charging coil.
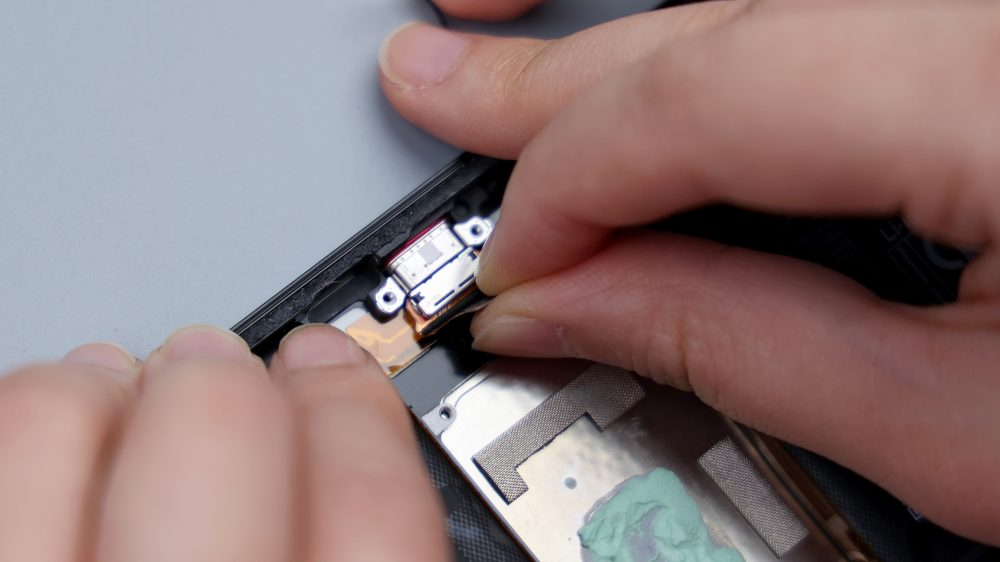
The 2 metal shrapnel in the left center corresponds to the NFC coil, the 3 pieces of foam around it provide cushioning protection for the FPC, there is a piece of LDS laser radar antenna right next to it, and the black part in the right center position on the opposite side covers and protects the USB port as well as takes on the function of the RF cable slot.
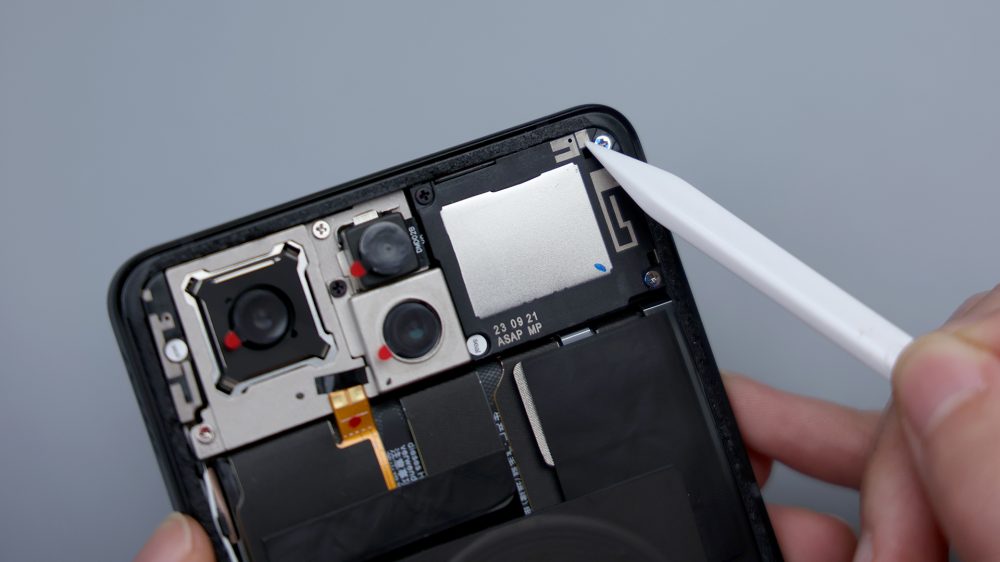
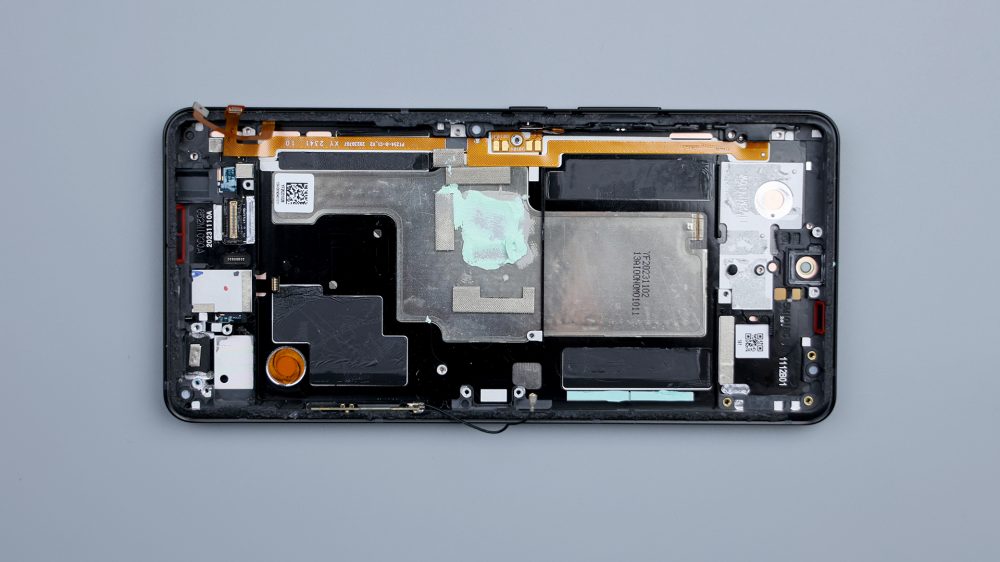
Next to a whole metal plate covering the motherboard, below the black tape on the inside of a piece of heat dissipation film, covering the battery below and a row of FPC, from the edge of the point of view, it should be extended upward to the inside of the metal plate. The secondary board area also has an LDS laser laser antenna, the cover is made of metal and plastic, and the round hole in the lower right corner corresponds to the bottom microphone.
Disconnect the BTB for wireless charging, unscrew the fixing screws of the metal plate, remove the antenna plate on the left side, pick the white coaxial wire, tear off the transparent tape on both sides and rip off the wireless charging coil. There is also 1 screw covered on the right side, unscrew it and then you can remove the metal plate.
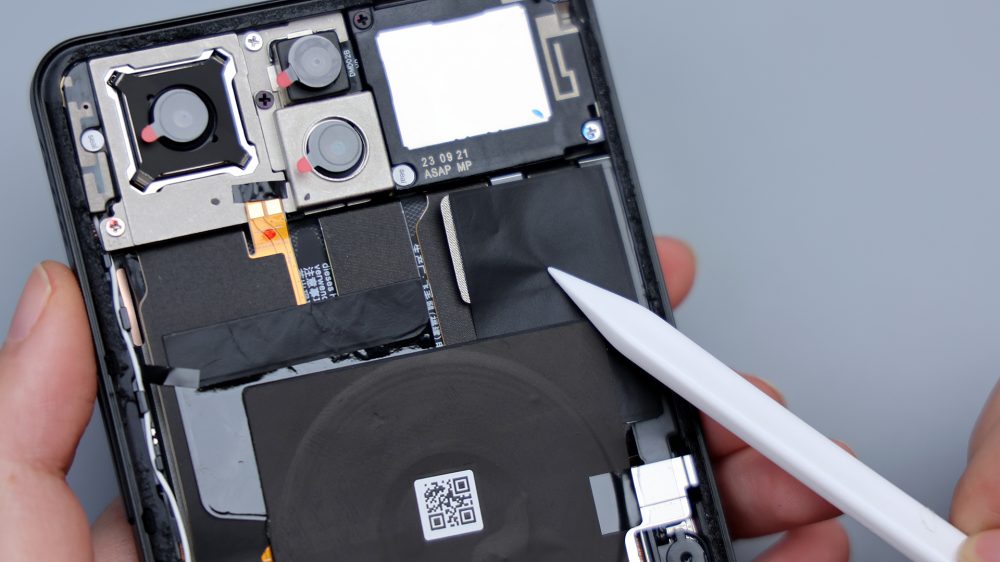
As expected, the large cooling film on the bottom extends upwards to the inside of the metal plate, covering most of the motherboard. Moreover, it is integrated with the one on top, which is equivalent to covering the middle of the main body, including the two batteries and most of the FPC. the inside of the metal plate has multiple strips of foam pads corresponding to the various BTBs around the motherboard, and the silicone residue in the center is the cooling material from the A-side of the motherboard.
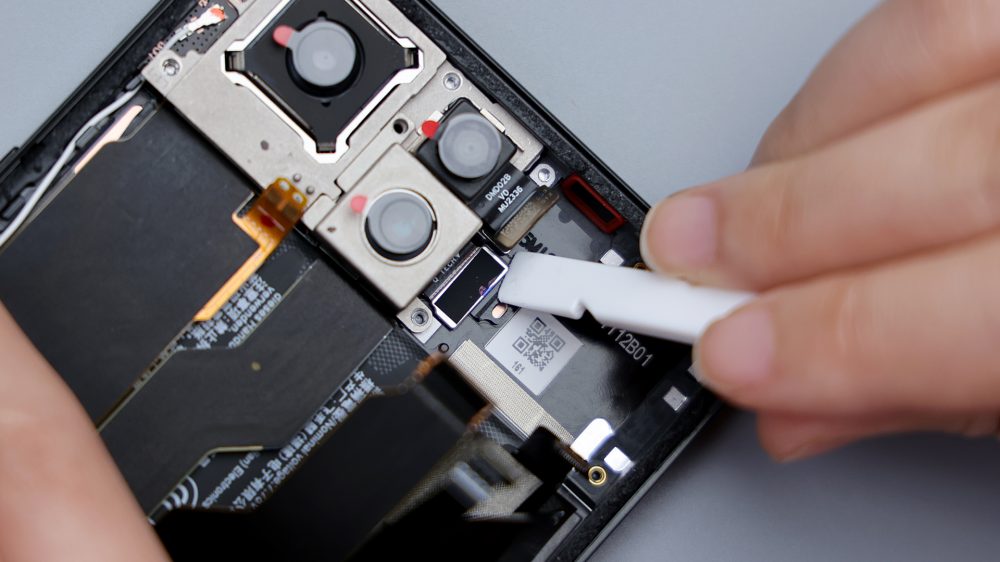
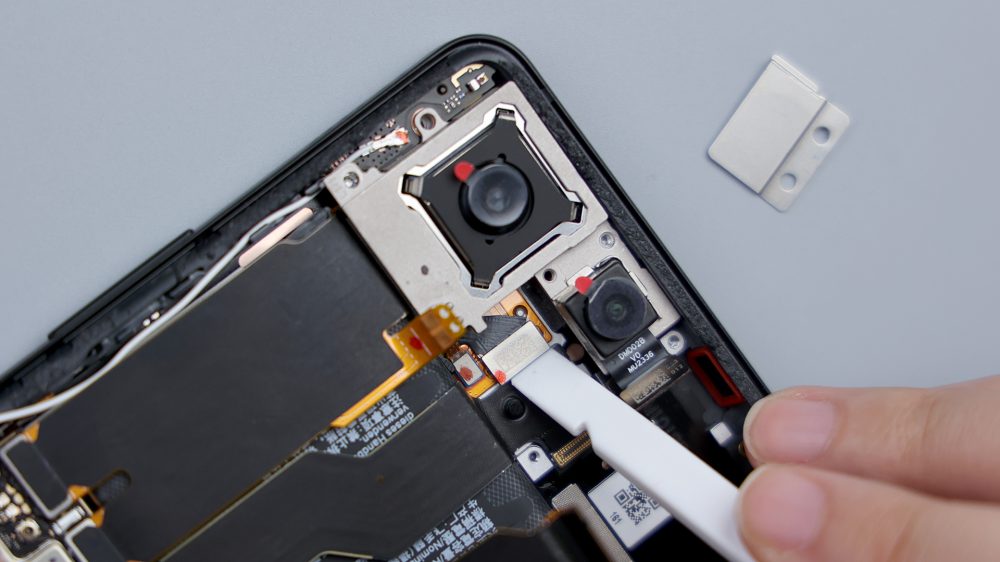
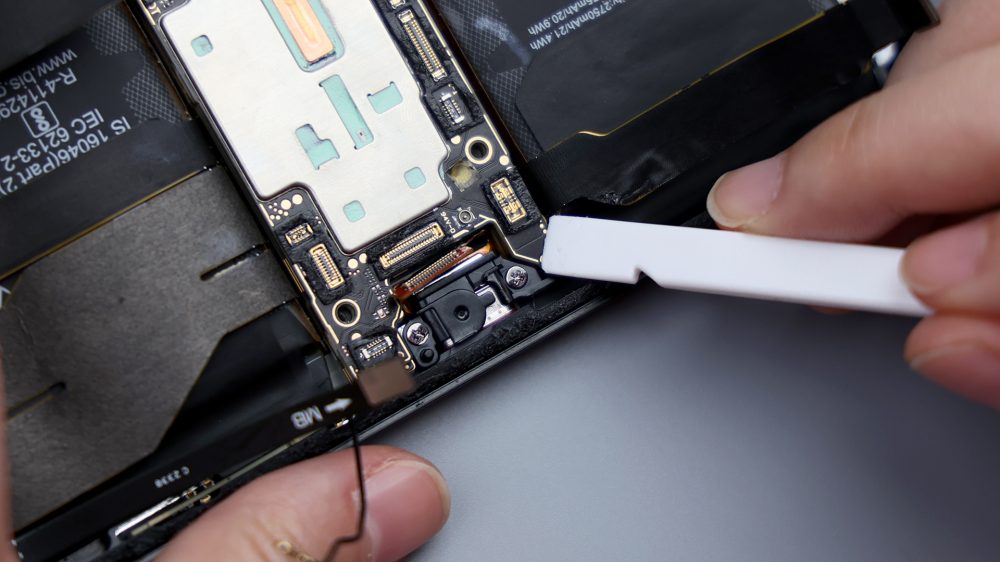
Disconnecting the battery BTBs, followed by a top-to-bottom disassembly starting from the camera area.
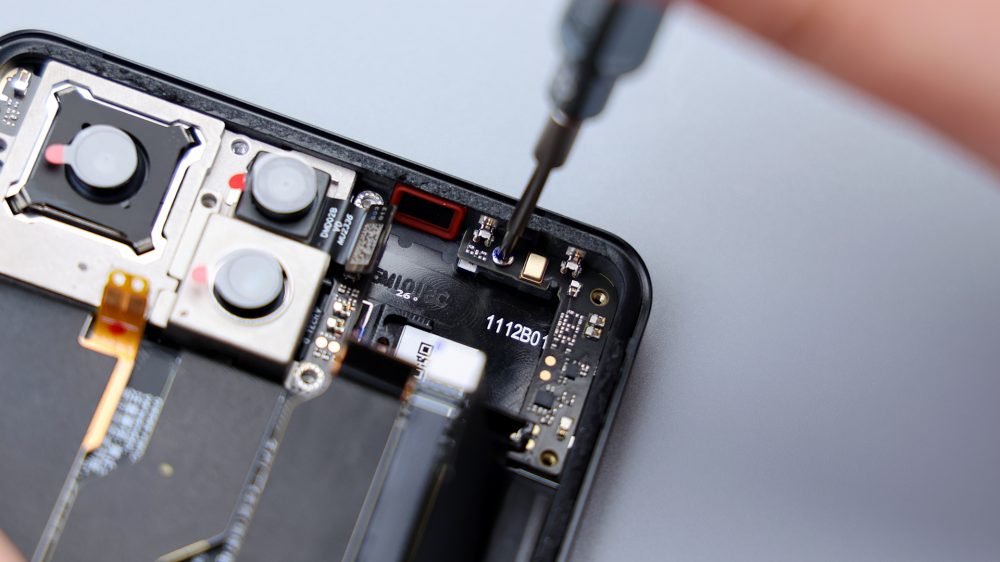
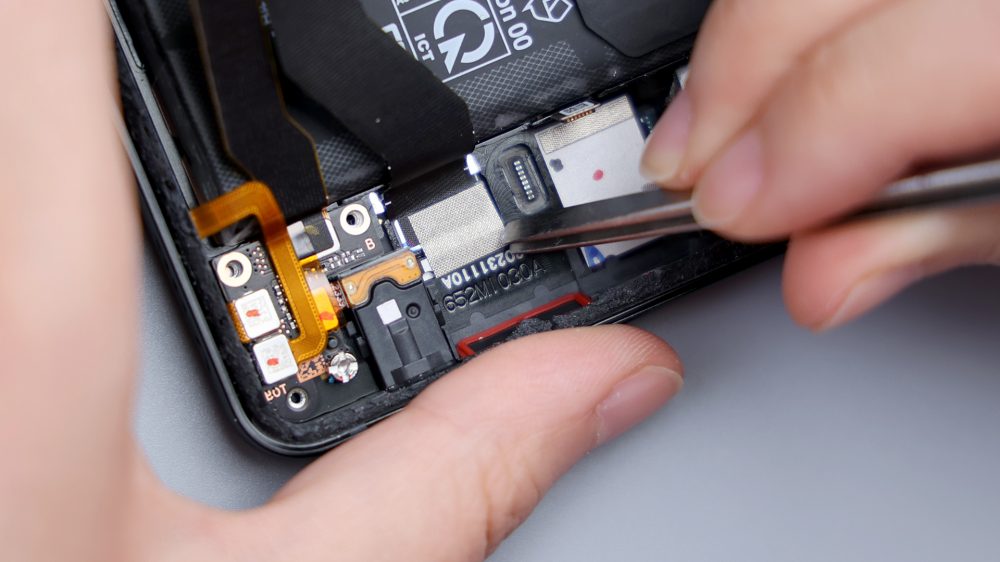
Tear off the tape from the flash contacts and pick up its FPC.
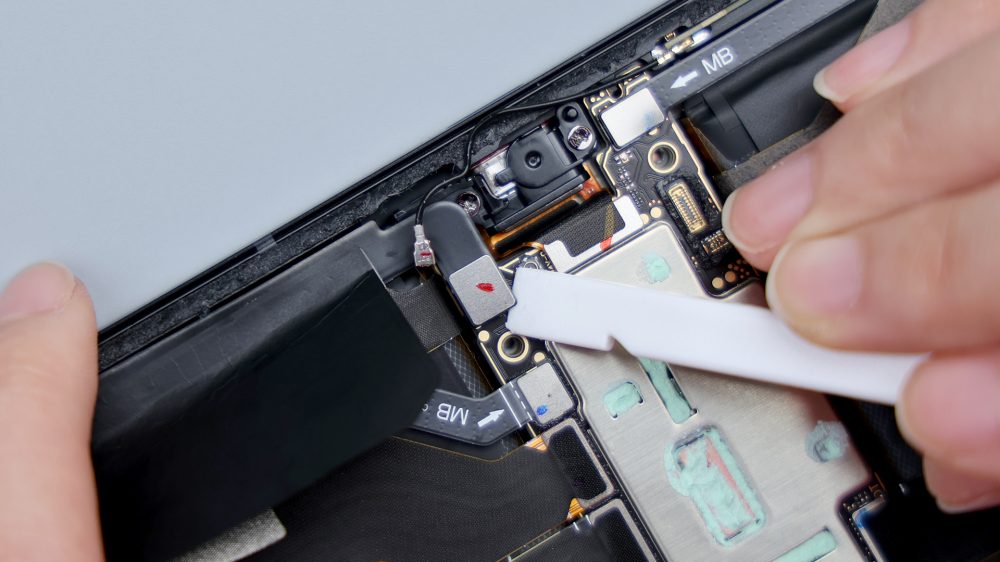
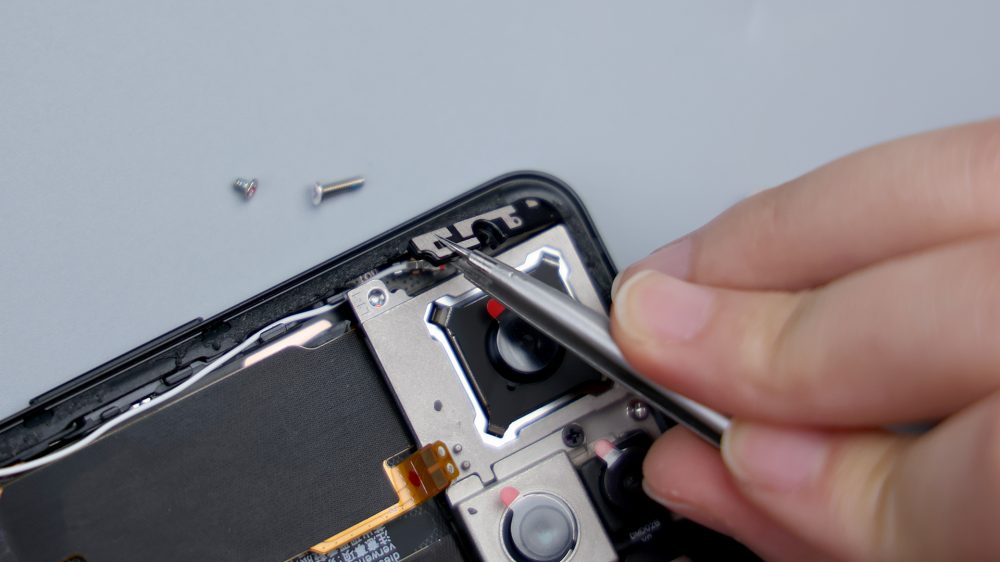
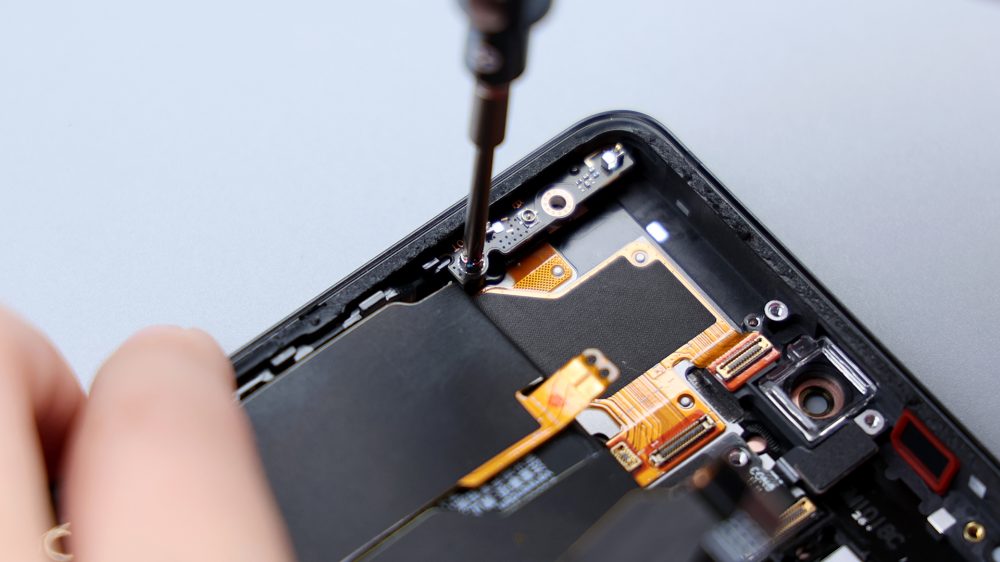
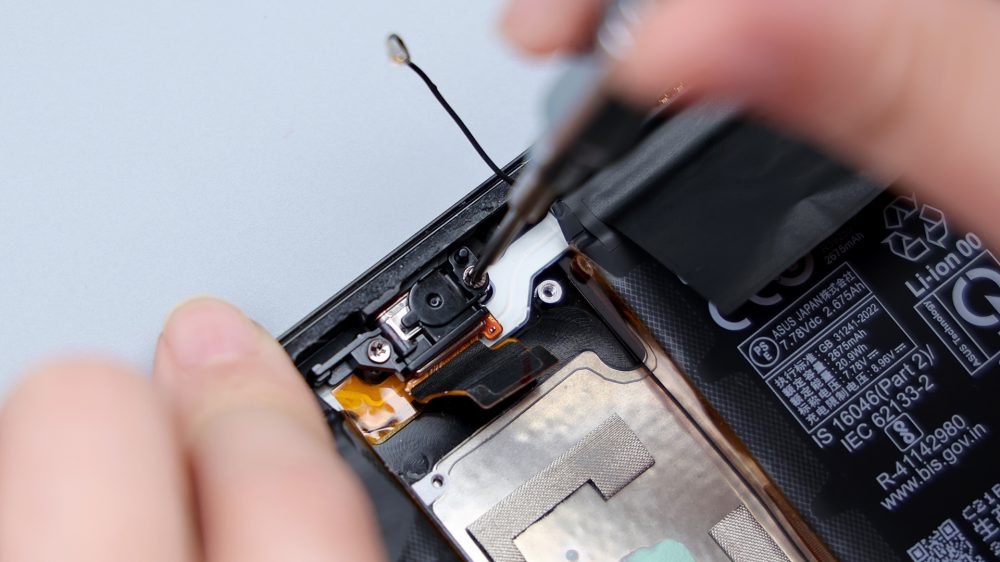
Unscrew the retaining screw in the upper left corner and pry up to remove the antenna board.
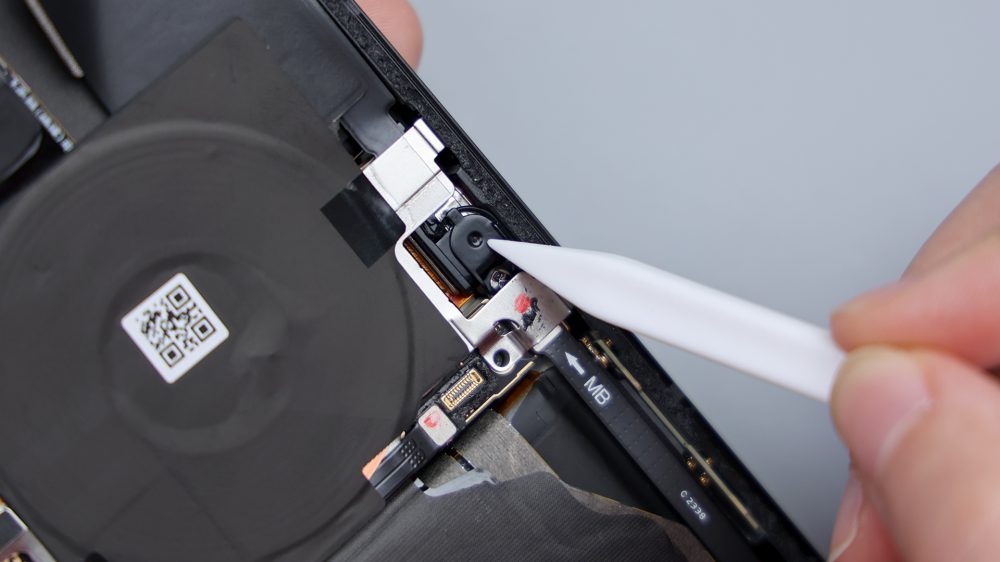
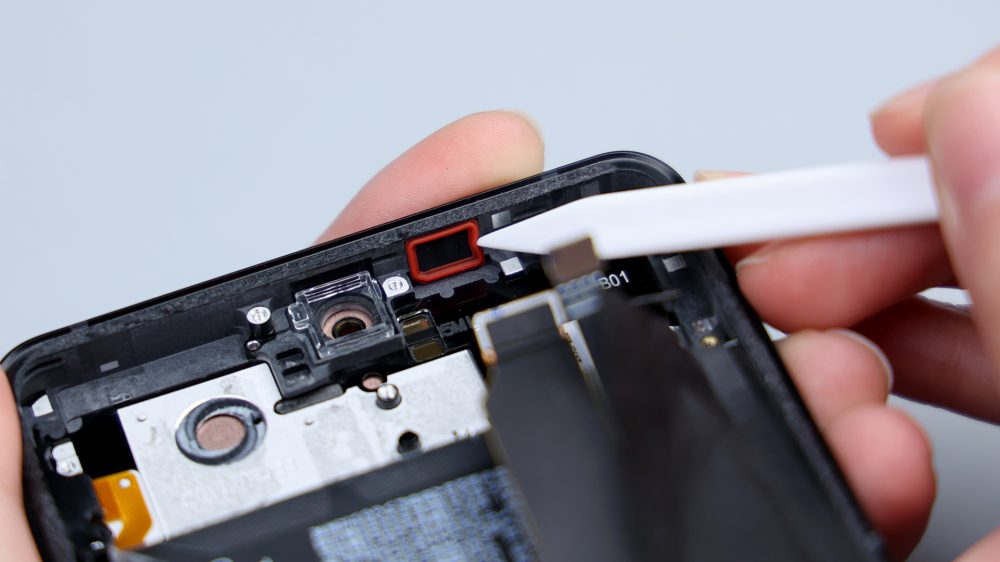
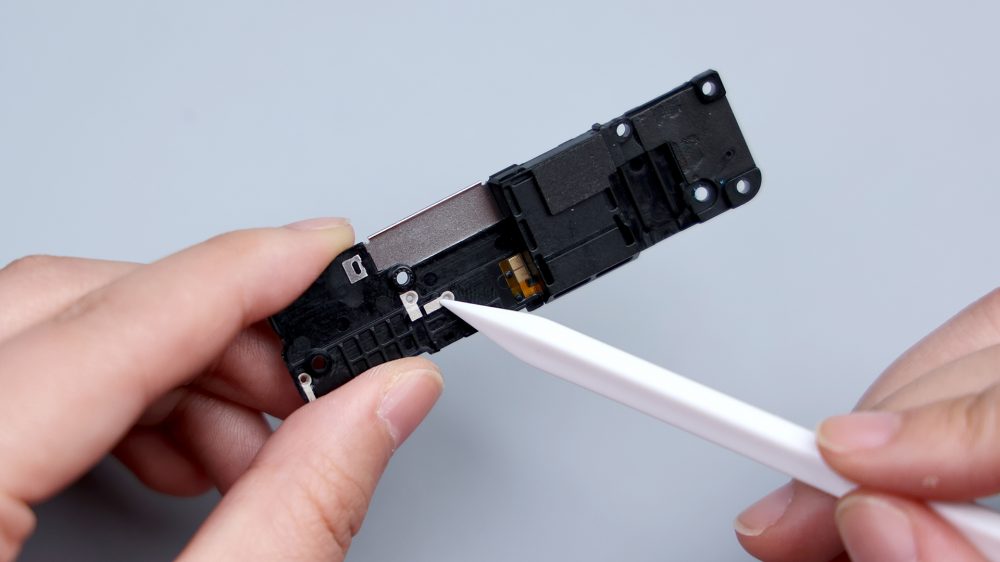
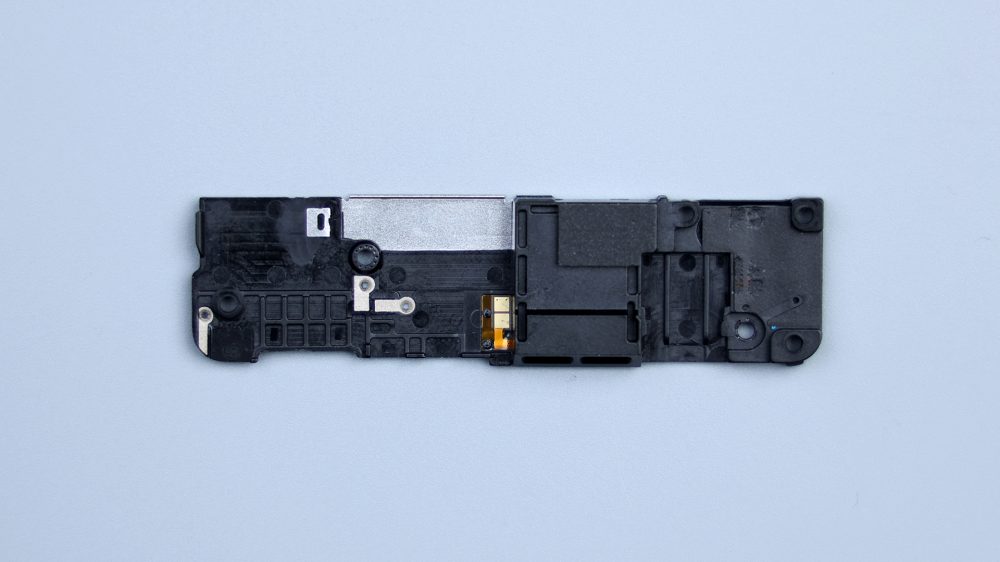
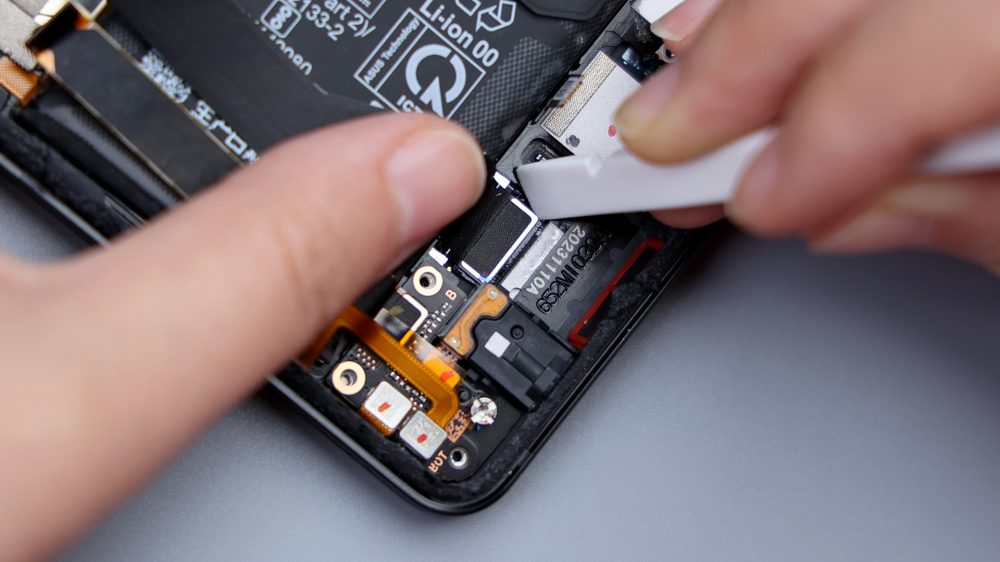
After dealing with the remaining screws, use tweezers to pry up and take out the upper speaker, it comes from Ruixing Technology with 1216 specification, the extension of the LDS laser radar antenna can still be seen on the edges and the inner side, the sound chamber is connected through 2 contacts, and next to it there is also 1 black limiting post to assist in fixing it, which corresponds to the round holes on the frame, and below it, 1 strip of black foam corresponds to the 3 BTBs on the small board. the sound chamber's outlet hole is located on the top, and it also It also serves as an earpiece, with a red rubber ring at the corresponding position on the frame, and the sound is transmitted through the micro-seam earpiece on the front of the phone.
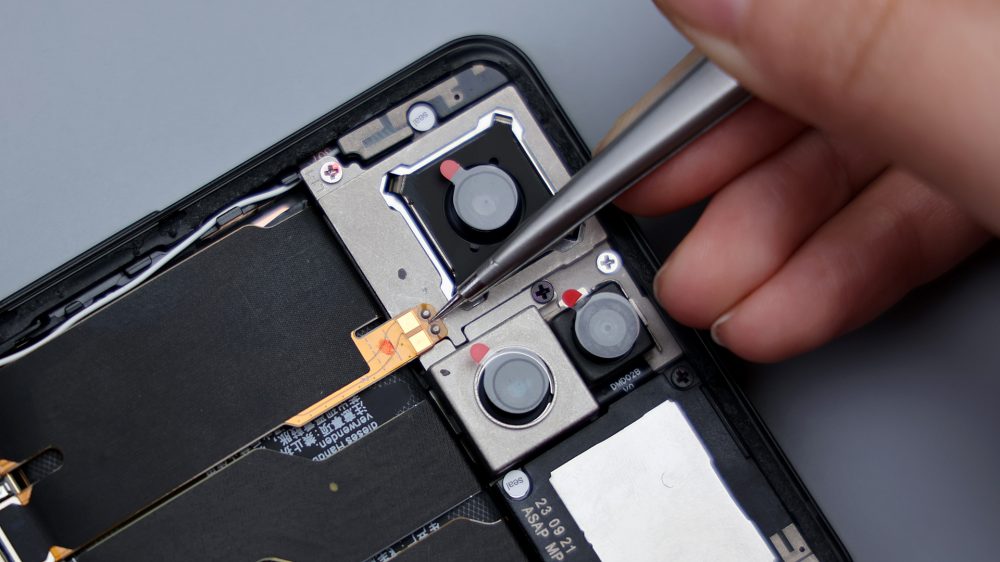
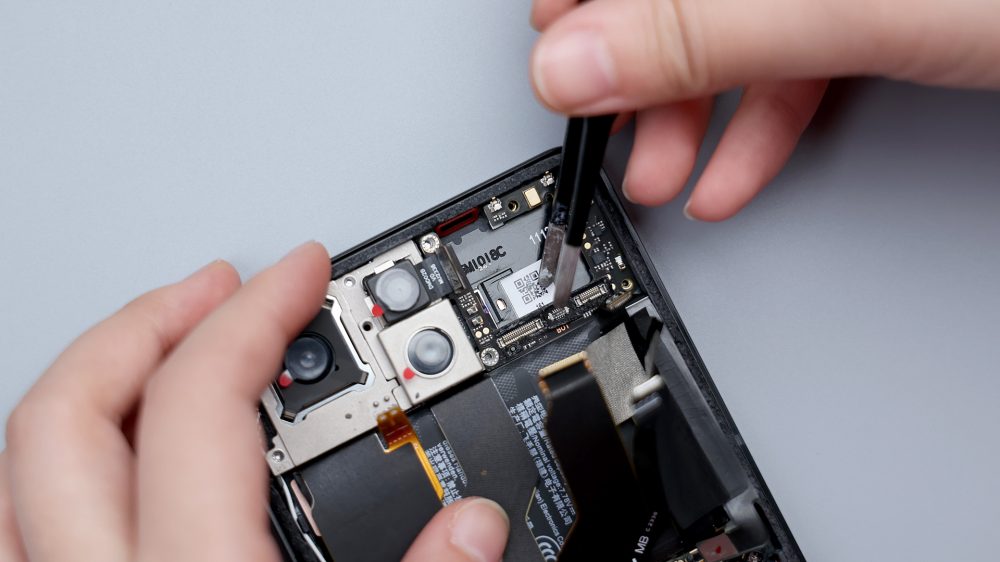
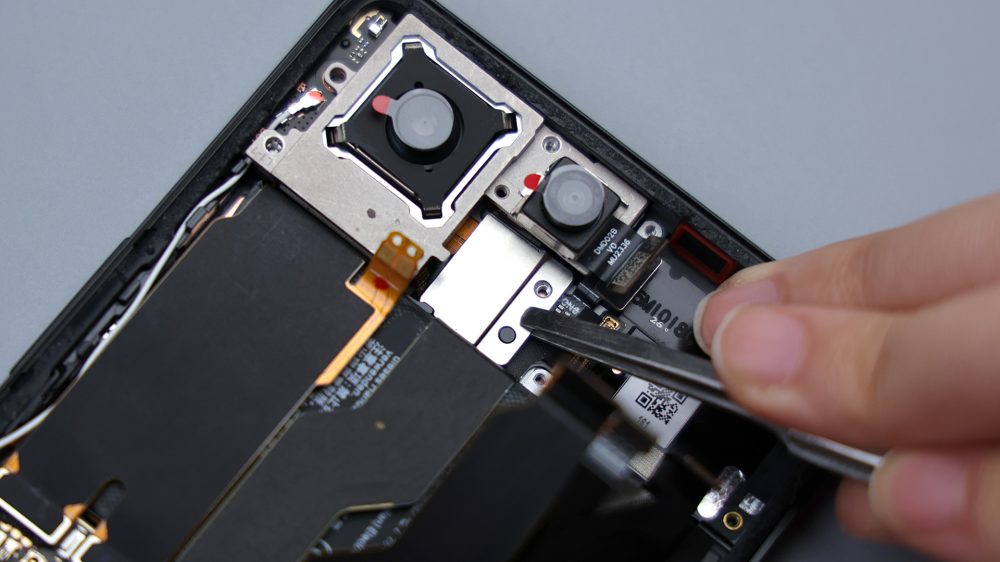
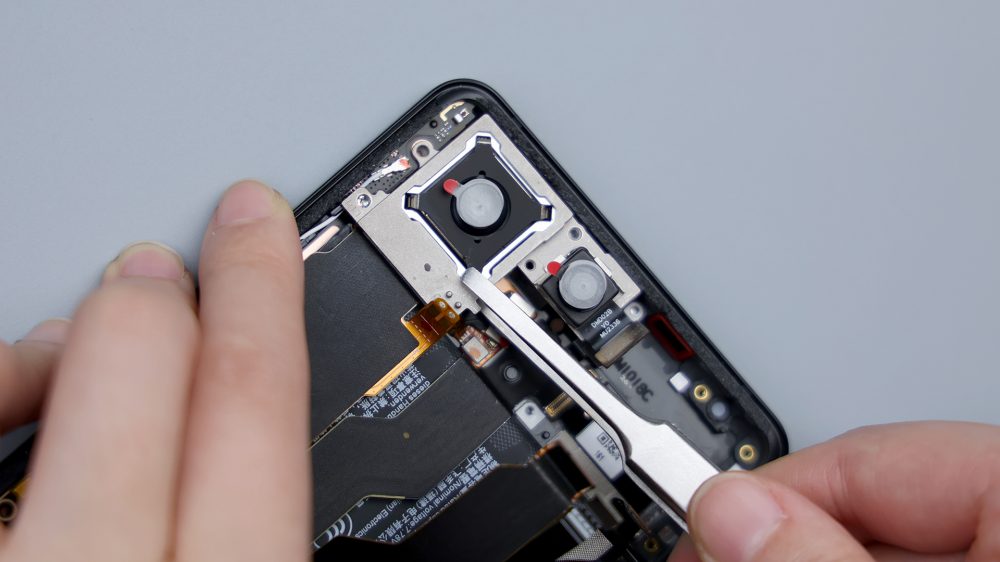
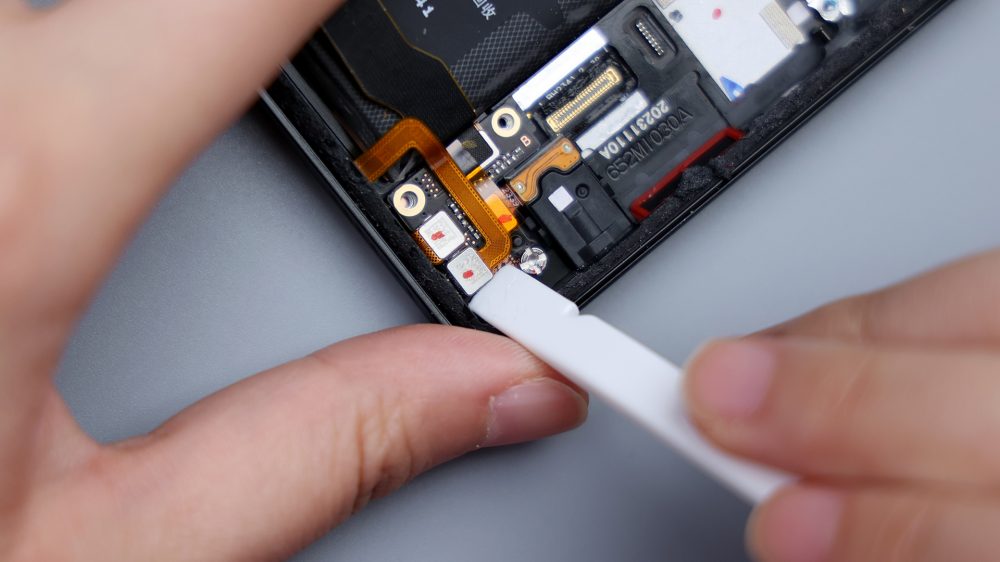
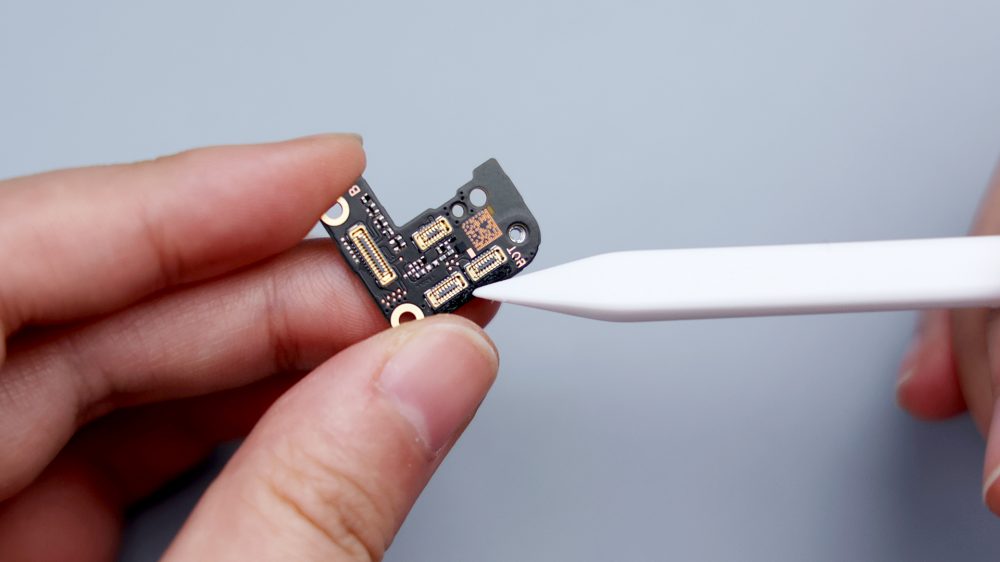
Disconnect the ultra-wide-angle lens and the three BTBs below in turn, unscrew one of the fixing screws, and take out the PCB, which integrates a noise-canceling microphone, and on the B-side, you can see the logos of ASUS and COMPEQ, so it seems that the supplier of this PCB is Huatong Computer, and there are water-resistant rubber covers for the three BTBs on the bottom of the base.
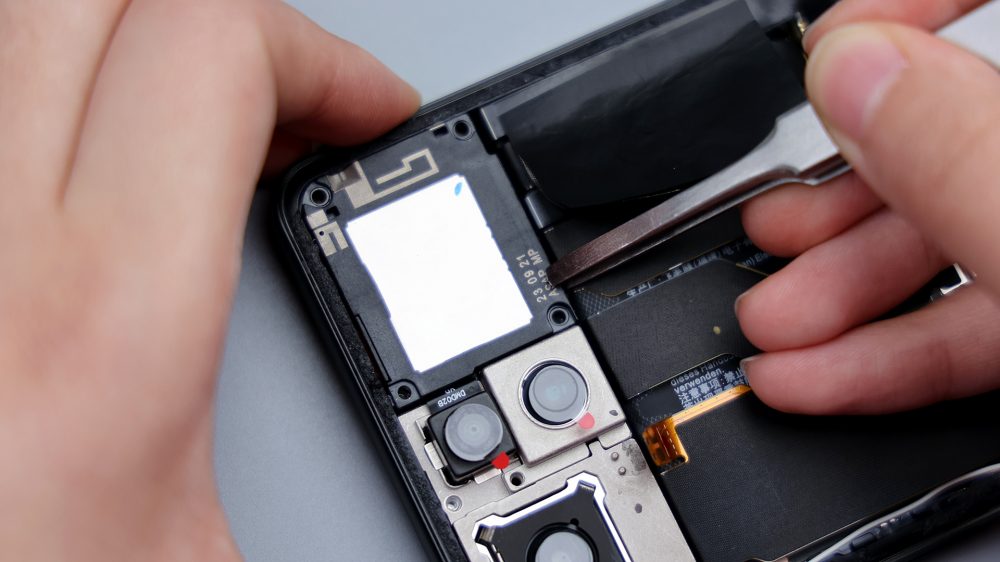
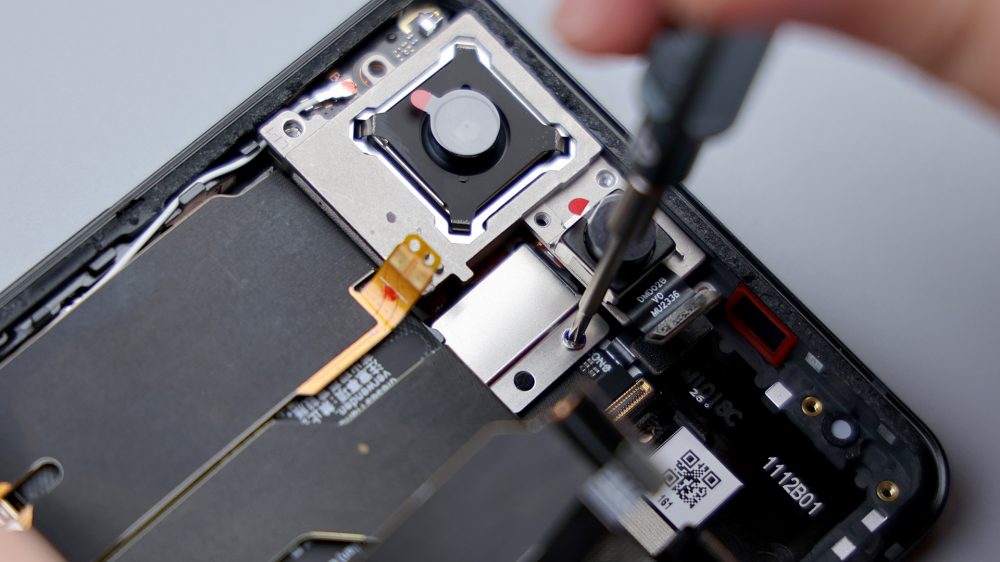
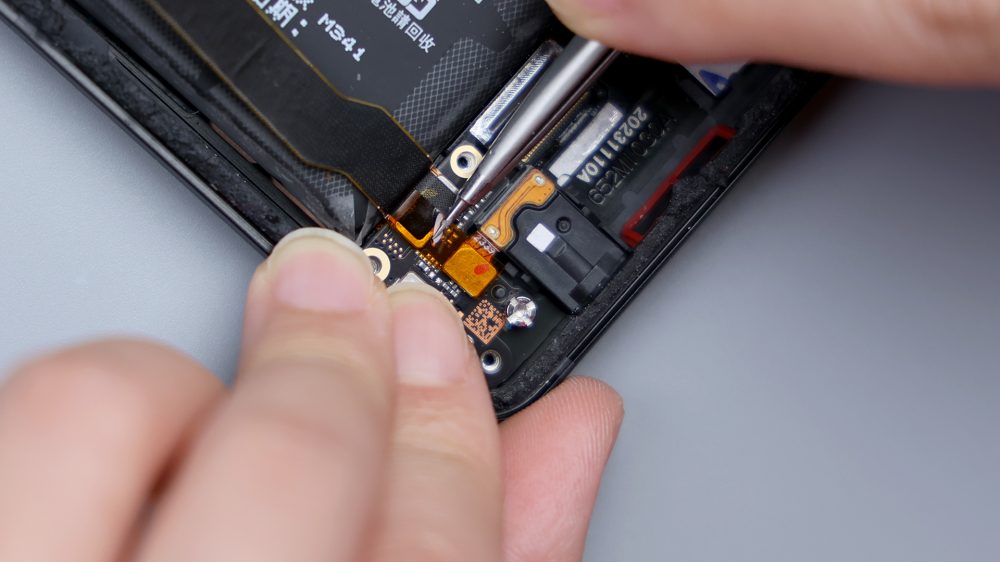
Disconnect the BTB for the telephoto lens, it can be removed separately. There is a small metal cover plate underneath which is held in place by screws, unscrew the screws and pry up the cover plate to reveal the BTBs for the main camera and the gimbal, after disconnecting them, the main camera and the ultra wide-angle lens can be taken off in one piece.
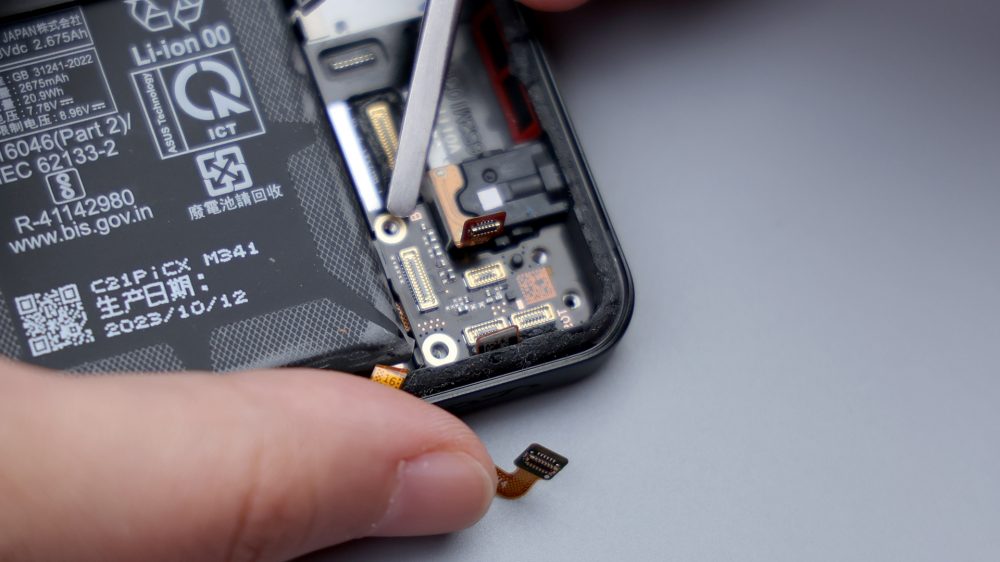
Then disconnect the BTB of the front lens, so that the front and rear four cameras are all together.
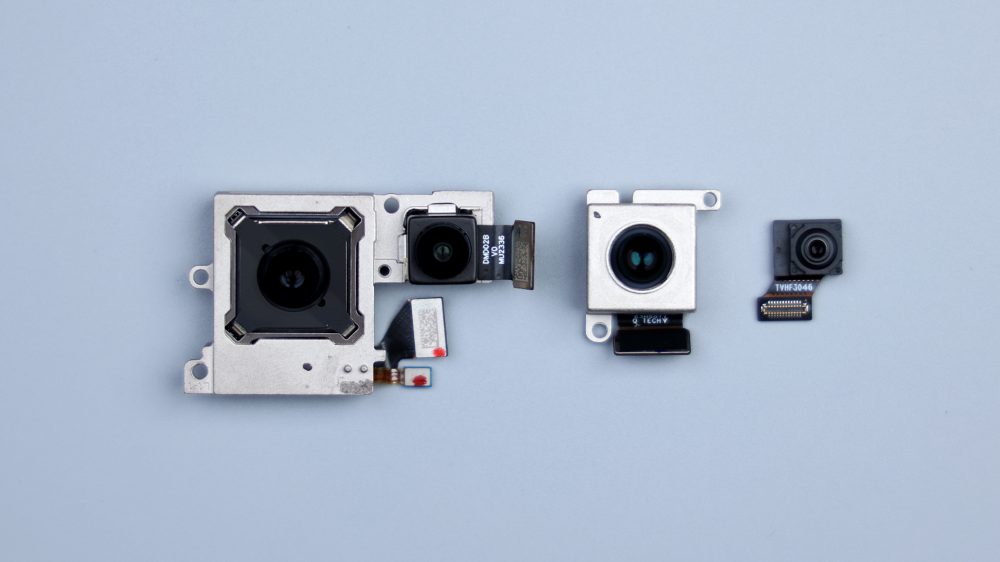
50 megapixel Sony IMX890 main camera, sensor area 1/1.56 inches, aperture f/1.9, equivalent focal length of 24mm, suitable for shooting street scenes, 2x lossless zoom mode, equivalent focal length of 50mm, suitable for shooting portraits and food, support for OIS optical stabilization, 6-axis anti-shaking Hybrid gimbal 3.0 support, support for ± 3 degrees of motion compensation, in mobile shooting It supports OIS optical stabilization, 6-axis anti-shake Hybrid gimbal 3.0, and ±3 degrees of motion compensation, which improves the anti-shake effect during mobile shooting.
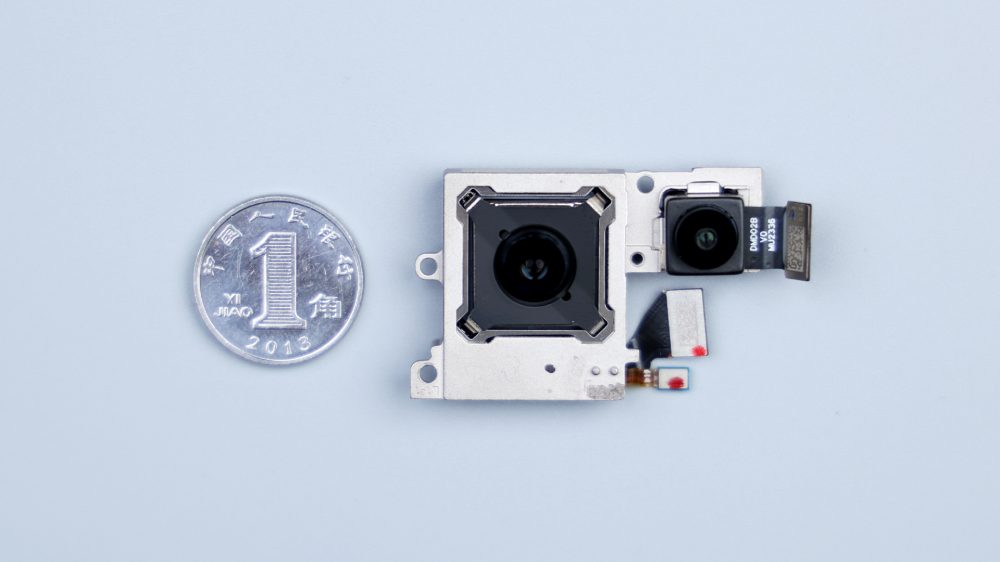
32-megapixel telephoto lens with 3x optical zoom, which is currently also the limit of magnification in upright telephoto, 5x lossless zoom, and 30x digital zoom, it also supports OIS optical stabilization, as well as 1.4 μm pixel merging technology, Night Scene mode, and Ultra HD zoom algorithms, and an aperture of f/2.4, which is the first time that a ROG phone is equipped with a telephoto lens.
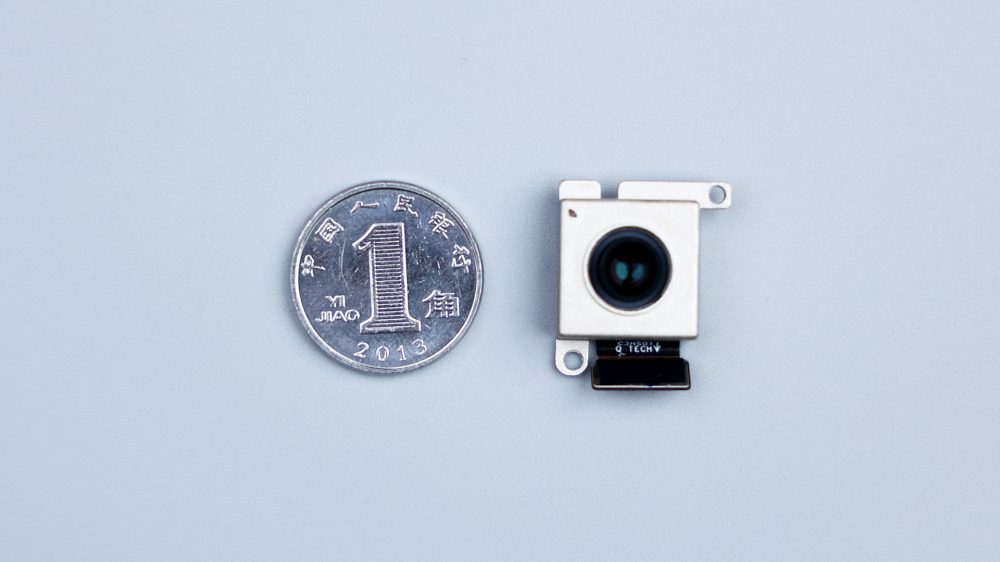
The 13-megapixel Howell OV13FF ultra-wide-angle lens with f/2.2 aperture features a free-form lens.The 32-megapixel Howell OV32C front-facing lens with 1/3.2 of the sensor area supports the wide-angle selfie feature and 1.4μm pixel merge technology.
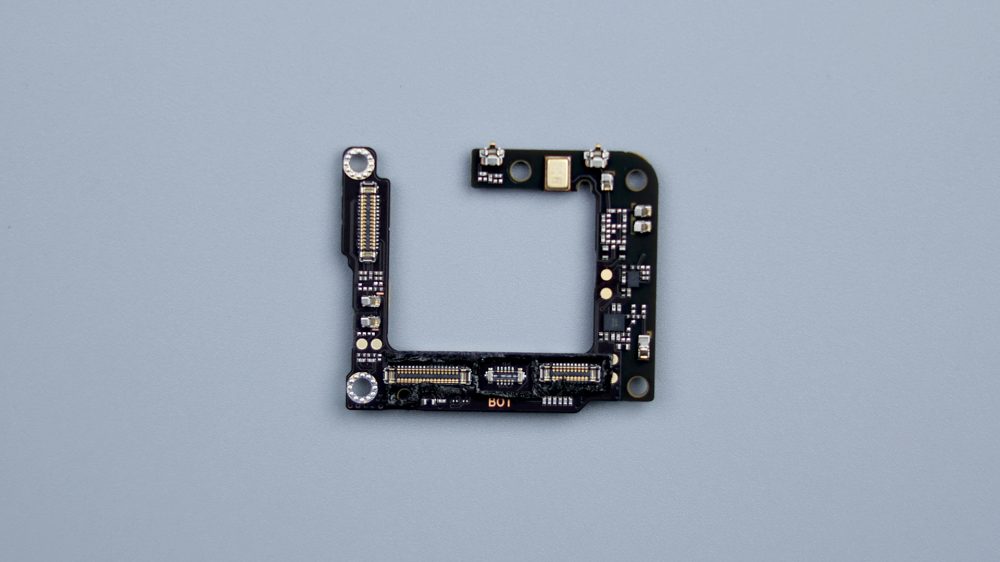
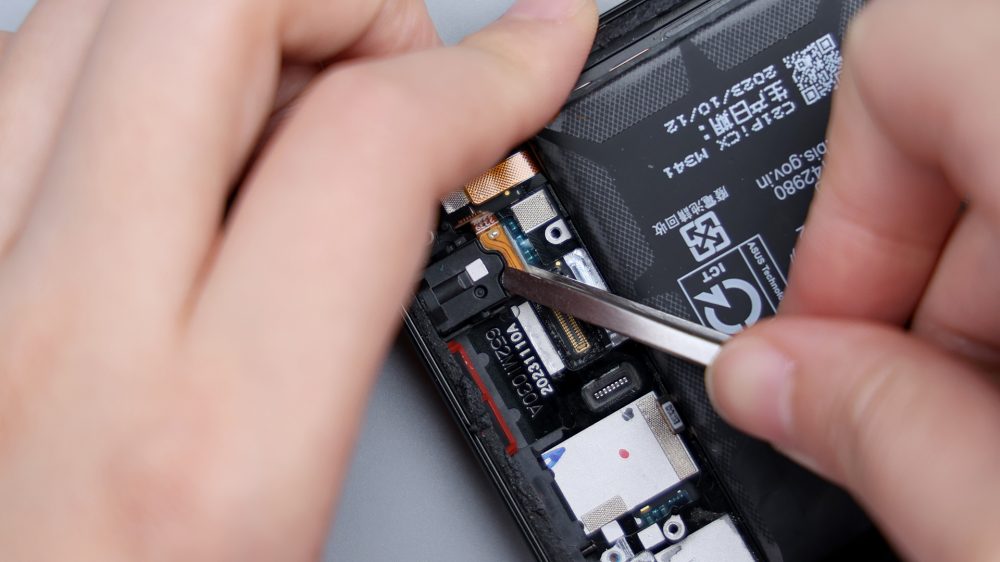
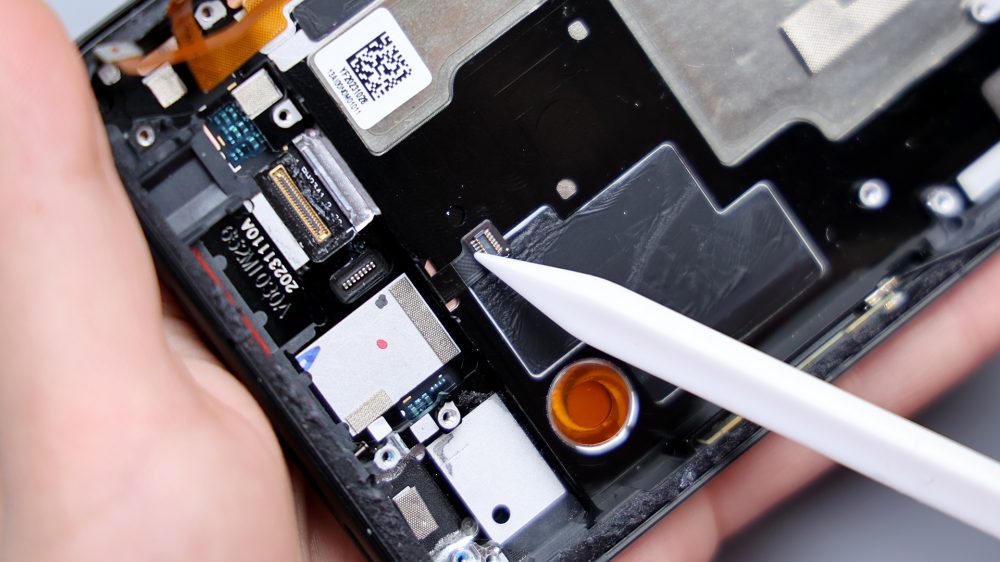
The disassembly continues by picking the white coaxial wire in the upper left corner, unscrewing 1 sub-screw and removing the PCB.Disconnecting the front ambient light sensor's BTB, which has the top half glued to the frame, carefully, and slowly tearing it off to remove it. Same deal with the wider PCB next to it, which is mainly responsible for connecting the image system.

After the upper area is cleared, the frame is revealed, the yellow FPC pressed on the left side corresponds to the adjacent shoulder key, and there are multiple cutouts on the frame, through which the copper foil on the inside of the screen can be seen.
The front lens features a rubber ring, the ambient light sensor has a foam pad, and the red rubber ring on the upper right earpiece, as well as the round foam ring on the microphone next to it, all provide cushioning protection. The exposed metal dots around the perimeter are responsible for antenna signal overflow.

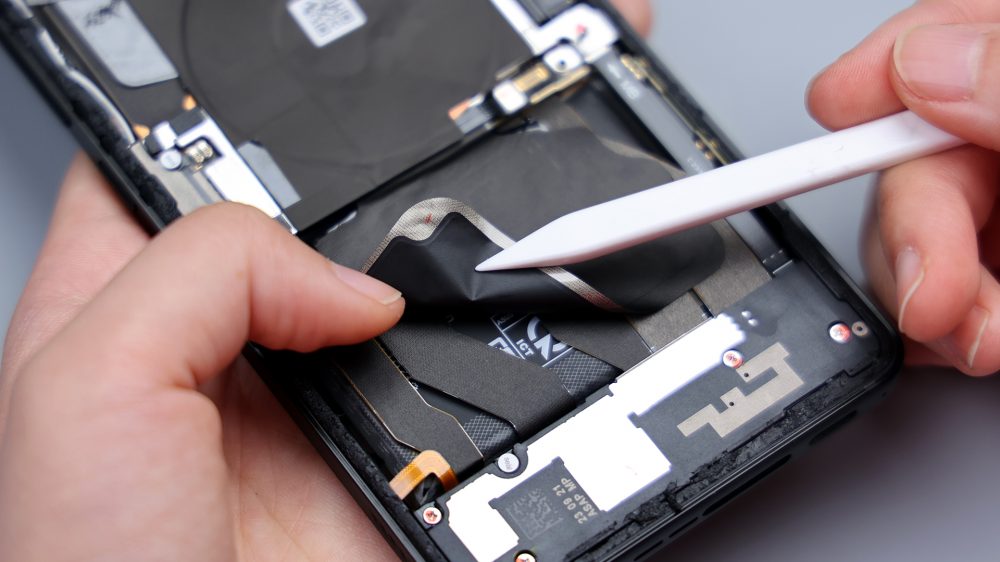
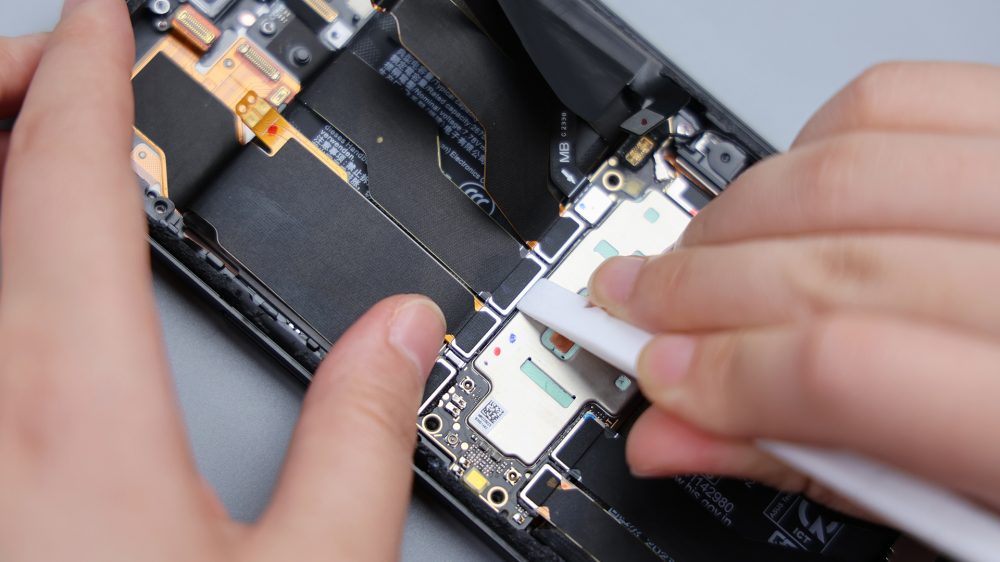
Tear off the remaining piece of thermal film on the right side, disconnect the 2 BTBs next to each other, and remove the corresponding FPC. pick off the black coaxial cable, and the remaining BTB connector on side A. Slowly pry it up and flip it over the motherboard, and there are a few more BTBs on side B. They're all covered by metal baffles, and the slightly wider one has a strip of foam padding attached to it. There is no shield in the center core area, a ring of conductive cloth is affixed next to it, and the outline of the processor is vaguely visible through the silicone, with small round holes on the edges, corresponding to the noise-canceling microphone in the center position. Pry up and remove the 2 metal baffles, disconnect the BTB pressed underneath, the motherboard is completely removed.
 >
>
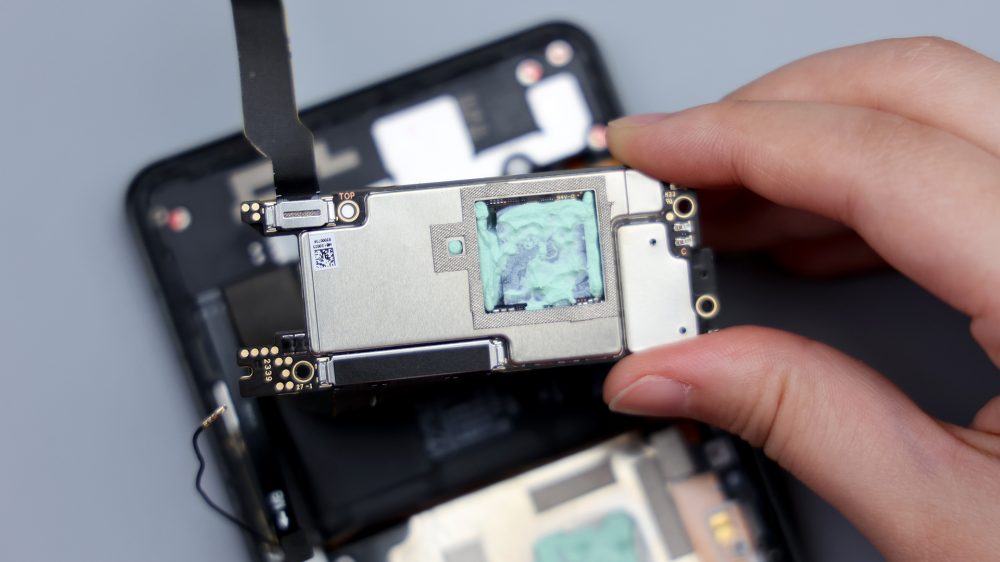
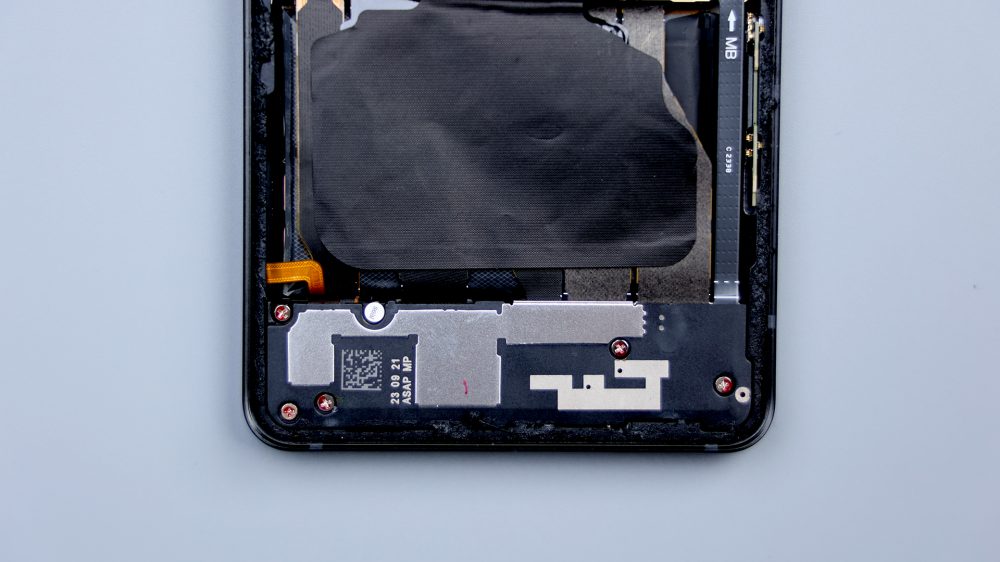
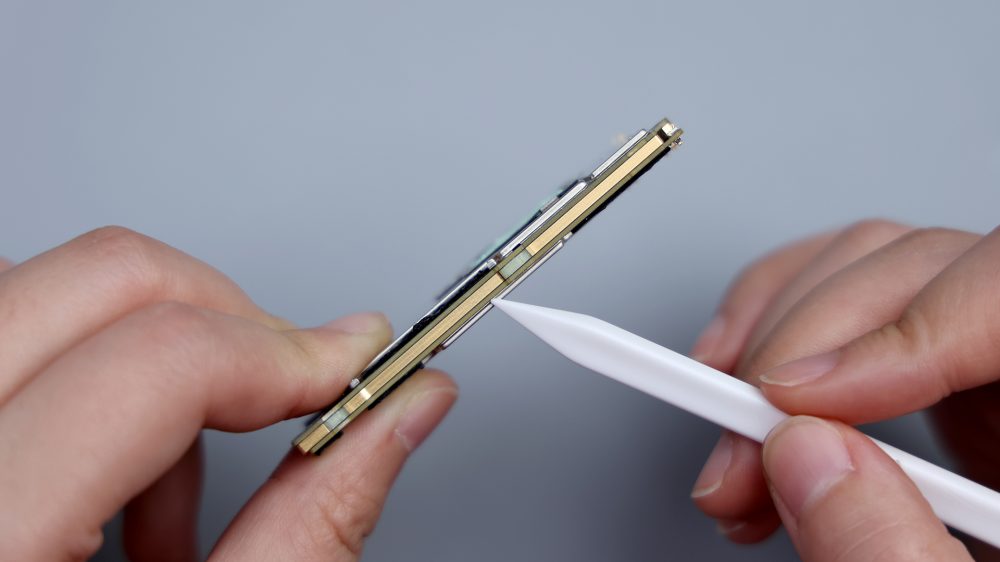
The ROG 8 Pro's motherboard doesn't look too big, almost half the size of a normal cell phone, and features a dual-layer PCB structure, but it's much thicker than the common dual-layer motherboards, as there's also a layer of heat-conducting copper pillars sandwiched in the middle of the two layers of PCB, which can be seen all around and on the A-side of the motherboard, and basically covers the entire motherboard area, dramatically improving the heat dissipation efficiency.
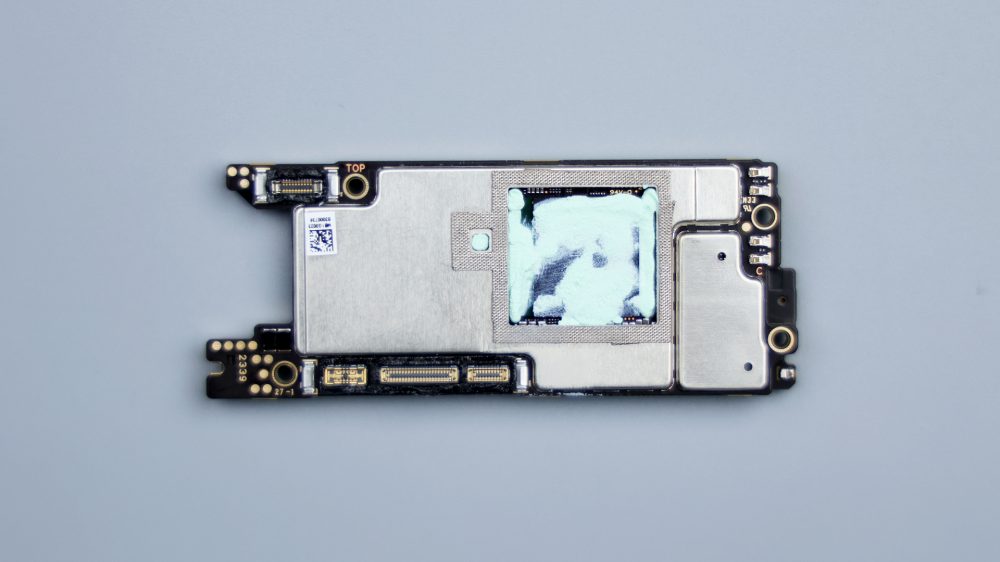
Motherboard A-side and B-side all BTB base outside the waterproof rubber sleeve, microphone on the left side of the center position, capacitors and small parts did not do the spot glue treatment, shield hollows are coated with heat spreading material.

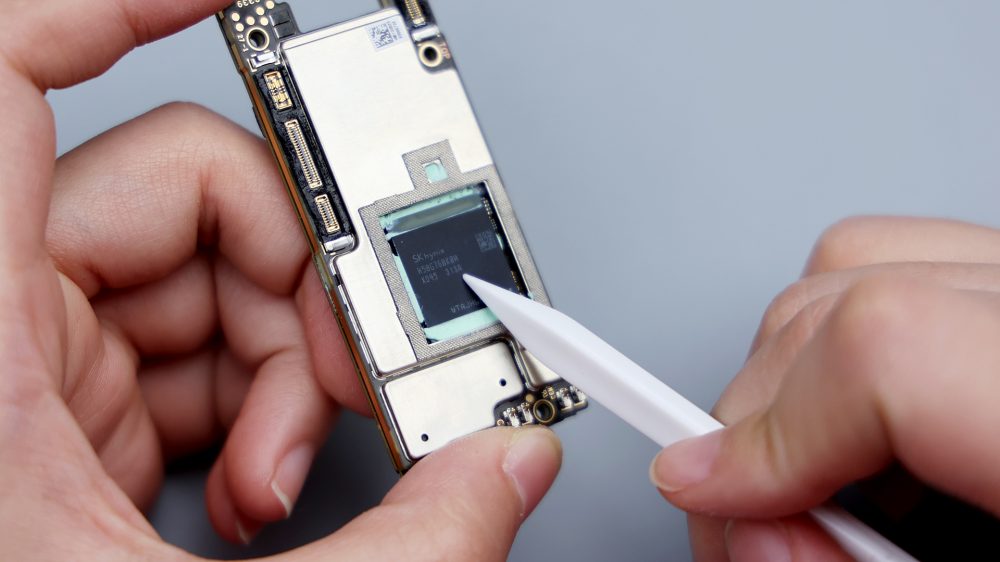
Wiping off the silicone, the most prominent chip on the B-side of the motherboard is the 16GB of LPDDR5X RAM from Hynix, and the slightly larger green chip underneath it is the Snapdragon 8 Gen 3 processor from Qualcomm, with a similarly sized chip covered next to it, which is the 512GB of UFS 4.0 flash memory.
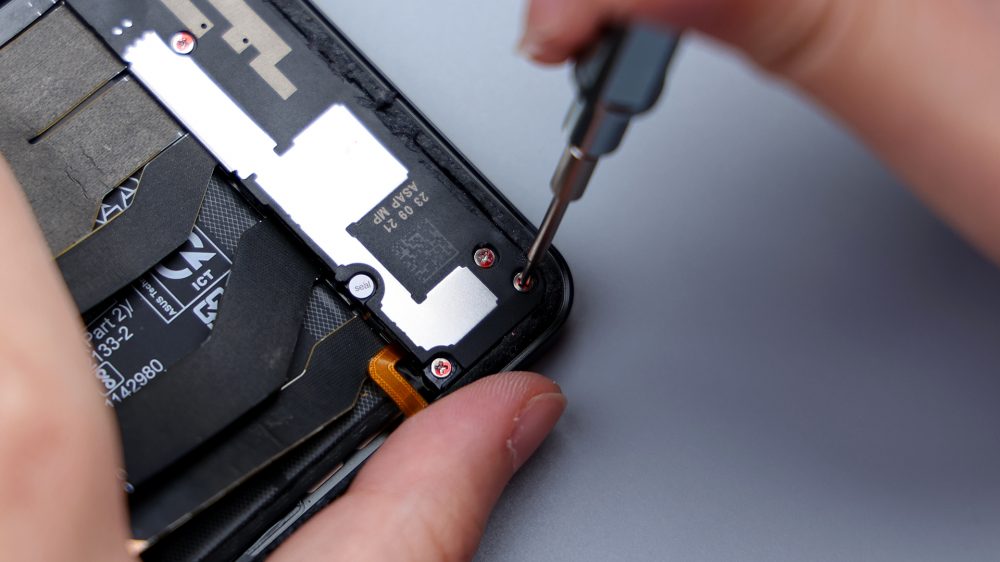
The view turns to the underside, unscrewing all of the retaining screws in the sub-panel area and prying up to remove the cover, which has a couple of small pieces of LDS laser laser antennae on the inside.
The speaker is integrated into the cover plate, connected to the secondary board via 2 contacts, a bit smaller in size than the upper speaker. The 2 adjacent pieces of foam, corresponding to the screen, shoulder buttons, headphone jack and the BTB of the main and sub board FPCs, provide cushioning protection for them.
The slightly larger PCB on the right has a metal cover plate that covers most of the BTB base.
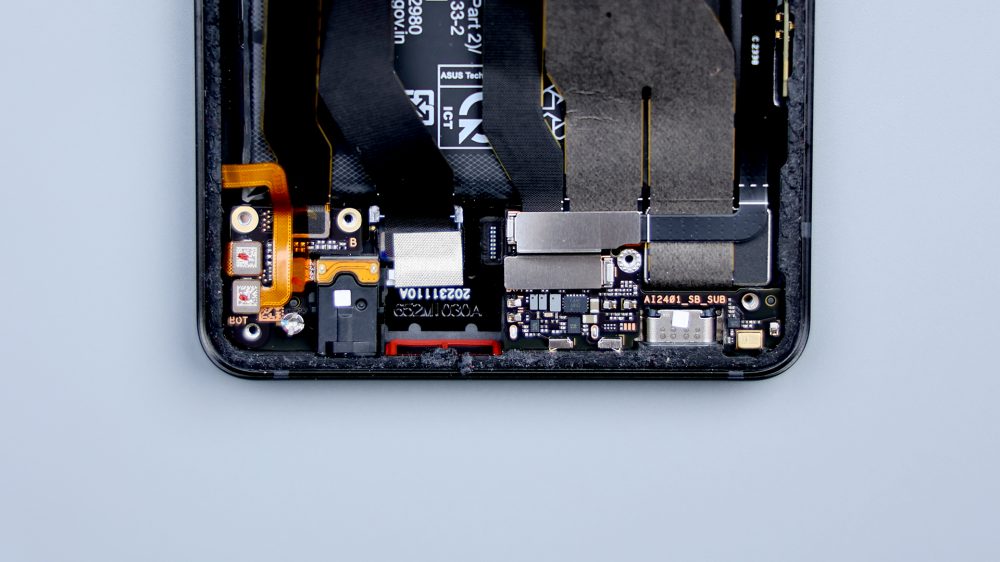
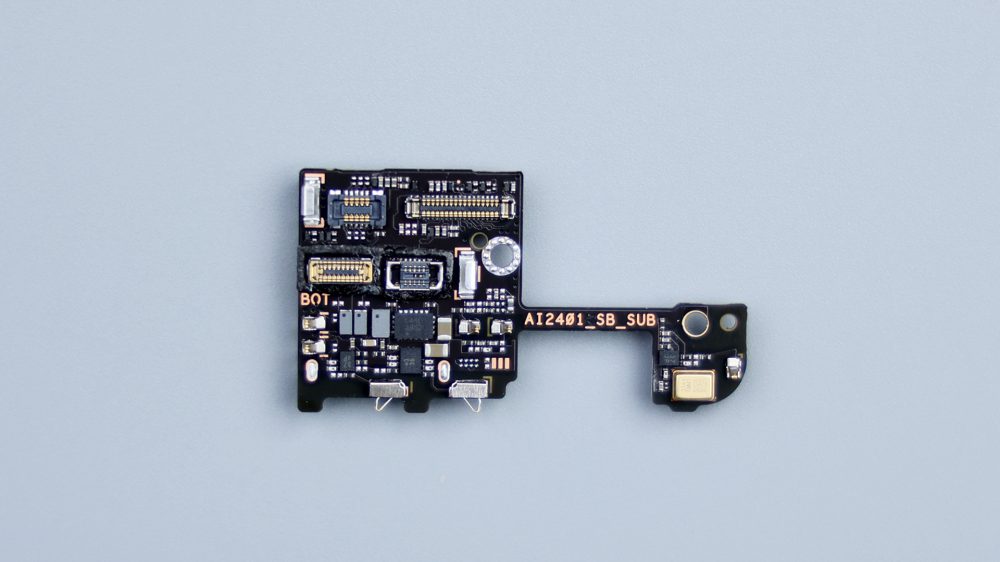
Unlike the mainstream centered placement, it has the USB port and microphone in the lower right corner. Pry up the metal cover plate, disconnect all the BTBs underneath, start from the gap near the battery, pry up with tweezers to take out the secondary board, most of the BTB bases on it are covered with waterproof adhesive sleeves, and the rest of them are covered with adhesive tapes, and the PCB's weak points are reinforced with metal sheets.
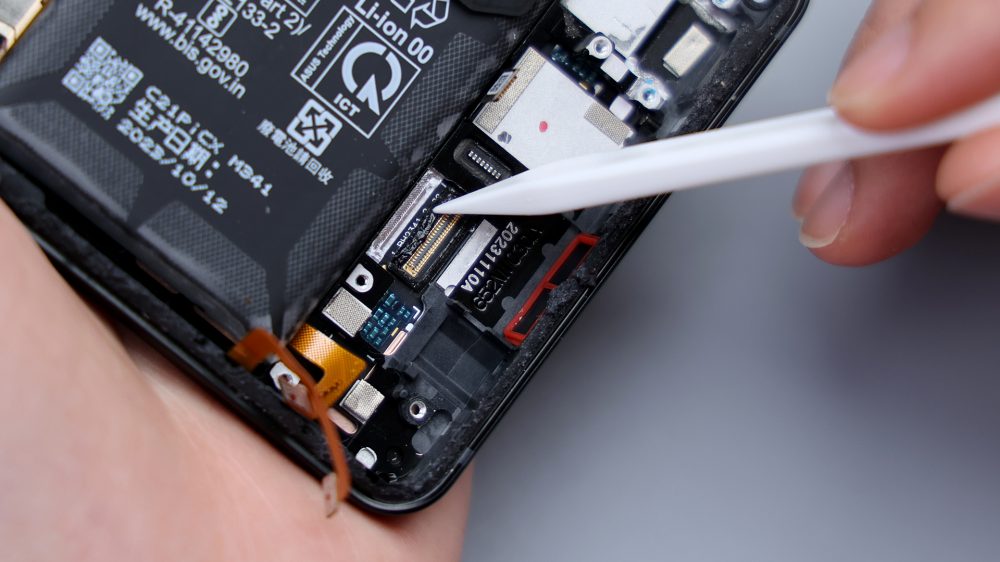
The USB port is directly connected to the motherboard via an FPC, there are 2 fixing screws, unscrew them and pry them up to remove them.

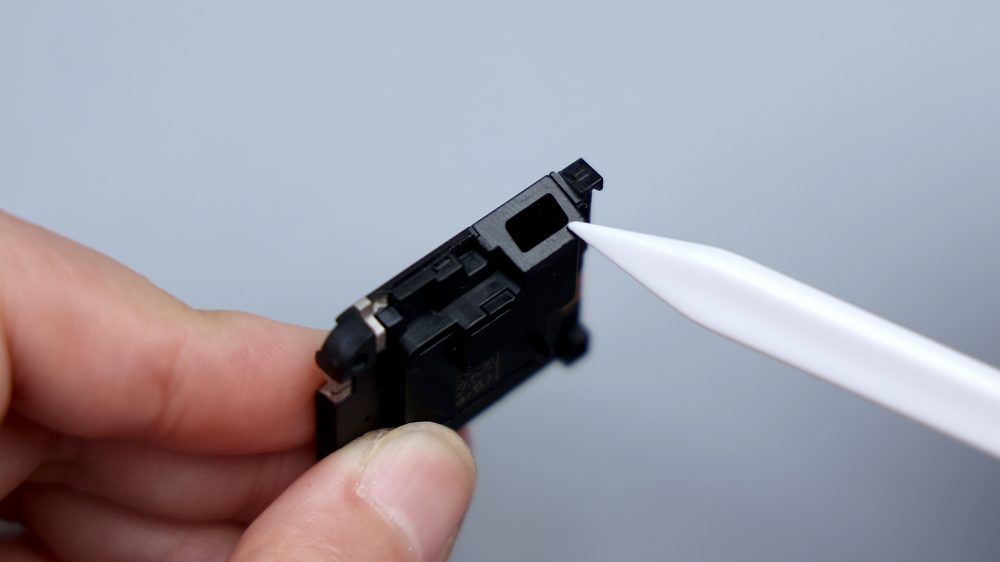
The vibration motor is fixed to the frame next to it with adhesive and a layer of cushioning foam. It's from Ruixing Technology, and it's an Ultra Wideband Linear Motor, model number ESA1016, which is the same as the one used on the previous ROG 7 series.

Tear off the conductive cloth next to the sound chamber, disconnect the screen BTB, it is not connected to the side like a normal cell phone, the BTB base does not extend upward to the front, look at this structure and location, if the screen is damaged, the replacement may not even need to remove the back cover, directly from the front can be replaced the screen.
The ROG 8 Pro comes with a 6.78-inch 165Hz Samsung E6 AMOLED flexible straight screen with Synopsys touch IC.
Disconnect the BTBs of the 2 shoulder keys next to it, tear off the yellow tape and deal with the remaining 2 BTBs. unscrew the fixed sub screws, pry up and take out the PCBs, the BTB bases of the shoulder keys are covered with waterproof adhesive, and the remaining ones are covered with adhesive tape.
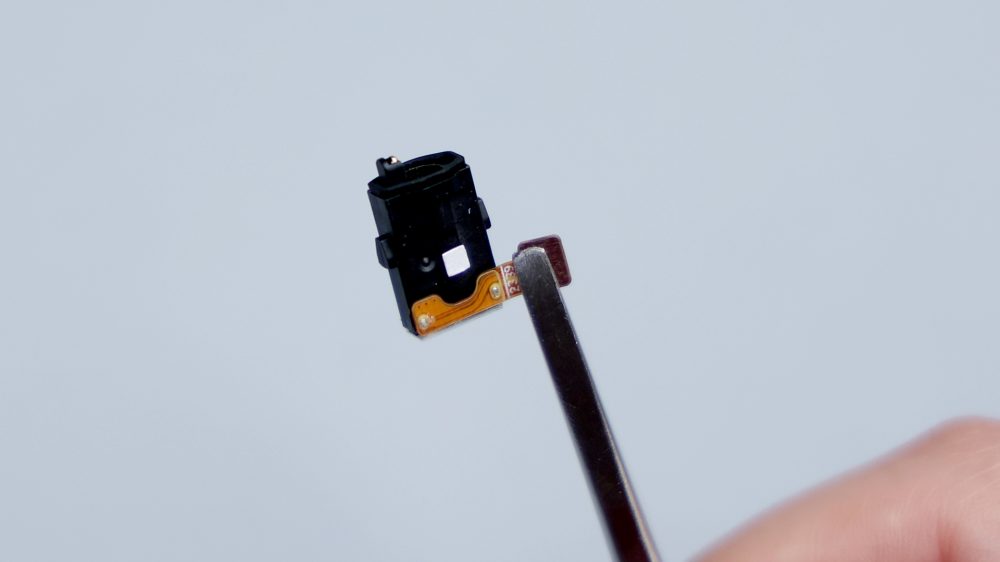
Take out the headphone jack, it's replaceable separately and easy to disassemble.
The black foam ring in the lower right corner corresponds to the microphone, and the sound receiving hole is designed with anti-dumbing, and the card pin inserted into it will not damage the microphone. The BTB base of the screen is affixed with a waterproof rubber sleeve, the capacitor next to it has a spot glue treatment, and the speaker outlet hole is equipped with a red rubber ring to enhance the airtightness.
The USB port on the side can also be removed, unscrew the 2 fixing screws, remove the black cable groove, lift upwards to remove the port.
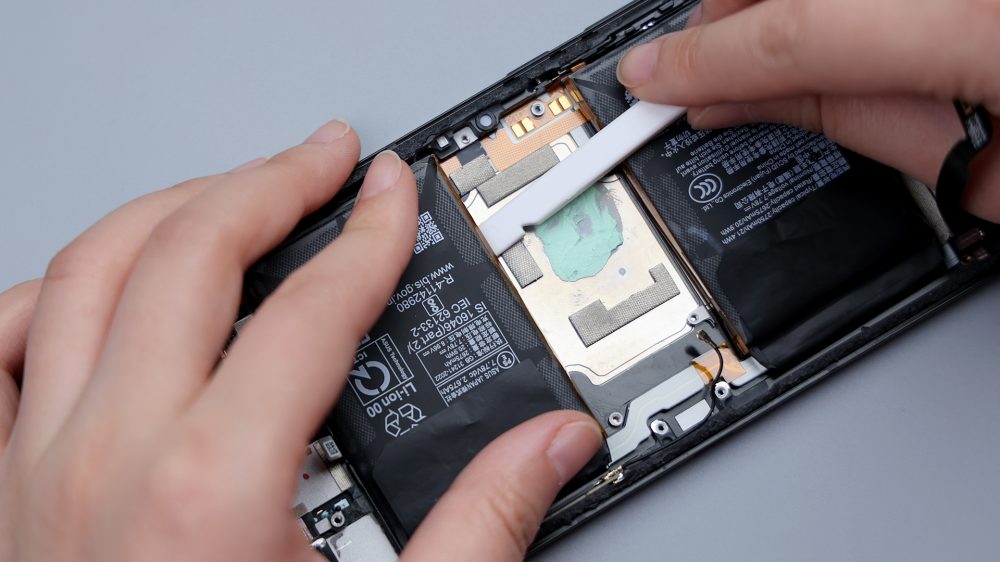
The upper and lower two batteries do not use easy to pull the adhesive, however, the fixation is quite tight, with a plastic pry bar a little pry up to take out.
 >
>
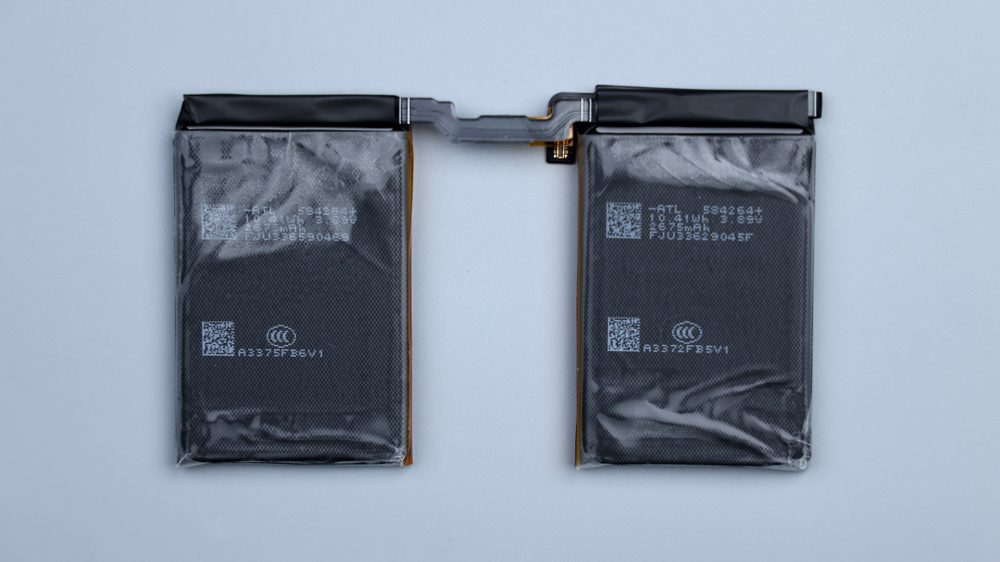
The battery adopts dual-cell single interface program, dual-cell equivalent total capacity of 5500mAh, support 65W wired fast charging, the manufacturer is SCUD Electronics Limited, the battery supplier is ATL, each battery has two parts of the upper and lower part of the adhesive fixed underneath, after removing the battery, but also retained most of the adhesive, that is, after the replacement of the battery, you can not have to make up for the adhesive, and directly put the new battery on the glue That is to say, if you want to replace the battery later, you can just stick the new one on without glue.
The metal frame has a large hollowed out area, and the entire stainless steel VC plate is exposed in a zig-zag shape, with the motherboard and battery on top touching the plate directly, which can greatly improve the cooling efficiency. The motherboard area has a large amount of silicone residue, and there is a circle of thick conductive cloth next to it. The 4 contacts in the left center correspond to the power and volume buttons, and the foam ring below corresponds to the noise-canceling microphone. 2 shoulder buttons are connected in series via an extra-long FPC, and the BTBs are all wired to the small board below.
There is a small BTB in the middle of the bottom that corresponds to the fingerprint module, and the ROG 8 Pro uses an ultra-thin on-screen fingerprint solution.
At this point, the disassembly of the ROG 8 Pro is pretty much complete. It is one of the most complex and difficult phones to disassemble and recover internally that I've encountered in recent months, mainly because of the special ID design and layout, which multiplies the number of parts and uses several types of screws, making it more difficult for ordinary users to change the battery themselves afterwards.
Its overall structure is similar to that of its predecessor, the division of large blocks has not changed much, and the adjustment and optimization are mainly focused on some details. The three lenses of the rear camera are lined up horizontally in a single line and changed to a matrix arrangement. The waterproof rating has been upgraded from IP54 to IP68, and a lot of waterproof measures have been added to the interior, with a ring of waterproof rubber sealing on the back cover, a waterproof rubber cover on most of the BTB base, and rubber rings around the parts corresponding to the openings. The flash has been moved from the cover to the inside of the back cover, and the light effect on the back cover has been changed from a colorful window to a light display matrix screen. Add wireless charging function, power 15W.
The imaging system is fully upgraded, the main camera has 6-axis anti-hand-shake Hybrid gimbal 3.0 support, a new 3x light-variable telephoto lens, and dual OIS optical stabilization for the main camera and telephoto. The camera position eliminates the long strip cover and adds a metal anti-roll bar. The battery capacity has changed from 6000mAh to 5500mAh, the main board increases the heat-conducting copper columns, and the VC even heat plate is replaced with stainless steel.
From the disassembly point of view, the big changes mainly come from three reasons, one is the change in the size of the phone's three circumferences, which compresses the internal space, making some blocks and parts to follow the compression. Secondly, the waterproof grade is upgraded, which requires many places to follow the upgrading process and assembly method to increase waterproof measures. Third, the heat dissipation system is upgraded, adding a layer of heat-conducting copper columns, bringing changes in the heat dissipation architecture.
From the point of view of the product itself, the ultra-wideband linear 1016 motor, heat-conducting copper pillars, the center cooling architecture, and the dual C-port design are all manifestations of the focus on the gaming experience, taking into account the gaming experience at the same time, the ROG 8 Pro has begun to focus on the utility of life, and has become more balanced. After all, if you use it as a main machine, you still have to take care of various daily needs, even if the game phone, it is not possible to hold it all the time to play games. This is surely also a decision that ROG has weighed, and its user profile should be those who are into gaming, but also want to carry around only one phone that can simultaneously satisfy the ultimate gaming experience, as well as a variety of other commonly used functions.
Ending with a teardown related chat, this installment is about the mid-architecture design used on the ROG 8 Pro. The reason why it looks so complex and has so many FPCs inside is fundamentally influenced by the mid-architecture. In common three-segment architecture phones, many components can be directly connected to the motherboard, such as the rear lens, front lens, and even some can be directly integrated on the motherboard, such as the noise-canceling microphone and ambient light sensor. But to the middle of the architecture of the phone, because the location of those parts can not be moved, and concentrated in the upper part, they and the motherboard pulled away from a long distance, the middle is also separated from a battery, these densely packed FPC, became their connection to the motherboard, the realization of their respective functions of the "pipeline" and "bridge ". Those components mentioned earlier, are through this way, directly or indirectly connected to the motherboard. The advantage of this design is that the heat can be controlled in the middle of the phone, holding the game will not affect the extreme gaming party, with the cool fan X can also do a rapid cooling, because the traditional cell phone cooling points are concentrated in the camera near, even if the cooling fan can not quickly cool down.