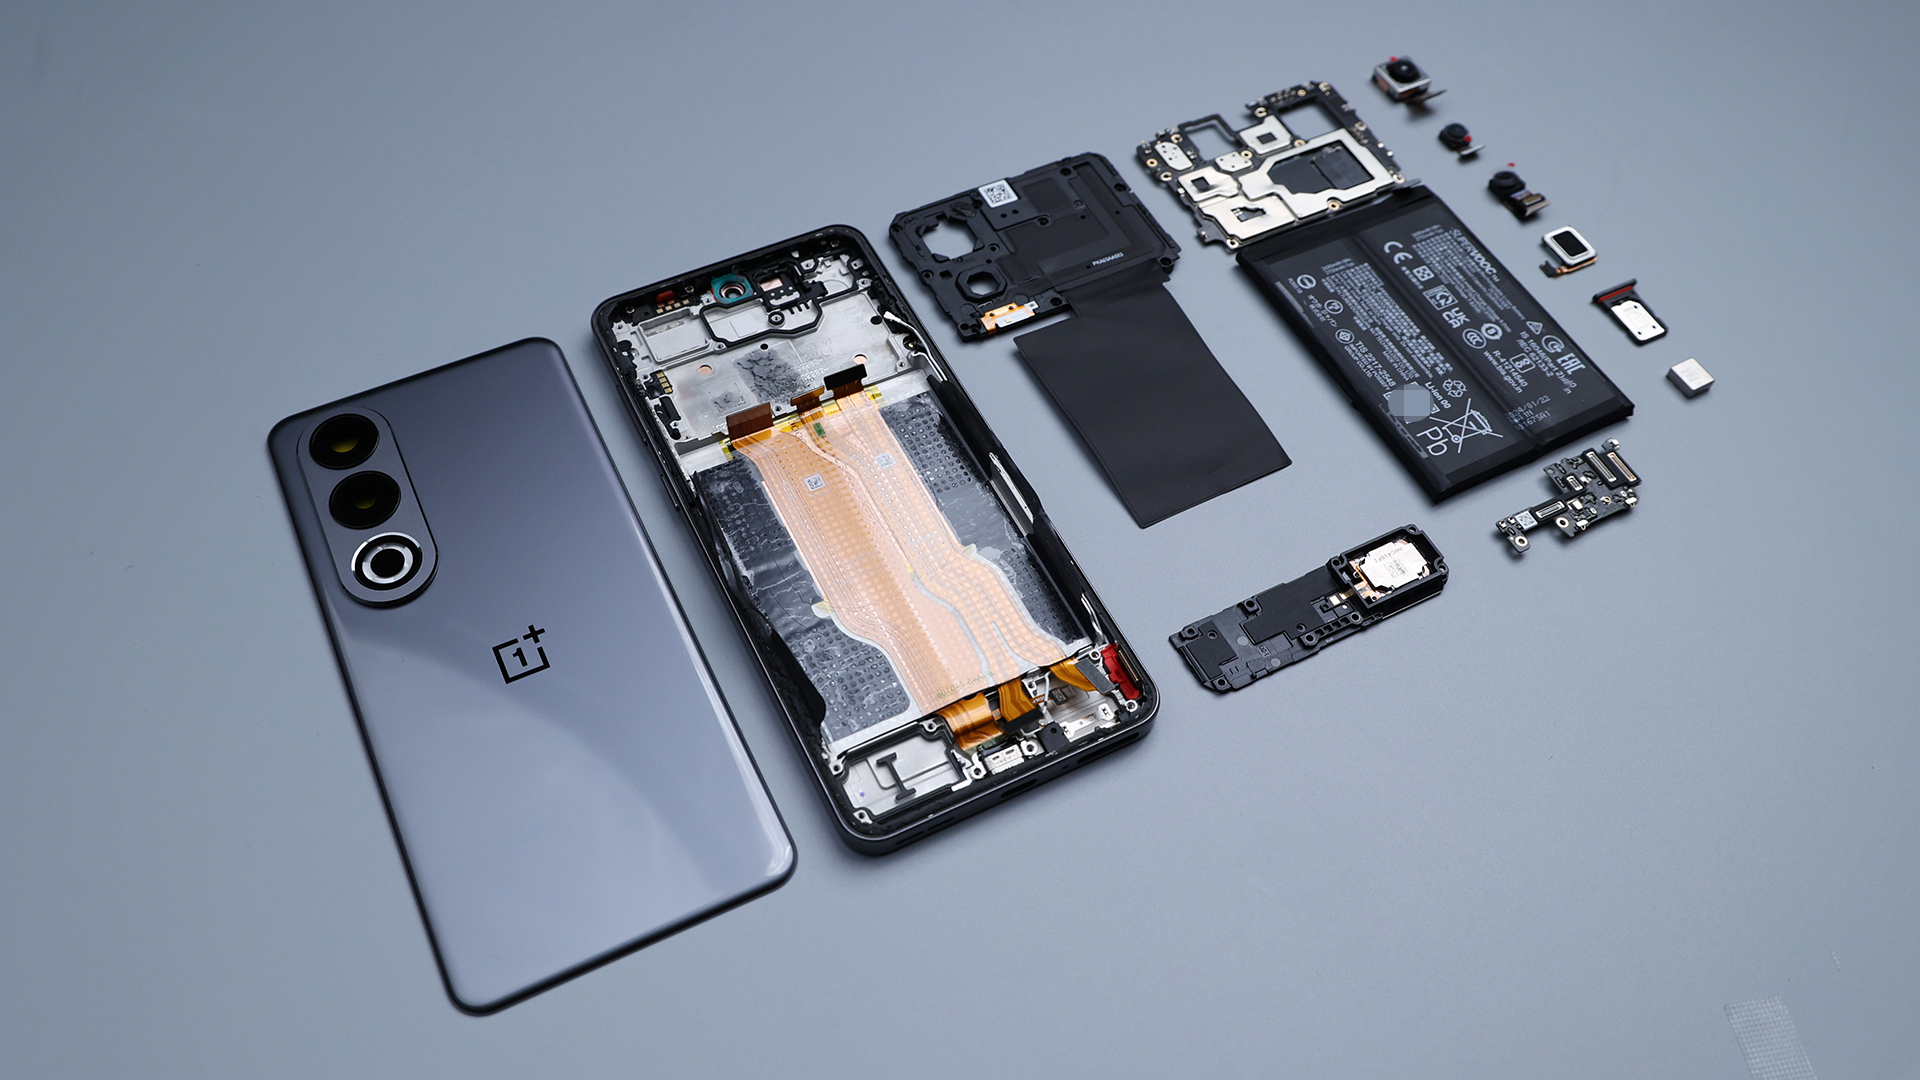
The protagonist of this issue's disassembly is the just released OnePlus Ace 3V, as a new mid-range force in the OnePlus product lineup, what is its ID design and internal structure like? What are the changes and upgrades compared to its predecessor? Below, we will find out by way of disassembly.

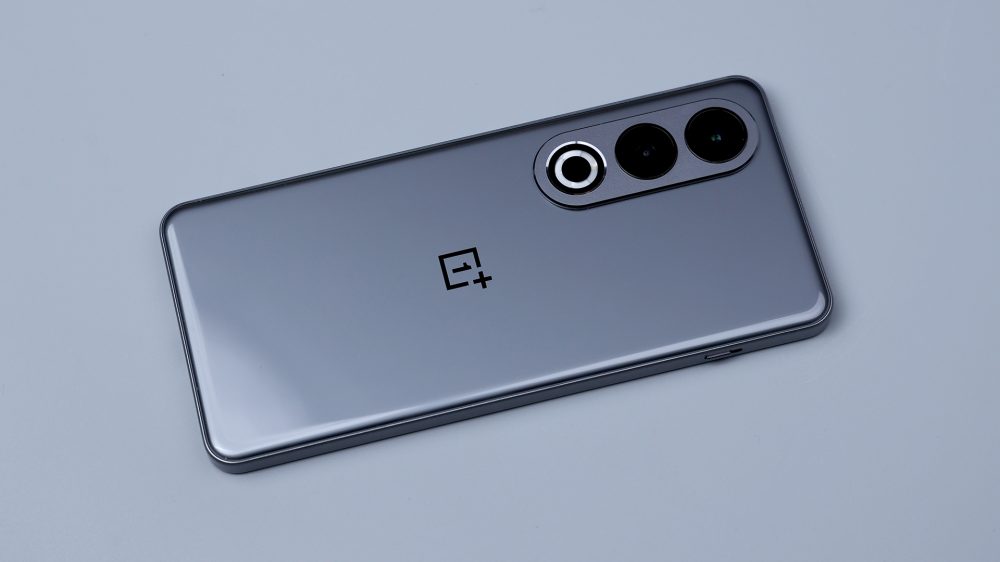
At the appearance level, Yiga Ace 3V has both continuity and change. The continuation is mainly reflected in the shape of the outline, the lines are consistent with the predecessor, four curved micro-arc back cover, right-angled edge of the plastic center frame, as well as the iconic three-stage switch.

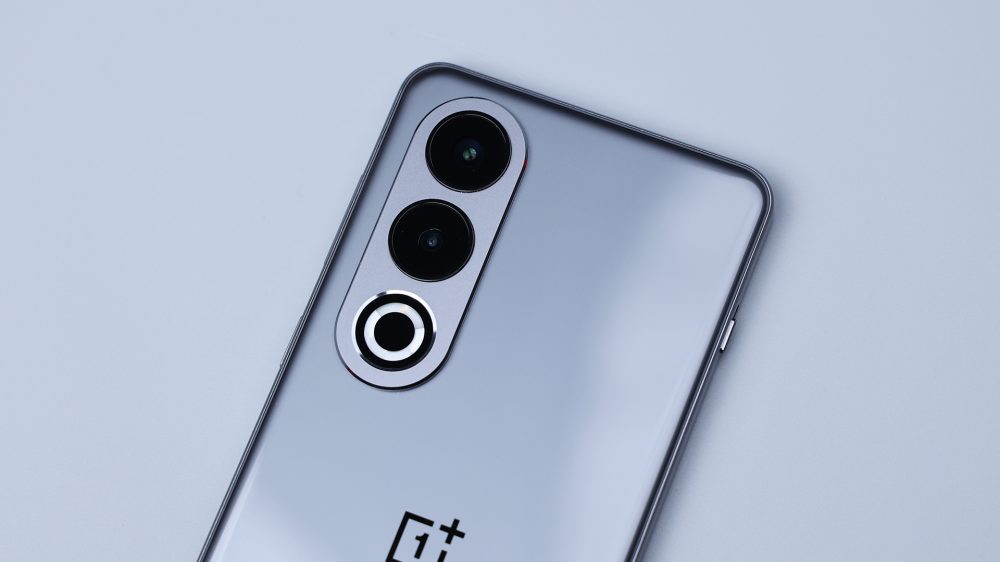
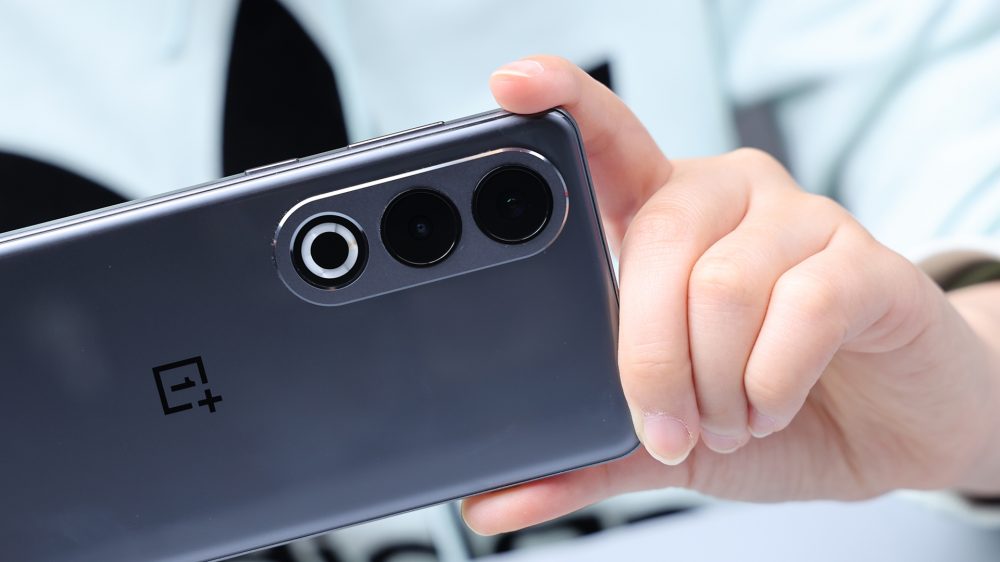
The change is focused on the rear camera area, the lens from triple camera to dual camera, vertical lined up, the flash position and shape has also been adjusted. Personally, I relatively like the design of the OnePlus Ace 2V, as for the OnePlus Ace 3V, it looks slightly bland. I don't know if you guys like the OnePlus Ace 2V or the look of the OnePlus Ace 3V.
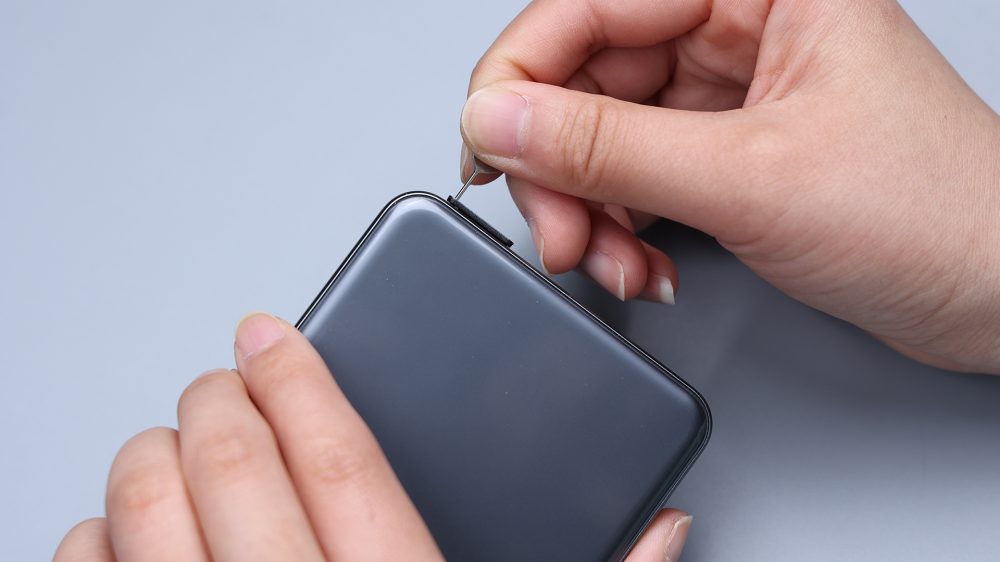
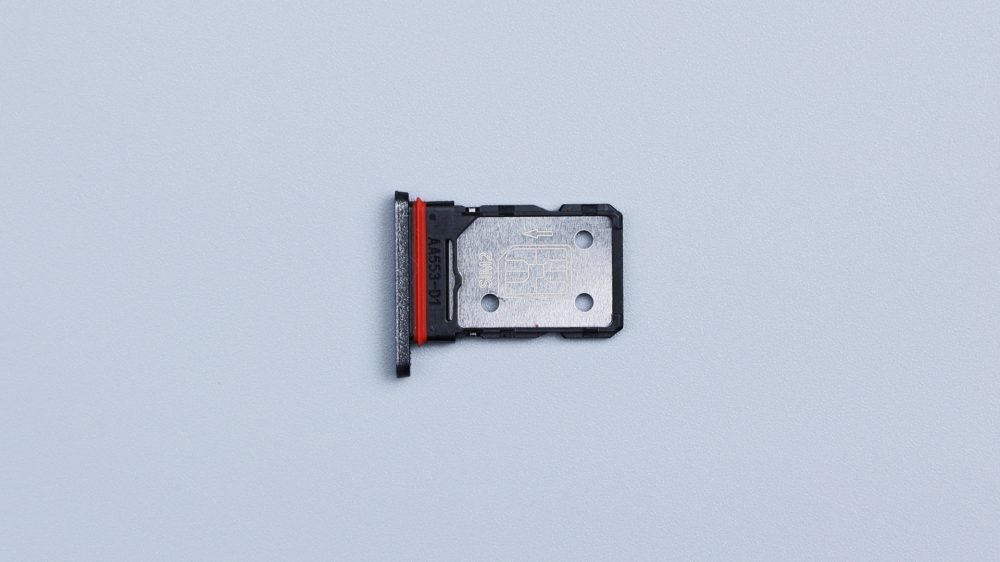
Here is the start of the disassembly, after turning off the phone, take out the SIM card tray, dual nano stack design, plastic bezel and frame + metal bezel, with red dust and waterproof rubber ring.
The OnePlus Ace 3V lens protrusion is not obvious, and it can be placed on a heating plate to heat the whole thing for 3 minutes at 100. After the adhesive is softened, it is still used to open the breakthrough with a metal cocking piece, and then change the plastic thin cocking piece, the difficulty of removing the adhesive is not too big, and all four edges are handled with ease, that is, the edges are slightly more difficult, and from the strength of the feedback on the hands, it should be done to reinforce, and it is good that there is no need for a second heating, so that you can open the back cover.

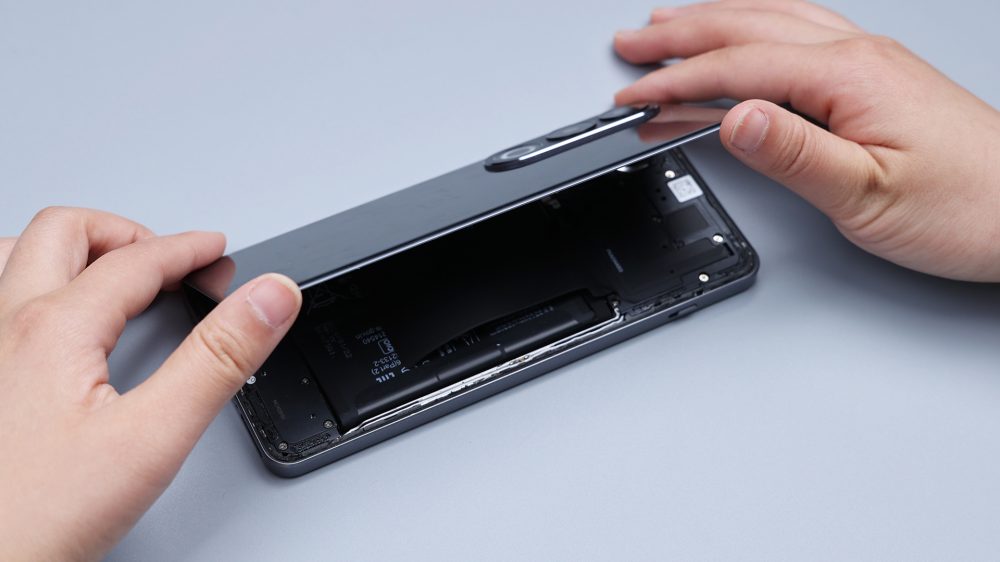
A circle of adhesive around the inside of the back cover, thick and sticky, as expected, most of the adhesive is relatively narrow, the four corners in order to strengthen the adhesive more than double the width.
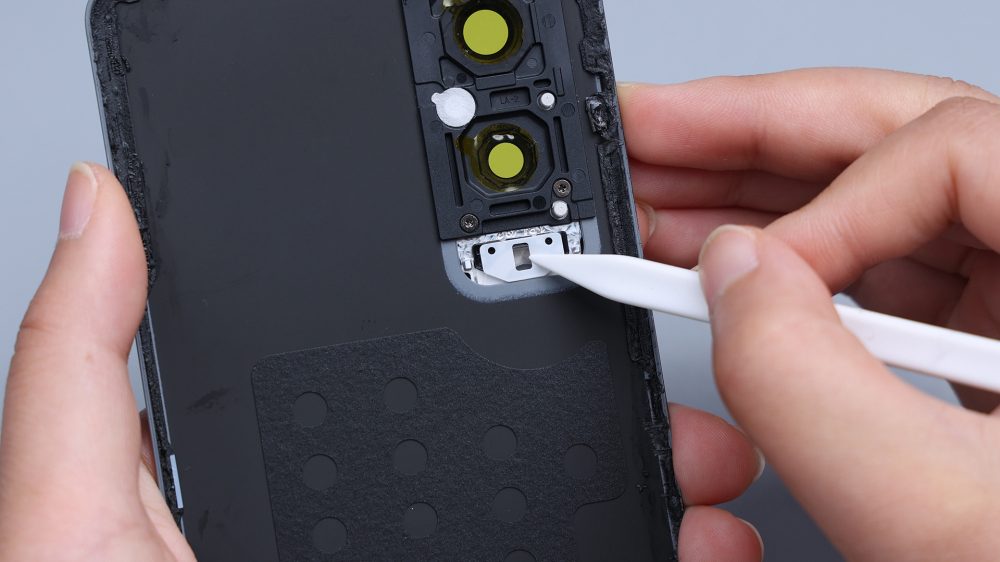
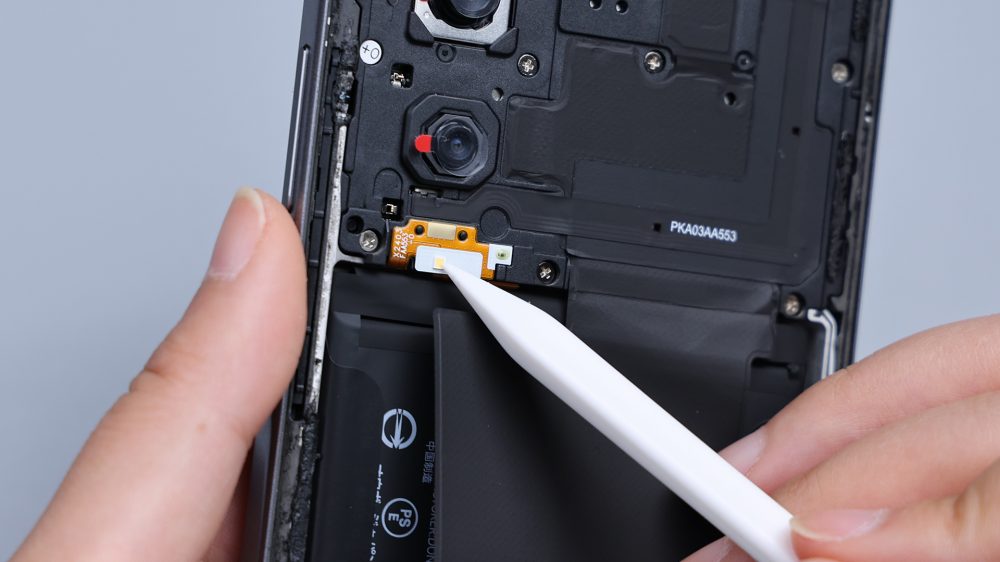
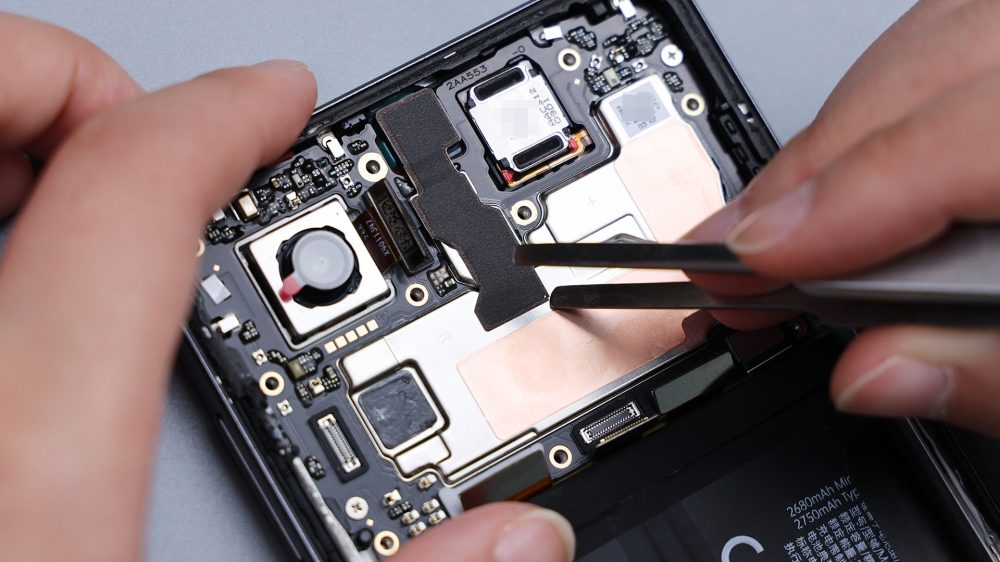
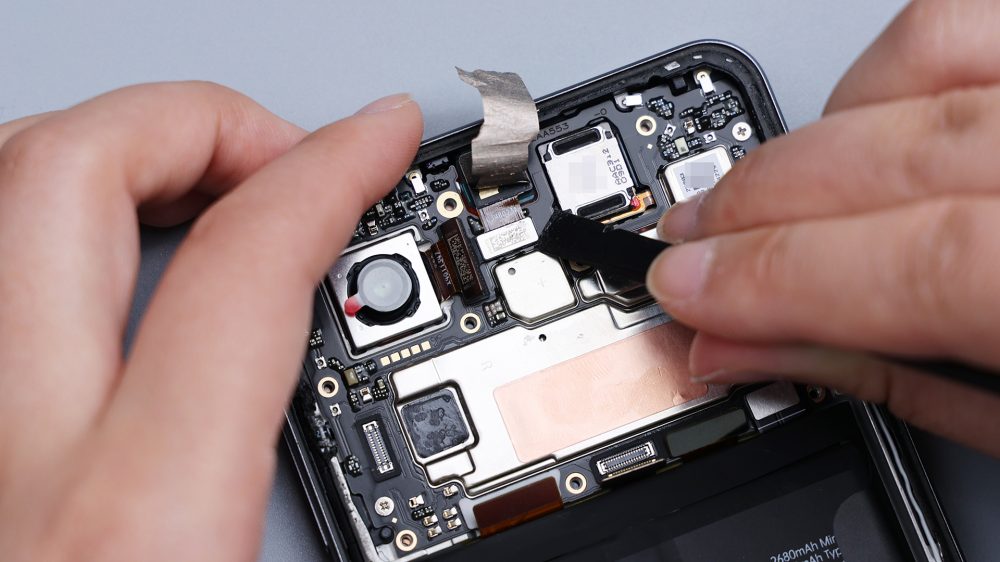
A small piece of black tape is affixed to the corresponding position of the power button FPC to avoid the wires from being stuck. Camera position also made some reinforcement, DECO inside the black plastic lining, you can still see a small amount of adhesive residue, not only sticky, hardness is also much higher than the edge of the adhesive, demolition of this place also feel the obvious resistance.
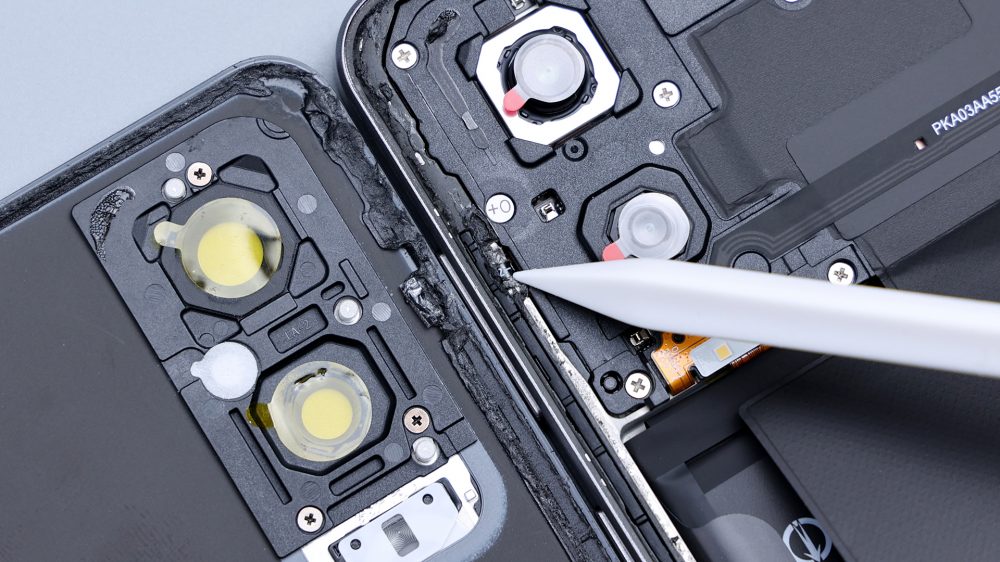
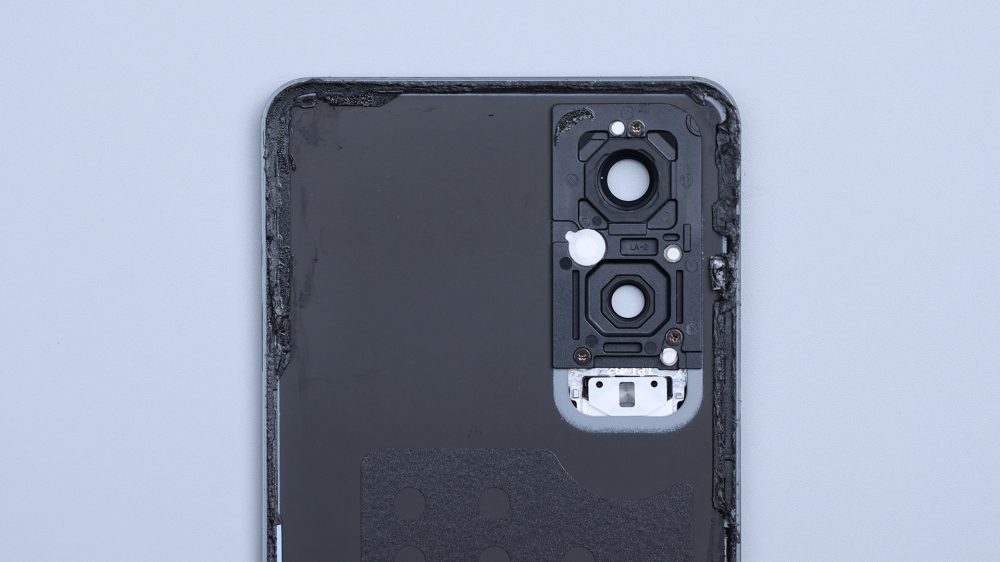
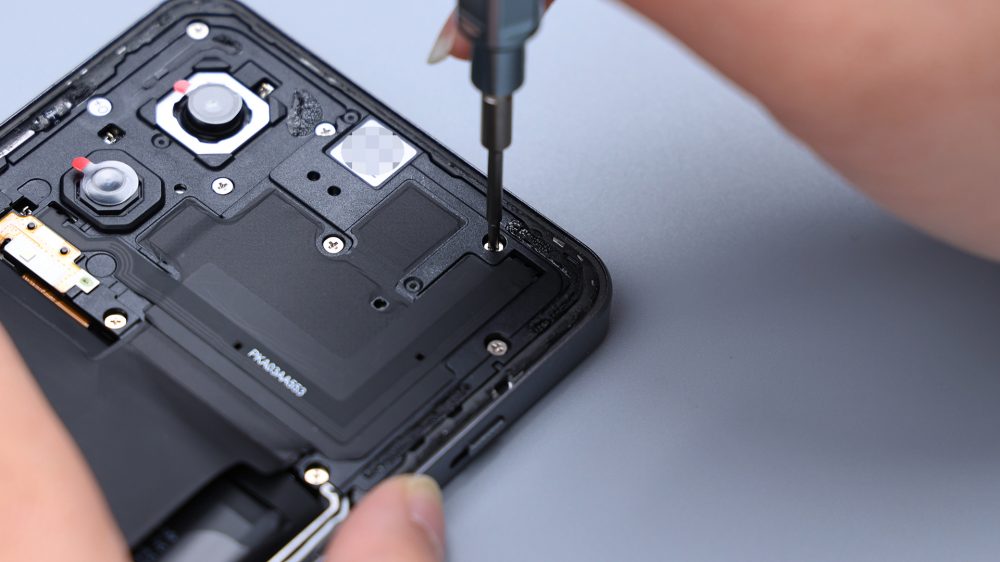
The DECO and the plastic liner are fixed with screws + adhesive, only 3 screws were used due to the small area.
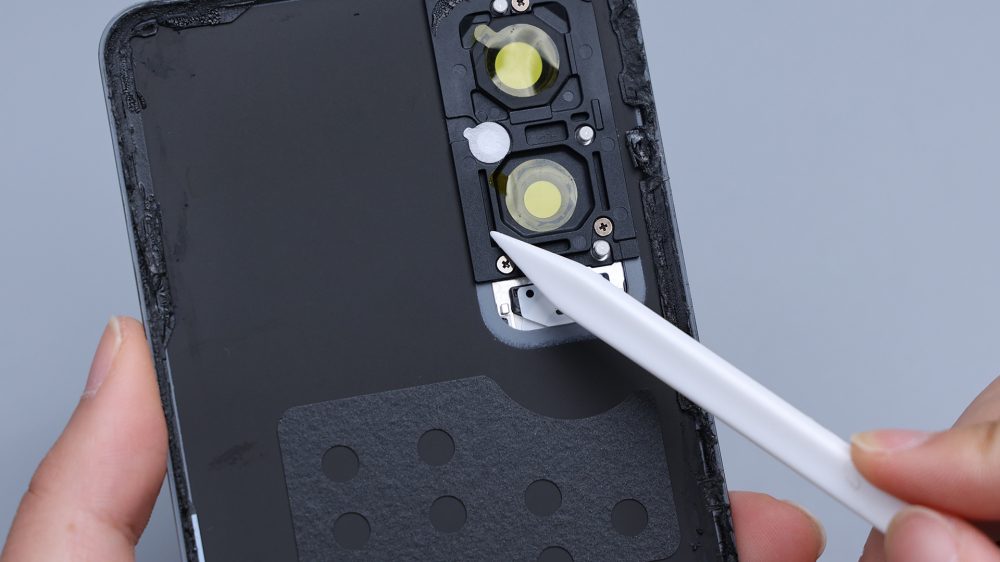
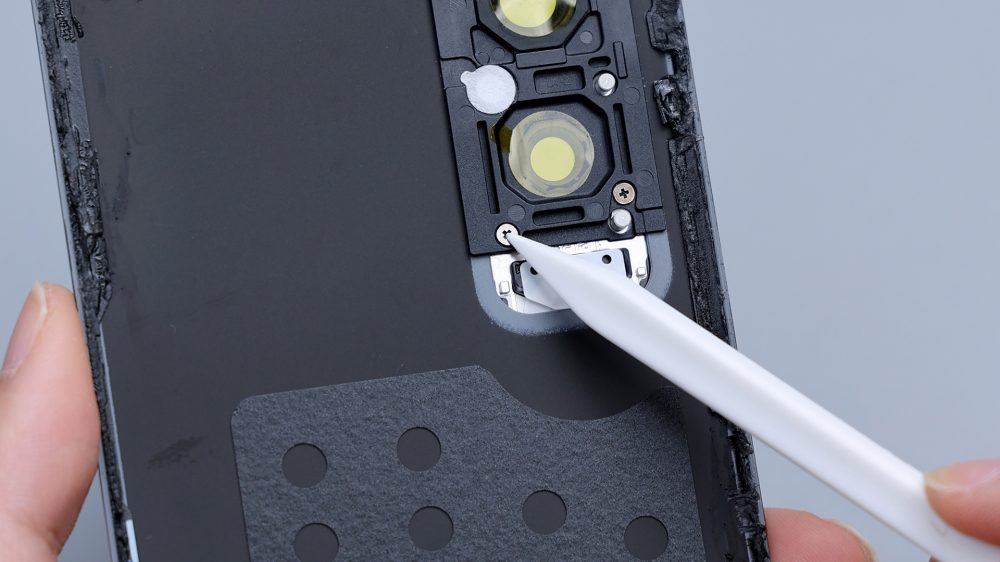
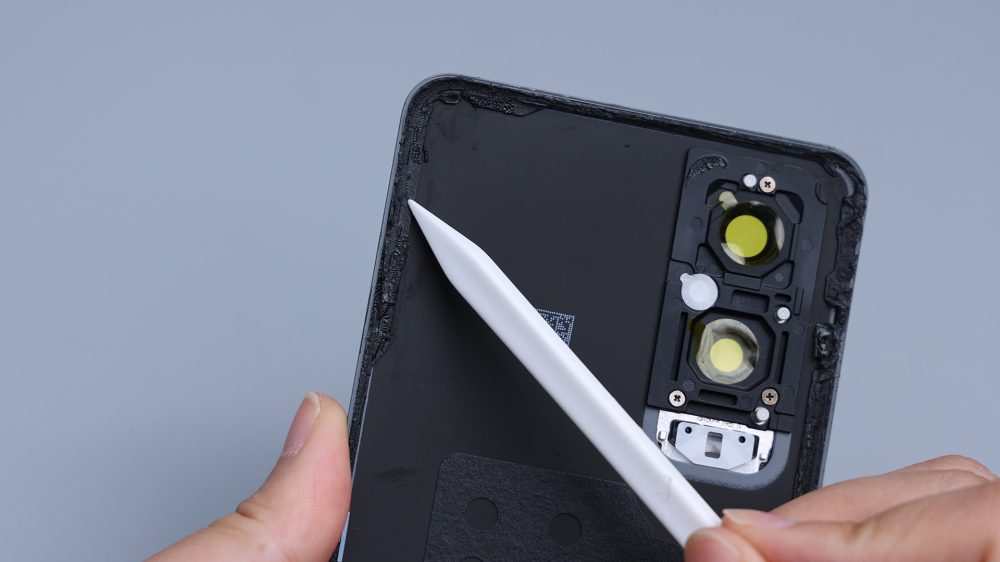
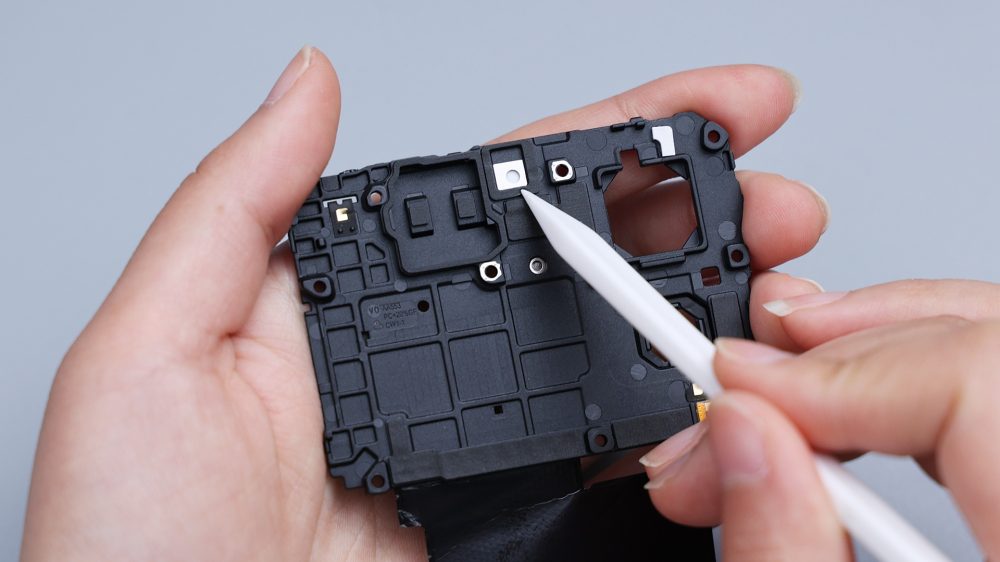
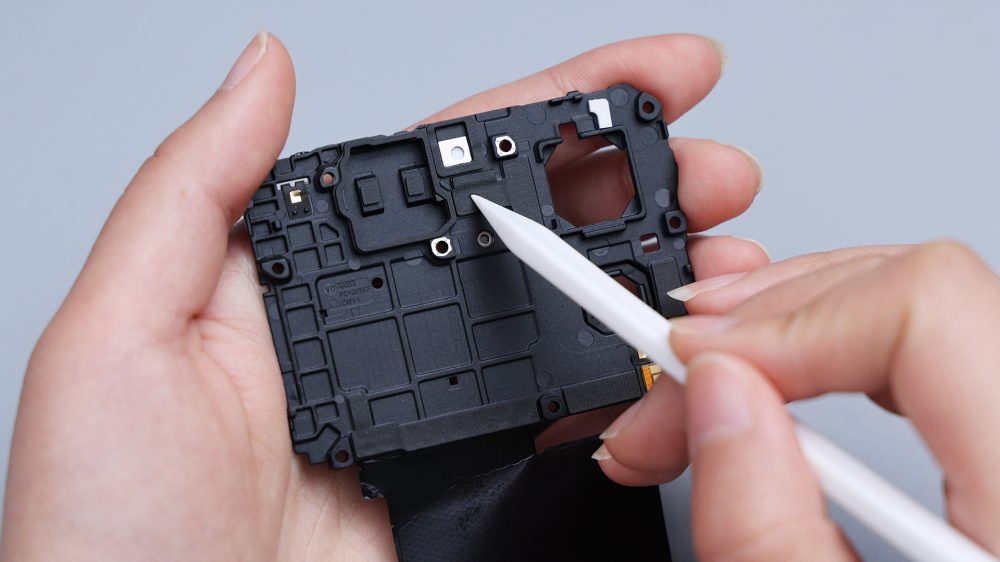
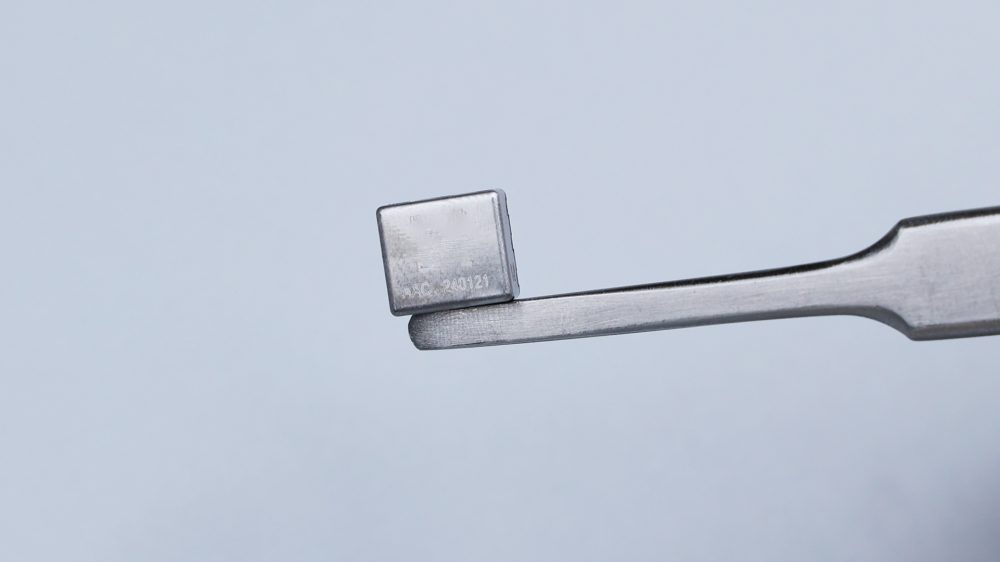
There are also 3 round metal limit posts around the periphery, one of their duties is to be responsible for conducting signals, with dotted indentations on them, corresponding to the 3 metal shrapnel on the motherboard.There are also 2 small square metal limit posts on the lower side of the DECO, and it is obvious from the glossy finish of the exposed part around them that the DECO bezel is made of metal. There are foam rings set in place where the main camera and the ultra wide-angle lens are located. There is a rectangular opening below the liner that corresponds to the flash.
From the outside, the flash is a circle, which can't help but give the illusion that there is a ring of light sources inside. In reality, only a small portion of the top of the circle is actually illuminated, and most of the rest of the area is decorative for aesthetic purposes.
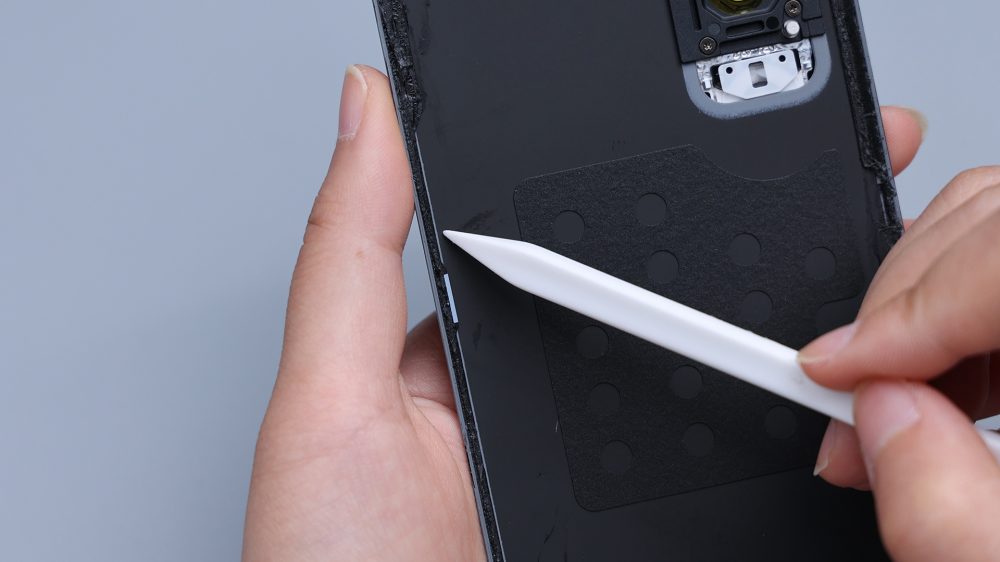
The large hollow foam in the middle of the back cover corresponds to the battery and the heat dissipation film, which plays the role of filling and buffering protection, and the square heat dissipation film in the lower right corner corresponds to the bottom speaker.
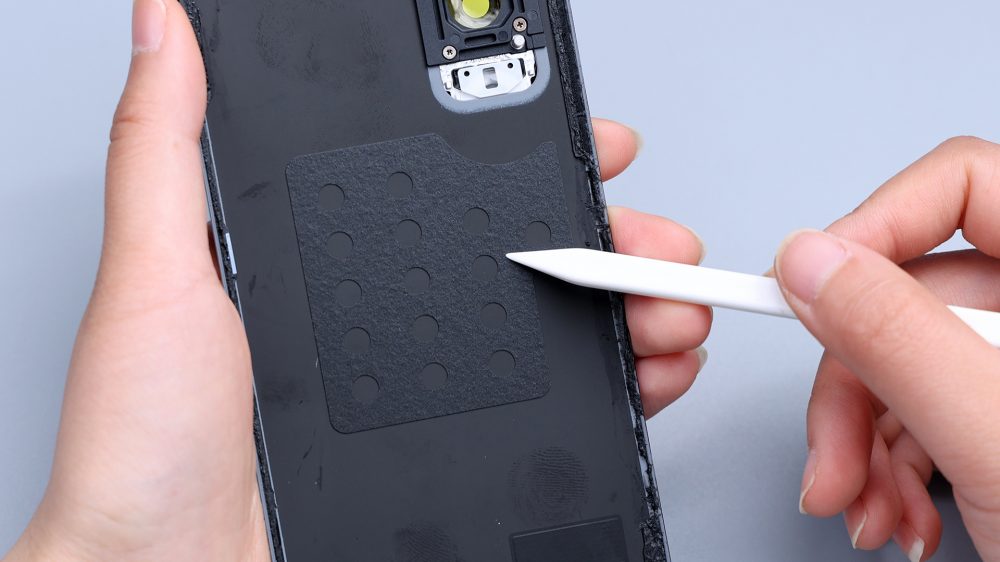
Around the main body of the phone can also be seen a circle of obvious adhesive residue, which can be seen in the strong adhesive, DECO area of the reinforcement points, distributed in the main camera above the left and right sides of the periphery of the three metal shrapnel corresponds to the inside of the back cover of the metal limit column.
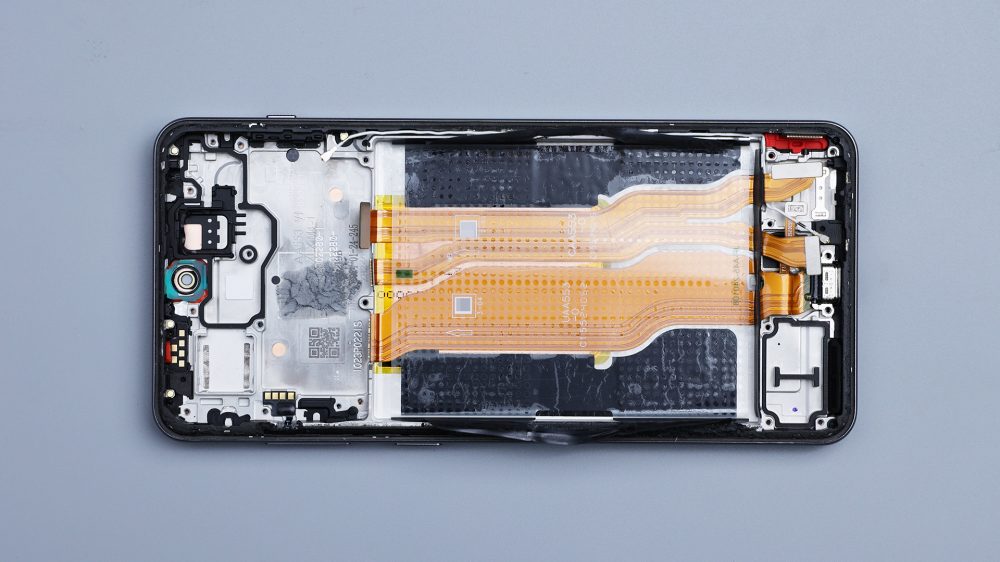
The NFC coil as a whole is L-shaped, from the upper right corner of the cover, through the extension to the lower left corner, it is also under the pressure of a piece of the same L-shaped thin foam + heat dissipation film, and then down is another layer of a larger area of the heat dissipation film, extending upward to cover most of the core heat generation area.
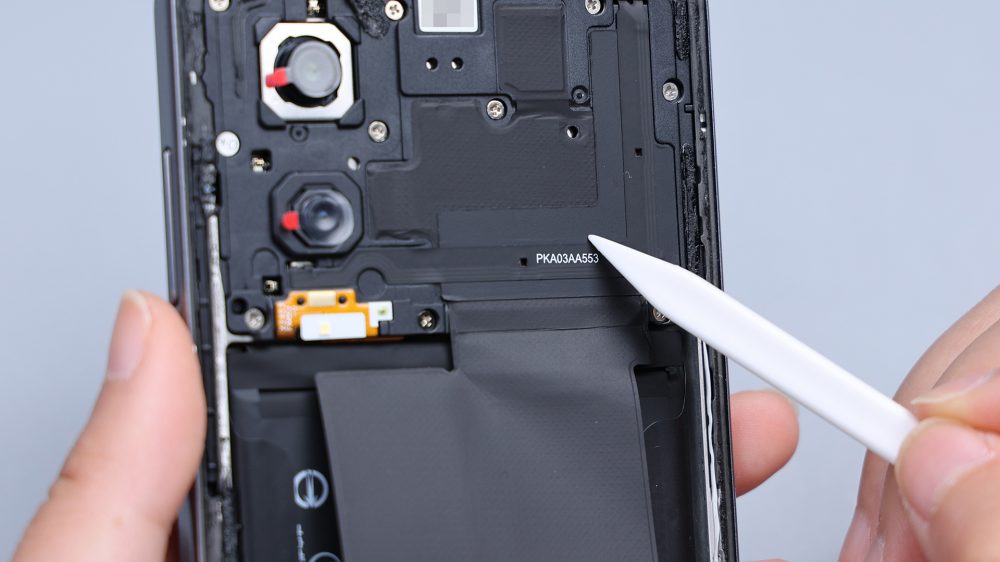
The flash is integrated on a yellow FPC with a single LED bead configuration. Above the battery is a graphite thermal patch that covers most of the battery area, from which the extended thermal film, mentioned earlier, comes. On the right side, there is 1 white coaxial cable connecting the main and secondary boards in the cable slot.
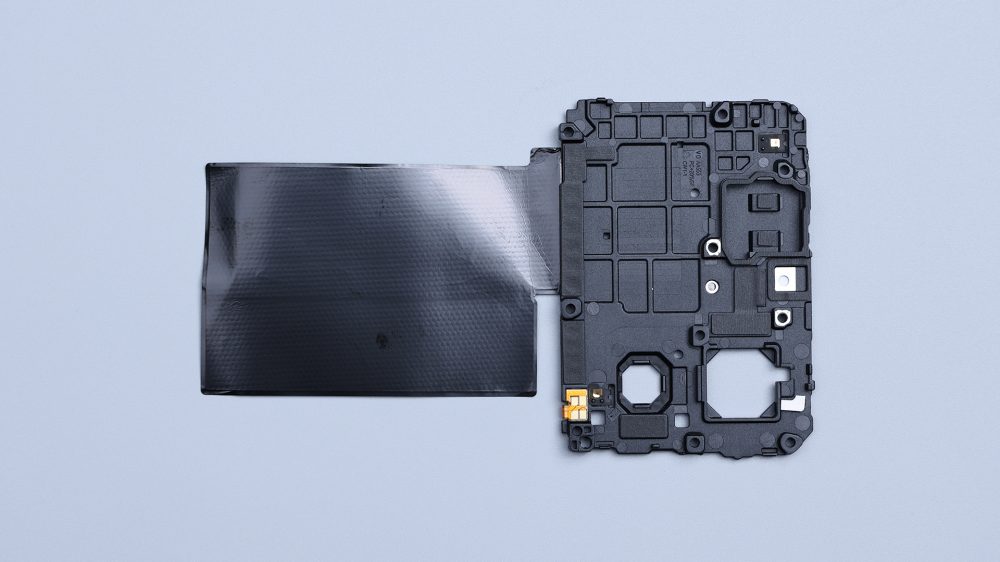
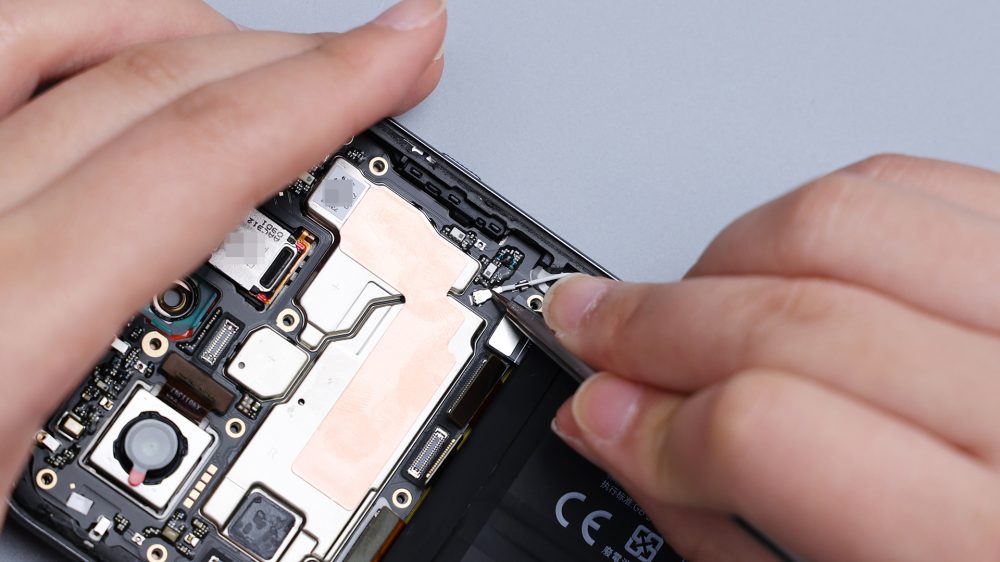
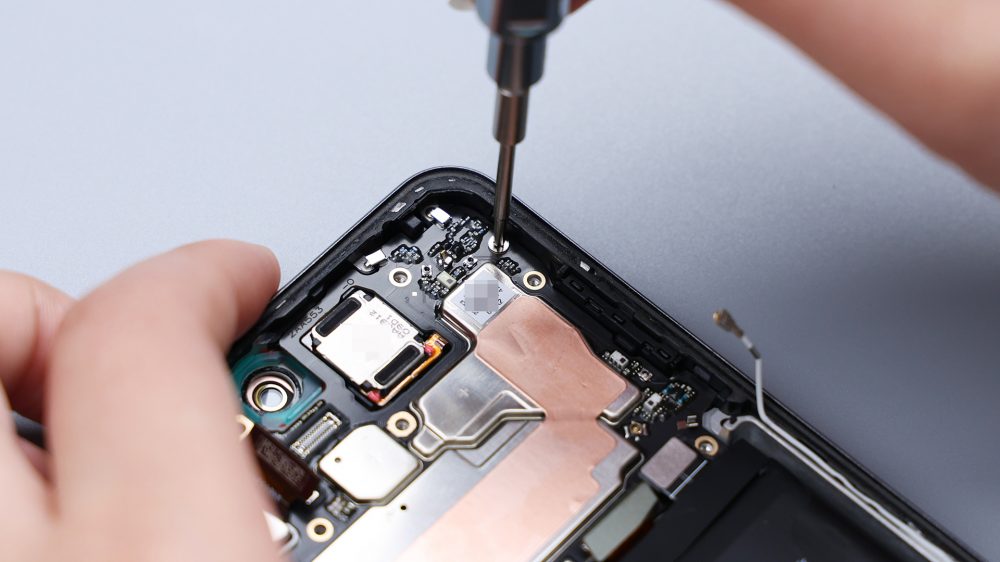
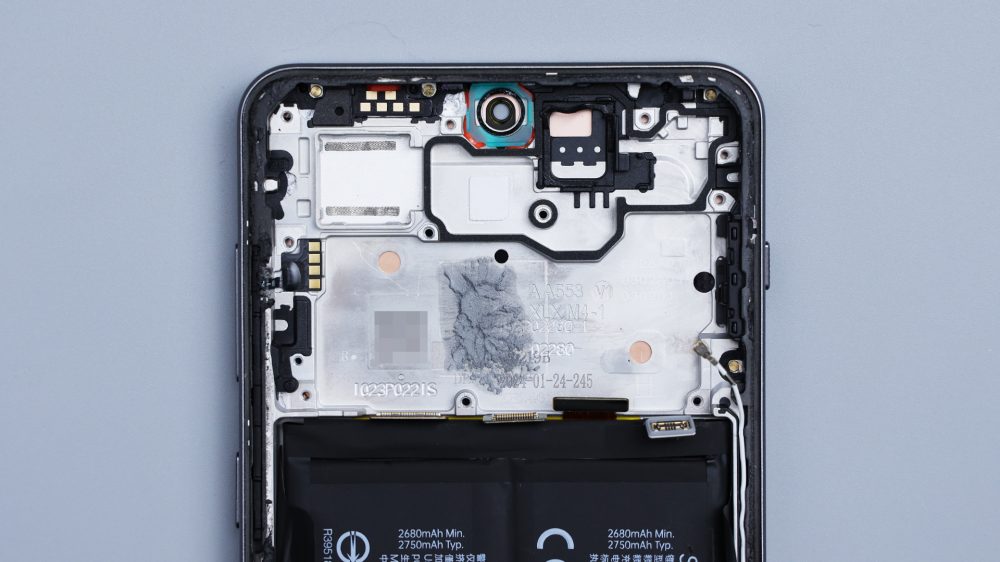
Unscrew all the fixing screws of the cover, pry up and remove the cover.
The vast majority of the front and back areas are made of plastic, only a few screw holes in the upper middle have a small amount of metal exposed, which is very rare in the recent disassembly of the phone, most of the phone's cover will use plastic + metal plate fusion scheme, and the metal plate will be arranged in the core area, to assist in the chip heat dissipation, while the core area of the OnePlus Ace 3V corresponds to the location of the core area, but it's a grid of squares.
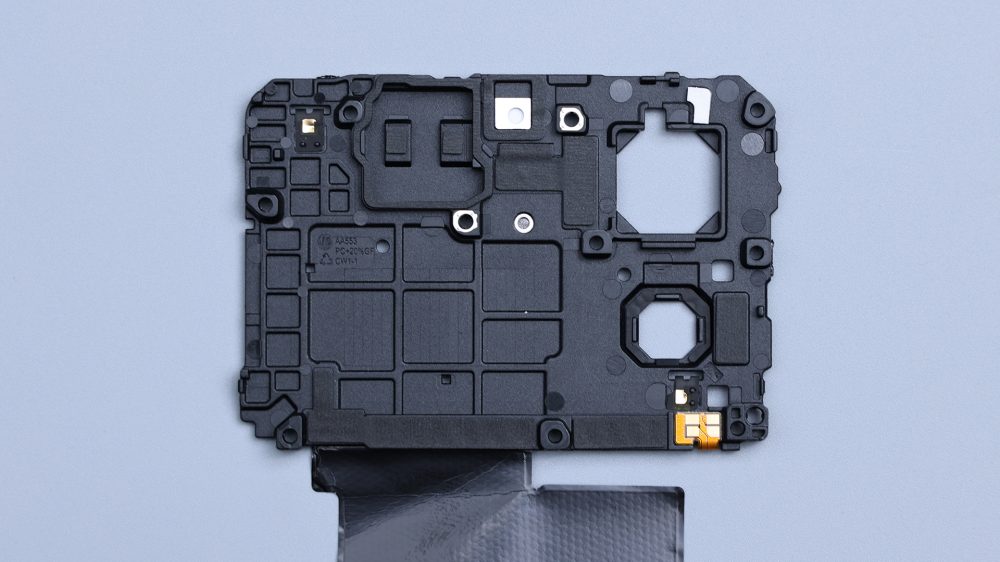
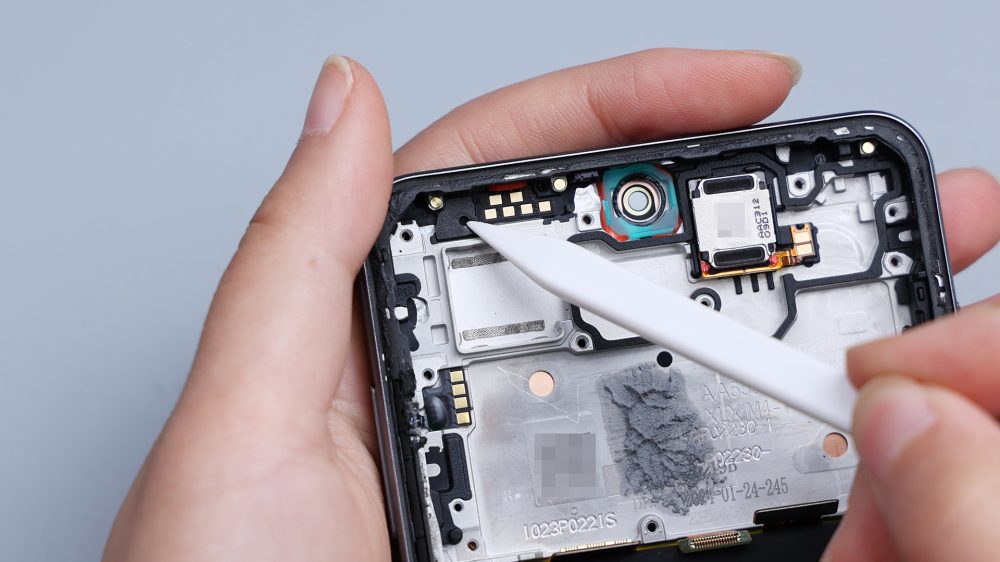
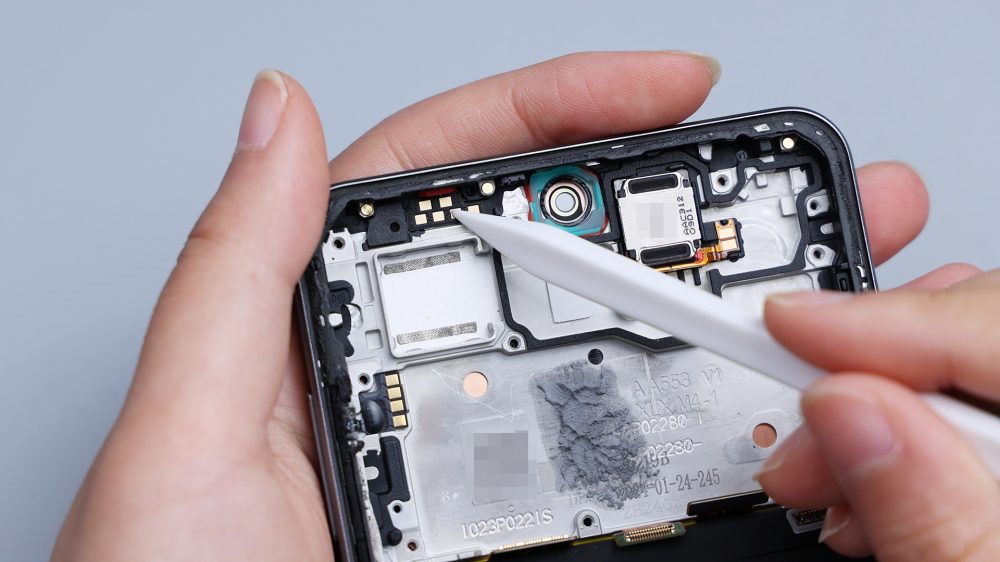
The corresponding position of the top speaker is wrapped in a circle of foam, and the modeling outline is basically the same as the shield around the speaker, which can not only provide buffer protection for the main board, but also play an airtight role in the sound cavity, avoiding sound leakage as much as possible, and guaranteeing the sound quality effect.
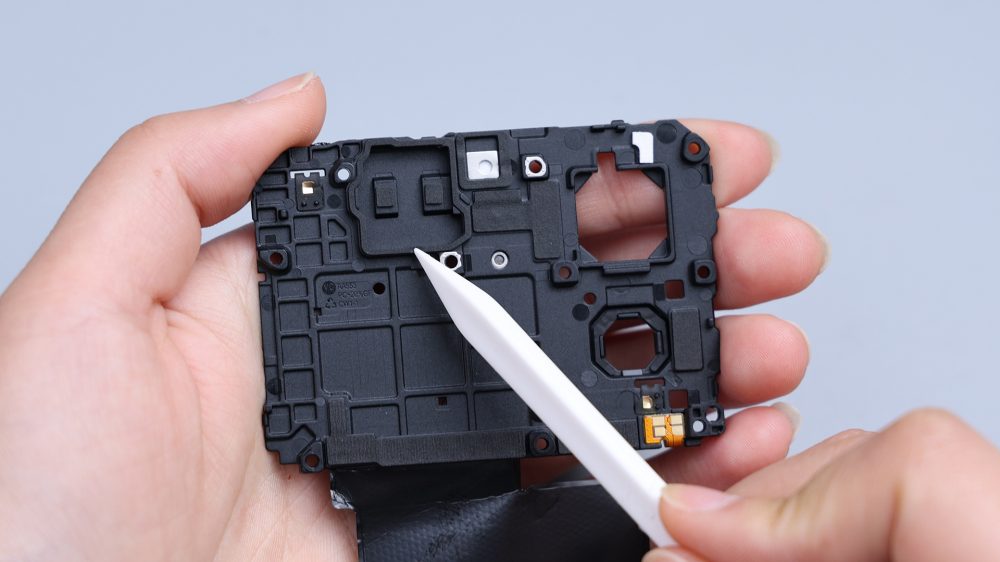
The center of the 2 small pieces of foam, is specifically to protect the speakers.
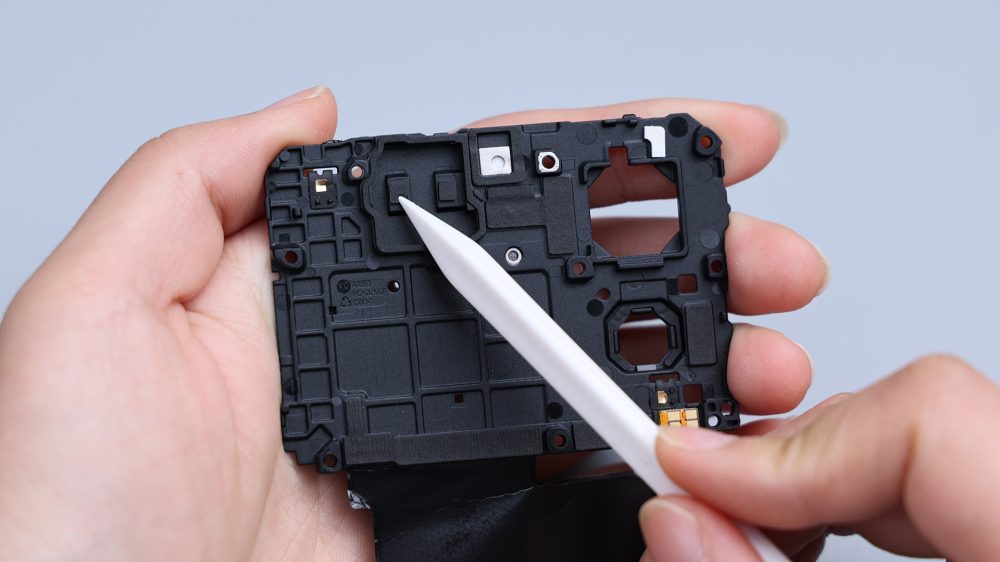
Right next to the foam ring corresponds to the front lens, the following T-shaped foam pad corresponds to the front lens and the main camera BTB, ultra-wide-angle lens of the BTB also has a foam pad, and also for the lens and added a foam ring, this point is really thoughtful.
The single contact in the upper left and lower right corners corresponds to the NFC coil, and the 4 contacts in the lower right corner correspond to the flash FPC. 2 long foam pads at the bottom correspond to the row of BTBs under the A-side of the motherboard, and the coaxial cable connector is also taken care of. The main camera has 1 white rubber pad on the top right corner, which corresponds to the noise-canceling microphone on top, kind of replacing the metal cover to provide protection for it.

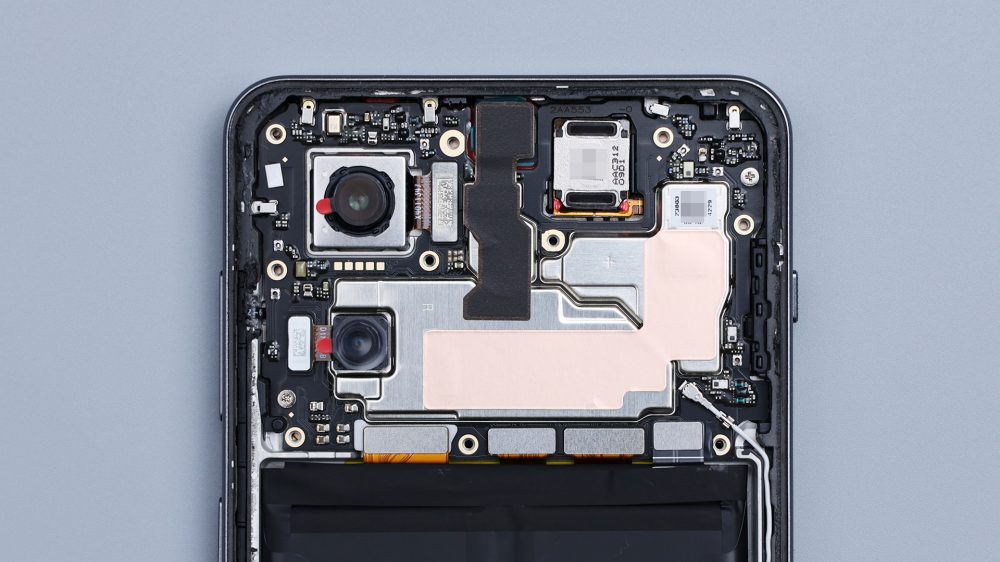
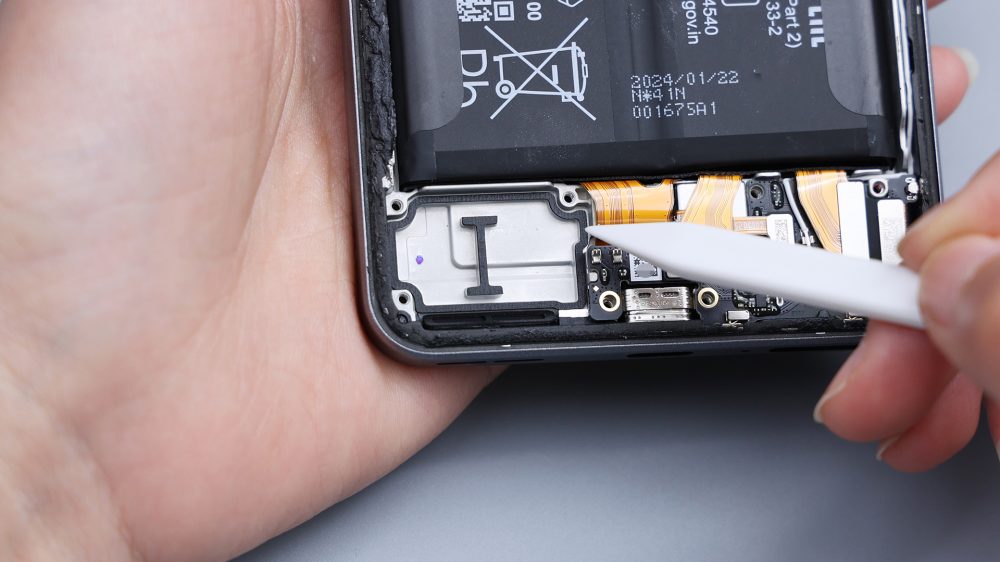
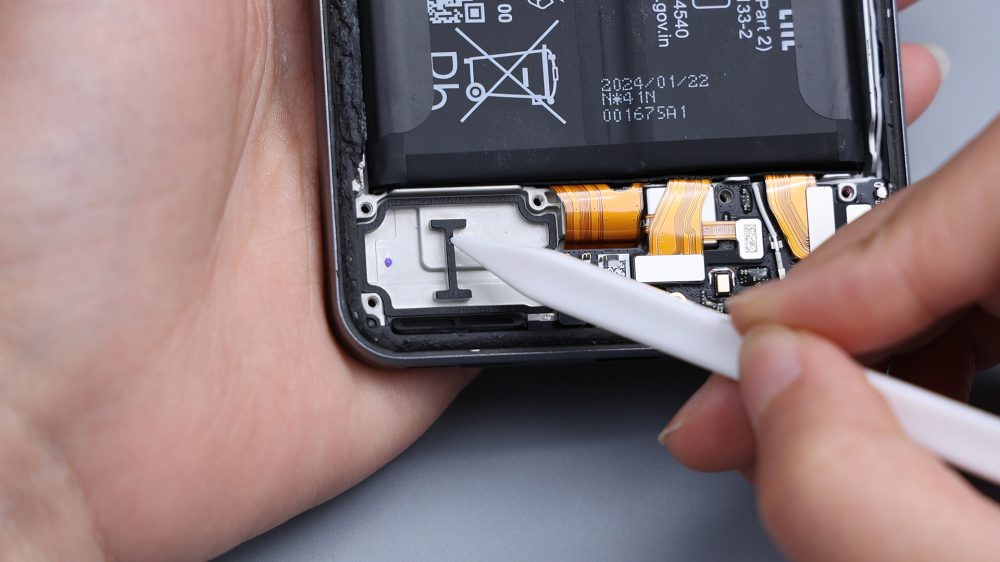
The motherboard has 2 separate fixing screws, and the A-side is quite full, with the noise-canceling microphone in the top left corner, a red rubber pad faintly visible in the gap next to it, and the IR further to the right. The front lens is in the center, with a long thermal film on the back, and all the capacitors and small parts on the A-side have been glued, including traces of gluing around some of the shields. There is 1 piece of L-shaped copper foil attached to the shield in the core area, and the connector for the coaxial cable is in the lower right corner of the foil.
After disconnecting the battery BTB, followed by dealing with the other BTBs in turn.
Of the 3 lenses, the ultra-wide-angle lens is relatively simple and can be removed directly after disconnecting the BTB.
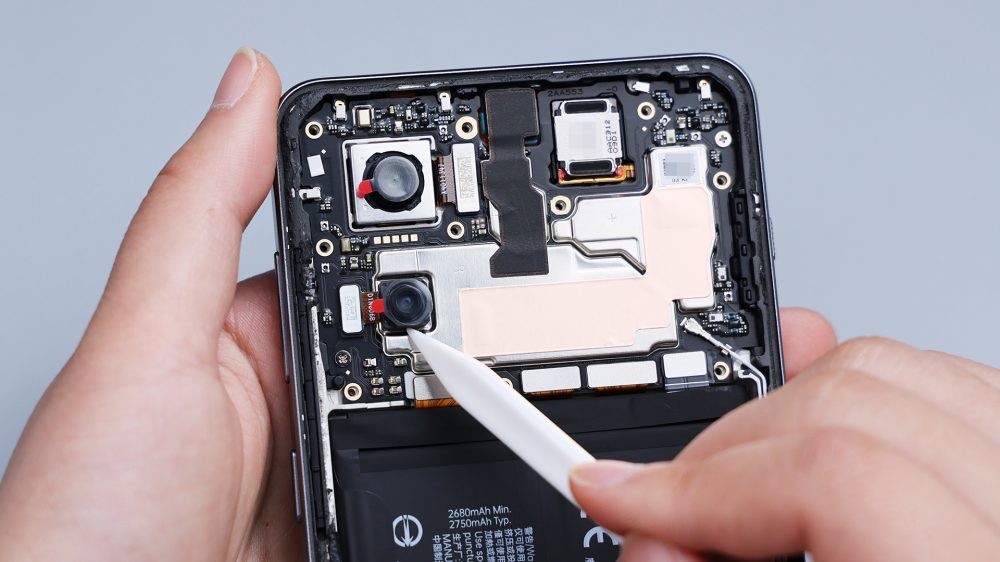
The main camera is glued to the frame and needs to wait until the motherboard is removed before it can be removed. The front lens has to be removed by tearing off the thermal film on the back, it is also reinforced with adhesive, but it is not glued as tightly as the main camera, and can be removed with a little force.
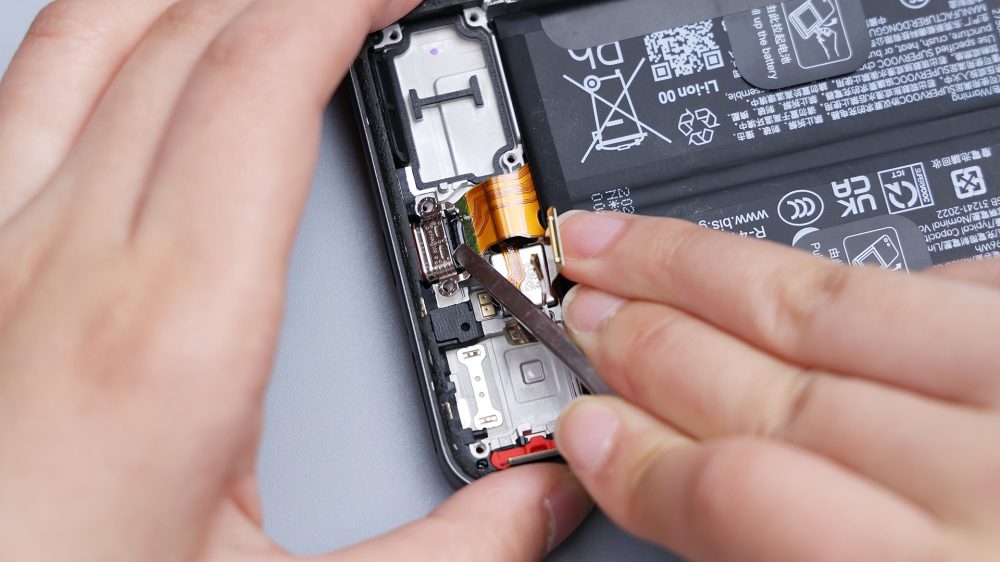
All that's left is the coaxial cable in the lower right corner, after disconnecting it unscrew the 2 main board fixing screws and pry up to remove the main board.
There are 2 strips of adhesive under the main camera, the fixing is quite tight, after fixing it, the front and rear cameras are all together.

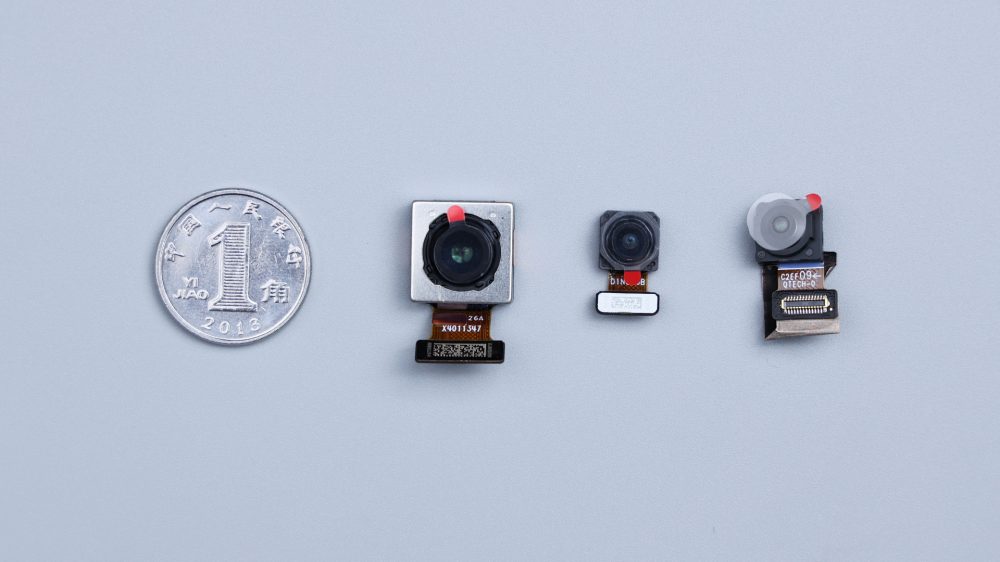
50-megapixel Sony LYT-600 main camera, sensor area 1/1.95 inches, support for OIS optical stabilization, aperture f/1.8. 8-megapixel ultra-wide-angle lens, aperture f/2.2. 16-megapixel front-facing lens, Samsung S5K3P9 sensor, f/2.4 aperture.
The motherboard's PCB is very thin, which is good for both thickness control and heat dissipation.
In order to accommodate the main camera and avoid the rear mirror group from protruding too much, the PCB adopts a broken board sinking program, and its corresponding position forms a square skeleton, including the front lens and speaker position next to it are also notched, and the good thing is that the motherboard is more integrated and does not have to do the stacking process.
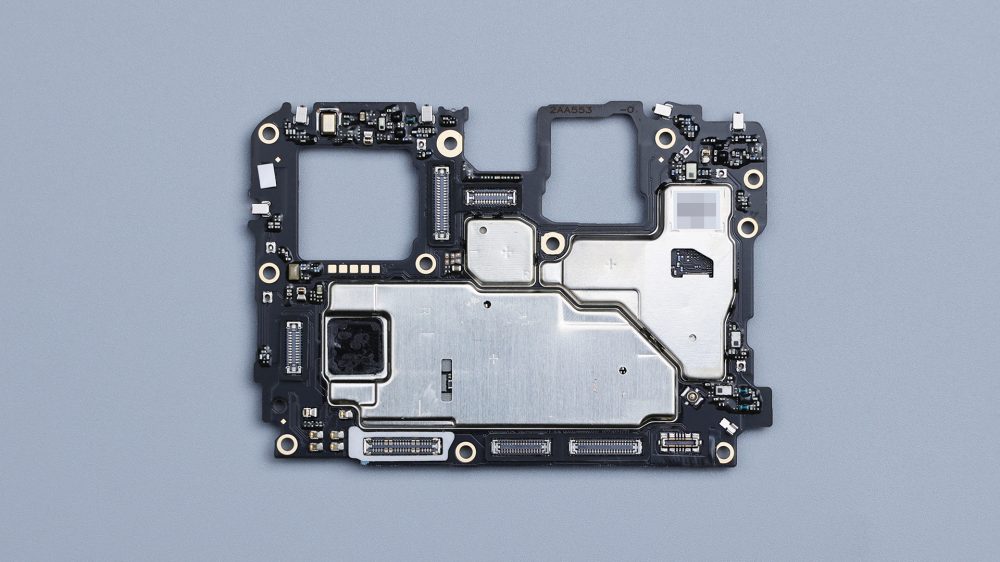
All BTB bases are protected by rubber rings except for the battery, which is placed on the connector end. The motherboard's B-side shield has a large piece of thermal film on it, and the core area is also coated with silicone grease, with a small piece of copper foil affixed to the shield above it. As with the A-side, all capacitors and small parts are spot-glued. The IR emitter is up in the center, and the round hole on the right side corresponds to the noise-canceling microphone.
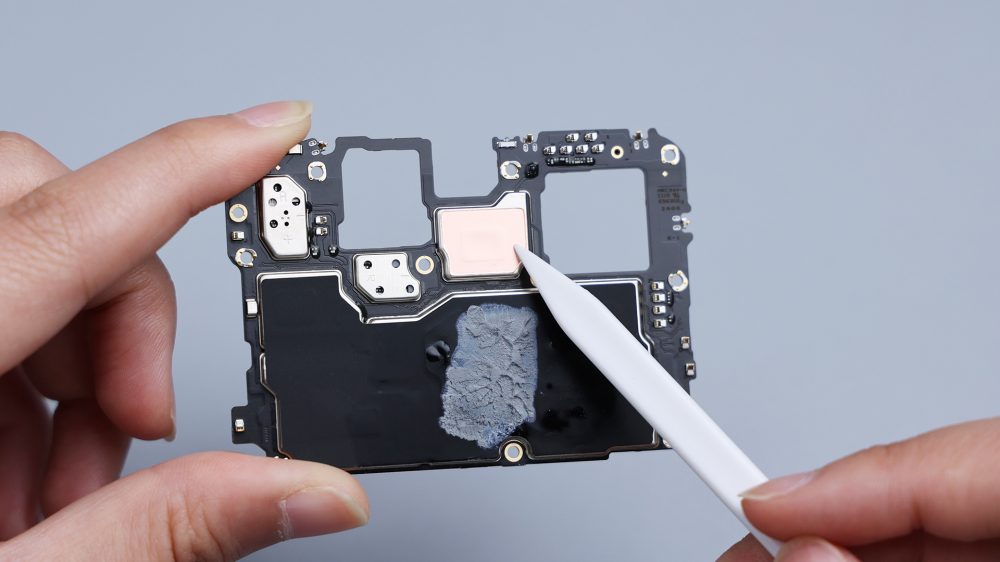
Tear away the black thermal film, and there is another layer of thermal material underneath, including blue silicone grease and thermally conductive silicone sheet. The largest chip in the core area is the 16GB of LPDDR5X running memory from Hynix, and pressed underneath is a slightly larger green chip, none other than the Snapdragon 7+ Gen 3 processor from Qualcomm. Next to it, slightly smaller, is a 512GB UFS 4.0 flash memory chip from Samsung. The one above the processor is the WCN6755 WiFi Bluetooth chip from Qualcomm. The lower-left corner of the processor is Qualcomm's PM7550 power management IC, and there's another chip above it, Qualcomm's SDR753 RF IC.The core chips have been glued, and the components around them have visible traces of gluing.

The empty frame area has a foam ring in the upper left corner, corresponding to the noise-canceling microphone.
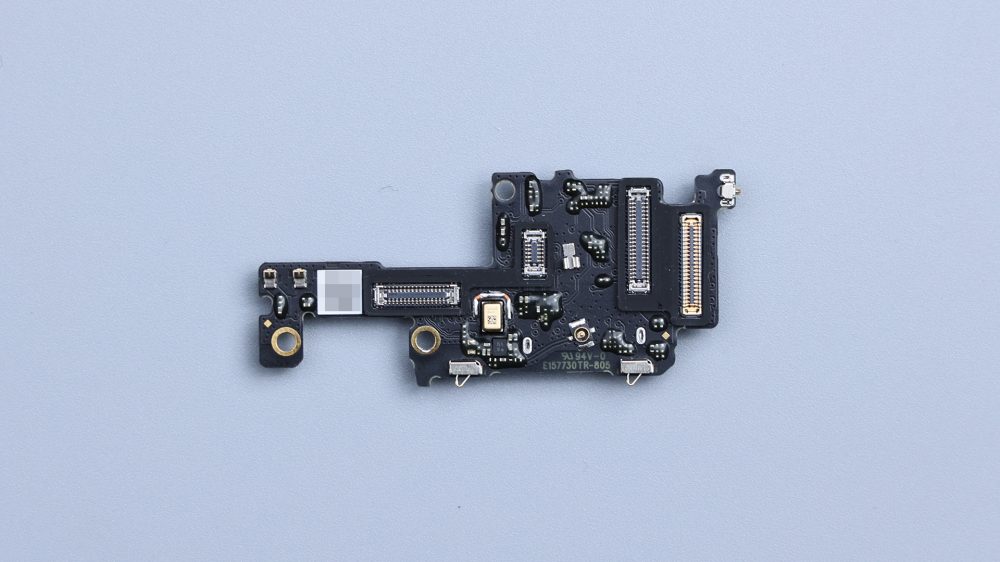
On the small PCB next to it, the front ambient light sensor and infrared emitter are integrated, and the red rubber pad in the gap before is for it.
The front lens features a foam ring, and it's also adhesive, providing both cushioning protection and anchoring. Immediately next to a large shaped foam ring, the speaker wrapped in, look at the shape of its shape, just with the motherboard B side of the shape of the upper 3 shields match, including the center of the screw holes, there is a separate foam ring, the main board to provide cushioning protection, this point is really very attentive.

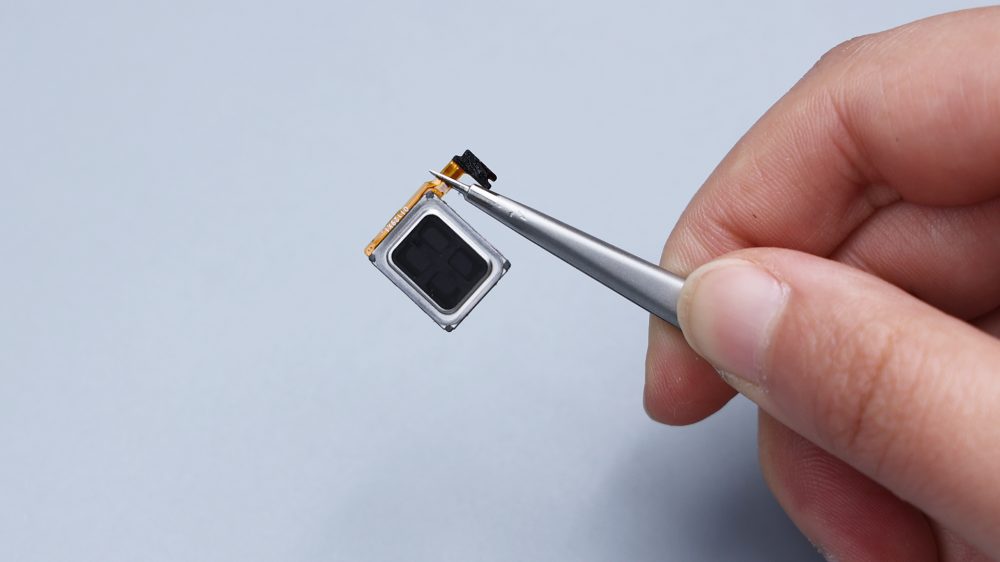
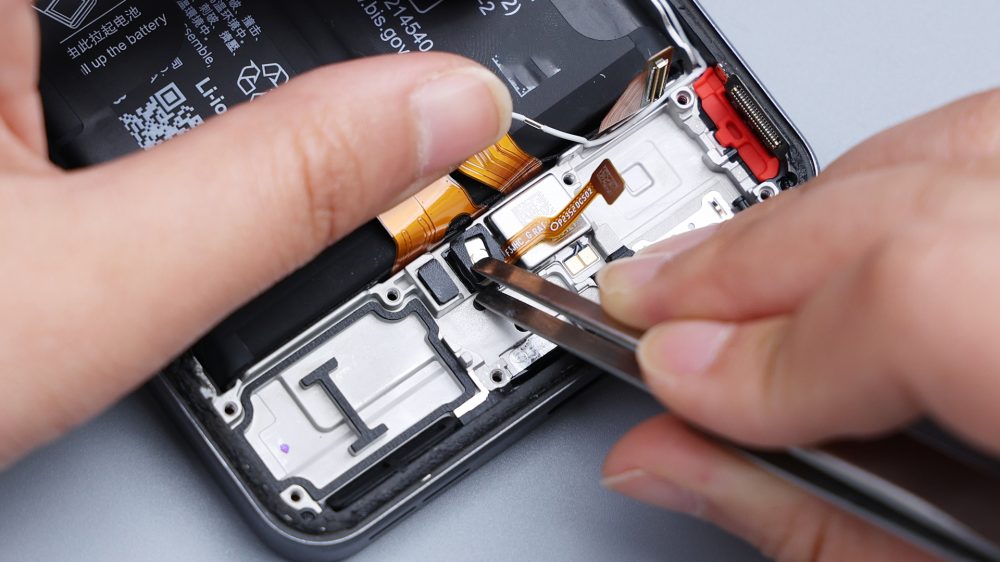
The top speaker is secured by adhesive, it comes from Rasonic and uses the 1012 specification, connecting to the motherboard via 2 contacts.
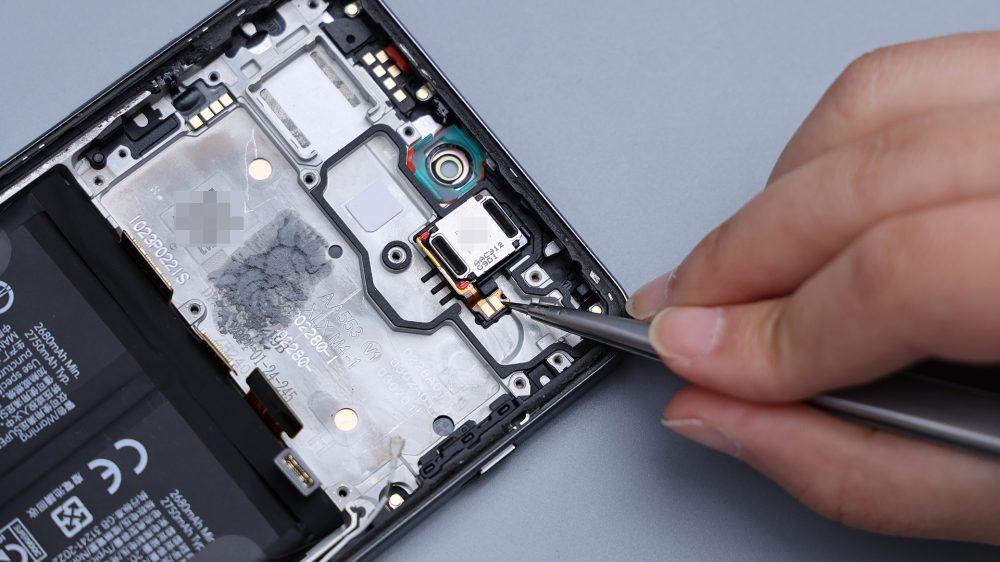
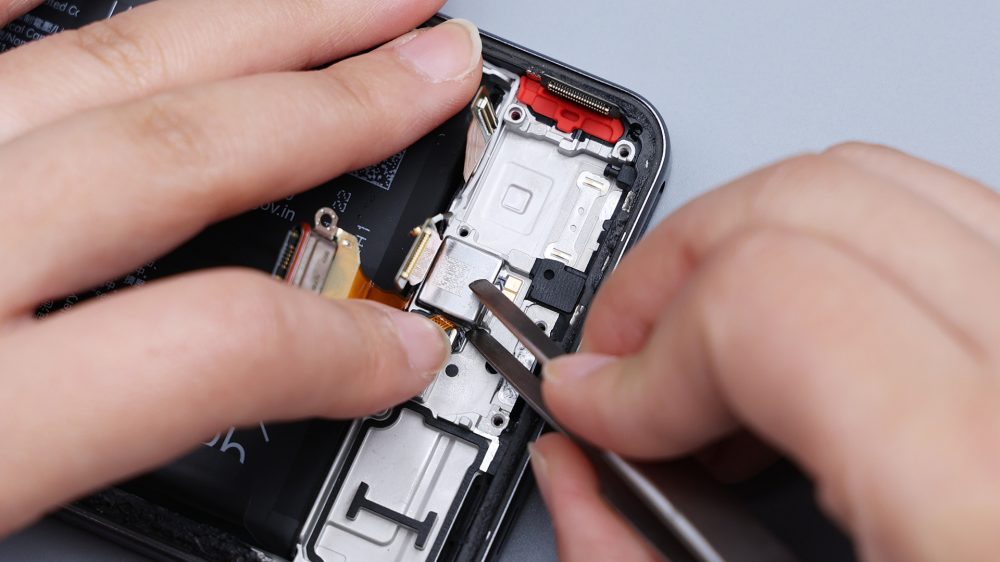
The main camera position is specially made with a limit slot with 2 strips of adhesive to ensure the solidity of its assembly. The 4 contacts on the left side correspond to the power and volume buttons. There is silicone residue in the center core area, and the heat dissipation copper foil on the back of the screen can be seen through the two circular cutouts diagonally opposite each other. The three-segment switch assembly is located on the right side and is secured to the center frame by a snap. A circle of round metal dots is distributed around it, responsible for signal overflow.
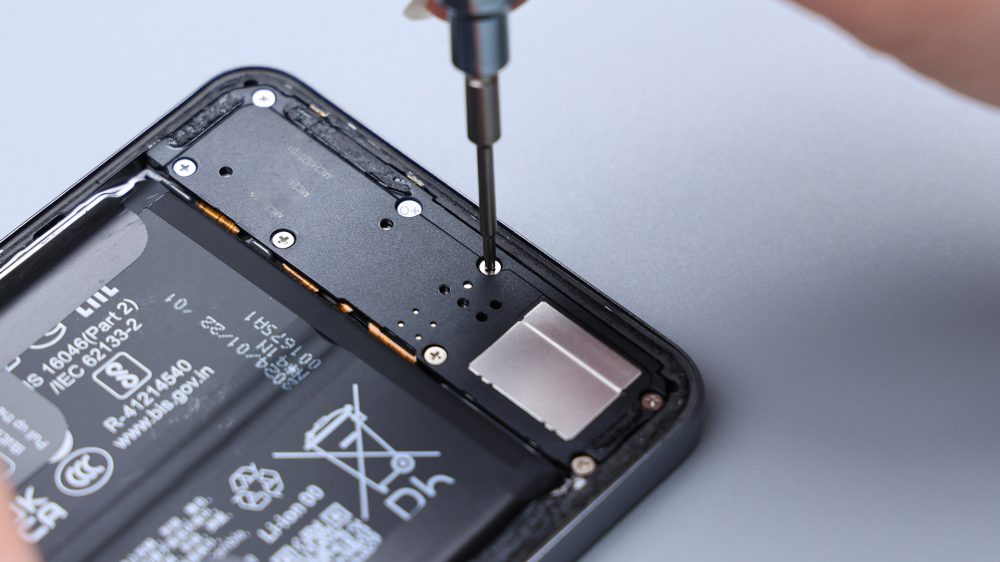
Turning your eyes downward, unscrew all the fixing screws in the secondary panel area and pry up to remove the cover.
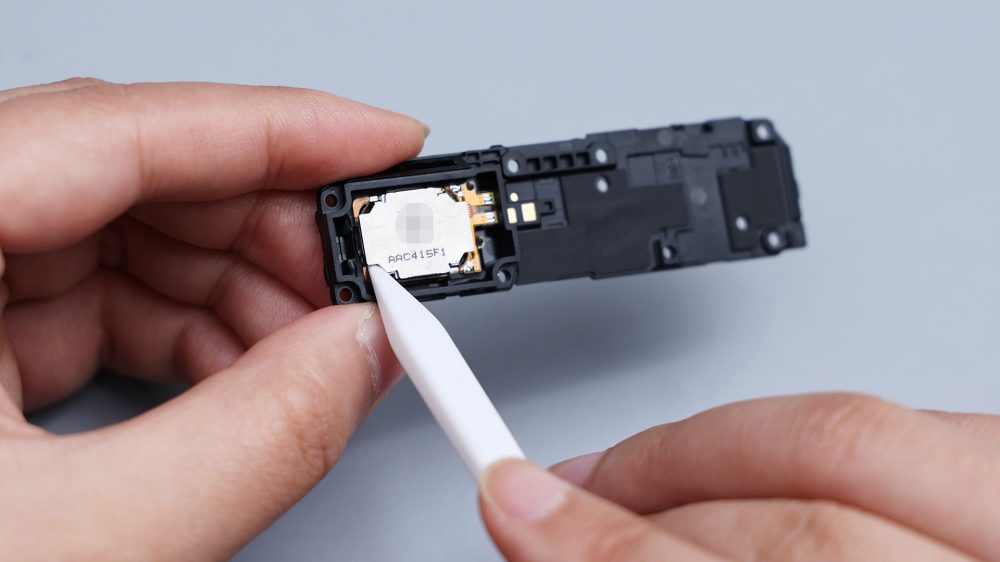
The bottom speaker is integrated on the inner side of the cover plate, with a thin foam pad at the location of the sound outlet hole, which comes from Ruixing Technology with 1115 specification and connects to the sub-panel via 2 contacts.
Unlike the common bottom speakers before, its speaker BOX is not fully closed, next door to the sister brand of the real me GT5 Pro also uses the same program, semi-closed for the sound quality will have a certain impact on the sound effect compared to the same level of fully closed speakers to be a little worse. There are two large pieces of foam on the right side of the speaker, corresponding to multiple BTBs and vibration units on the sub-panel.
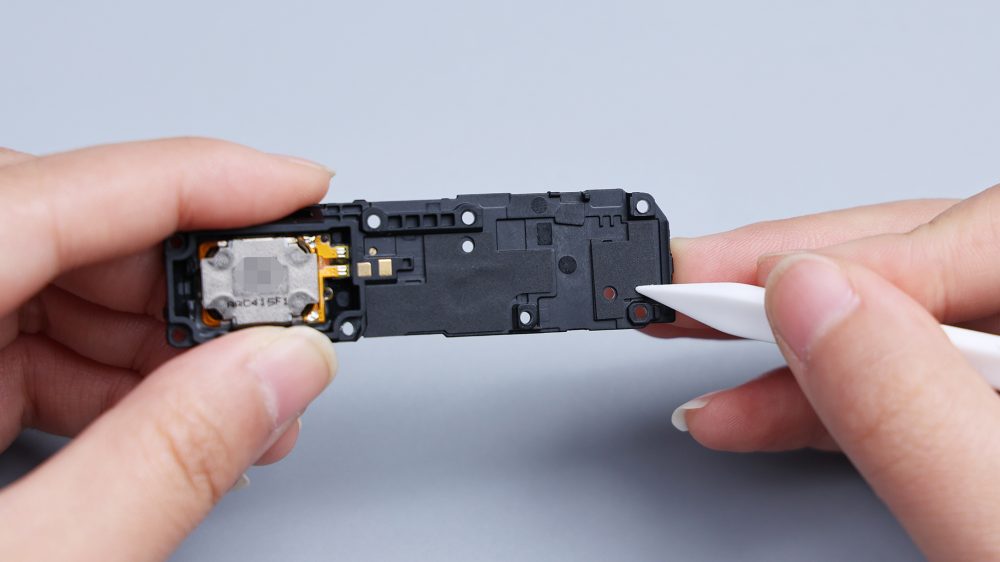
On the bottom frame, the corresponding position of the speakers, there is a ring of shaped foam, just with the speaker frame shape fit, similar to the role of the inside of the motherboard cover, can play a closed role in the sound cavity, equivalent to the use of metal frames for the cover of the sound cavity, simulating the fully enclosed assembly, try to avoid sound leakage, reduce sound quality loss. The I-shaped foam in the center is specially designed to provide cushioning protection for the speakers.
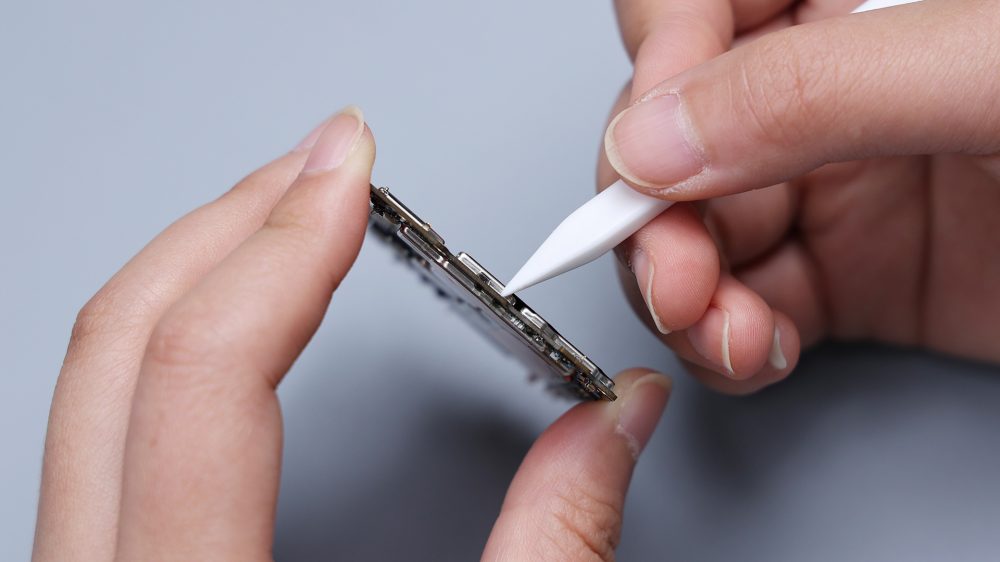
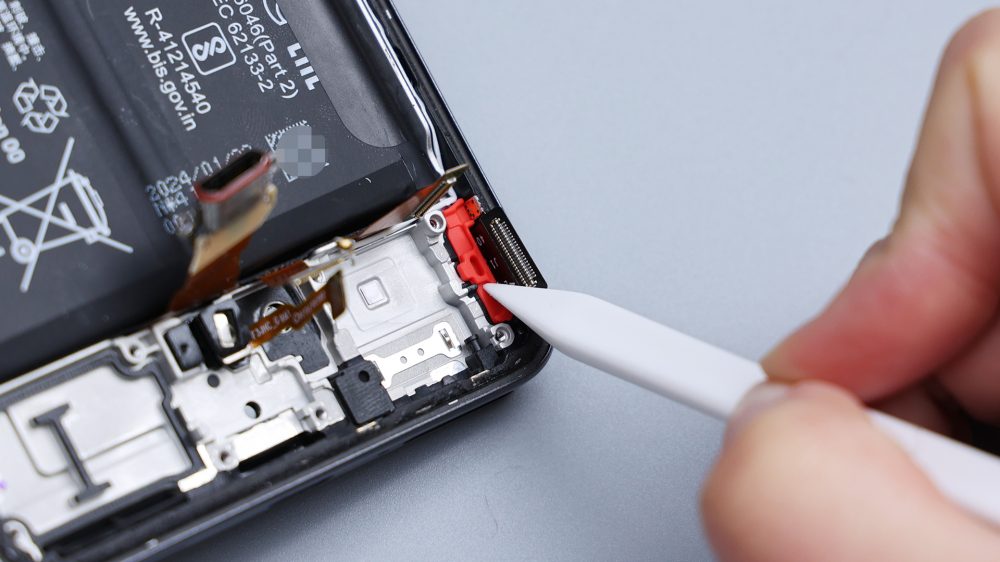
Disconnect the screen, main and secondary FPC and fingerprint identification BTB in turn, pry up and remove the secondary board, the USB interface is not integrated in the secondary board, but through a yellow FPC directly connected to the motherboard, the interface is equipped with a red dustproof and waterproof rubber ring.
The protection of the secondary board is also complete, all BTB bases are equipped with a rubber ring, the capacitors on the A-side and the B-side, have a spotting treatment, and the B-side of the round hole corresponds to the microphone.
The fingerprint recognition module is cushioned and protected by foam pads above and next to the fingerprint recognition module, which is held in place by adhesive and plastic limiting posts, and the fingerprint recognition on the OnePlus Ace 3V uses a short-focus lens solution.
The vibration unit is also fixed by adhesive, it comes from Ruixing Technology and adopts 0809 specification, which is connected to the secondary board through 2 contacts.
There is a red rubber pad next to the screen FPC, and a black foam pad near the USB port position corresponds to the microphone. The sound receiving hole is of anti-dumbing design, even if the card pin is inserted by mistake, it will not damage the microphone.
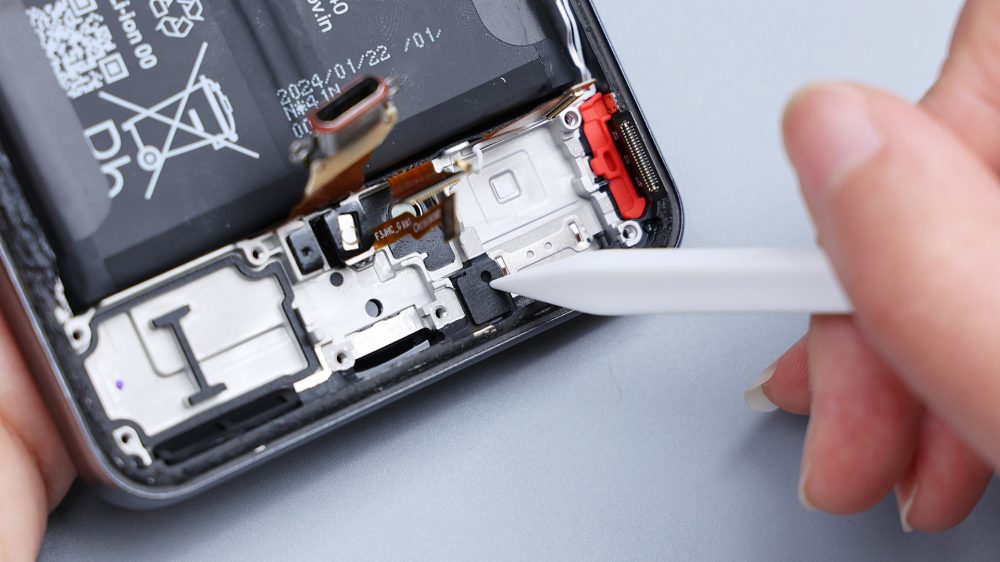
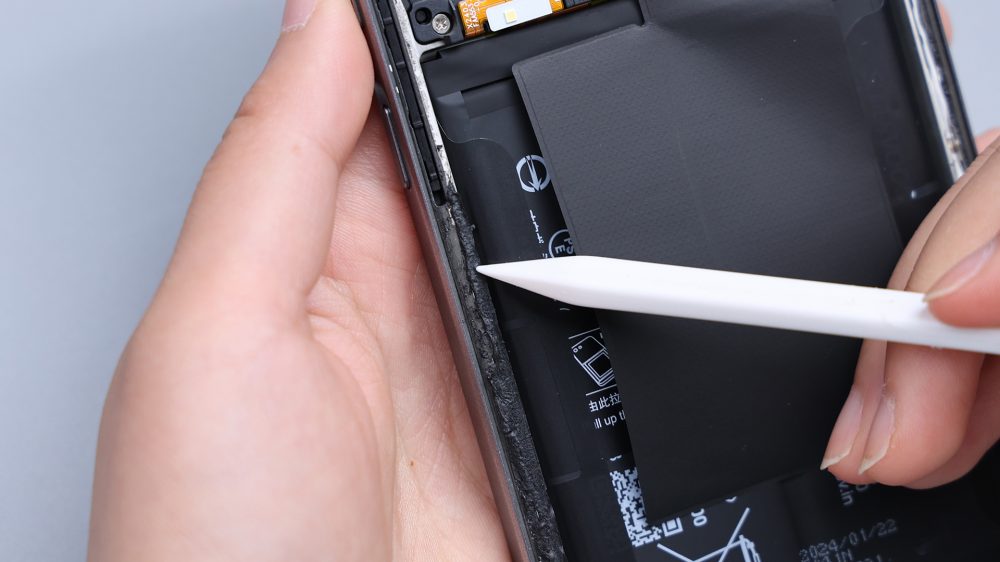
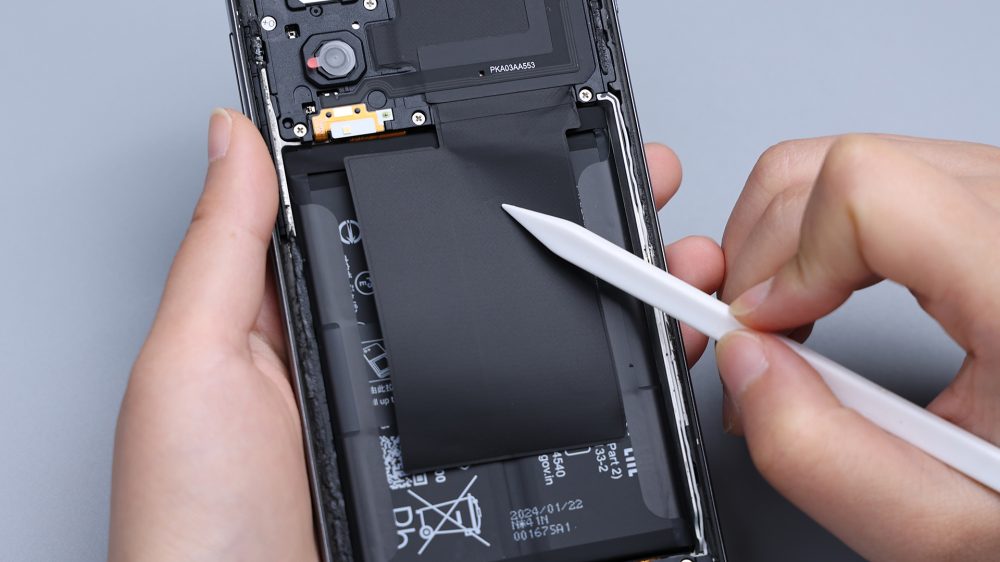
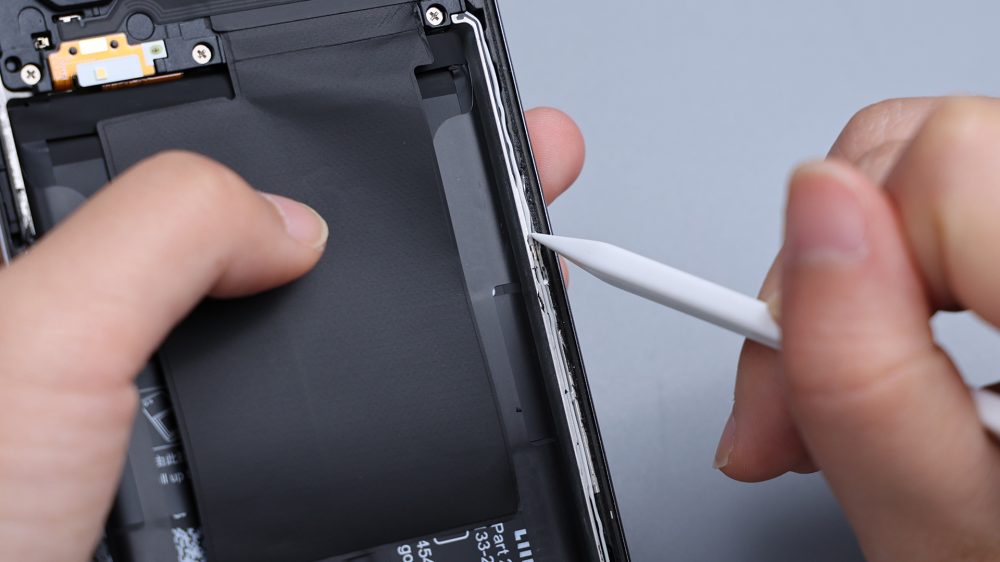
The battery is fixed by double-side adhesive tape, according to the illustration, tear off the tape and lift it upward to remove the battery.
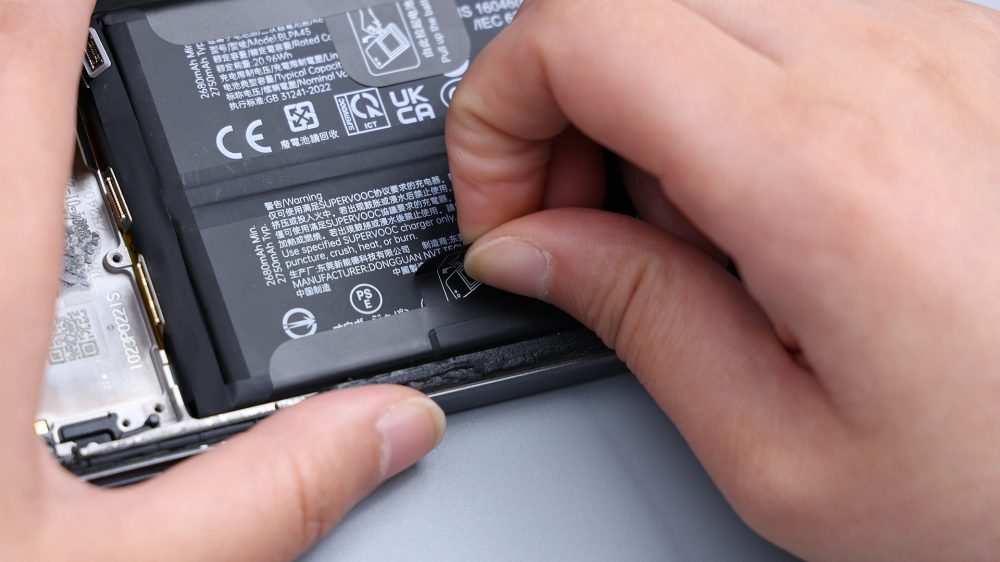
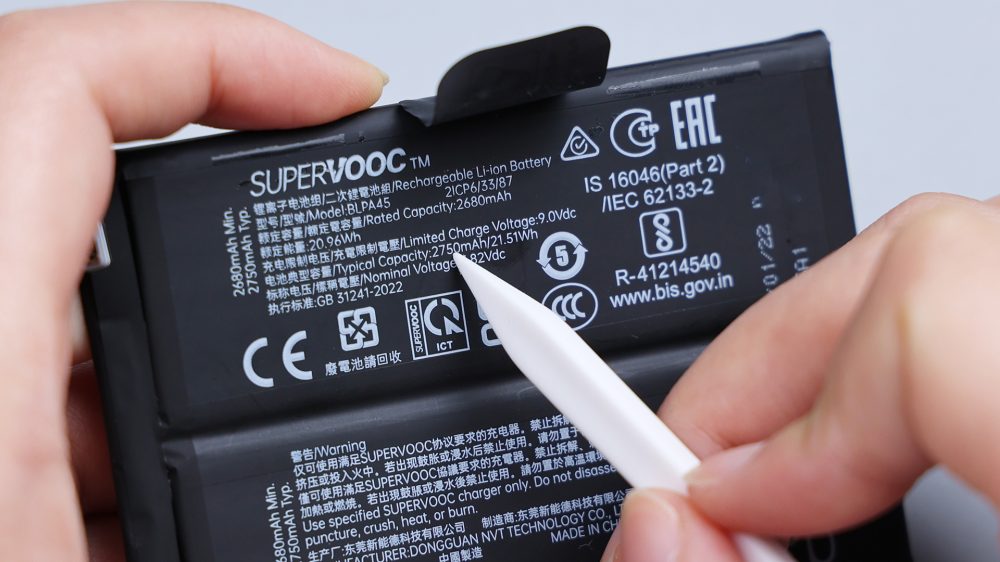
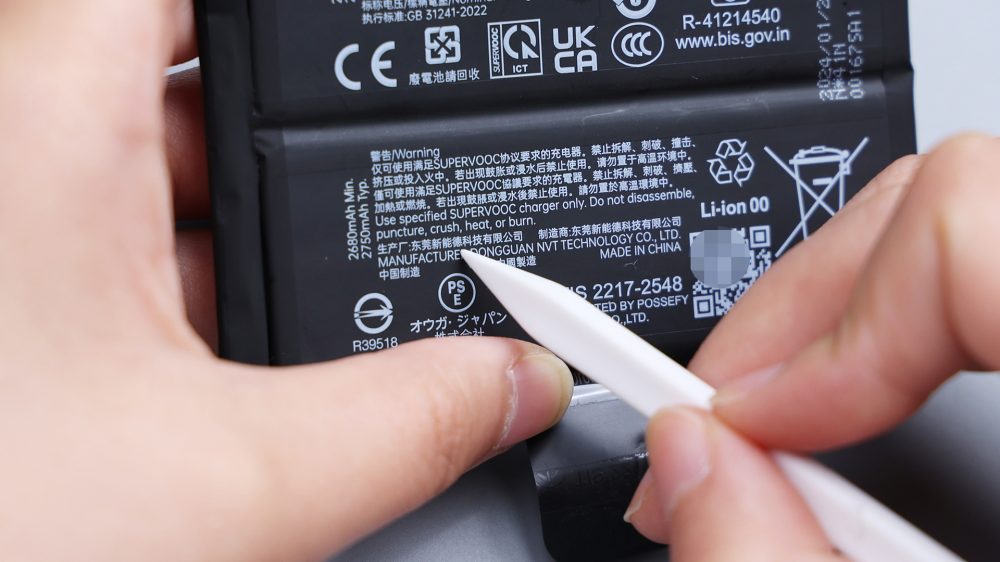
It adopts a dual-cell single interface program, OnePlus Ace 3V supports 100W wired fast charging, the battery equivalent total capacity of 5500mAh, the manufacturer is Dongguan Xinnengde, the battery cell from ATL. the middle position of the frame below the battery has a large skeletonized, direct contact with the VC equalization plate, for the battery and the main and secondary panels of the FPC heat dissipation.
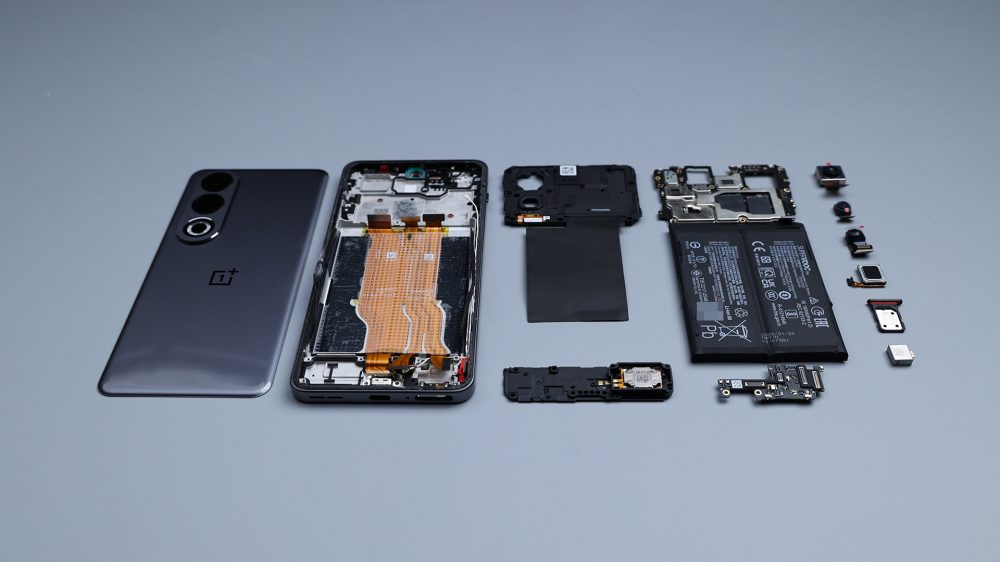
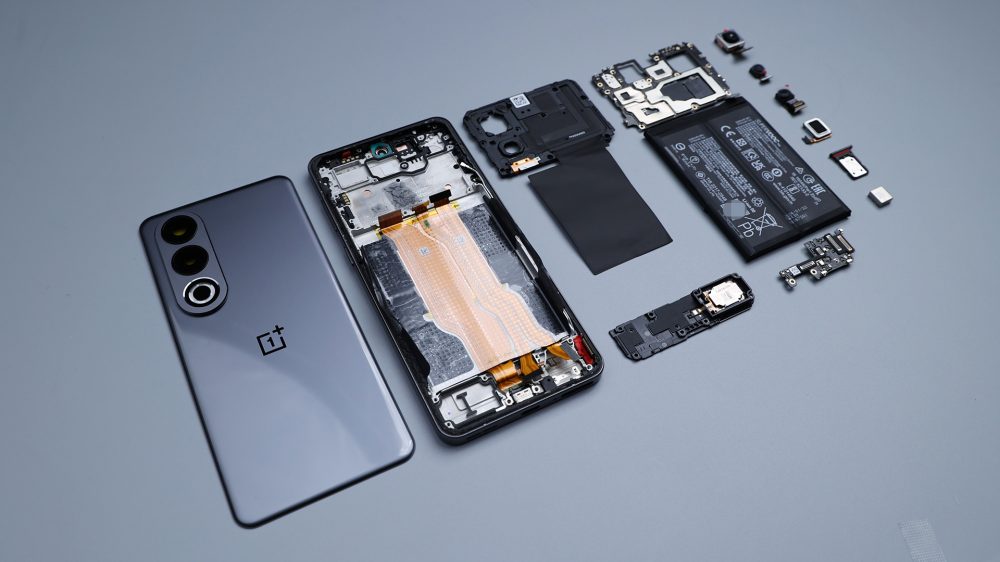
By this point, the disassembly of the OnePlus Ace 3V is basically complete. It continues the stylized contours and lines of its predecessor, and although the design of the rear camera module has been adjusted, the overall style remains simple.
From the point of view of disassembly, the whole machine protection measures or OPPO system has always been a high level, the back cover adhesive thick and sticky, the four corners have also been widened and strengthened processing, the lens area has an independent point of gluing position, to ensure that the back cover assembly is solid.
On the inside of the cover of the main and secondary boards, there are a lot of foam pads and foam rings, covering all BTBs, as well as the upper and lower dual speakers, dual microphones, lenses, fingerprint identification module and vibration unit. All BTB bases on the main and secondary boards feature rubber rings, and all capacitors and small parts on both sides of the AB are spot-glued, and the main board also receives special care with a foam ring on the frame, which is a kind of enhanced protection. In addition, like the flash, the speaker sound hole, the top noise reduction microphone, the front ambient light sensor, the screen FPC location, but also set up a separate rubber pad to protect, the main camera and the front lens have adhesive reinforcement, the speaker sound hole is also a foam ring, the frame is also similar to the upper speaker shaped foam, as well as the I-beam foam, and even the fingerprint identification module, there is a special foam ring to protect. Heat dissipation measures are also covered in place, the motherboard AB side of most shields have copper foil or heat dissipation film, the motherboard B side of the heat dissipation film outside coated with silicone grease, inside there is silicone grease and thermally conductive silicone film, and then down there is a VC even heat plate, that is, the cover plate is missing the metal layer, this point I do not know how the engineers are considered. As a whole, it can be said that all that should be there, and all that should be taken care of, for this price point of the phone is definitely considered a high standard.
The usual rules, the end of the chat a disassembly-related topics, this issue to say is that manufacturers are beginning to try to abandon the patchwork of lenses. In recent months, a new trend in the combination of cell phone lenses, that is, the gradual increase in the use of dual camera program models, but also the main push of the popular models, such as iQOO Neo 9, Honor 90 GT, as well as the dismantling of the OnePlus Ace 3V. their common point is that they all belong to the mid-range, the reason why I chose to start from the price segment, on the one hand, because the mid-range is a number of lens of the "high incidence area". "high incidence area", on the other hand, because the mid-range machine to remove the number of lenses, the impact on the photographic experience is very small, but the cost savings have a high utilization value, can be invested in a more needy, more practical place. For example, OnePlus Ace 3V this time triple camera into double camera, and then the main camera followed the enhancement, increased OIS optical stabilization, the predecessor OnePlus Ace 2V does not support optical stabilization, this thing, in the actual photographic process, can be more useful than that make up the number of 2 million macro or depth of field lens.