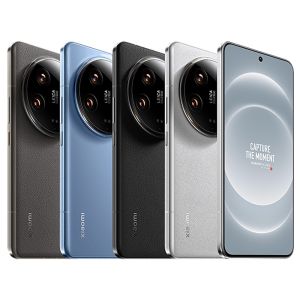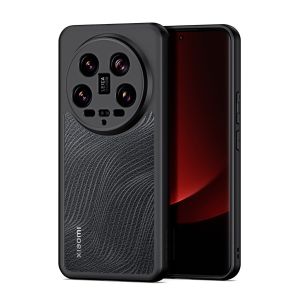
This, right here, is Xiaomi's latest flagship, the Xiaomi 14 Ultra, which has just been announced.
To be honest, its appearance is kinda sudden, it was released 4 days after the official announcement, which is considered a fast and tight time pace for a flagship phone. As the oversized cup of that Xiaomi 14 series, what is so strong about the Xiaomi 14 Ultra? How does its ID design and internals differ from its two smaller siblings? Here's how we'll find out by way of a teardown.
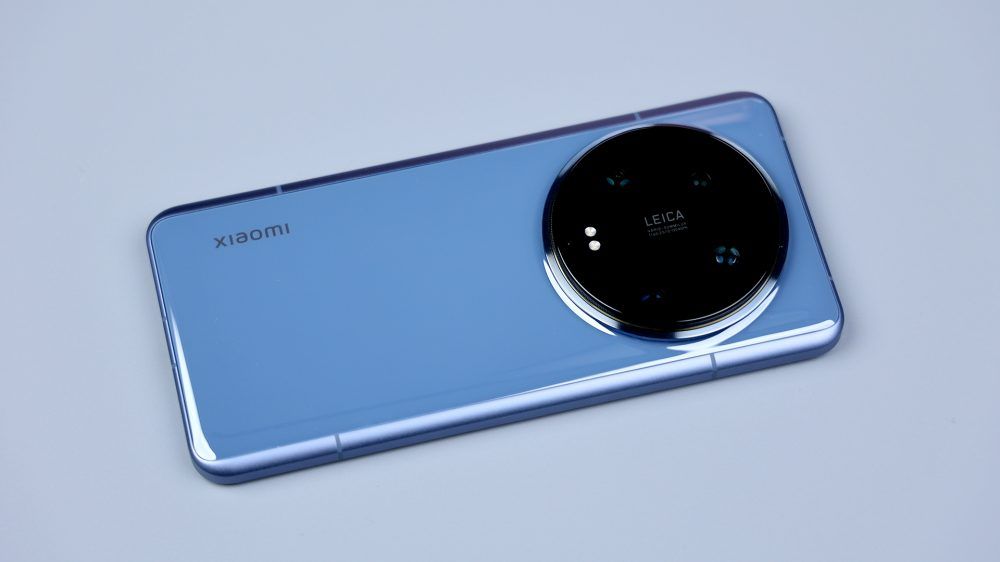
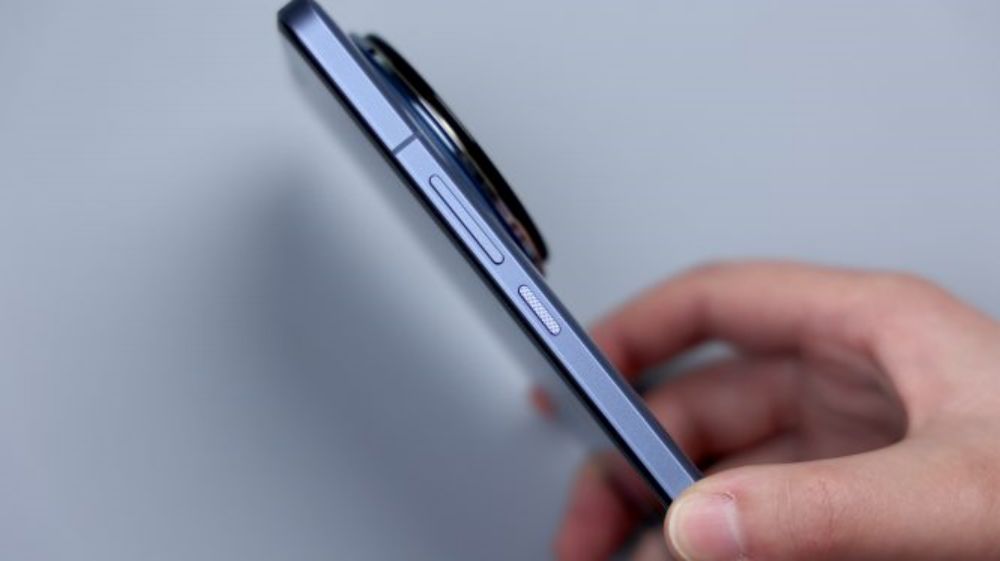
The appearance of the Xiaomi 14 Ultra has made some fine-tuning on the basis of its predecessor, and the most obvious change is that the back cover removes the gently sloping design of the Xiaomi 13 Ultra, so that the back curve becomes relatively straight and neat, the continuation of the fully wrapped metal center frame and the three-section visual effect, the use of a larger double side cut arc, the lines are more silky, and the front side is equipped with a full equal-depth micro-curved screen, and all of these detailed adjustments are combined together to make the Xiaomi 14 Ultra has a comfortable palm fit and grip.
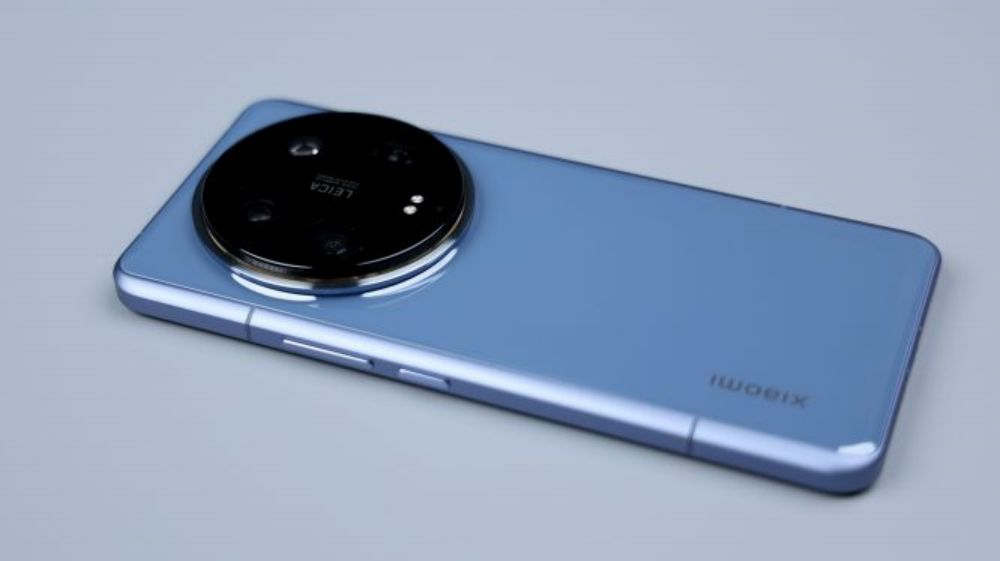
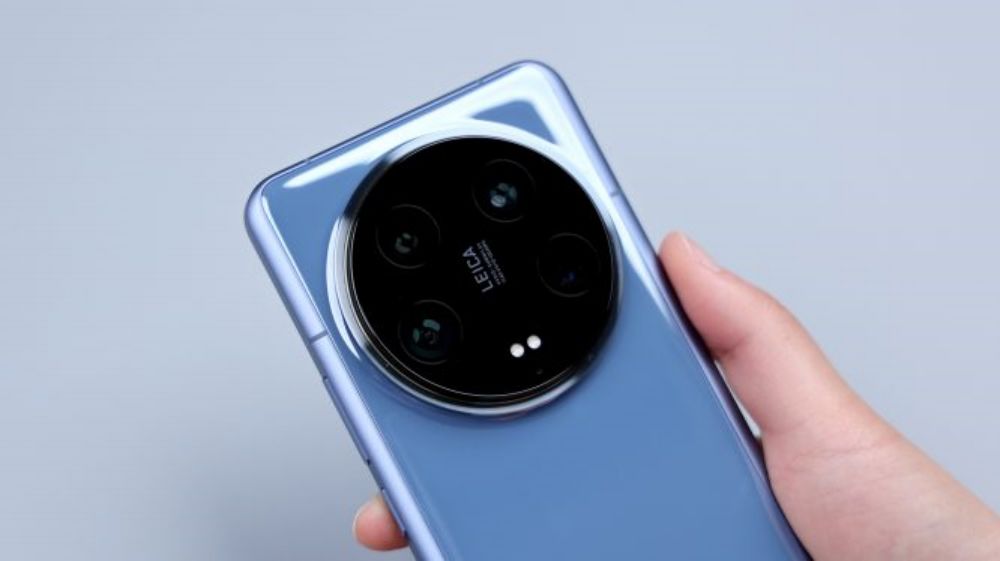
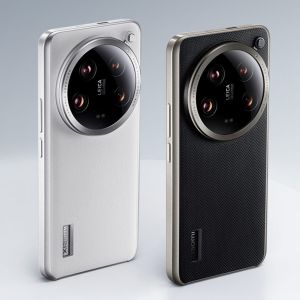
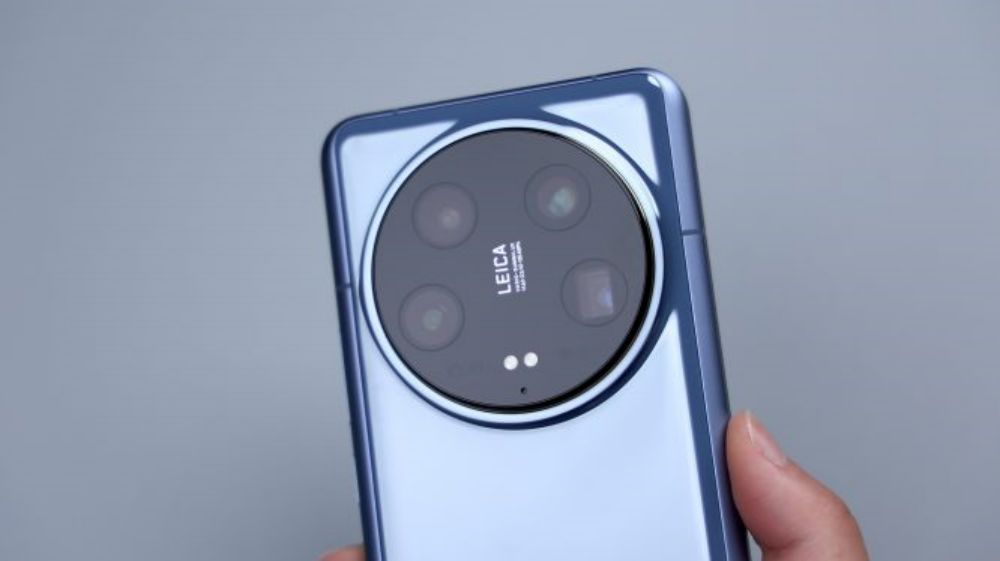
The back is still the classic camera ring, but this time there is a new match with the Parisian stud pattern, from a number of angles, Xiaomi 14 Ultra will have a sense of the camera, but also just in line with its product positioning. Especially when you put on the dedicated camera grip, you'll realize that there's another deeper meaning to this line design. By the way, do you like the design of the Xiaomi 14 Ultra?
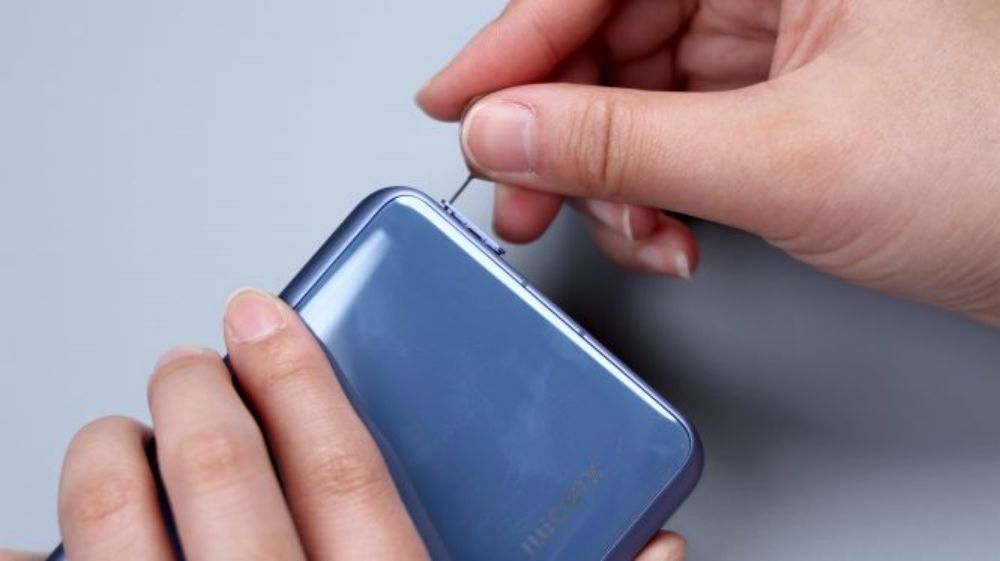
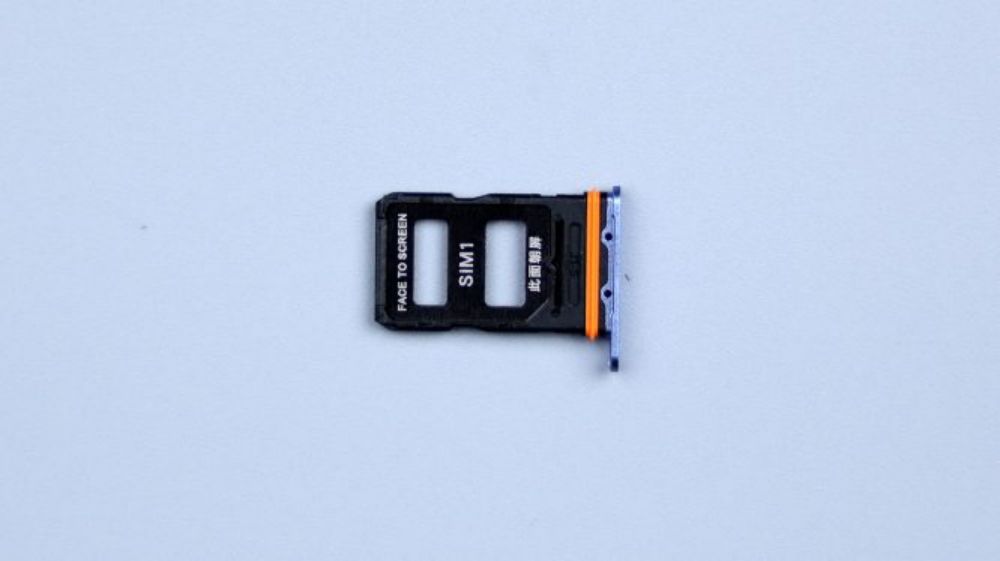
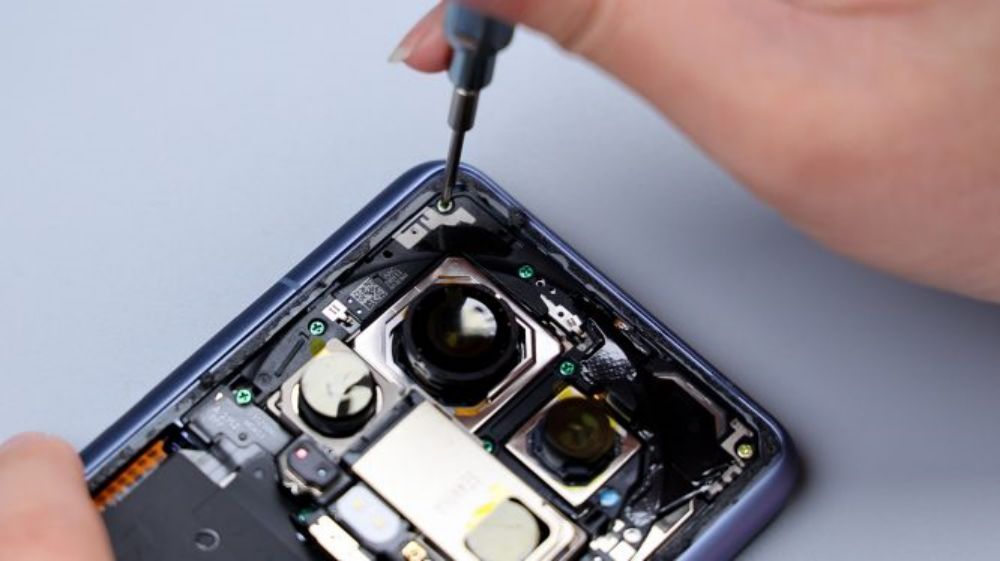
Here's how to start disassembling it, after turning off the phone, take out the SIM tray, dual nano stack design, metal bezel and bezel + plastic frame, orange dust and waterproof rubber ring.
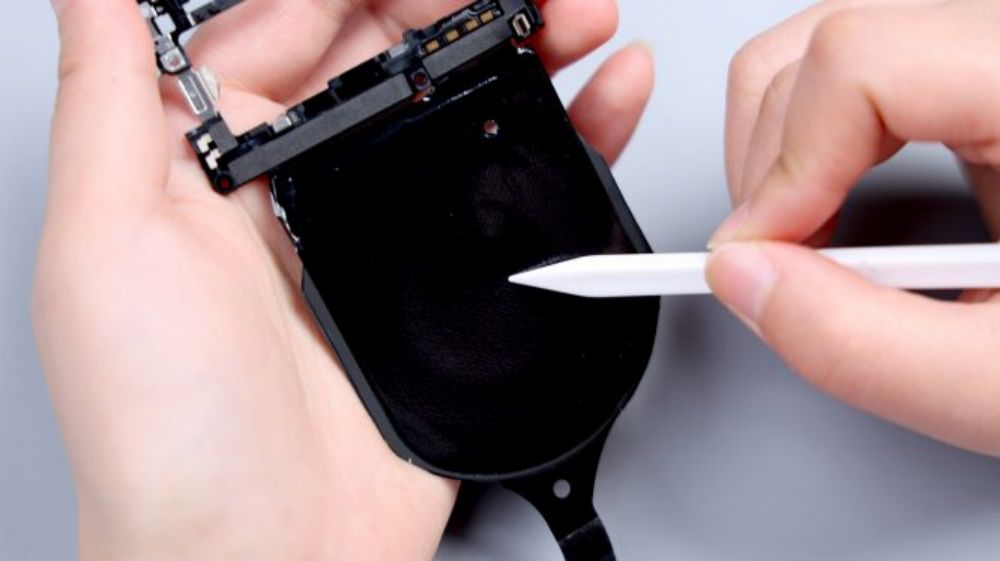
Heating the back cover is a little bit of trouble, the lens module is too big, how to put on the heating plate is not a good idea, you can only first heat the lower half, or 100 degrees, heating for three minutes. Good thing we have this is the Dragon Crystal ceramic back cover, with the aid of suction cups, it is easy to open the breach, the back of the three sides in addition to the glue is very simple, that is, the upper half has to be heated again separately, and then clean up the remaining adhesive, and then open the back cover, the process is very easy. Mainly because the back cover around the circle of adhesive is relatively narrow, and with the kind of sticky soft glue, it is not difficult to deal with, there is a separate spot in the upper left corner.

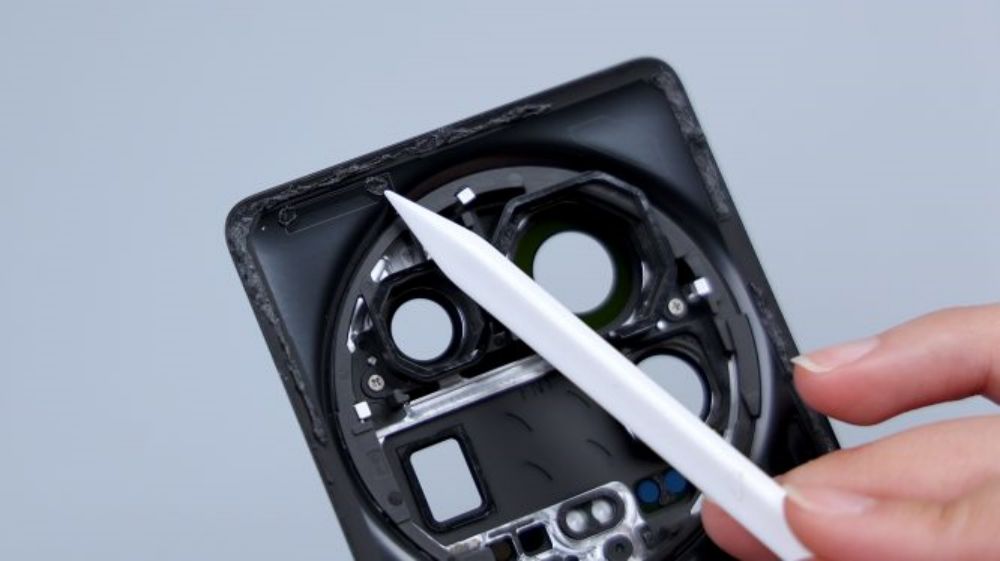
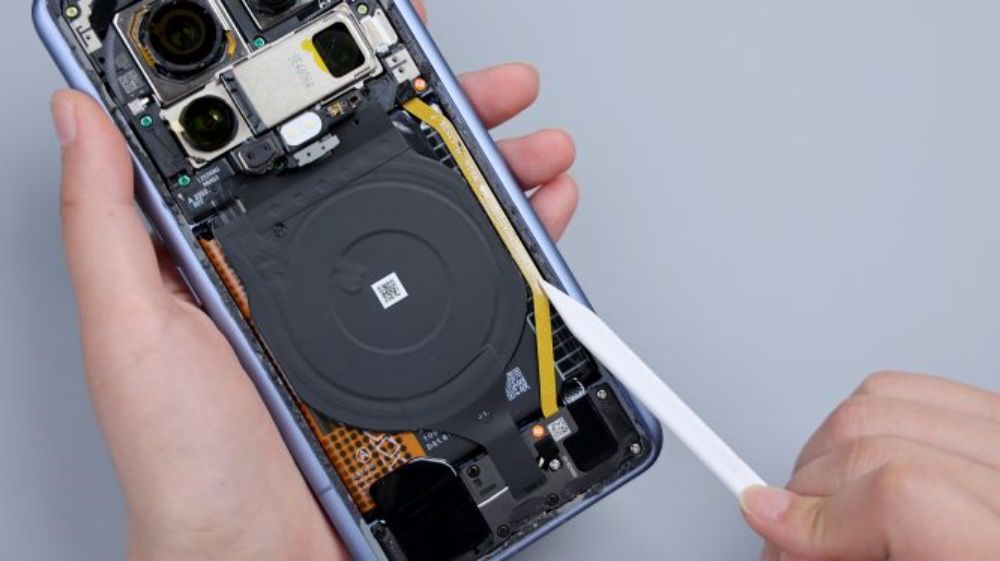
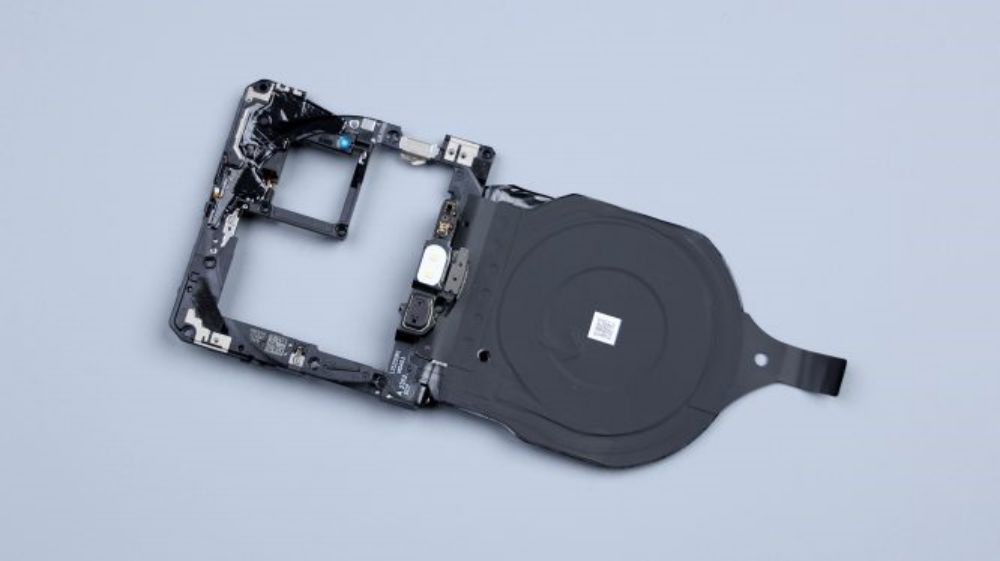
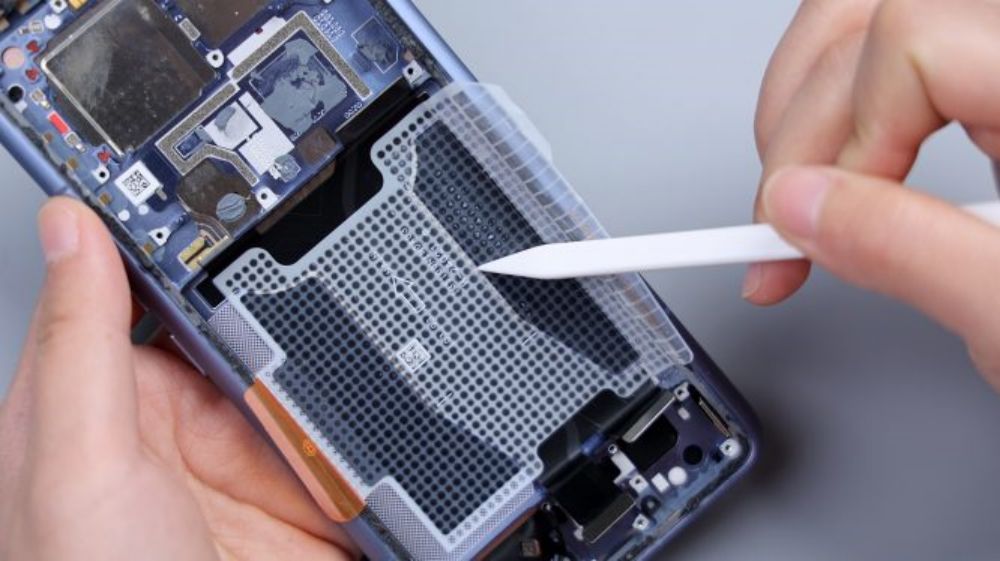
At the bottom right of the DECO is a small piece of shaped foam, in the center is a large piece of black thermal film, corresponding to the battery and wireless charging coils, also pressed underneath is a block of cushioning foam, from the outline of the skeleton shape, and further down there are two pieces of shaped long foam.
On the inside of the DECO there is a black plastic liner with a dual screw + adhesive fastening method, with a total of 5 screws. There are also three large and three small 6 metal restriction posts, as well as several plastic restriction posts to assist in snapping the assembly together.
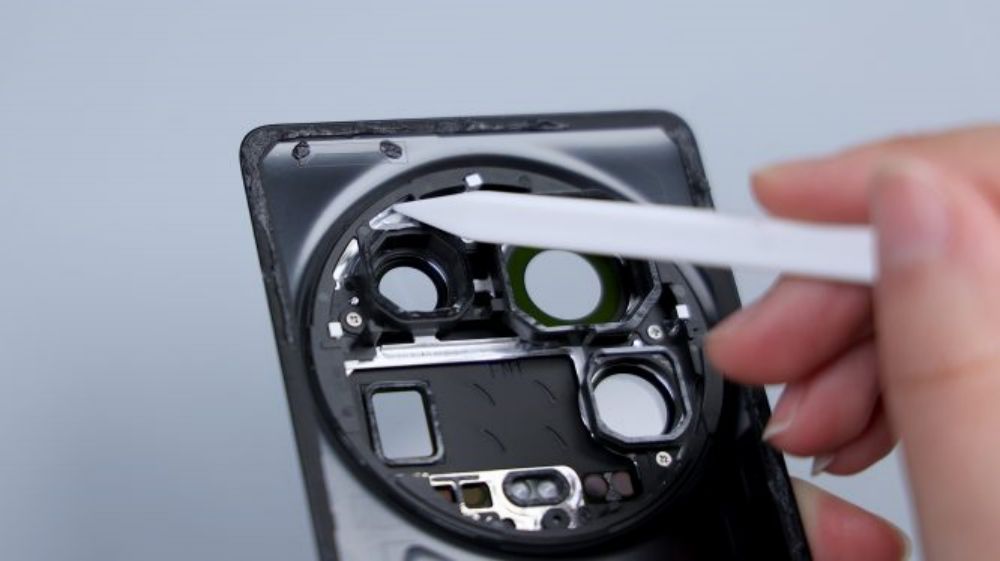
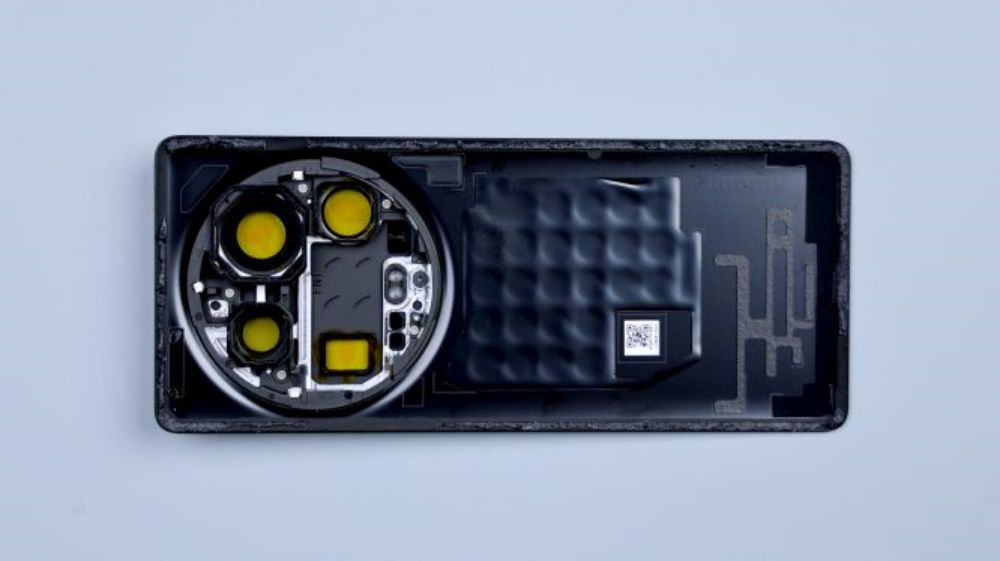
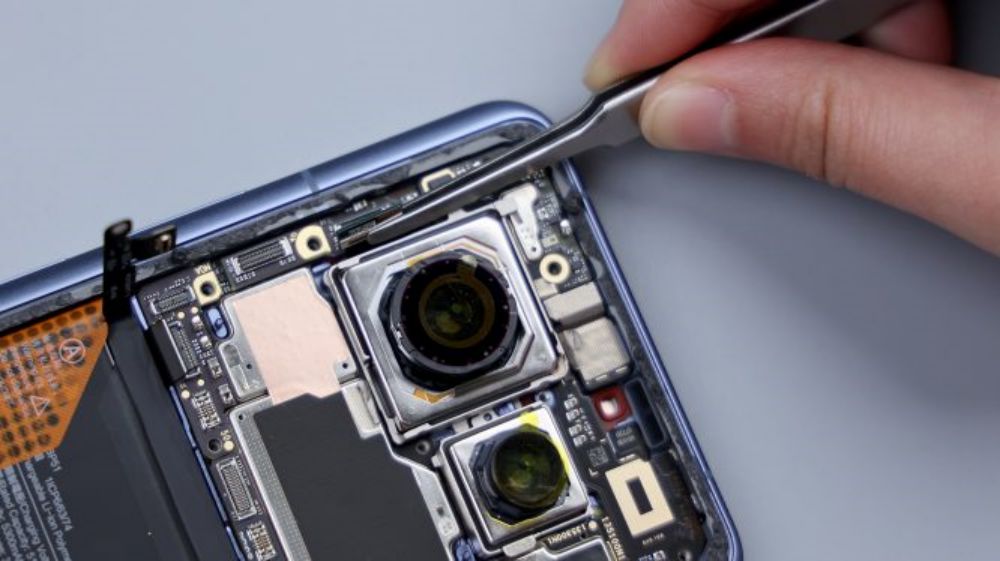
From the hollowed-out position of the liner, you can see that the outer frame is made of metal, and in order to accommodate the rear quad camera, it still has plenty of space in the Z-axis.
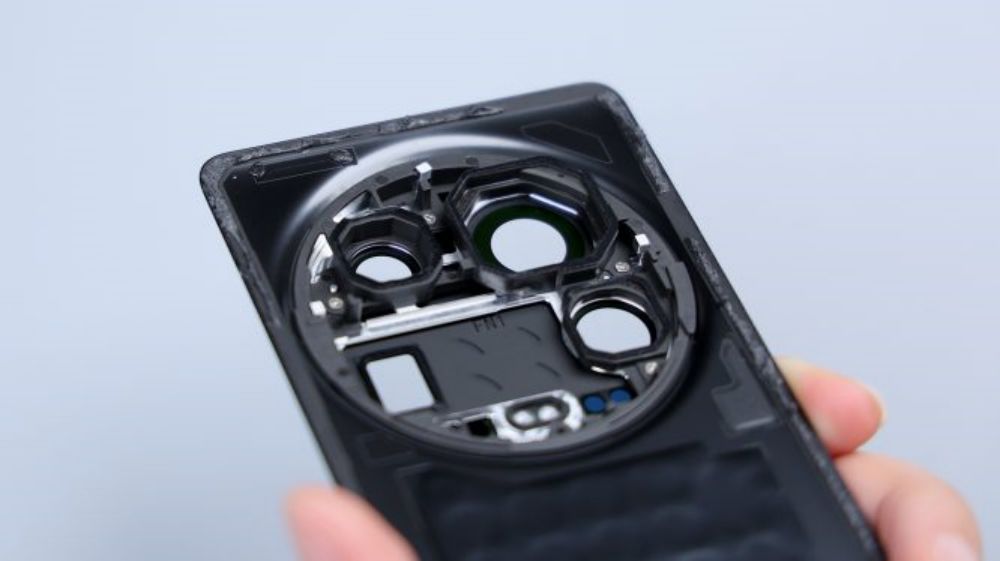
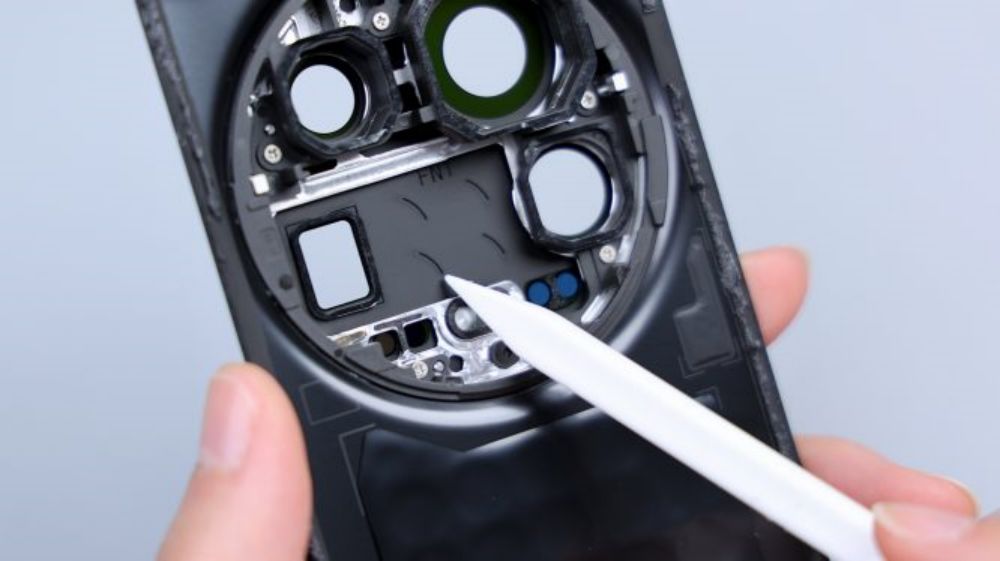
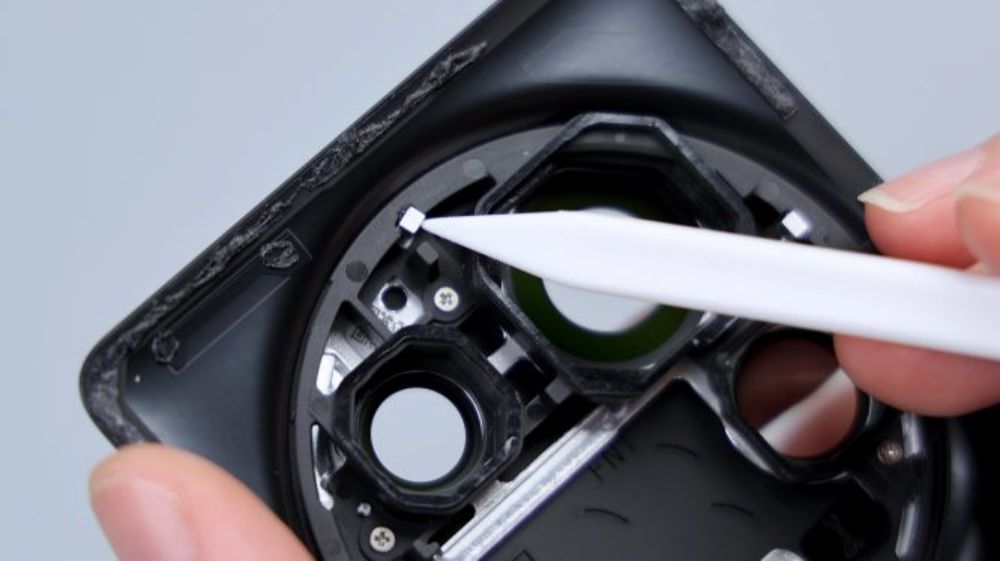
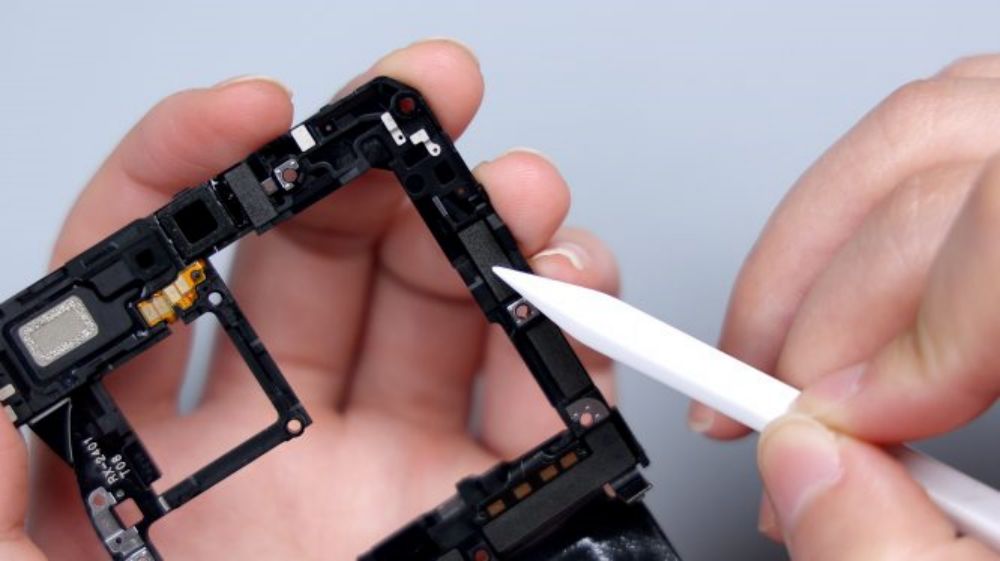
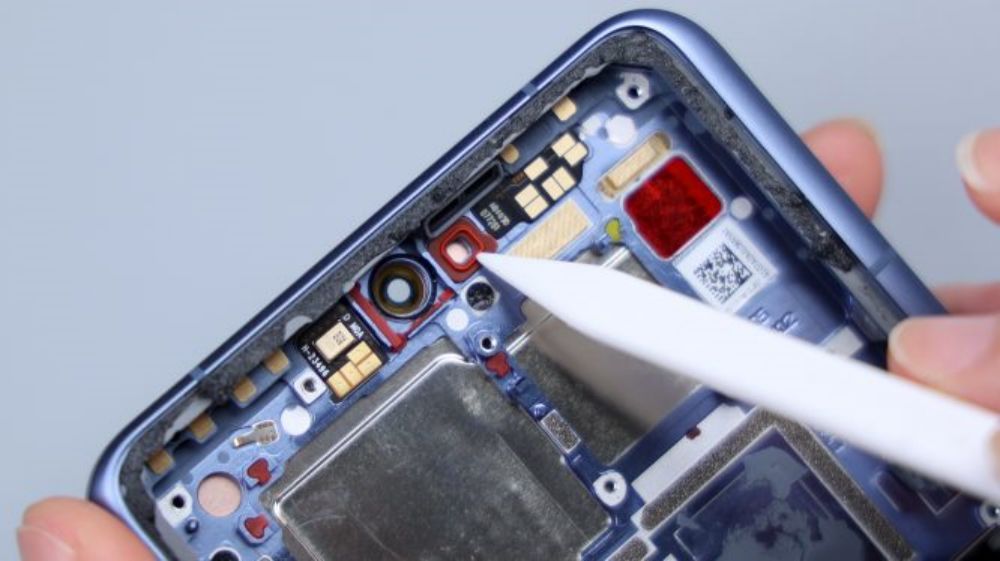
The corresponding positions of the four lenses are equipped with foam rings. There are six small round holes in a row immediately below, and only five can be seen from the outside because the lens of one of the openings is very dark in color and can only be seen by placing it under the light, and they are set up in groups of two each, and they are also set up with different shapes of cushioning foam, and as for the small foam circle further down, it corresponds to the noise-canceling microphone. There is a metal shrapnel on the left side down, corresponding to the metal piece on the edge of the cover, for signal conduction.
The periscope telephoto corresponds to a small detail, the black sticker here, there are four rounded indentations, I do not know what function.
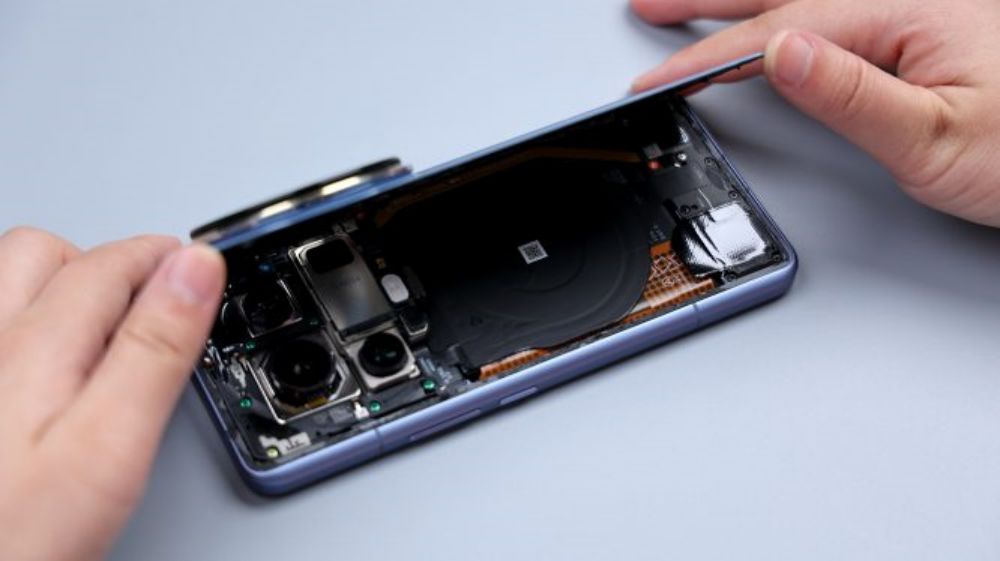
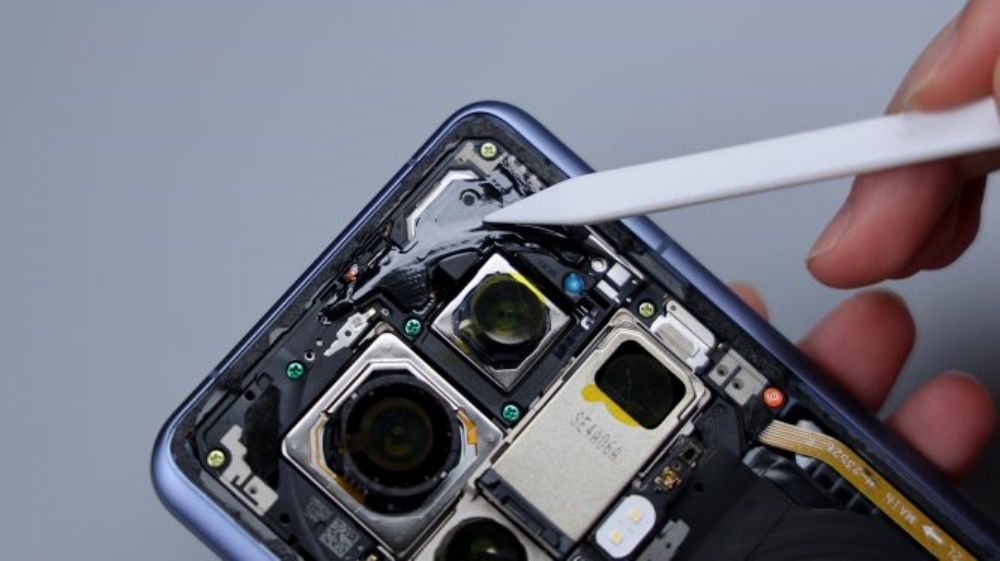
The outer edge of the body of the phone still has a lot of adhesive residue, localized knots, but also once again reflects the strong adhesive. The most striking thing about the main body of the phone is still the huge rear camera module, the configuration, really for the image of the "monster", just look at the size, each lens out, are enough to do the main camera.
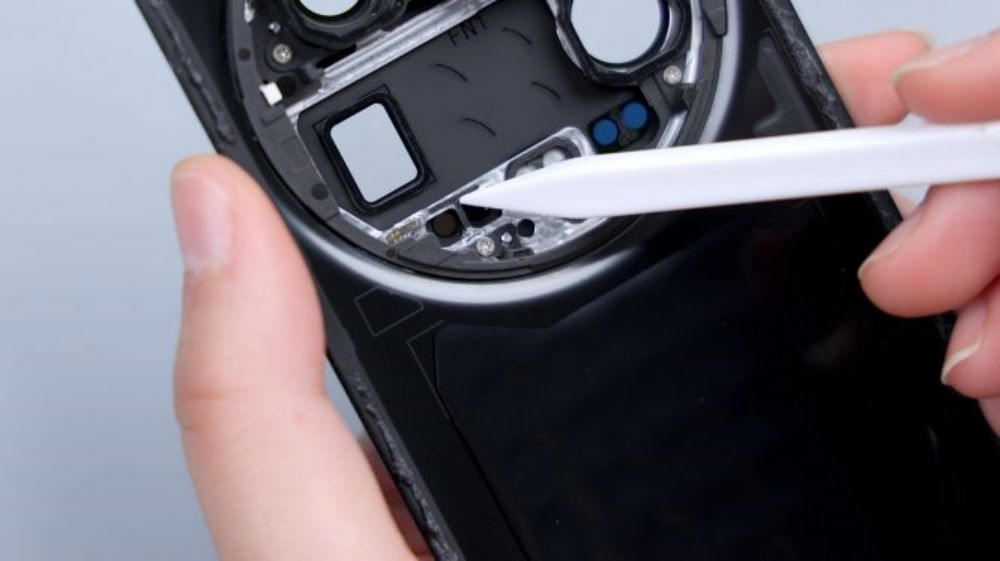
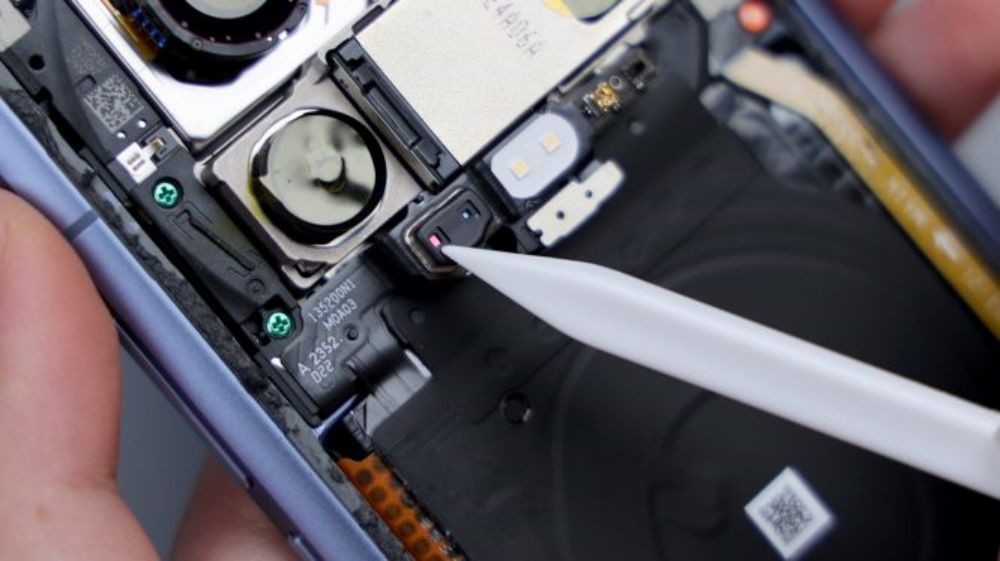
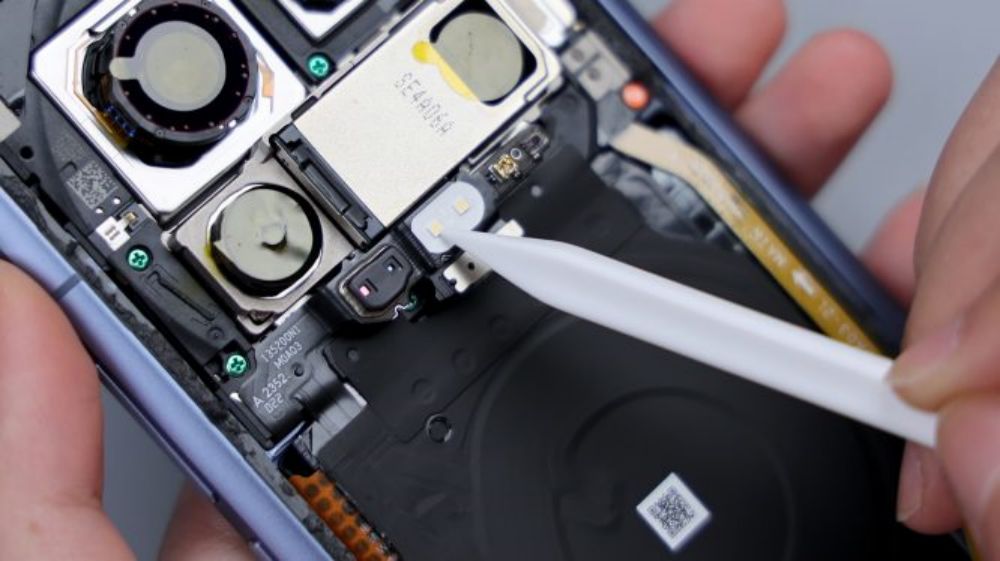
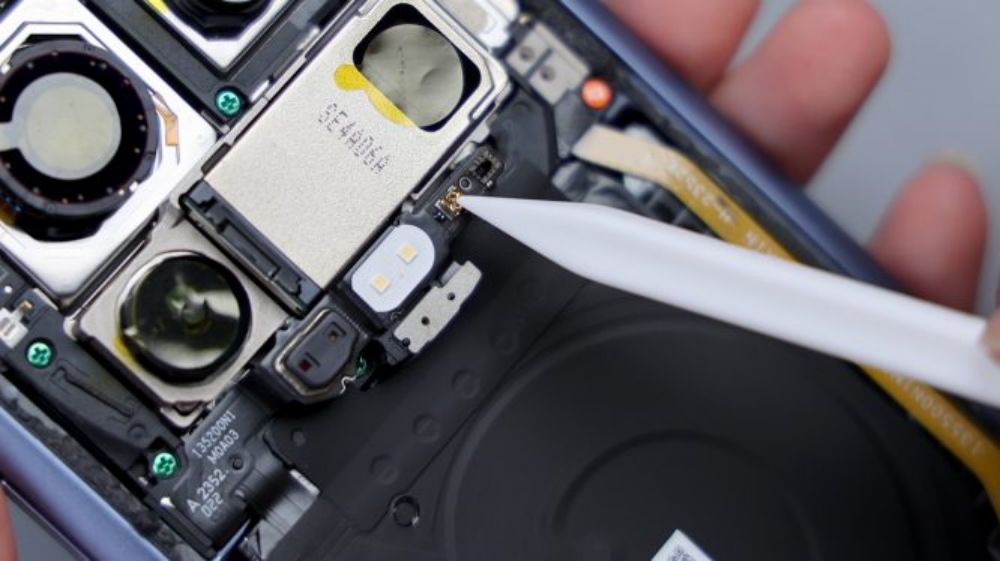
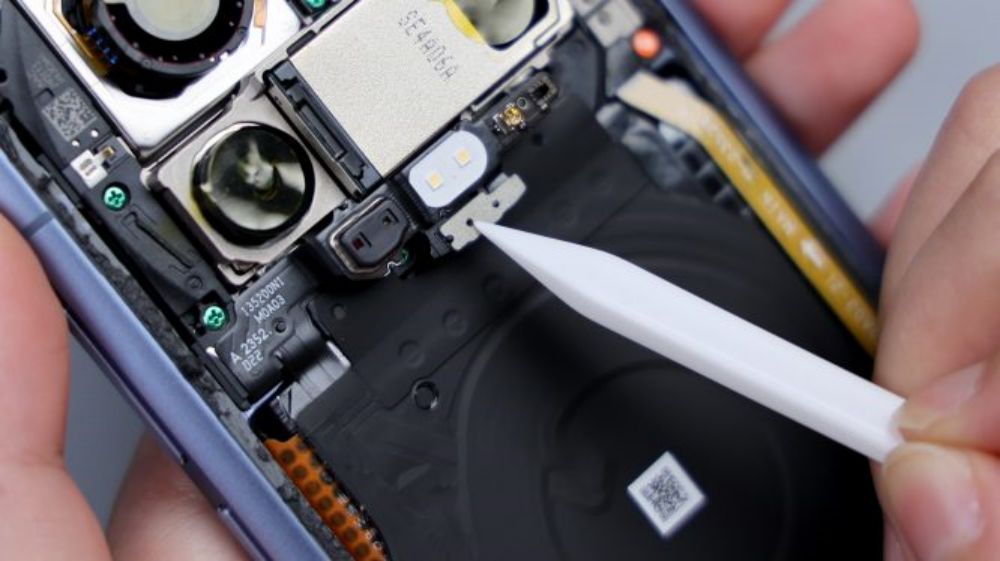
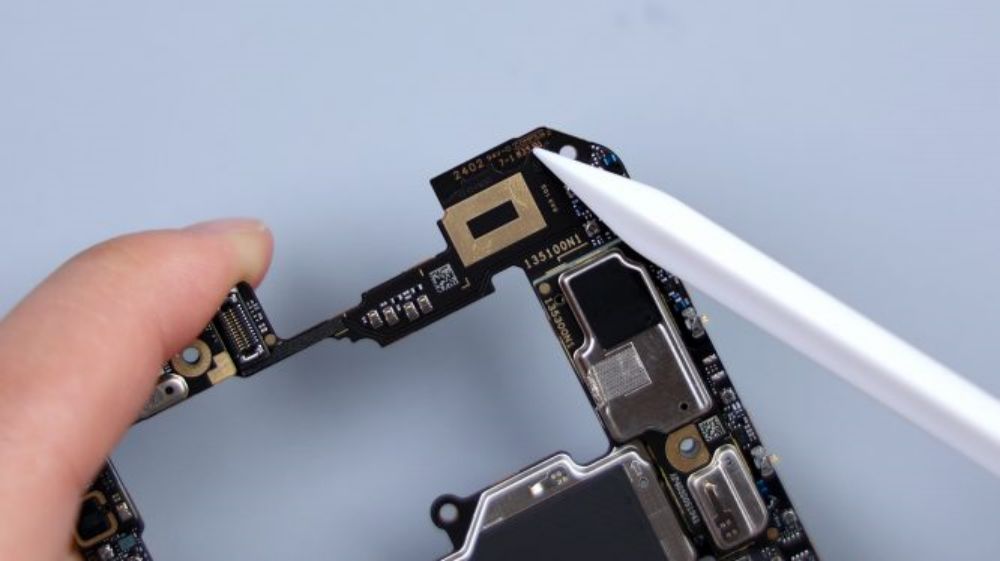
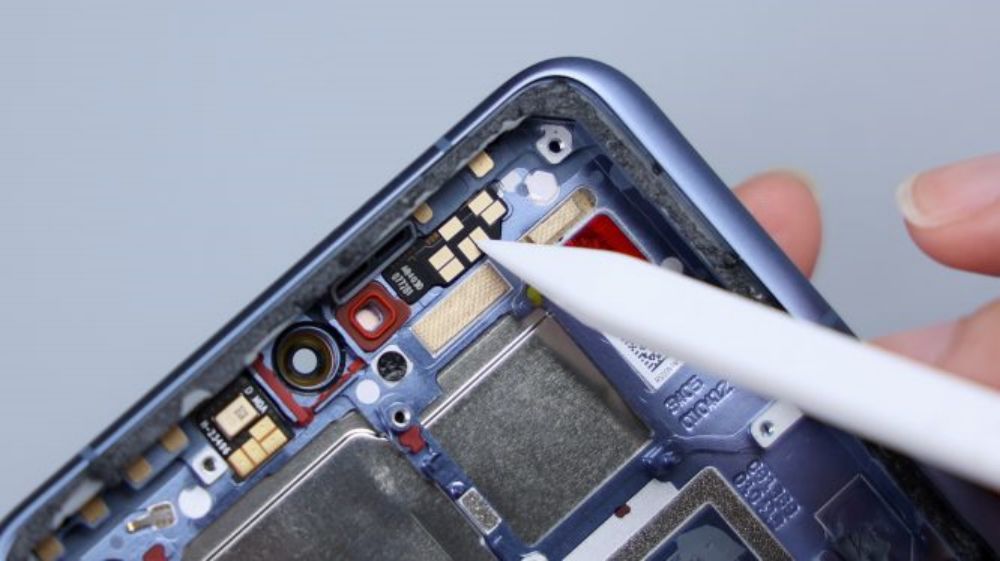
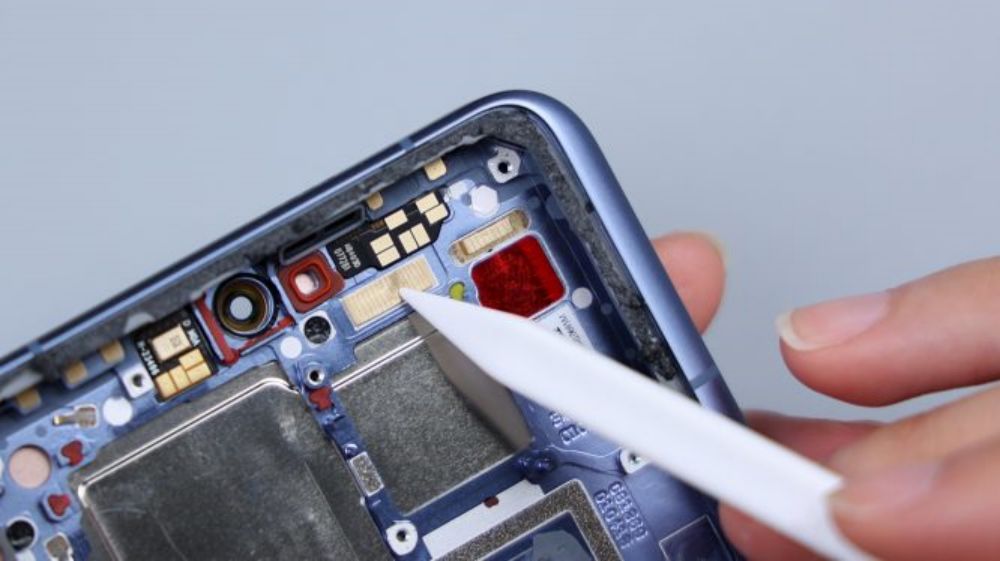
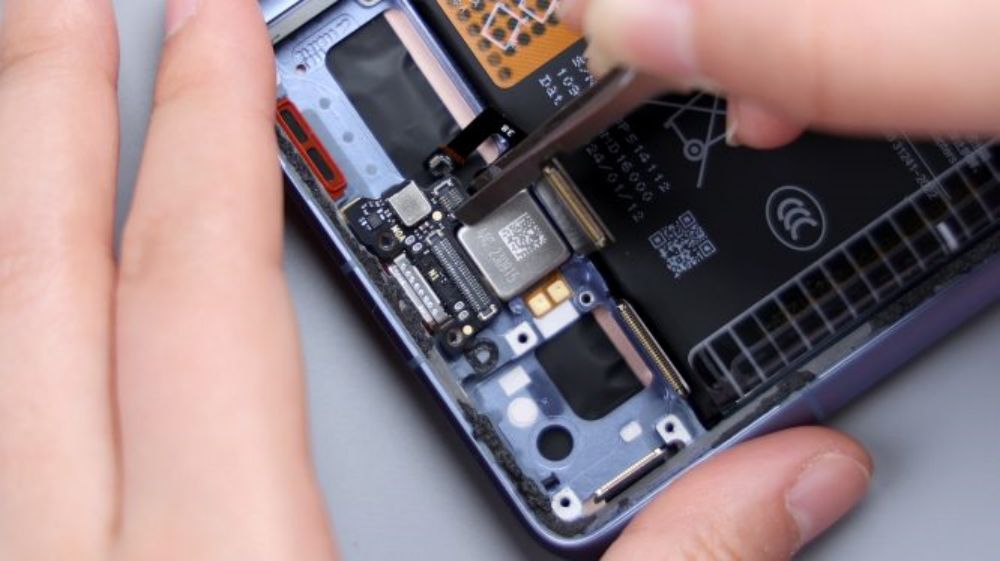
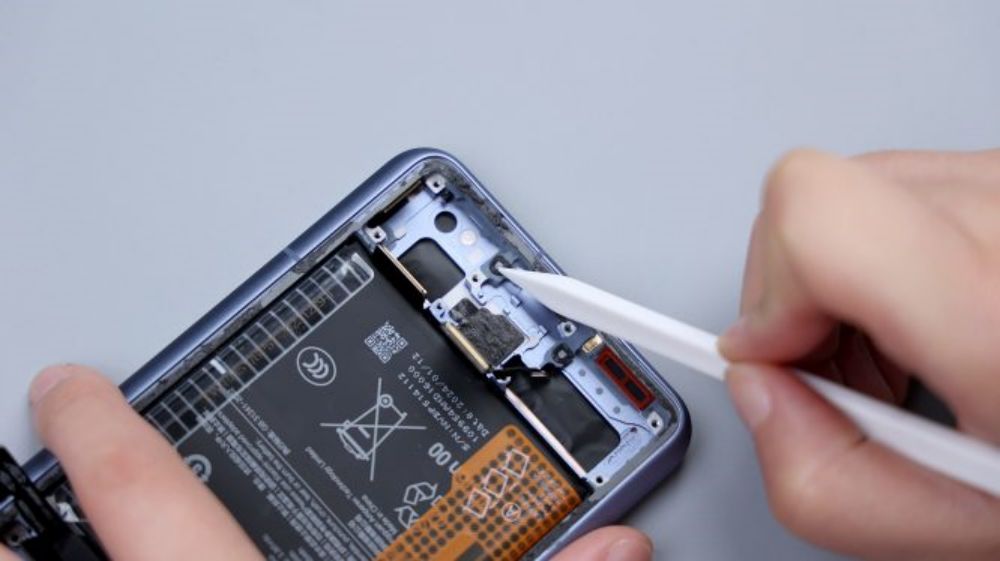
The lower left corner of a FPC, down to the inside of the cover, which is connected to a number of small parts, including laser focus module, flash, infrared emitter, rear ambient light sensor, as well as the rear noise-canceling microphone, the flash for the dual-LED bead configuration. Three LDS laser radar antennas are distributed in the upper left, upper right, and lower right corners of the cover.
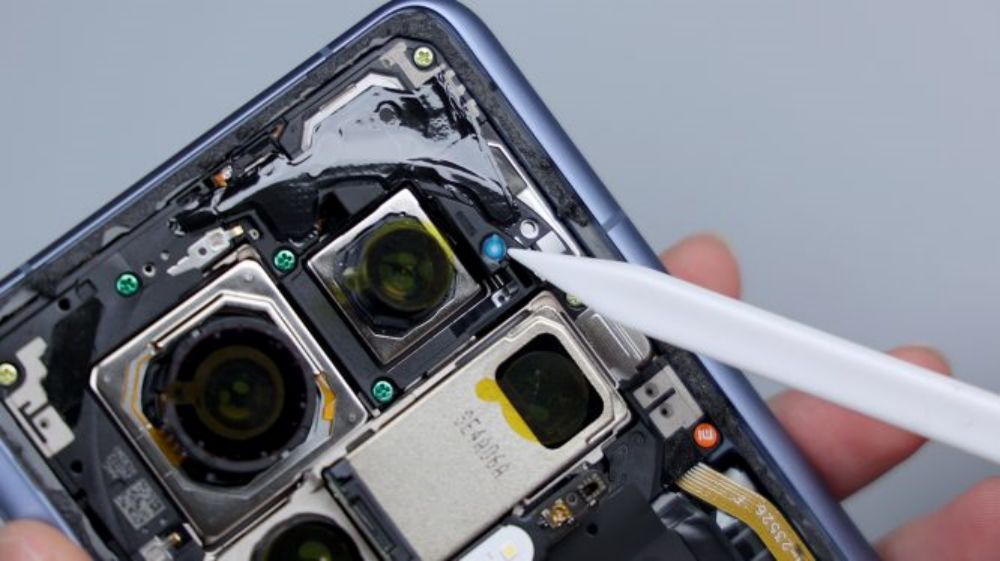
Around the main camera, there are 2 metal shrapnel pieces that are responsible for signal overflow, and traces of the shrapnel after contact can still be seen on the 2 metal limit posts corresponding to the inside of the DECO.
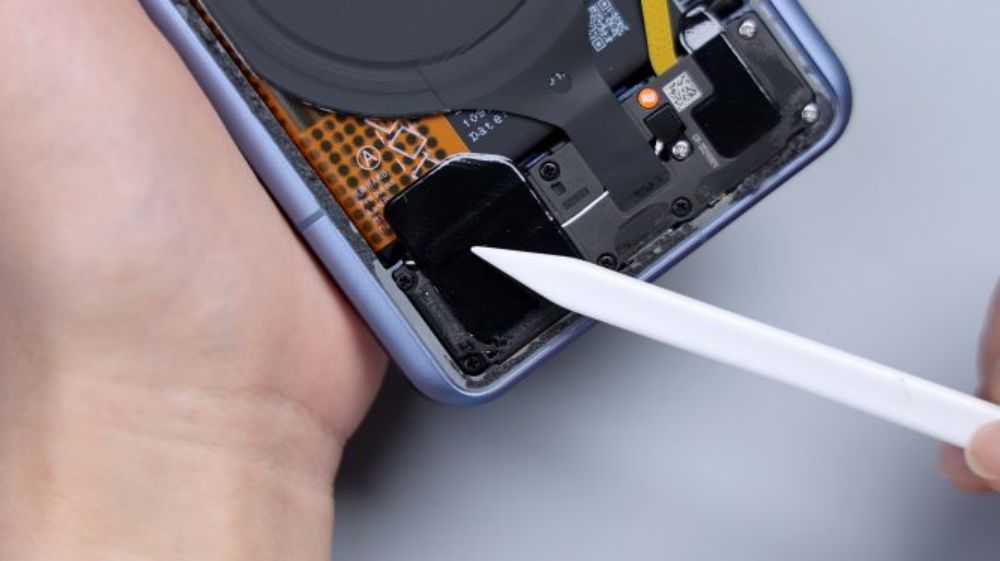
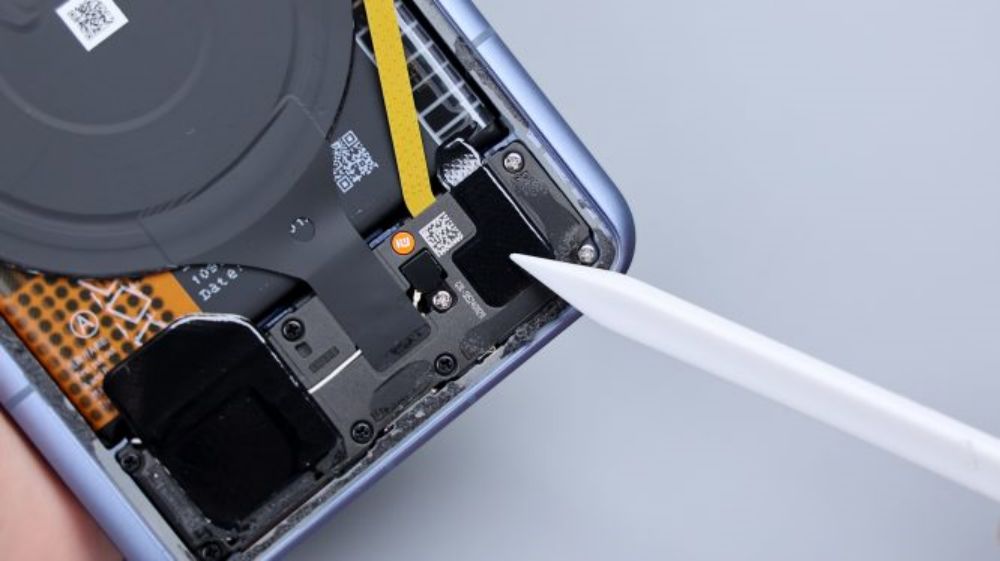
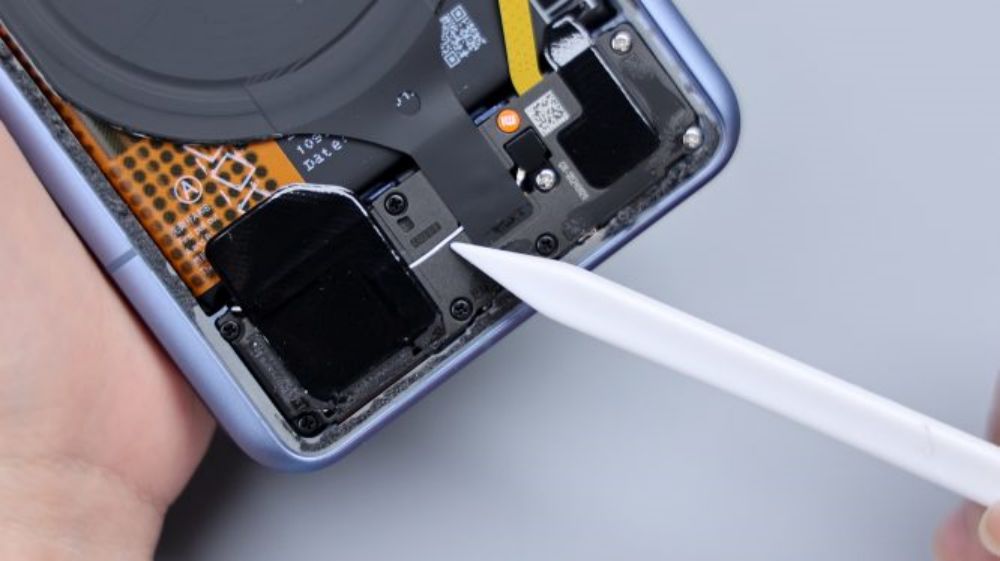
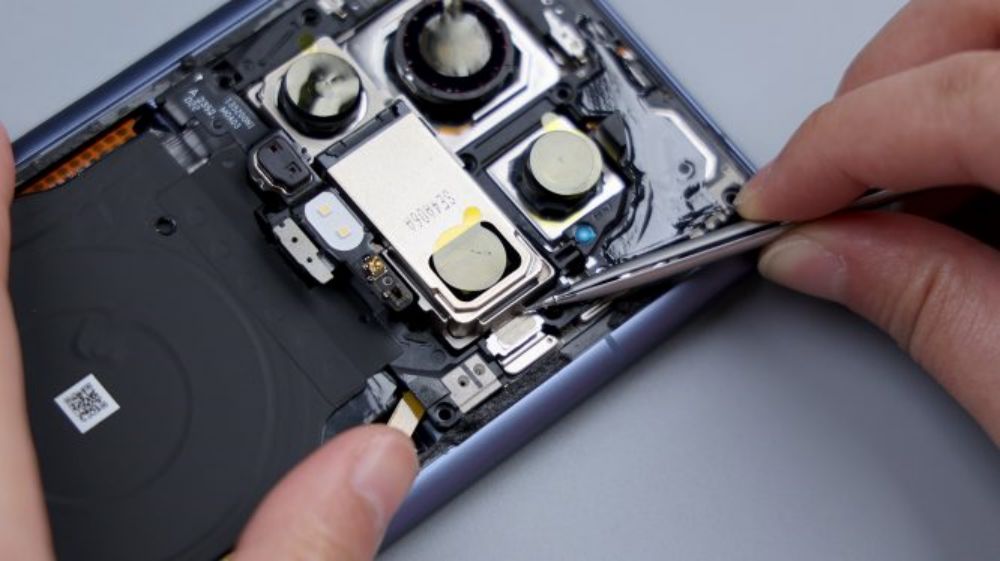
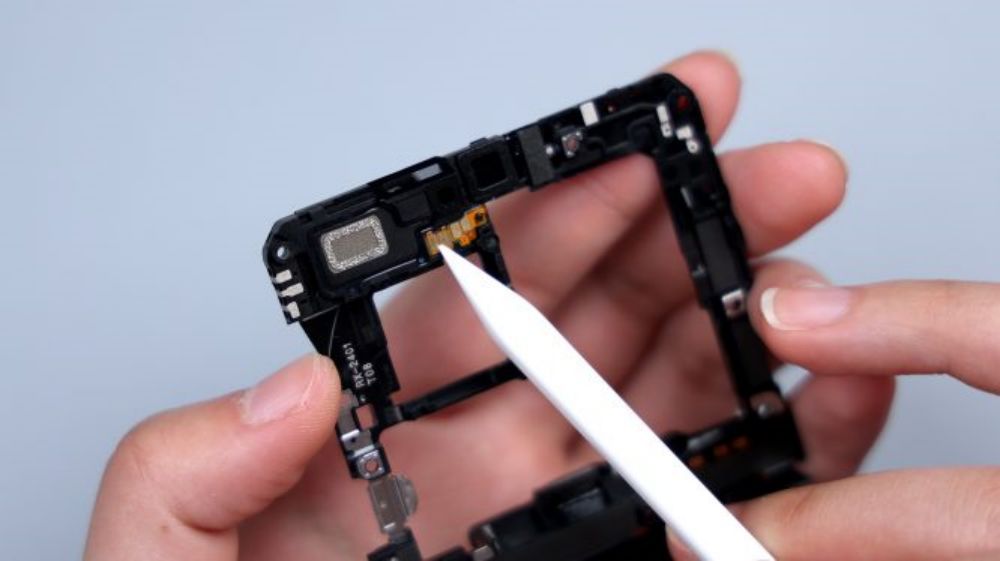
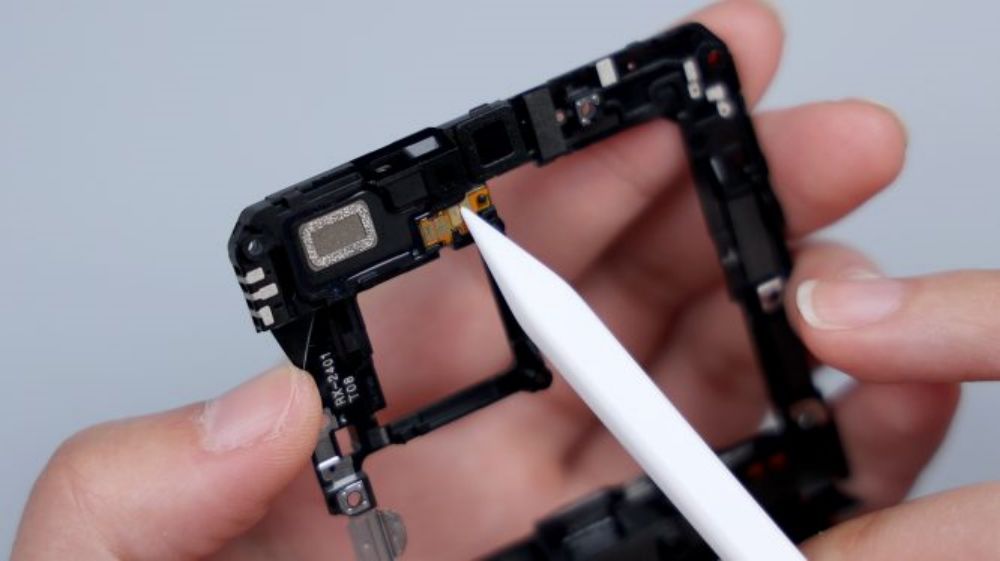
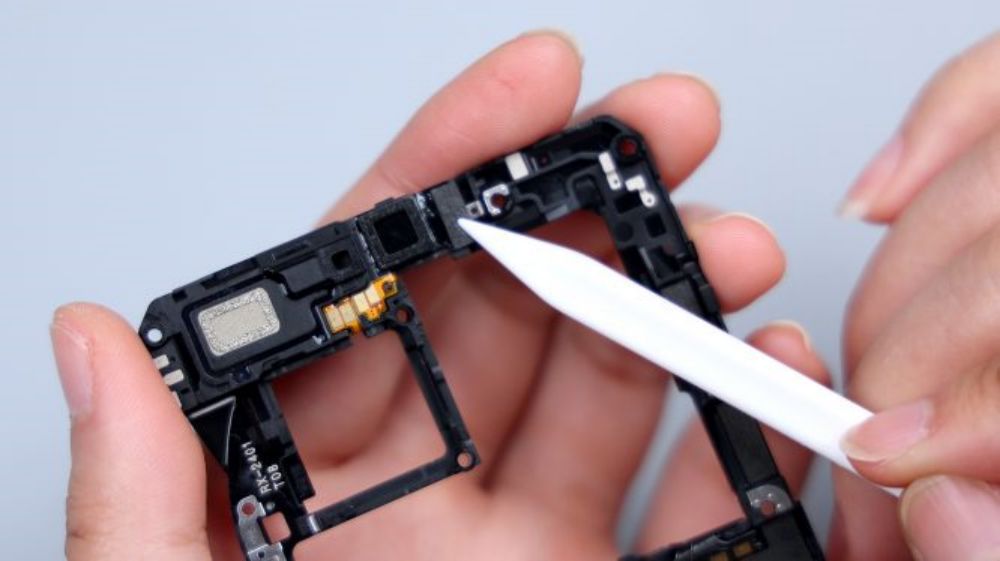
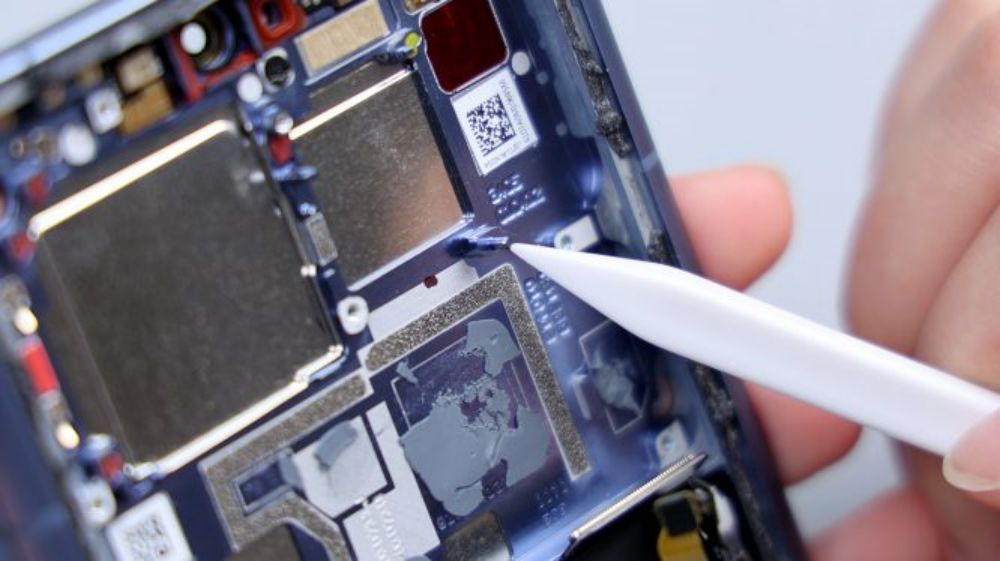
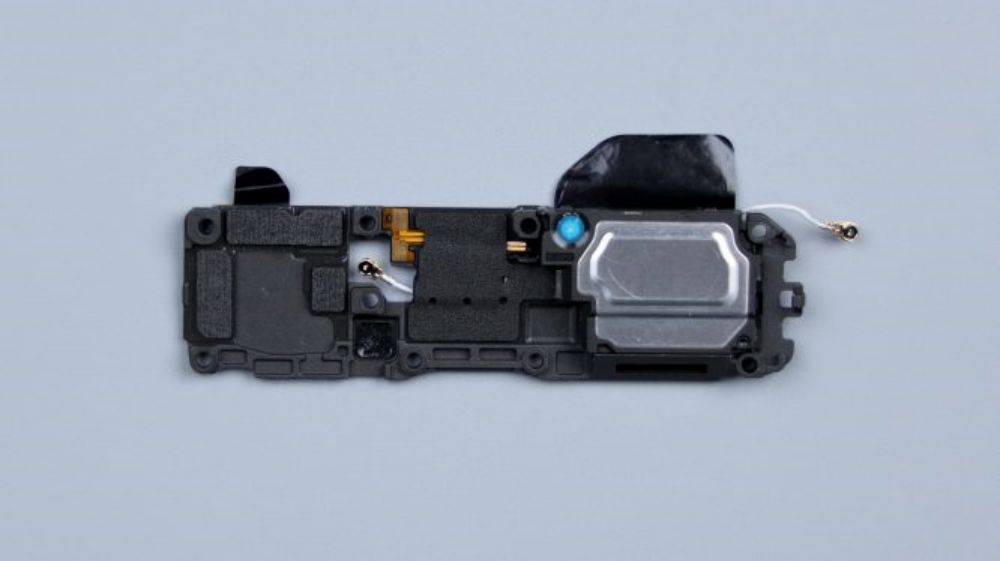
Where the top speaker is located, there is a piece of heat dissipation film affixed to it, taking care of all the parts that can be covered as much as possible.
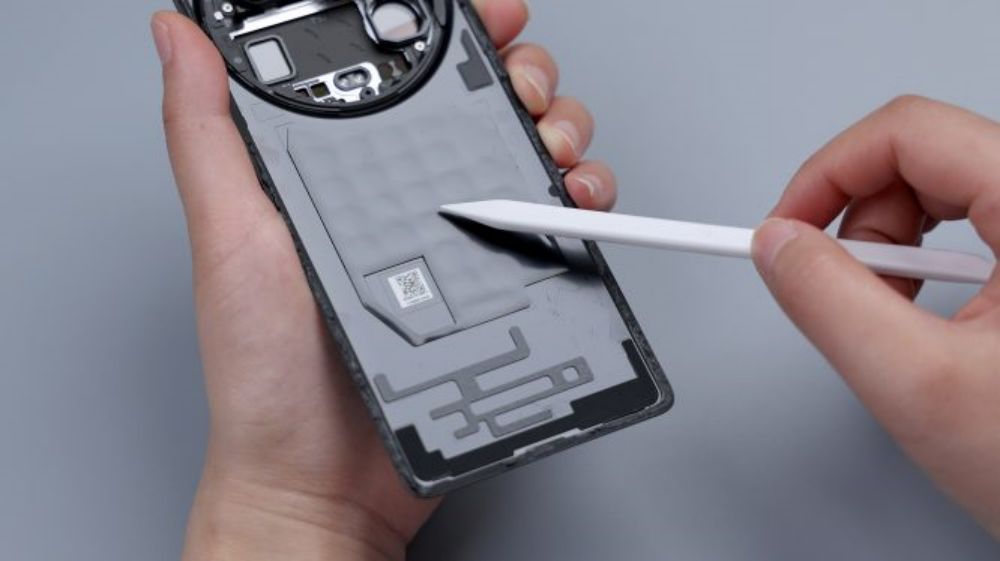
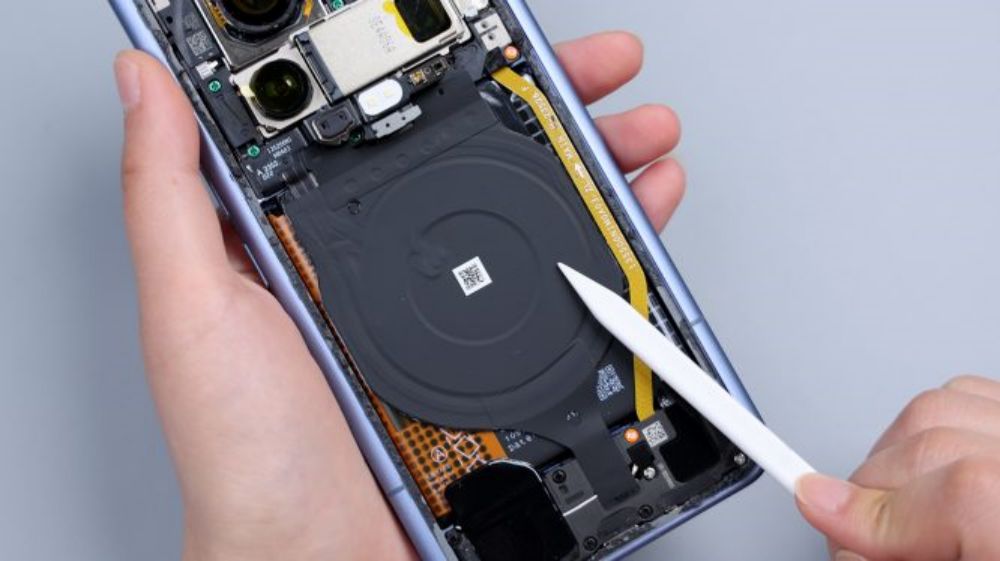
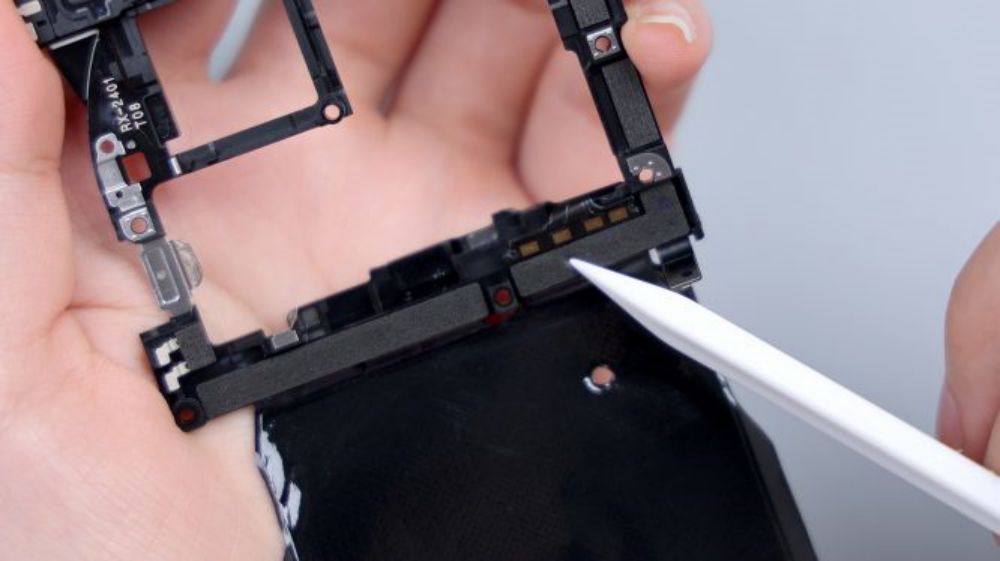
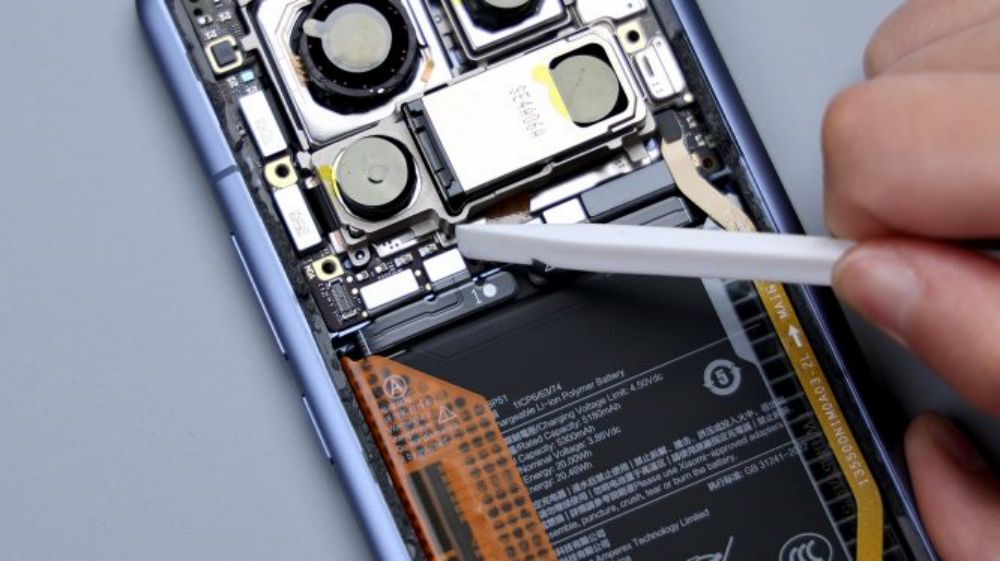
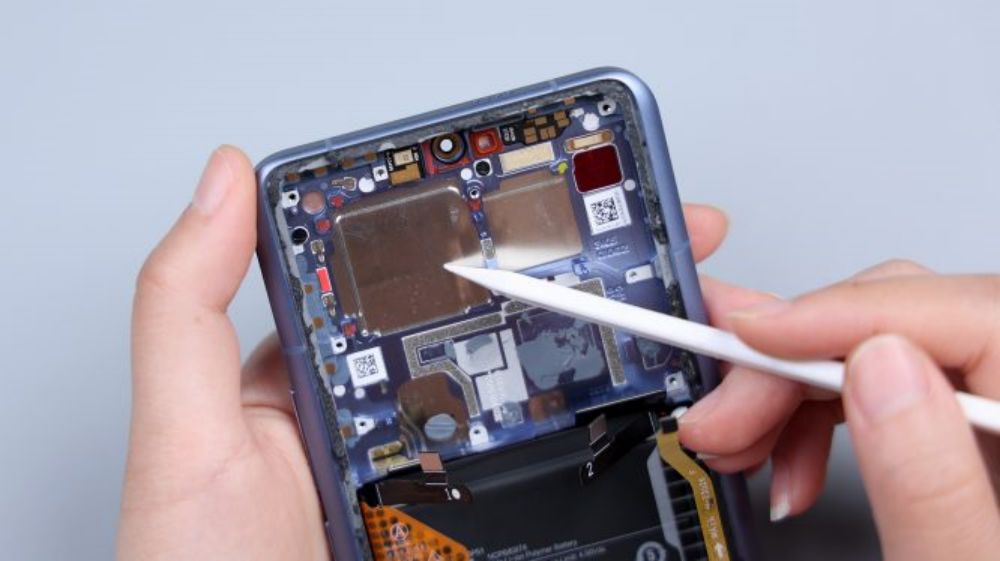
The cover screws come in two colors, green near the camera area and yellow on the perimeter sides. The Xiaomi Mi 14 Ultra's wireless charging and NFC coils are integrated together, located above the battery, and share a common FPC, which has a heat dissipation film applied to its surface and extends downward to be glued to the cover of the secondary board. The yellow FPC immediately to the right is responsible for connecting some of the functions of the main and secondary boards.
There is a piece of thermal film on the left and right side of the cover of the secondary board, and the larger one corresponds to the bottom speaker, with a white coaxial cable running through the left and right side of the board. The fixing screws on the secondary board are also available in two colors, black and silver.
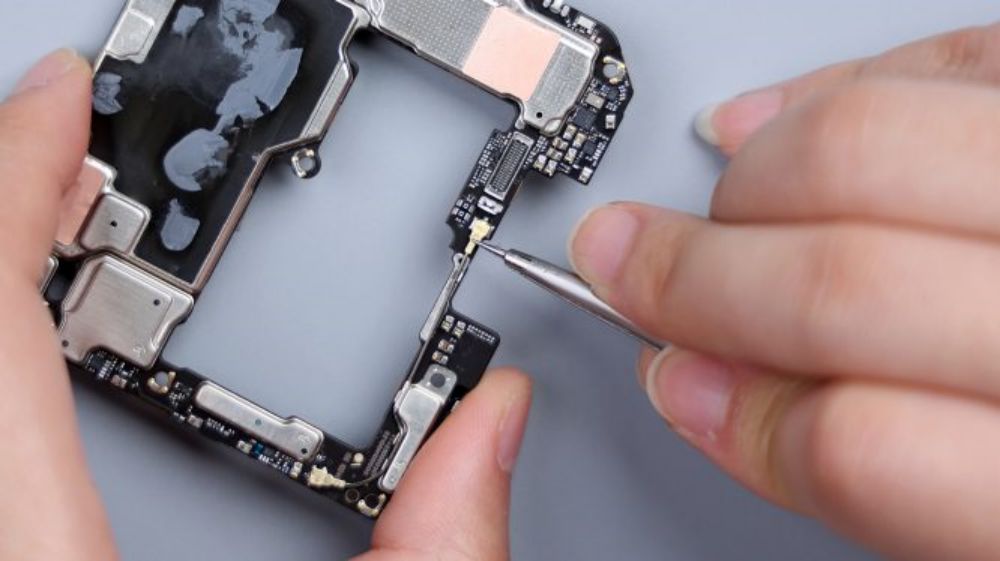
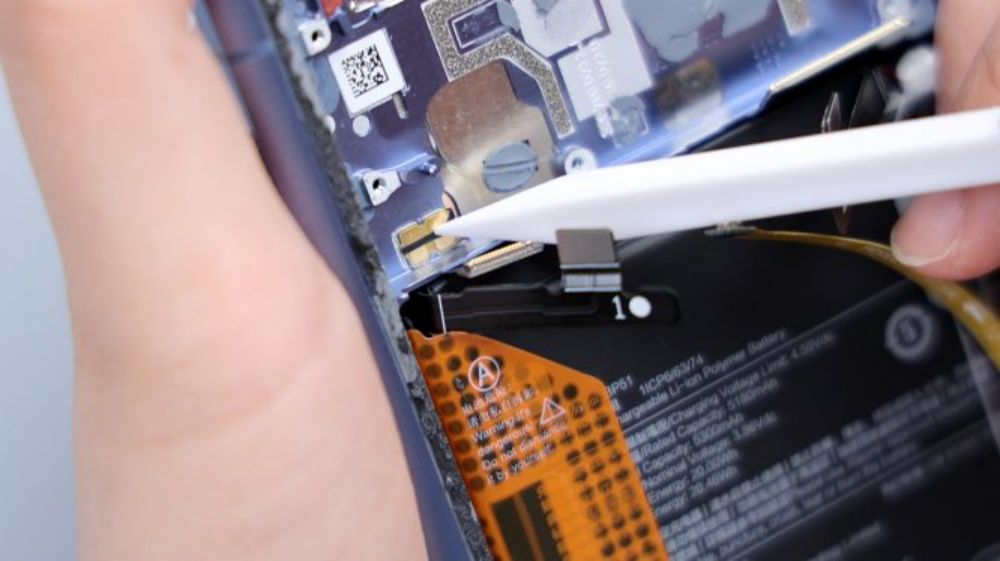
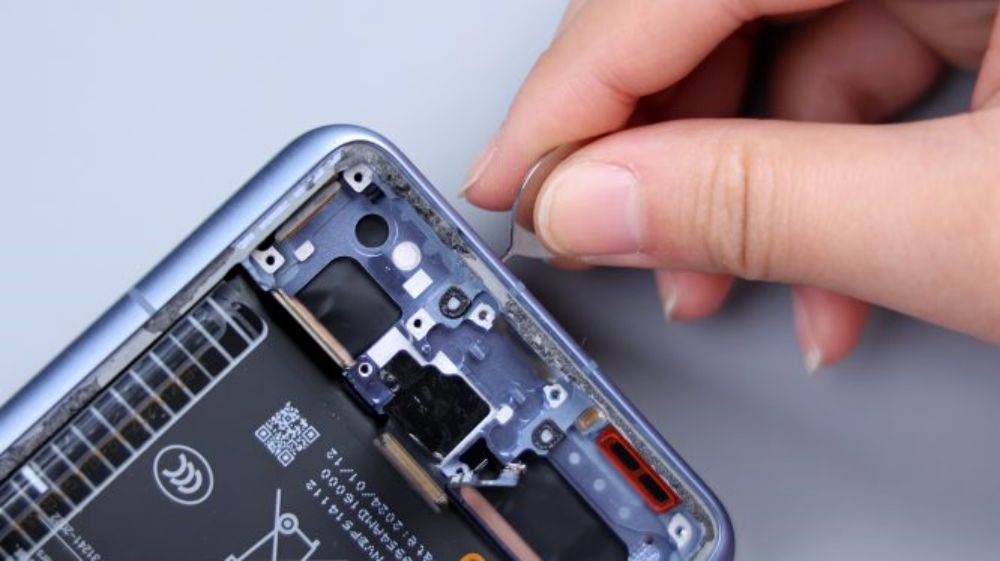
The disassembly continues, unscrew all the fixing screws in the main board area, tear off the conductive cloth connecting the periscope head, pry up the cover, and then slowly lift it up in the direction of the battery, taking care not to push too hard, because there is still a BTB connected to the flash cable at the corners, and then after disconnecting it, tear off the heat dissipation film extended by the NFC coil, in order to completely take off the cover.
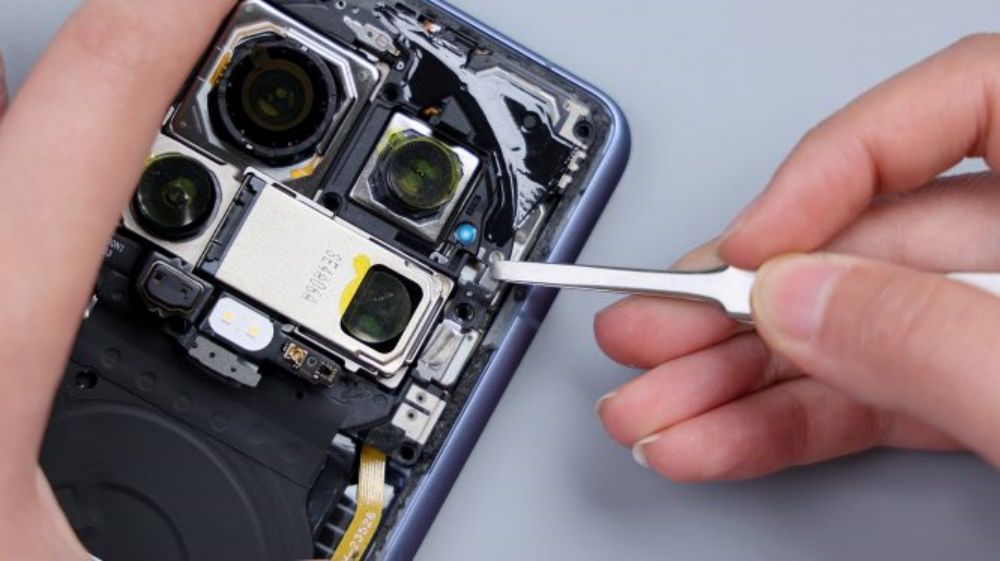
Unlike its predecessor, this time the cover is a single unit, and an Oreo-style bulge similar to that of the Real Me GT5 Pro has been made.
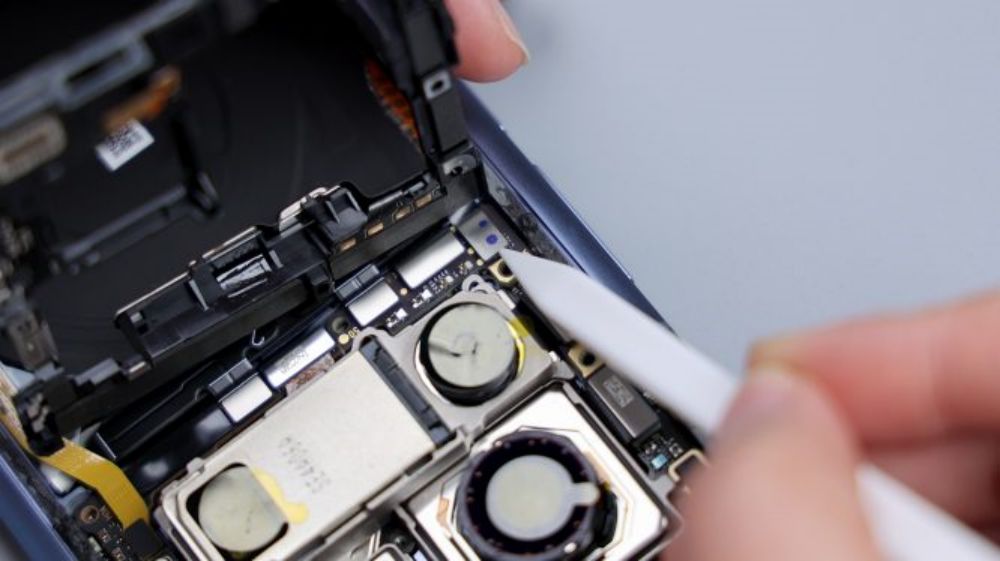
The LDS laser laser antenna on the outside, also extends to the inside of the cover, including the sides, to give more space for the laser antenna, and also to facilitate signal boosting.
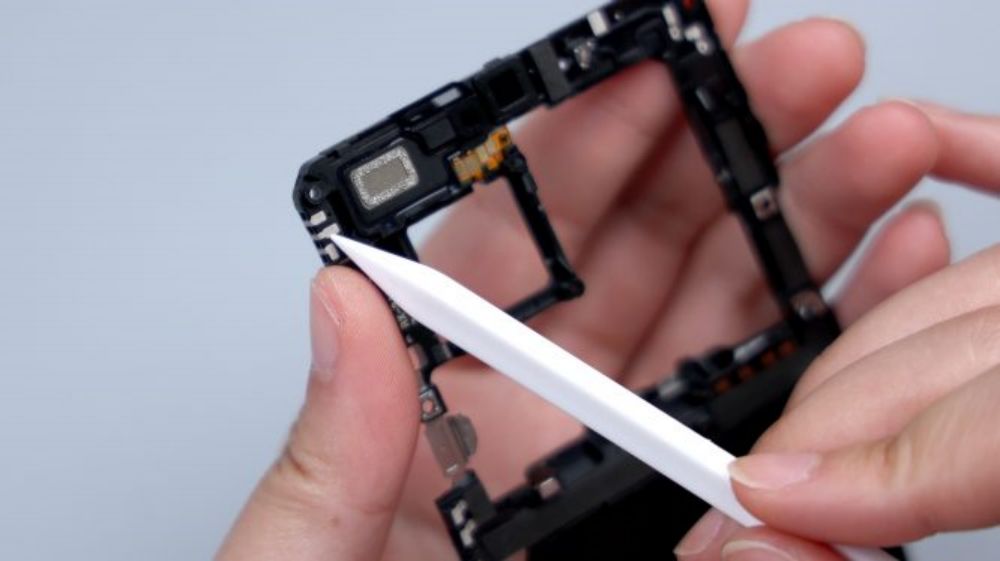
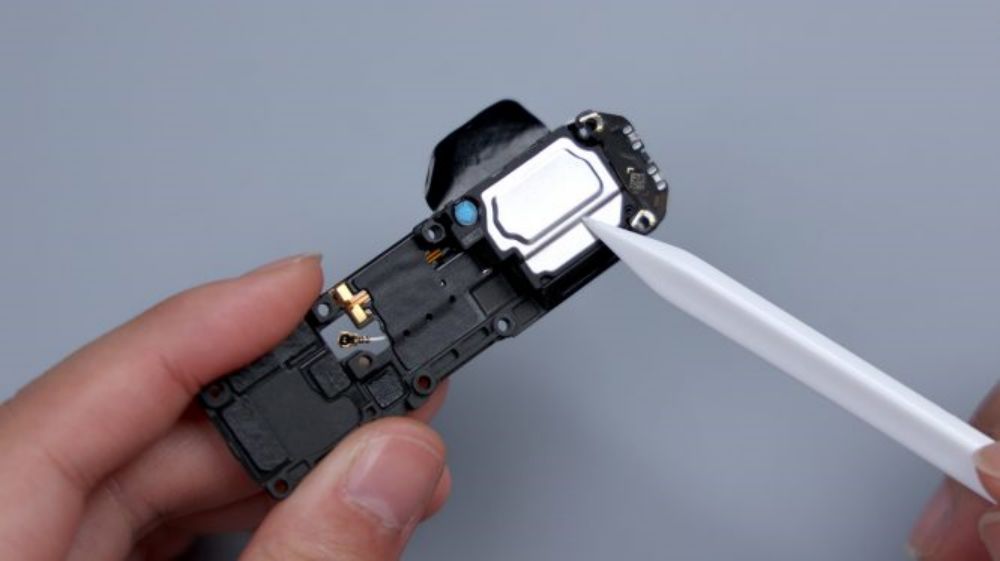
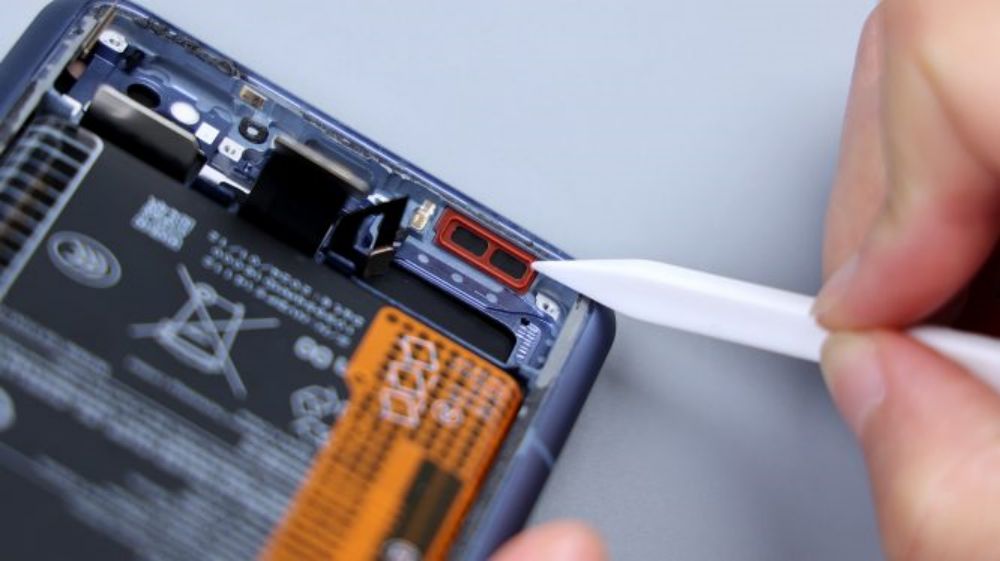
The top speaker is located in the upper left corner, continuing the previous generation's solution of separating the speaker from the earpiece, with a separate leak-proof earpiece, which can be seen by tearing off the heat dissipation film on the front of the cover, with a dual-side sound design, and a white dust mesh that's vaguely visible on the left and right sides.
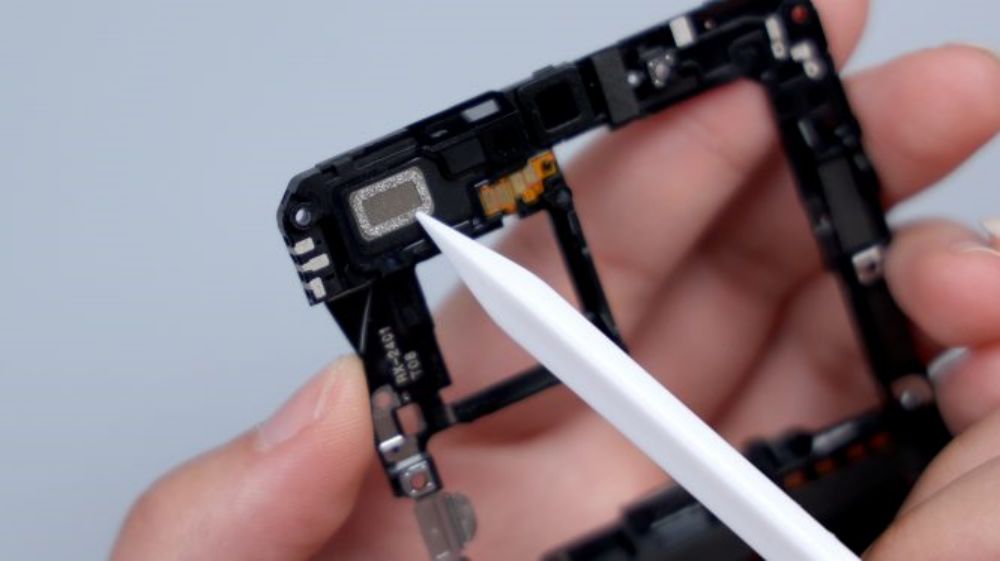

Each of them has an independent sound cavity for directional sound generation, which is delivered through the diagonal cut channel on the top to avoid sound leakage and improve call quality. The speaker and earpiece are both from Ruixing Technology, and they are connected to the motherboard through four contacts on the lower right, of which two on the left side correspond to the speaker, and two on the right side correspond to the earpiece.
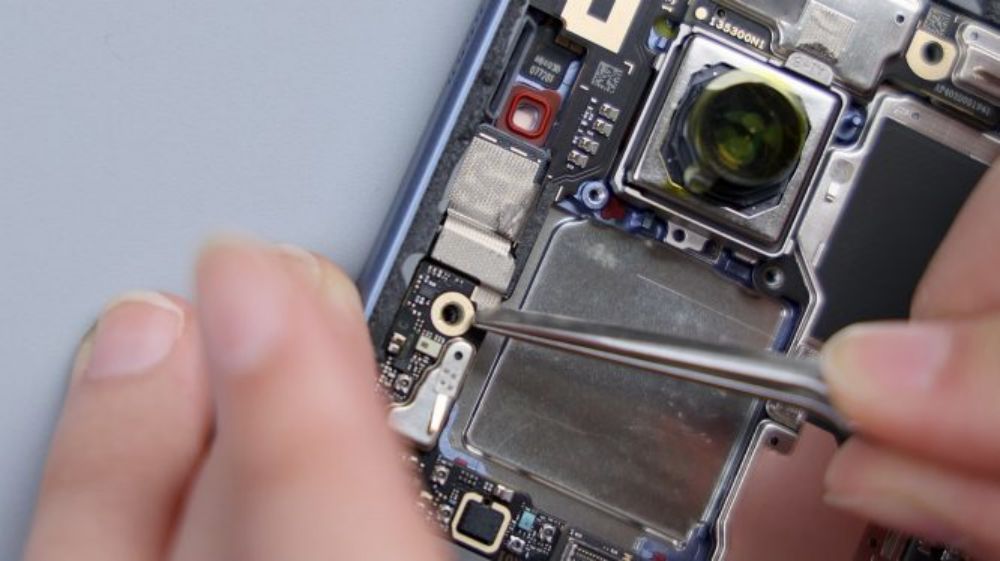
The foam ring and foam pads at the top right of the contacts correspond to the front lens and its BTB, and there is a heat dissipation film underneath.164
The two foam pads on the right side correspond to the BTBs of the main camera and the ultra wide-angle lens. the long foam pad on the bottom right corresponds to the BTBs of the flash, the battery, and the main and secondary FPCs, the longer foam pad on the bottom left corresponds to the BTBs of the periscope head, the battery, and the screen, and as for the small piece of foam pad on the bottom left, it corresponds to the BTB of the yellow FPC.
The metal piece on the lower left edge corresponds to the metal shrapnel on the edge of the motherboard. The four contacts on the lower right corner correspond to the wireless charging and NFC coils, and the large piece of heat dissipation film on the inner side extends slightly upwards to cover the lower row of BTBs to provide auxiliary heat dissipation for the interfaces.
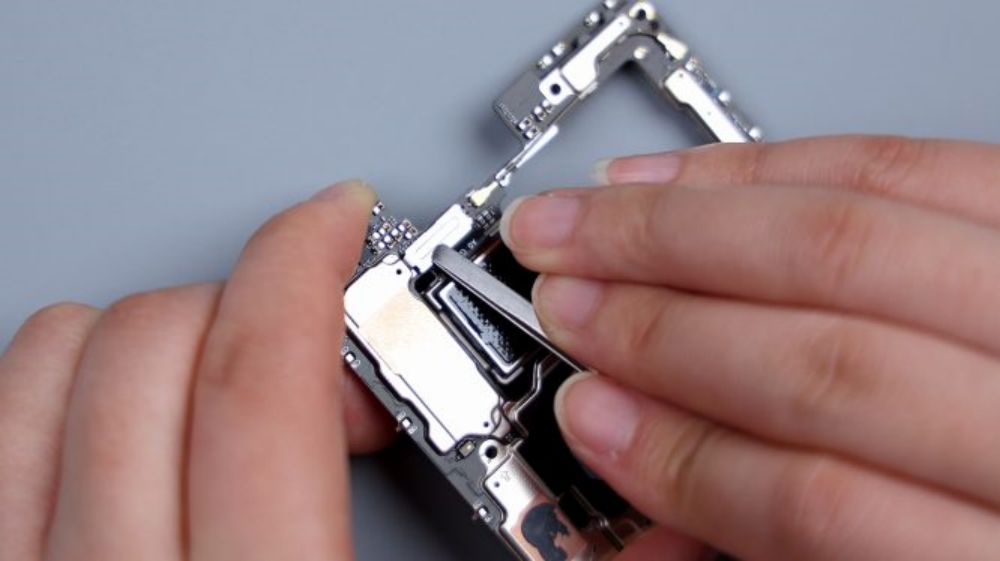
After disconnecting the 2 BTBs for the battery, tear off the conductive cloth for the front lens, then disconnect all the remaining BTB connectors on the A-side of the motherboard in turn, and the main camera, the ultra-wide-angle lens, the periscope lens, and the front lens can all be removed.
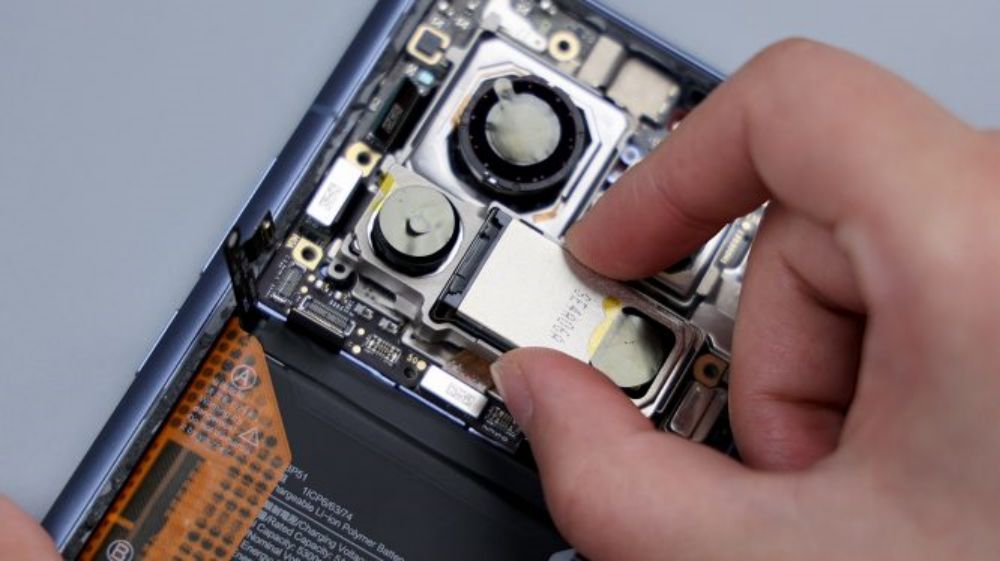
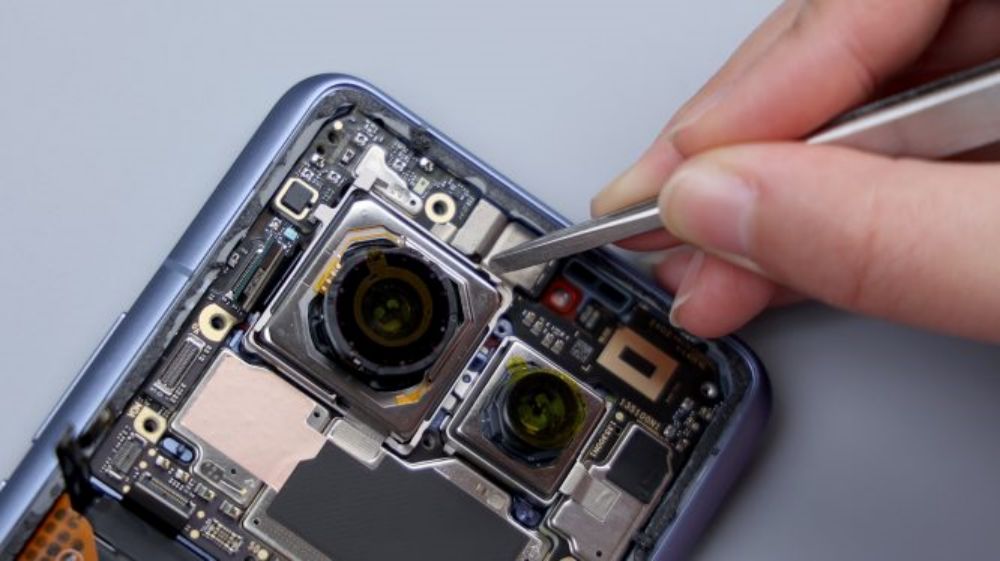
The BTB of the telephoto lens is pressed on the B side of the motherboard, so you need to pry it up to take out the motherboard first. there is a metal plate on the BTB to fix and protect it, pry up the metal plate and disconnect the BTB, then you can remove the telephoto lens, and by the way, the gray coaxial cable next to it is also disconnected and removed.
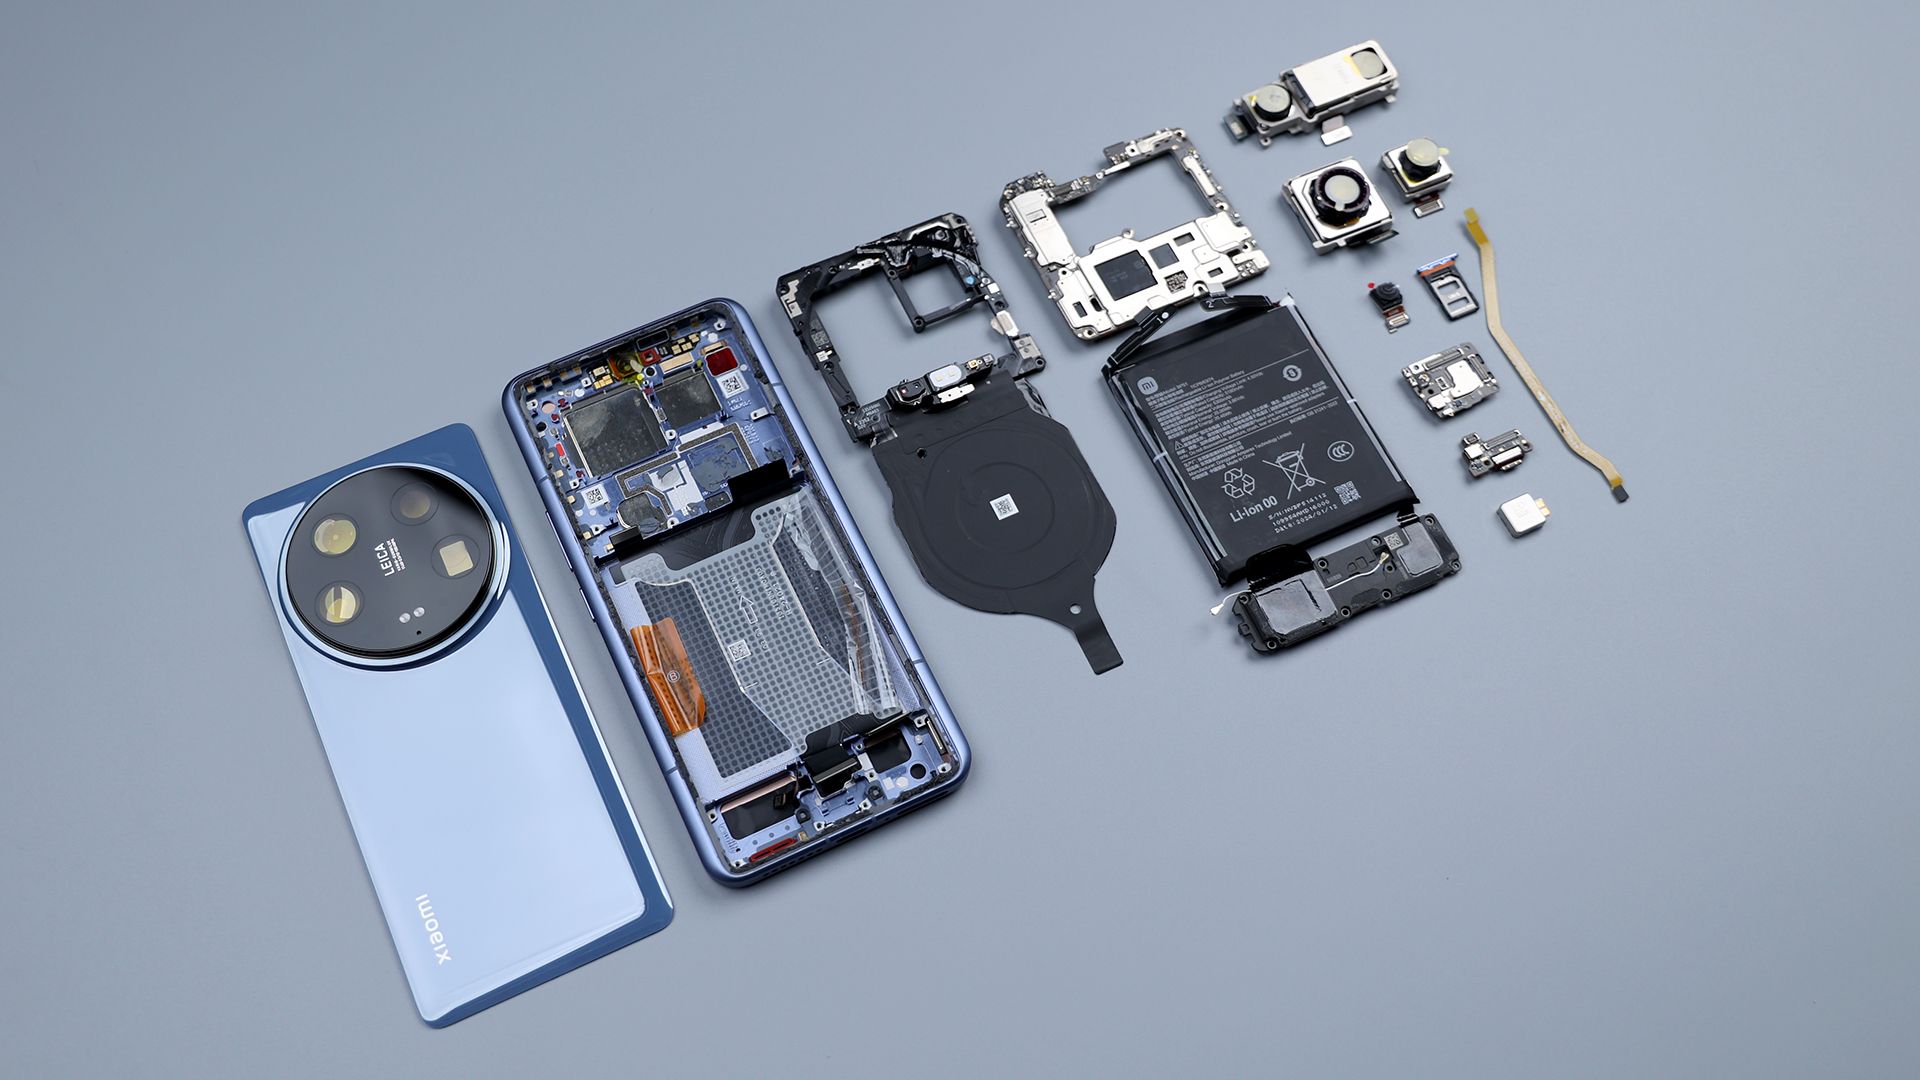
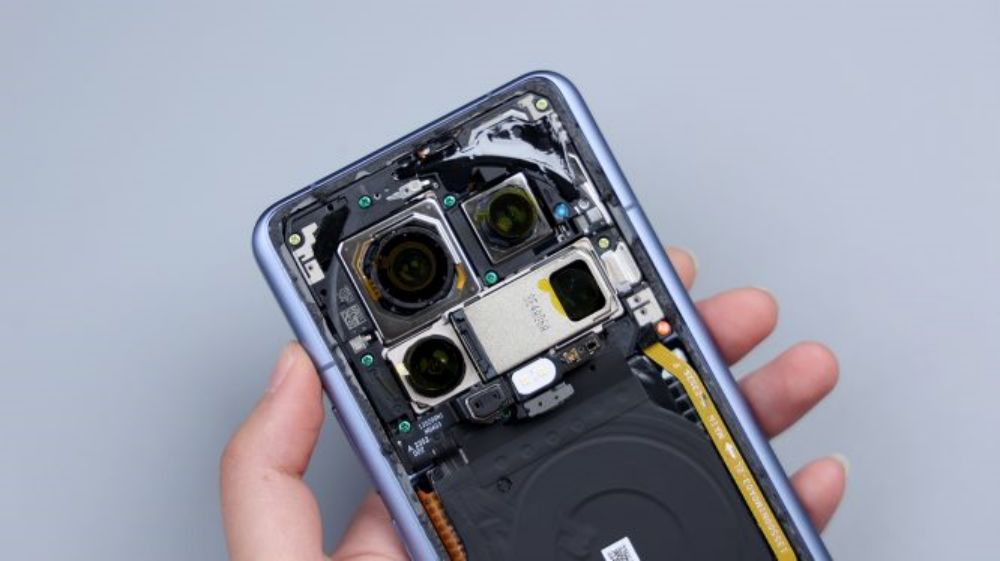
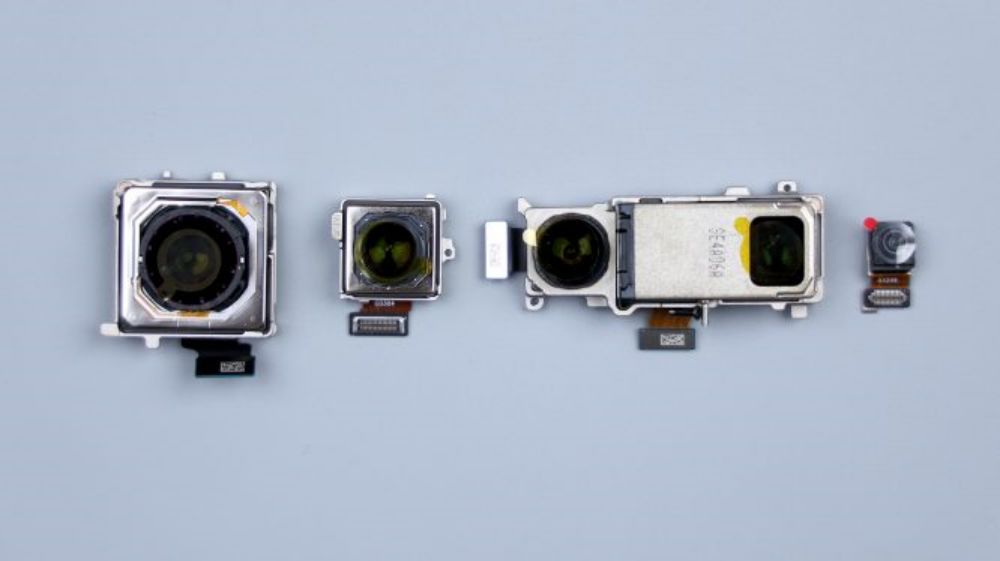
At this point, the Xiaomi 14 Ultra's five front and rear cameras come together, 50-megapixel main camera, Sony's new generation light metaphor LYT-900 sensor, 1-inch outsole, support for OIS optical stabilization, equivalent focal length of 23mm, support for stepless aperture adjustment, can be switched infinitely between f/1.63-f/4.0, 8P-coated lenses. 50-megapixel ultra-wide-angle lens, Sony IMX858 sensor, 12mm equivalent focal length, f/1.8 aperture, 7P coated lens.50MP Floating Telephoto Lens, Sony IMX858 sensor, supports OIS optical stabilization and Floating Focus Group technology, 75mm equivalent focal length, f/1.8 aperture, 6P coated lens.50MP Periscope Telephoto Lens, Sony IMX858 sensor. Support OIS optical stabilization, equivalent focal length 120mm, aperture f/2.5, 5P lens. 32MP front lens from Howell Technology. The four rear cameras with lossless zoom technology, complete coverage of 12mm, 23mm, 46mm, 75mm, 120mm and 240mm six focal lengths, basically to meet the needs of the majority of users of daily multi-scene shooting.
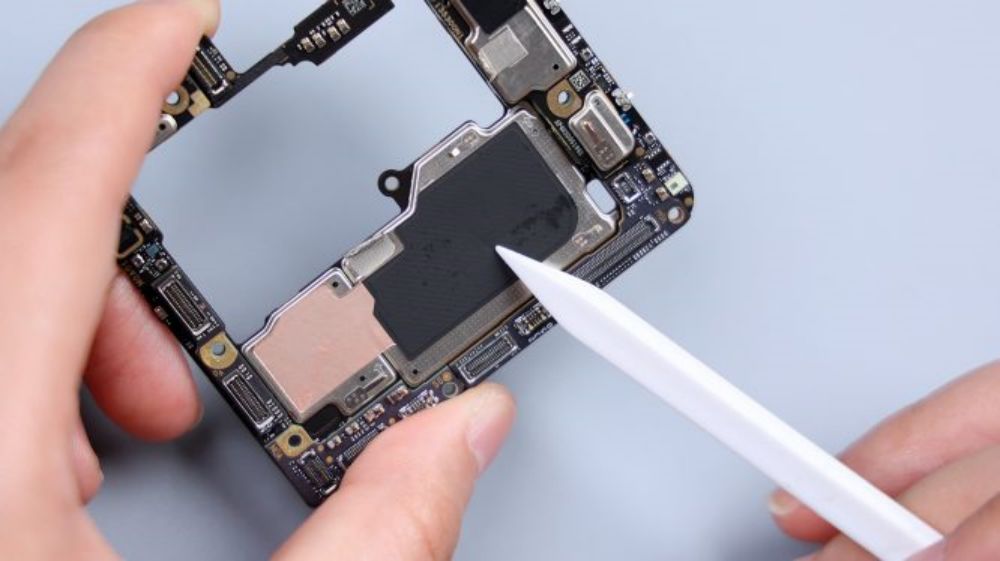
It can be seen that due to the large size of the main camera and telephoto lens, and protrudes significantly, need to occupy more vertical space, in order to accommodate these two lenses, had to use the broken plate sinking way, its corresponding area of the motherboard formed a large area of skeletonization.
For this reason, a circle of BTB bases around the perimeter, as well as some small parts, are placed on the thickened and padded laminated motherboard, however, all core chips are still placed on the thinner main PCB to ensure better heat dissipation.
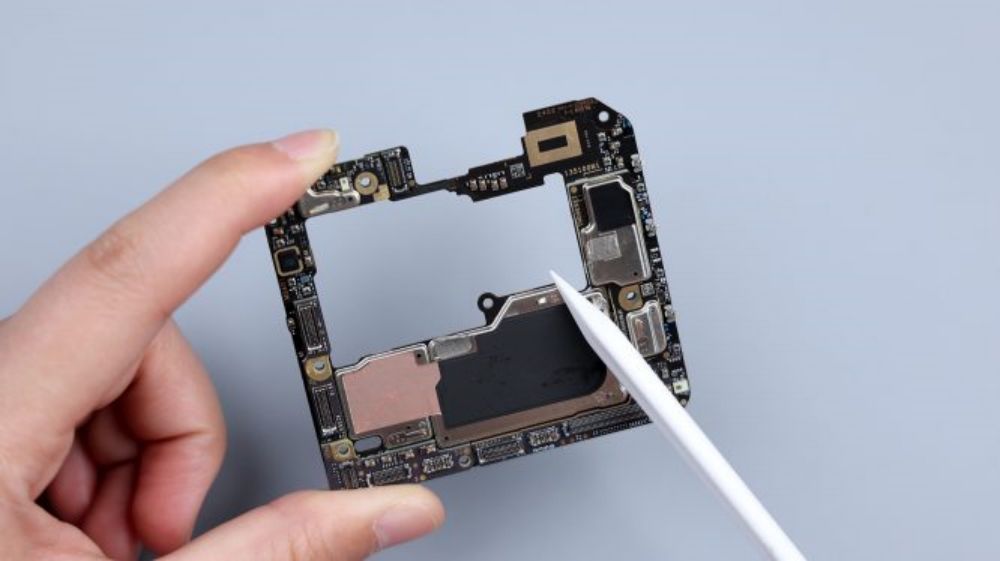
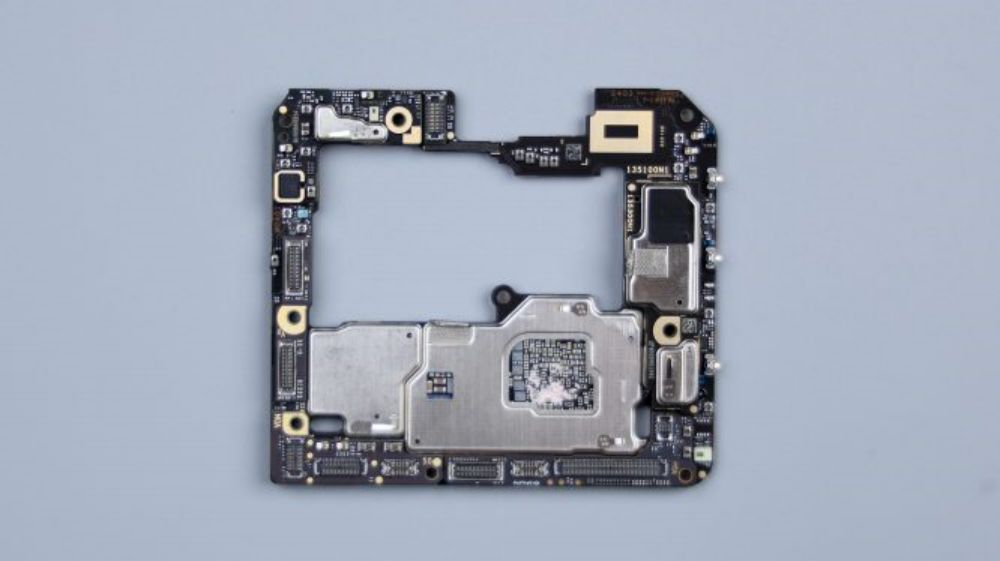
According to the "COMPEQ" logo in the upper right corner, the PCB supplier is "Huatong Computer Co.

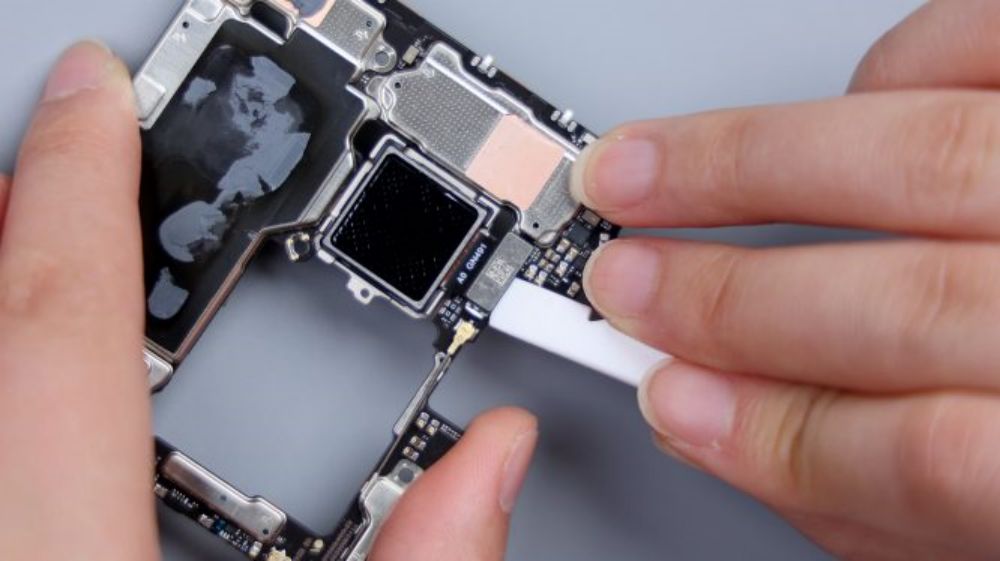
Most of the metal shields on the A-side are covered with copper foil and heat dissipation film, and there is no foam ring on the BTB connector. Instead, the BTB is protected by a foam pad on the inside of the cover, and there is no adhesive on the small capacitors and components around it.
Multiple metal shrapnel on the shield, responsible for conducting signals. The weak link next to the front lens has a cushioning foam pad affixed to it, and the B side is reinforced with metal tabs in the corresponding positions. The BTB of the telephoto lens does not have a foam ring, but instead opts for a more solid metal baffle to protect it from disconnection in the event of a heavy drop, and the peripheral capacitors are not glued.The shield on the B-side is also covered with a copper foil and a heat dissipation film, and the surface of the core area is coated with silicone grease to assist in heat dissipation.
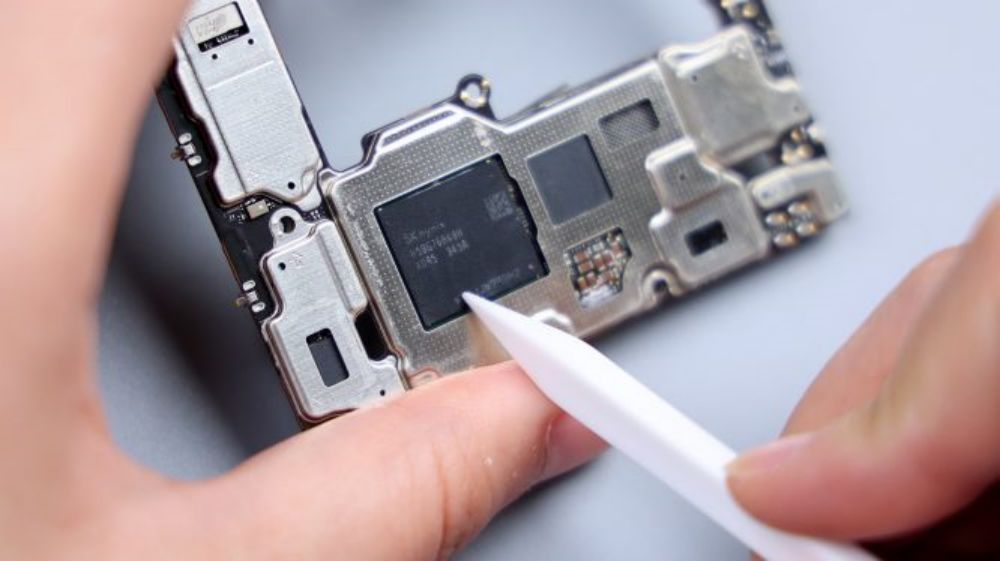
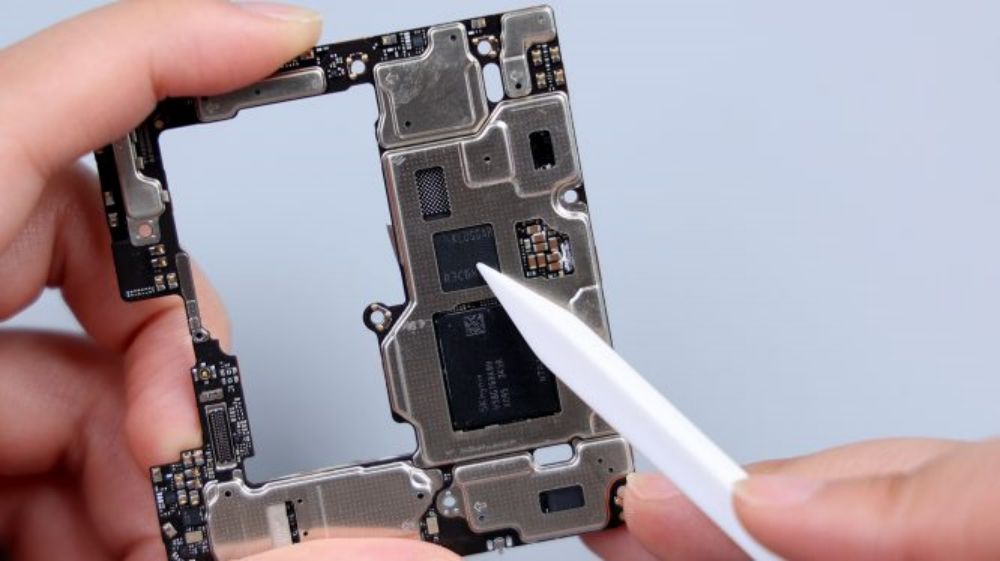
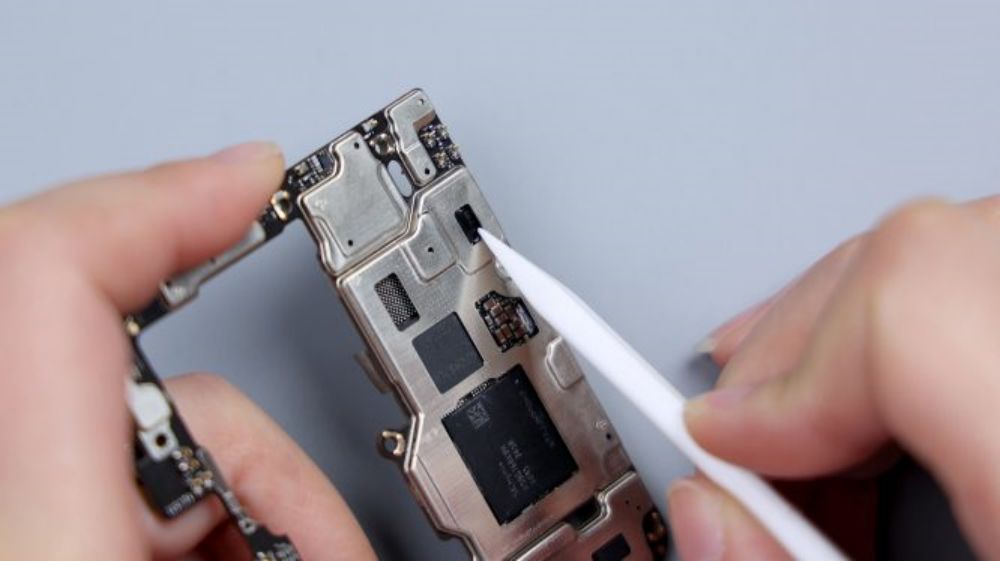
Tear away all the copper foil and heat dissipation film, there is still a layer of heat dissipation material inside. The largest chip on the B-side is the 16GB LPDDR5X running memory from Hynix, and a green chip is also faintly visible underneath it, which is the Snapdragon 8 Gen 3 processor from Qualcomm, and next to it is a slightly smaller chip, which is the 1TB UFS 4.0 flash memory chip from Samsung, and close to the bottom edge, which is printed with the Xiaomi logo, is Xiaomi's own 1TB UFS 4.0 flash memory chip. LOGO, is Xiaomi's self-developed Surge P2 intelligent fast charging chip.
 >
>
Near the bottom of the hollow shield, it looks like the chip was originally intended to be placed, but I do not know why it is empty.A side near the battery BTB position, there is also a power IC from Qualcomm.
On the metal frame, the main camera and telephoto lens, as well as some of the chips are hollowed out, and the stainless steel VC heat shield is exposed underneath.

The Xiaomi Mi 14 Ultra is equipped with a new dual-loop cold pump, which provides cooling for the third-generation Snapdragon 8 processor, while adding a camera-specific cooling loop, so that the lens can touch the heat equalization plate directly to ensure the stable operation of the camera system.
Also, like the broken plate sink, another purpose of the frame skeletonization is to reduce the height of the mirror set protrusion. Corresponding to the core area of the motherboard, there are large areas of silicone residue. Dense metal dots and metal shrapnel around the frame are responsible for signal overflow, boosting the antenna radiation area and signal strength. The circular cutout in the upper left corner reveals part of the copper foil on the inside of the screen.
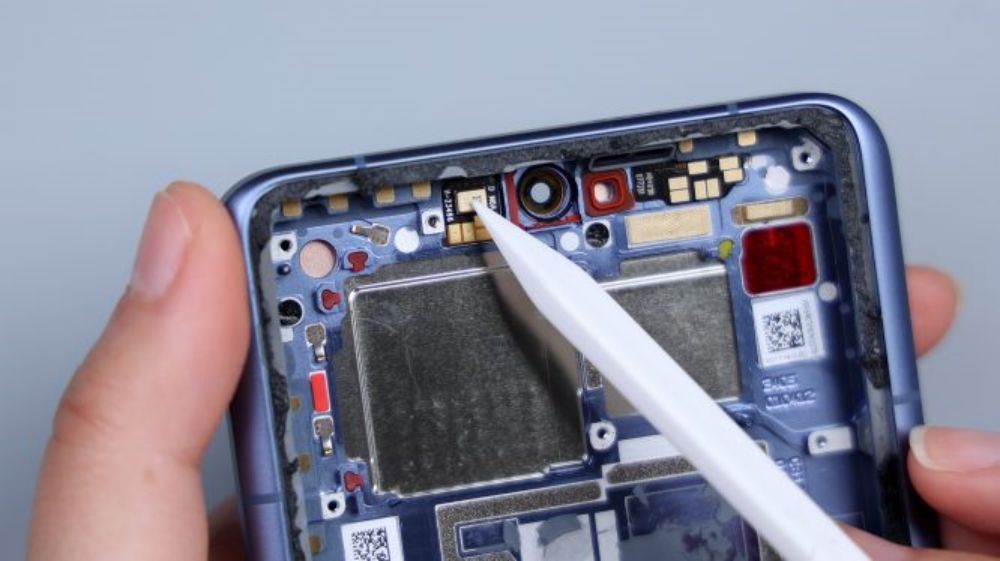
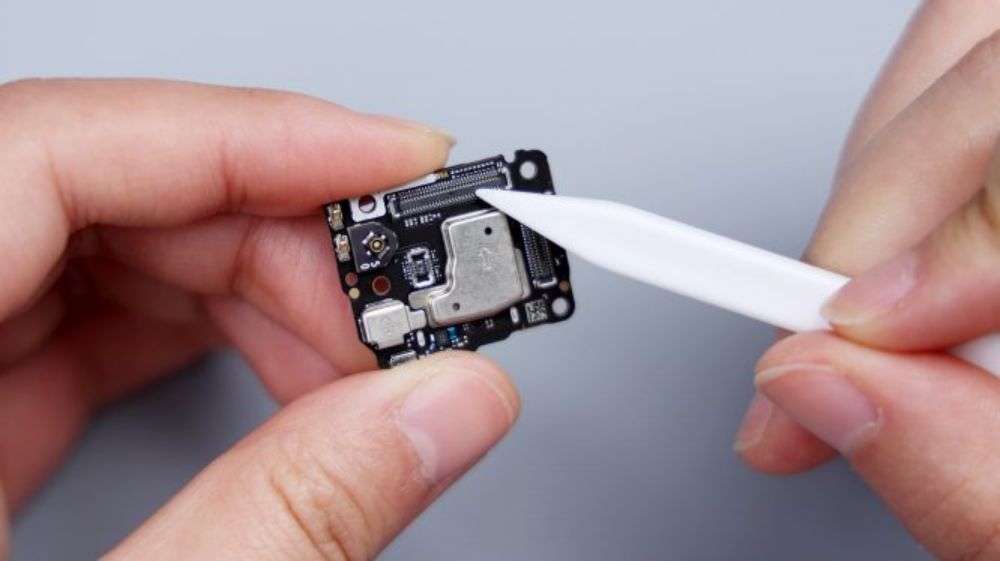
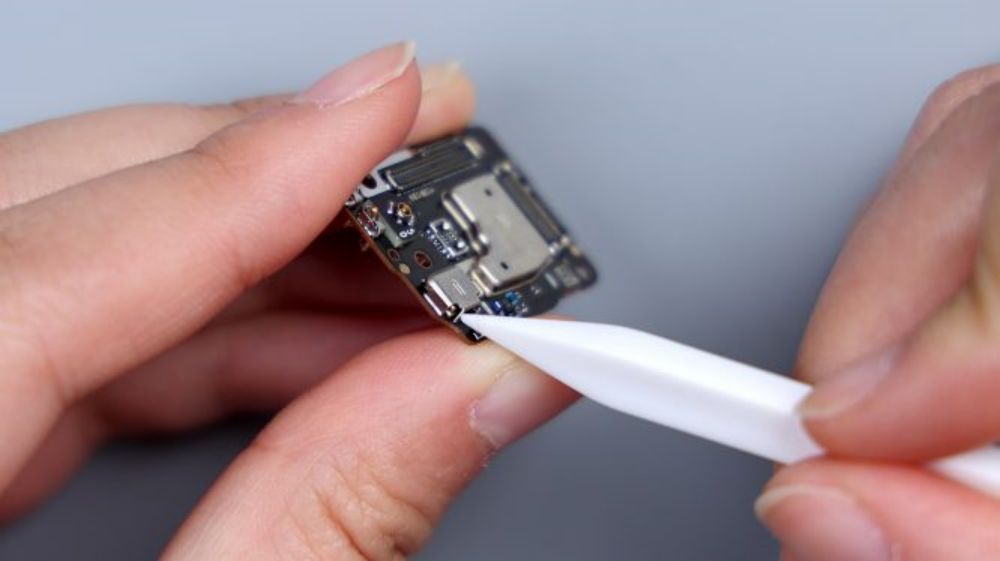
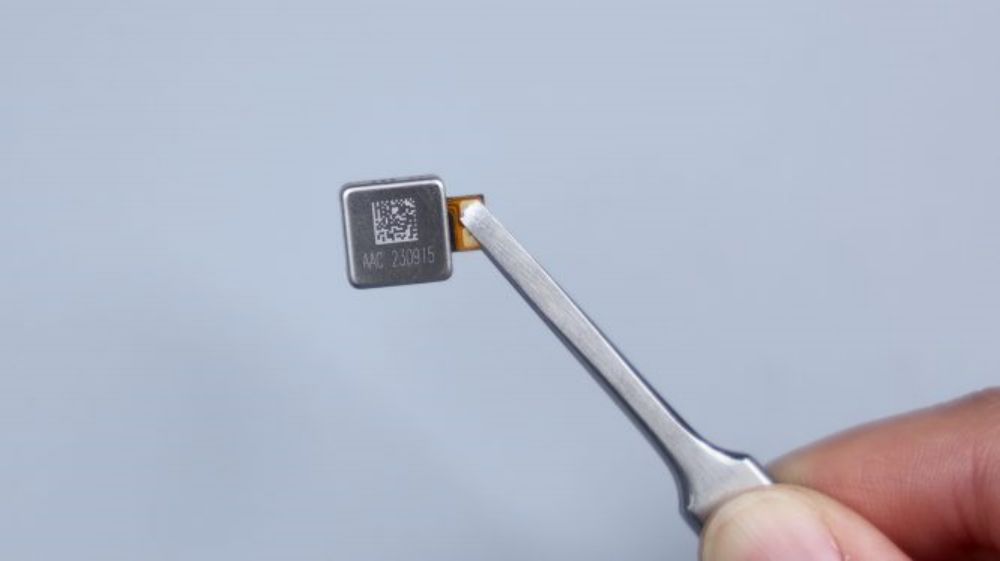
The small piece of PCB at the top center integrates 1 noise-canceling microphone, which is connected to the motherboard via 4 contacts.
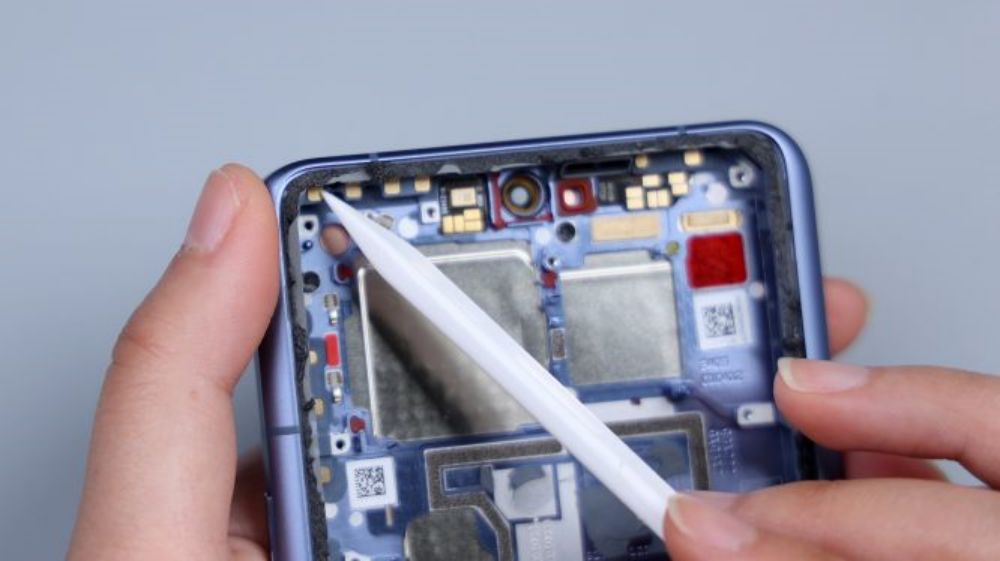
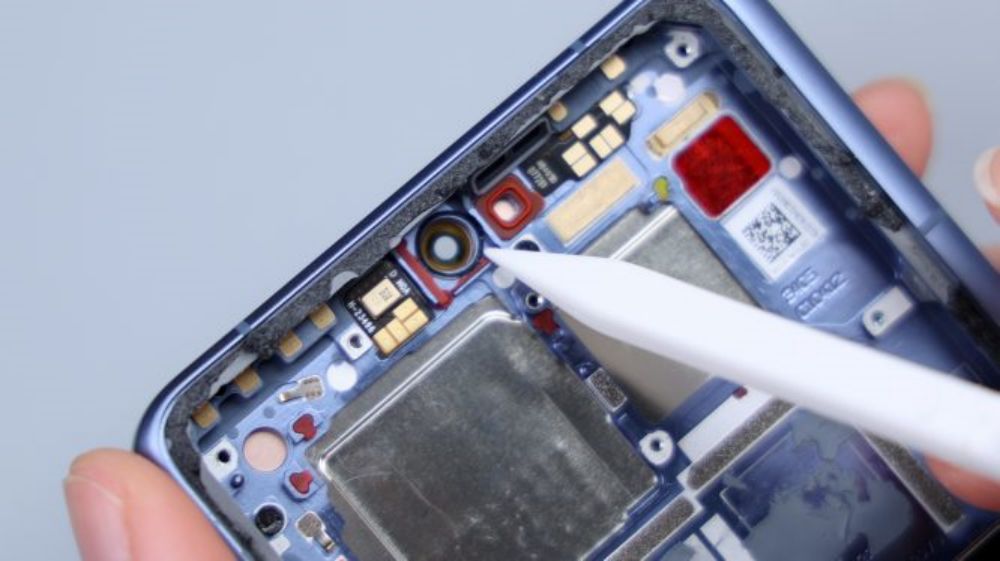
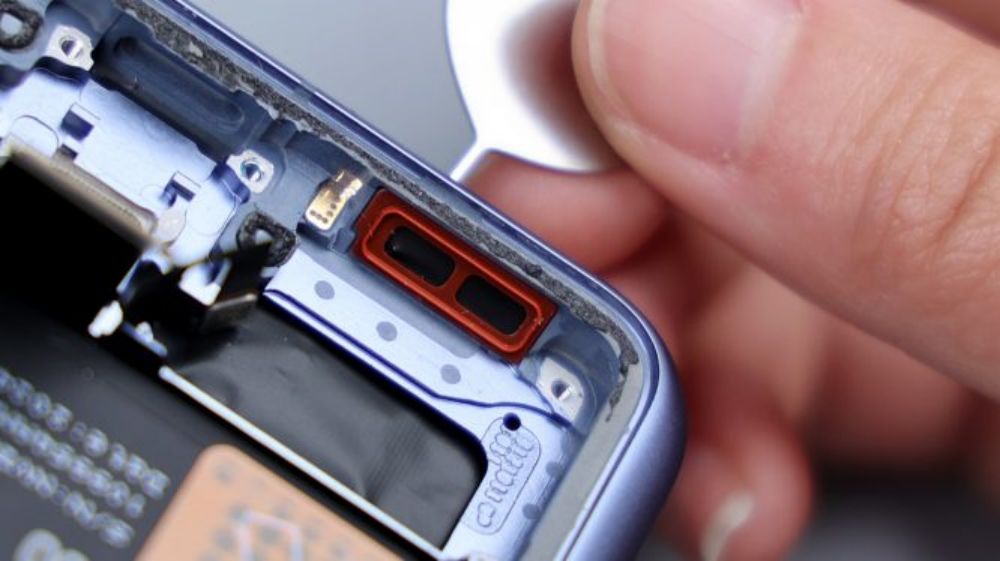
The front lens location features a foam ring and a red rubber pad to provide protection for the lens. The red rubber ring on the right side corresponds to the earpiece, and the diagonal cutout hole and gray rubber ring immediately next to it correspond to the sound channel, preventing sound leakage during speaker and earpiece transmission. The small PCB right next to it integrates the front ambient light sensor, which connects to the motherboard via 7 contacts and two thick conductive cloths underneath. The four contacts in the lower left corner correspond to the power and volume buttons. There are also multiple blue limit posts on the frame to assist in securing the motherboard and rear lens.
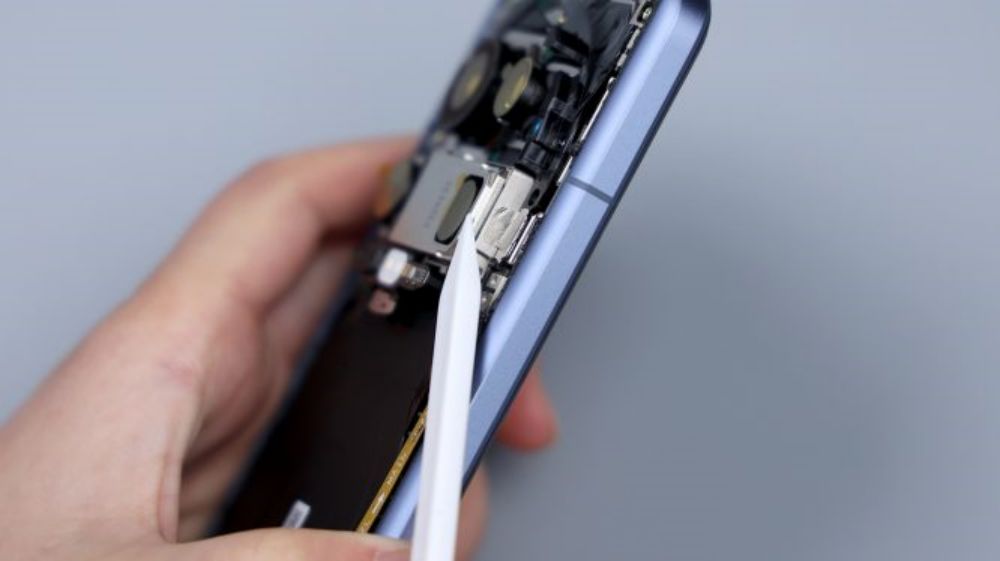
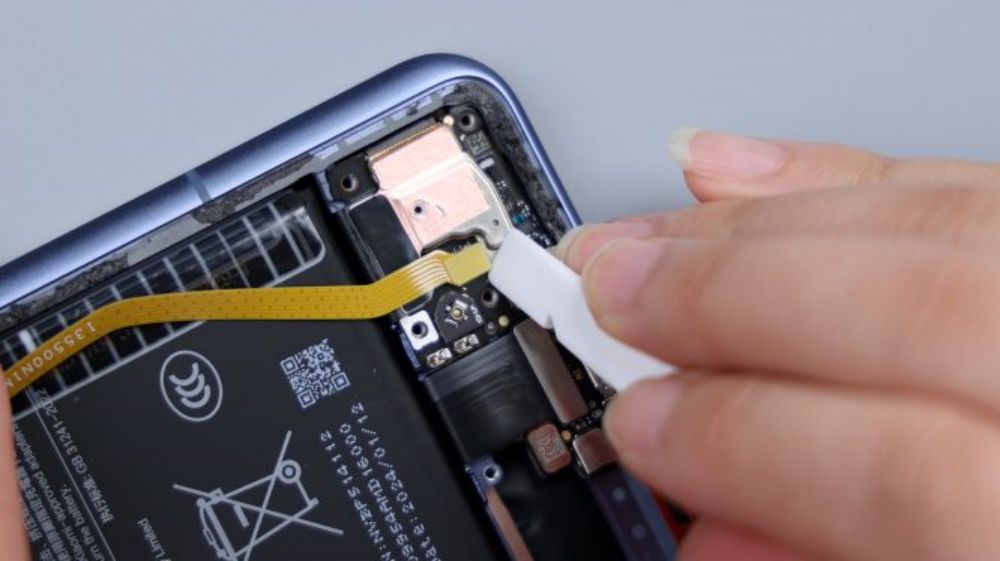
Turn your eyes to the bottom, unscrew all the fixing screws in the sub-panel area, one of the screws is still pressing a black metal plate, underneath it is the connector of the white coaxial cable, after picking the coaxial cable, you can remove the cover plate.
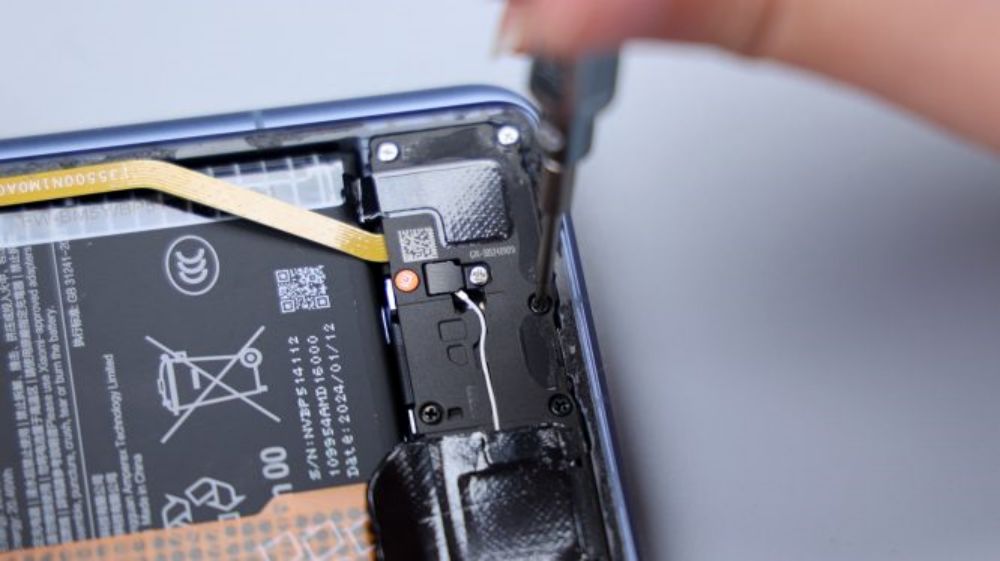
The audio cavity is integrated in the cover plate, the supplier is Gore Acoustics, and is connected to the secondary board via 2 contacts. The PCB on the right is the small antenna board, connected to the white coaxial cable.
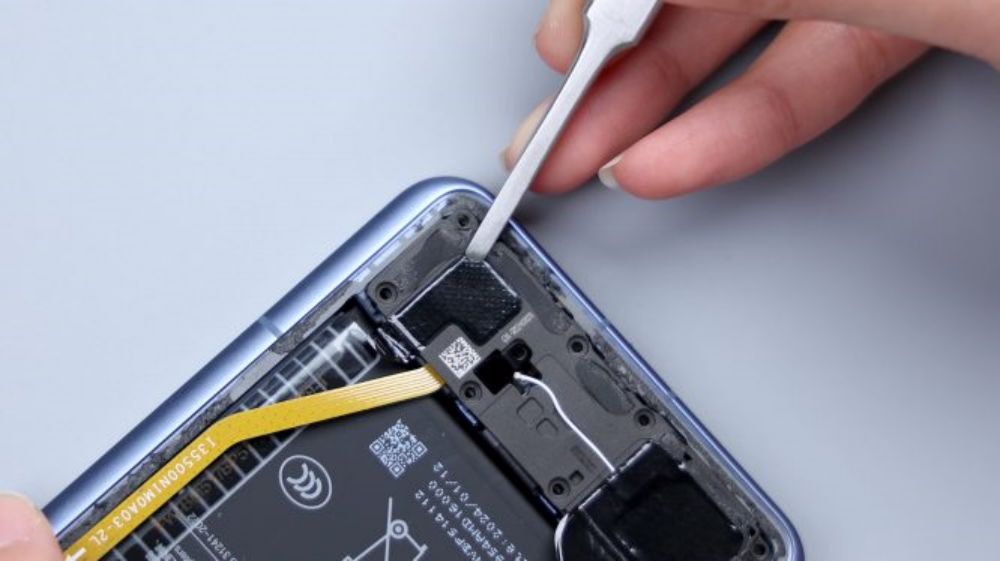
There is a piece of foam in the center, which provides cushioning protection for the BTBs of the main sub-panel and the fingerprint module, as well as the vibration unit, while the 3 smaller pieces of foam on the left correspond to multiple BTBs such as the screen.
Pry up the small antenna board and disconnect the coaxial cable. Followed by disconnecting all the BTBs on the secondary board in turn, among them, the screen BTB has a copper foil attached to it, which needs to be torn off first, and the fingerprint identification BTB is connected to the small plate of the tail plug, and the Xiaomi 14 Ultra adopts the ultra-thin screen fingerprint solution.
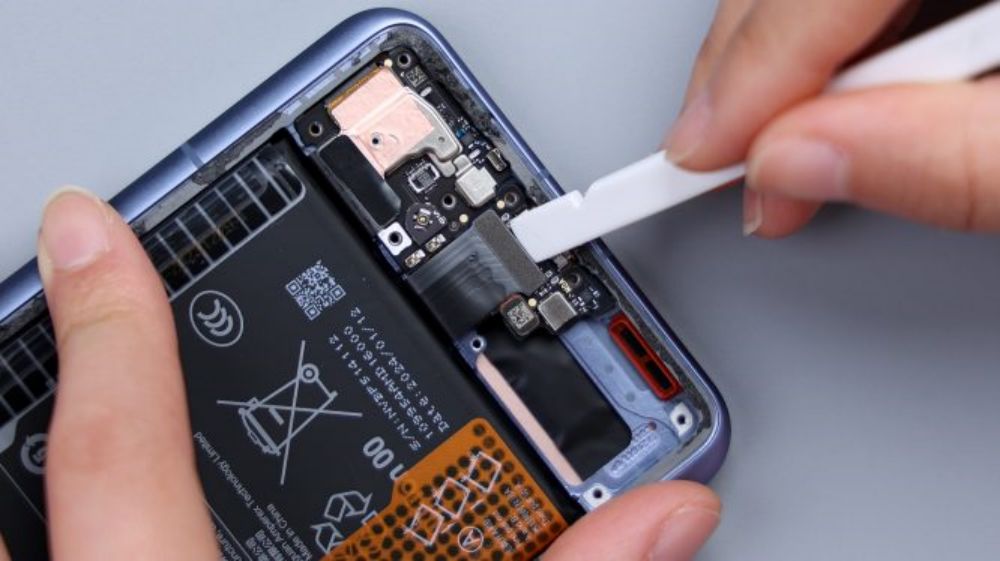
Pry up the secondary board and the tail plug platelet, the top BTB also does not have a foam ring, but a small amount of spot glue appears around it.
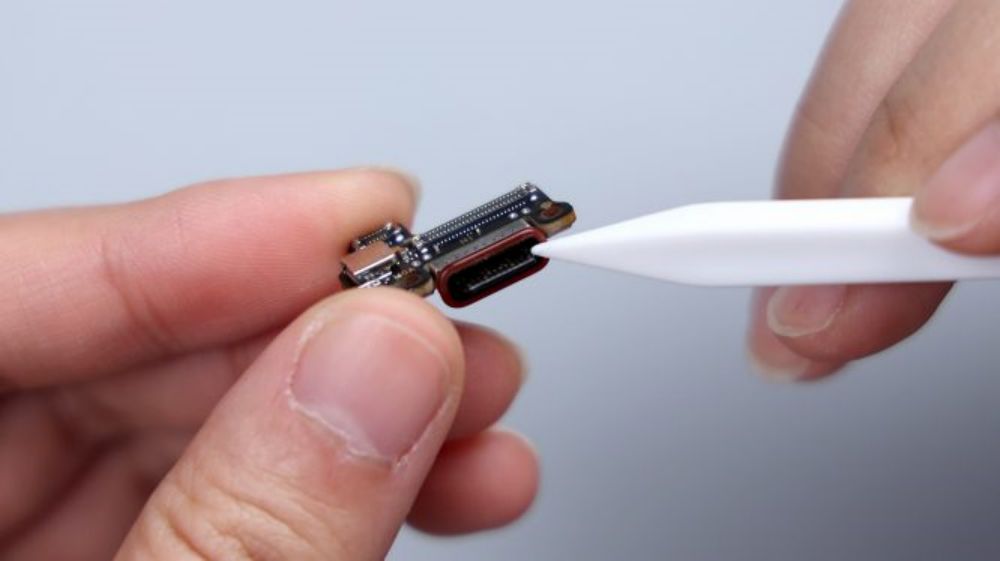
USB interface is integrated in the small board, there is a red dustproof and waterproof rubber ring outside, the interface adopts the USB 3.2 standard, the transfer rate of 10Gbps, support for 4K Display Port output. From the logo on the small board, the PCB supplier is Shenghong Technology, and the secondary PCB of the Xiaomi 14 is also supplied by Shenghong Technology, which is an enterprise specializing in the research, development, production, and sales of high-density printed circuit boards, and is headquartered in Huizhou, Guangdong Province.
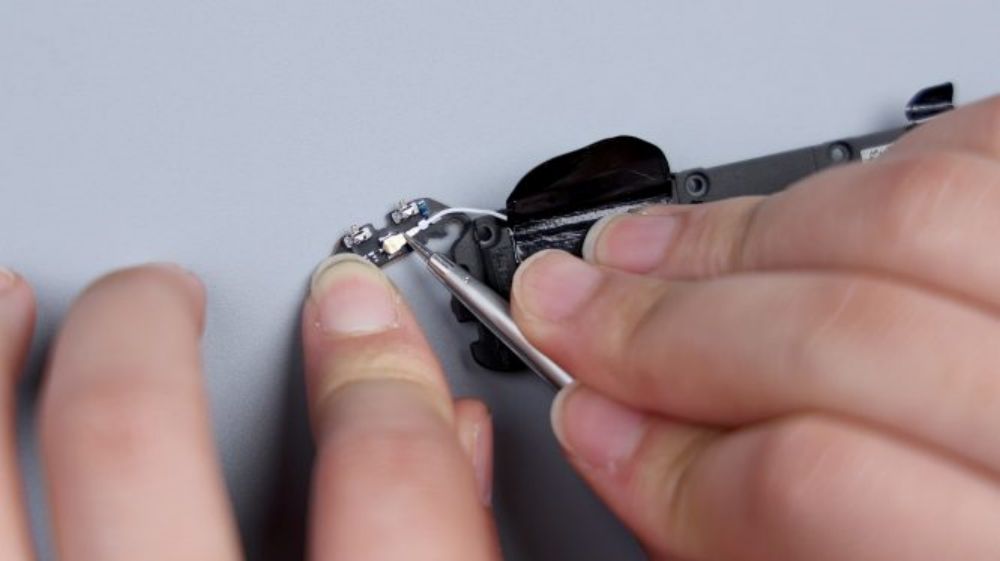
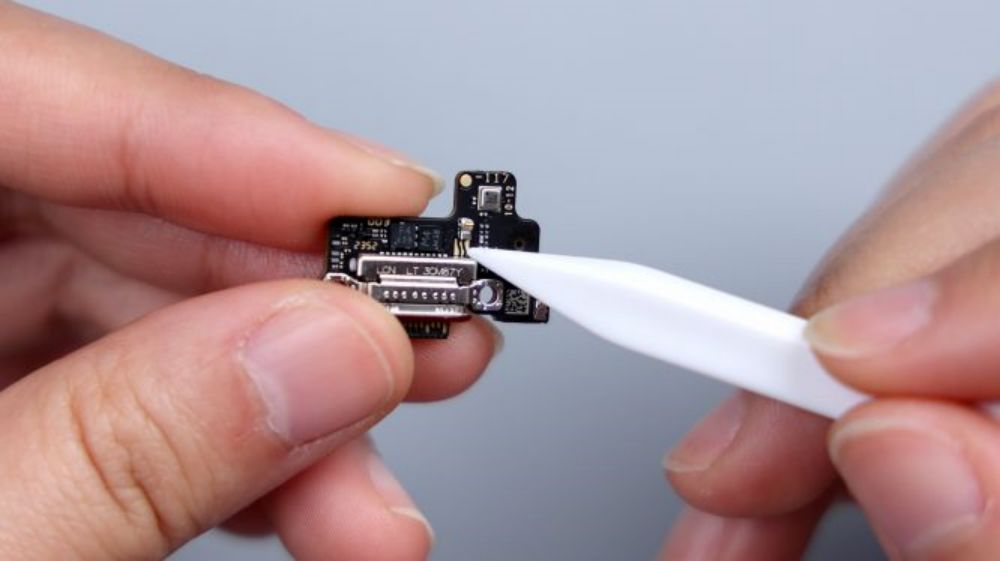
There is 1 microphone integrated on the vice board and the tail plug small plate respectively, and there is a metal cover outside to protect it, together with the 2 on the top and the lens position, that is to say, the Xiaomi 14 Ultra adopts a 4-microphone combination, and the sound collection effect is further strengthened.
The vibration unit is glued to the frame, connected to the secondary board through 2 contacts, pry up with tweezers to remove, it comes from Ruixing Technology, model number SLA1010, consistent with its predecessor, this is as a large cup of Xiaomi 14 Ultra relatively weak place, after all, the large rear camera module squeezes out a lot of internal space, and can only be entrusted to the vibration unit to make some sacrifices.
The 2 foam rings on the frame correspond to the 2 bottom microphones, and they both feature an anti-dumbing design to avoid jamming pins from damaging the microphones.
The corresponding position of the speaker is equipped with a red rubber ring to improve the tightness of the sound hole. Here by the way, the speaker's sound hole is no anti-dulling design, if the card pin or similar objects inserted into the sound hole, it will pierce the inside of the dust mesh, in the future, if you clean up these holes of the accumulated dust, be sure to pay attention to this point.
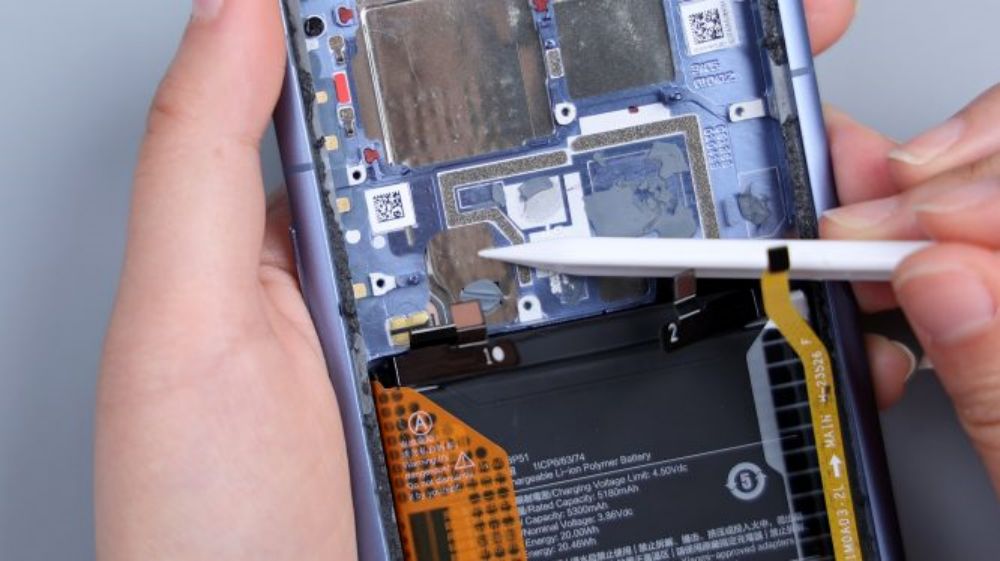
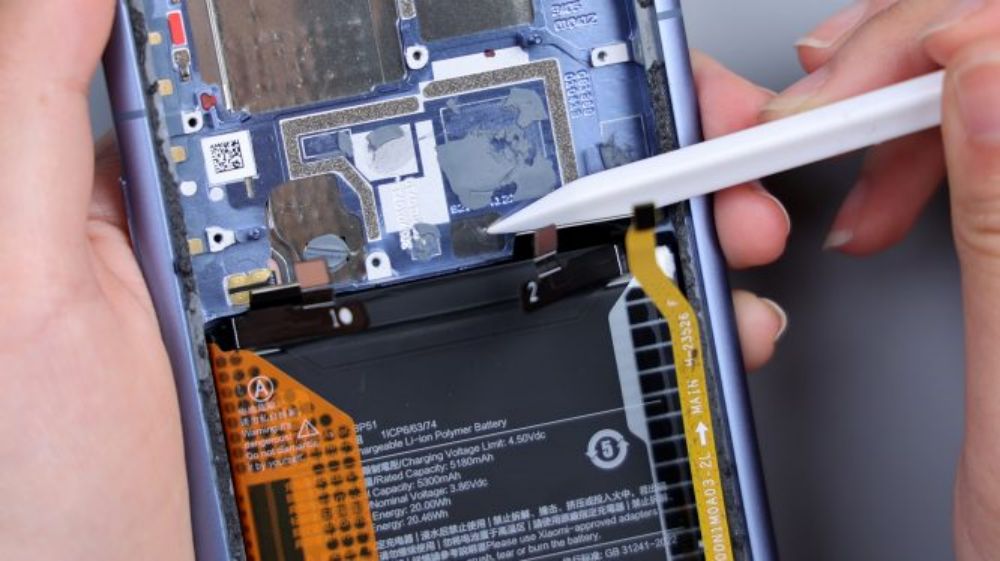
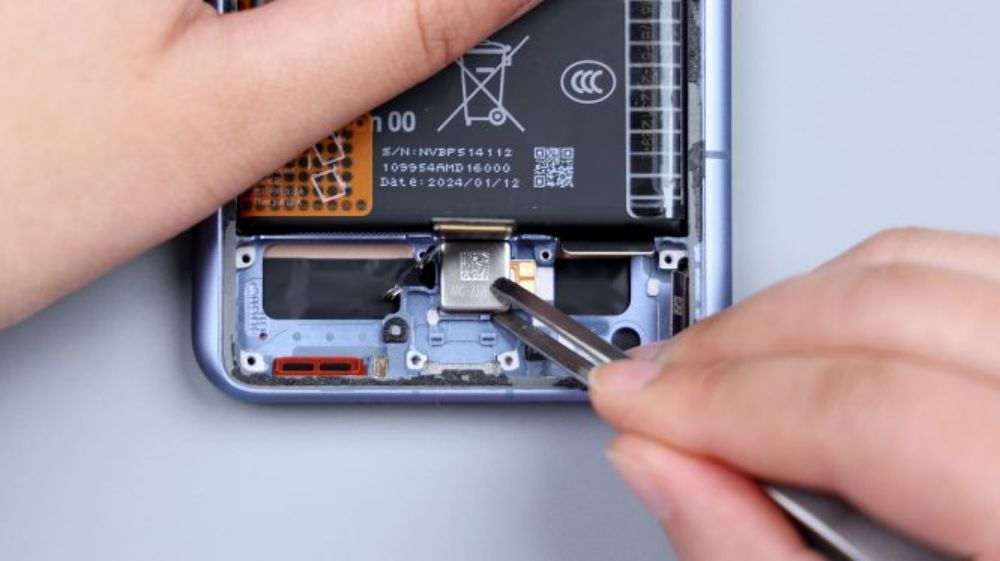
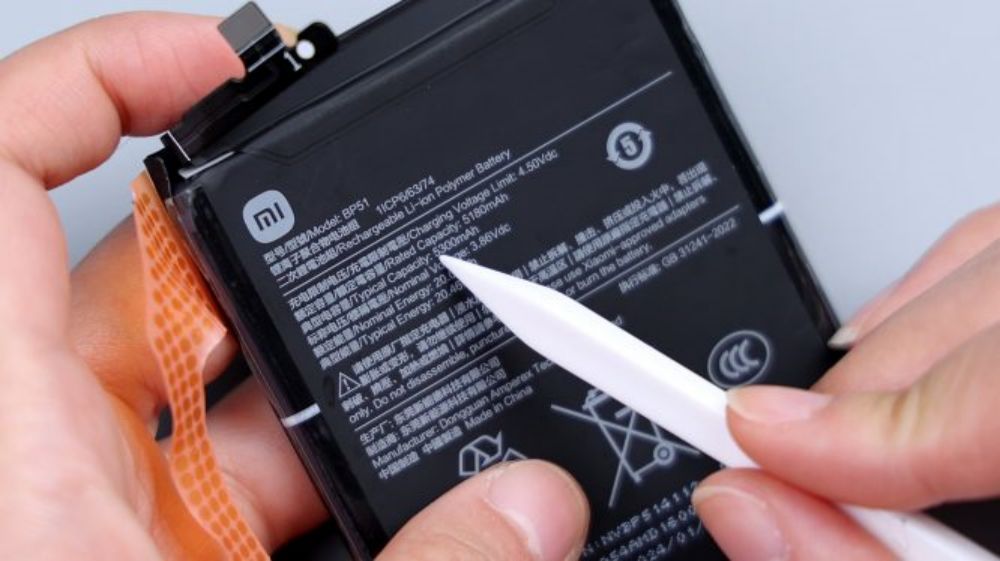
According to the illustration, tear off the single-side easy-open adhesive that holds the battery in place, and lift it upward with force, and it can be easily removed. It adopts a single-cell dual-interface scheme with a capacity of 5300mAh, supports 90W wired fast charging and 80W wireless fast charging, and the manufacturer is Dongguan New Energy Technology Co. Ltd, with ATL as the cell supplier.The frame underneath the battery is large hollowed out, directly contacting the VC equalization plate, which dissipates the heat for the battery and the main and sub-panel FPCs.
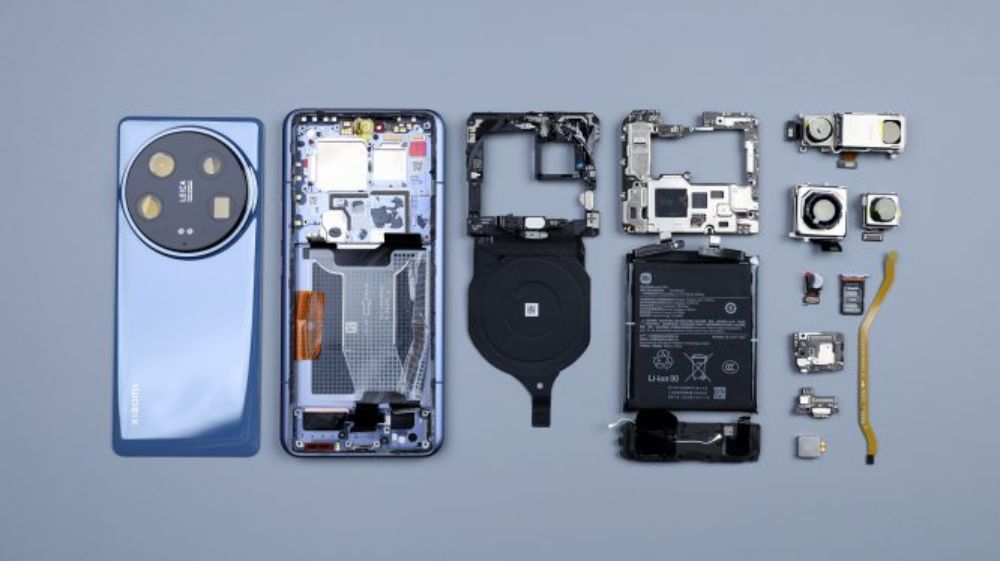
Here, the disassembly of the Xiaomi 14 Ultra is basically complete. After watching the whole disassembly process, it is not difficult to find that from the exterior design and styling outline, to the internal structure and ID design, Xiaomi 14 Ultra has a lot of similarities with its predecessor. At first glance, it seems to be an old bottle of new wine, but it rather reflects that Xiaomi's product thinking is becoming more and more mature, if every generation of products to change the design, frequently update the appearance of the product, it looks like innovation, but in fact there is a great deal of risk and a variety of uncertainties. The first point is that every time you have to get a new set of internal structure to adapt to the new appearance, the maturity and stability of the program is not a small challenge. On the contrary, small changes to the exterior and fine-tuning of the structure is a more prudent approach. Continuous optimization of details on a set of solutions, continuous micro-innovation, on the one hand, can improve the performance, integration and stability of the product, on the other hand, can be a greater degree of cost savings and control, improve production efficiency and capacity, and in the long run, but also more suitable and conducive to the operation of the millet innovation factory. As manufacturers can have more financial resources and energy to invest in research and development, consumers can also use more reliable products, such as Apple's iPhone and Samsung's Galaxy S series, is a representative case of similar product lines.
Of course, in the continuation, compared with its predecessor, Xiaomi 14 Ultra also has many changes and optimization upgrades. The back cover removes the gently sloping design of its predecessor, and the back line becomes flat and clean. The cover has gone from two parts, to a whole, and made an Oreo-like bulge. The tandem layout of multiple sensors on the rear has changed from a scattered Y-shape to a lined-up layout, and the degree of integration has been further improved. The rear main camera interface was adjusted from the B side of the motherboard to the A side, and then the interface of the telephoto lens was moved to the B side. The rear four cameras of the metal integrated anti-roll bar has been split, the main camera and telephoto each have a separate anti-roll bar, the ultra wide angle and periscope lens is integrated in a anti-roll bar, split for the main camera and telephoto broken plate sinking, control height, if still integrated together, the lens will be more protruding, and take up more internal space. The rear main camera is replaced with a new generation of Sony Light Metaphor LYT-900 sensor, and the aperture of the periscope telephoto lens is raised to f/2.5. The processor is upgraded from Snapdragon 8 Gen 2 to Snapdragon 8 Gen 3. The area of the motherboard breakout plate and the center frame skeletonization is increased, and while the previous generation only had the main camera breakout plate skeletonized, the current generation also adds a location for the telephoto, mainly for the purpose of vertical space and heat dissipation. Infrared emitter, top noise-canceling microphone, front ambient light sensor location shifted, and is not integrated on the motherboard, the infrared moved to the flash FPC, the other two are integrated in a separate PCB small board, embedded in the hollowed-out position of the center frame. The cover of the secondary board has been changed from two separate parts to a whole piece.The Type-C port specification has been upgraded from USB 3.0 to USB 3.2.The bottom speaker, which has been changed from Ruixing Technology to Gore Acoustics. The battery capacity has increased from 5000mAh to 5300mAh, and the manufacturer has changed from Zhuhai Guanyu to Dongguan New Energy. The wireless fast charging power has been increased from 50W to 80W. the bottom microphone has been increased from 1 to 2, and the total number of microphones has been increased from 3 to 4. the screen illumination material has been upgraded from C7 to Gore Acoustic. The screen light-emitting material has been upgraded from C7 to C8, and the peak brightness has been increased from 2,600nit to 3,000nit.
The old rules, the end of the chat a disassembly-related topics, this issue to say is to remove the back cover. Many of my friends have asked me why it takes so much effort to dismantle the back cover every time. Why don't you use alcohol when removing it? In fact, I have the special alcohol for removing the screen and back cover, but I don't use it mainly for two reasons.
First, I want to show the actual adhesion and fixed state of the back cover and other parts of the adhesive, so that it is also easy to explain the assembly of the phone, looks more intuitive. The second is to show the actual dismantling of the back cover and other components, dismantling difficulties and operating difficulties, because in some cases, users want to do it themselves to dismantle the machine, but there is no such special alcohol around, if you buy it from the Internet, the courier also need time, this time there is a need for non-alcohol-assisted dismantling of the tutorials, such as understanding of the back of the adhesive viscous or not viscous, with a plastic warping piece or metal warping piece, dismantling time, which What are the precautions to take when disassembling, etc. Therefore, I have been in the demolition of the time, has not been used alcohol, mainly or want to restore the real dismantling scene, if the show is too easy, for users who like to do it themselves, not much help.